Learn how to use Aditum in minutes
Short, visual guides for residents. Each tutorial shows you, step by step and with real screenshots, exactly how it looks on your phone.
What will you find here?
Step by step
Numbered instructions, clear and easy to follow, with no jargon.
Real screenshots
Images of the app pointing out the exact spot you need to tap.
Organized by topic
Reservations, visitors, finances, assemblies and more, grouped by module.
Quick answers
A frequently asked questions search to clear up doubts instantly.
How does it work?
Open a module in the menu on the left.
Choose the feature you want to learn.
Follow the steps along with their screenshots.
Activate your account and log in
When management creates your account, you receive a welcome email. Follow these 3 steps to activate it and enter Aditum for the first time.
Open the welcome email
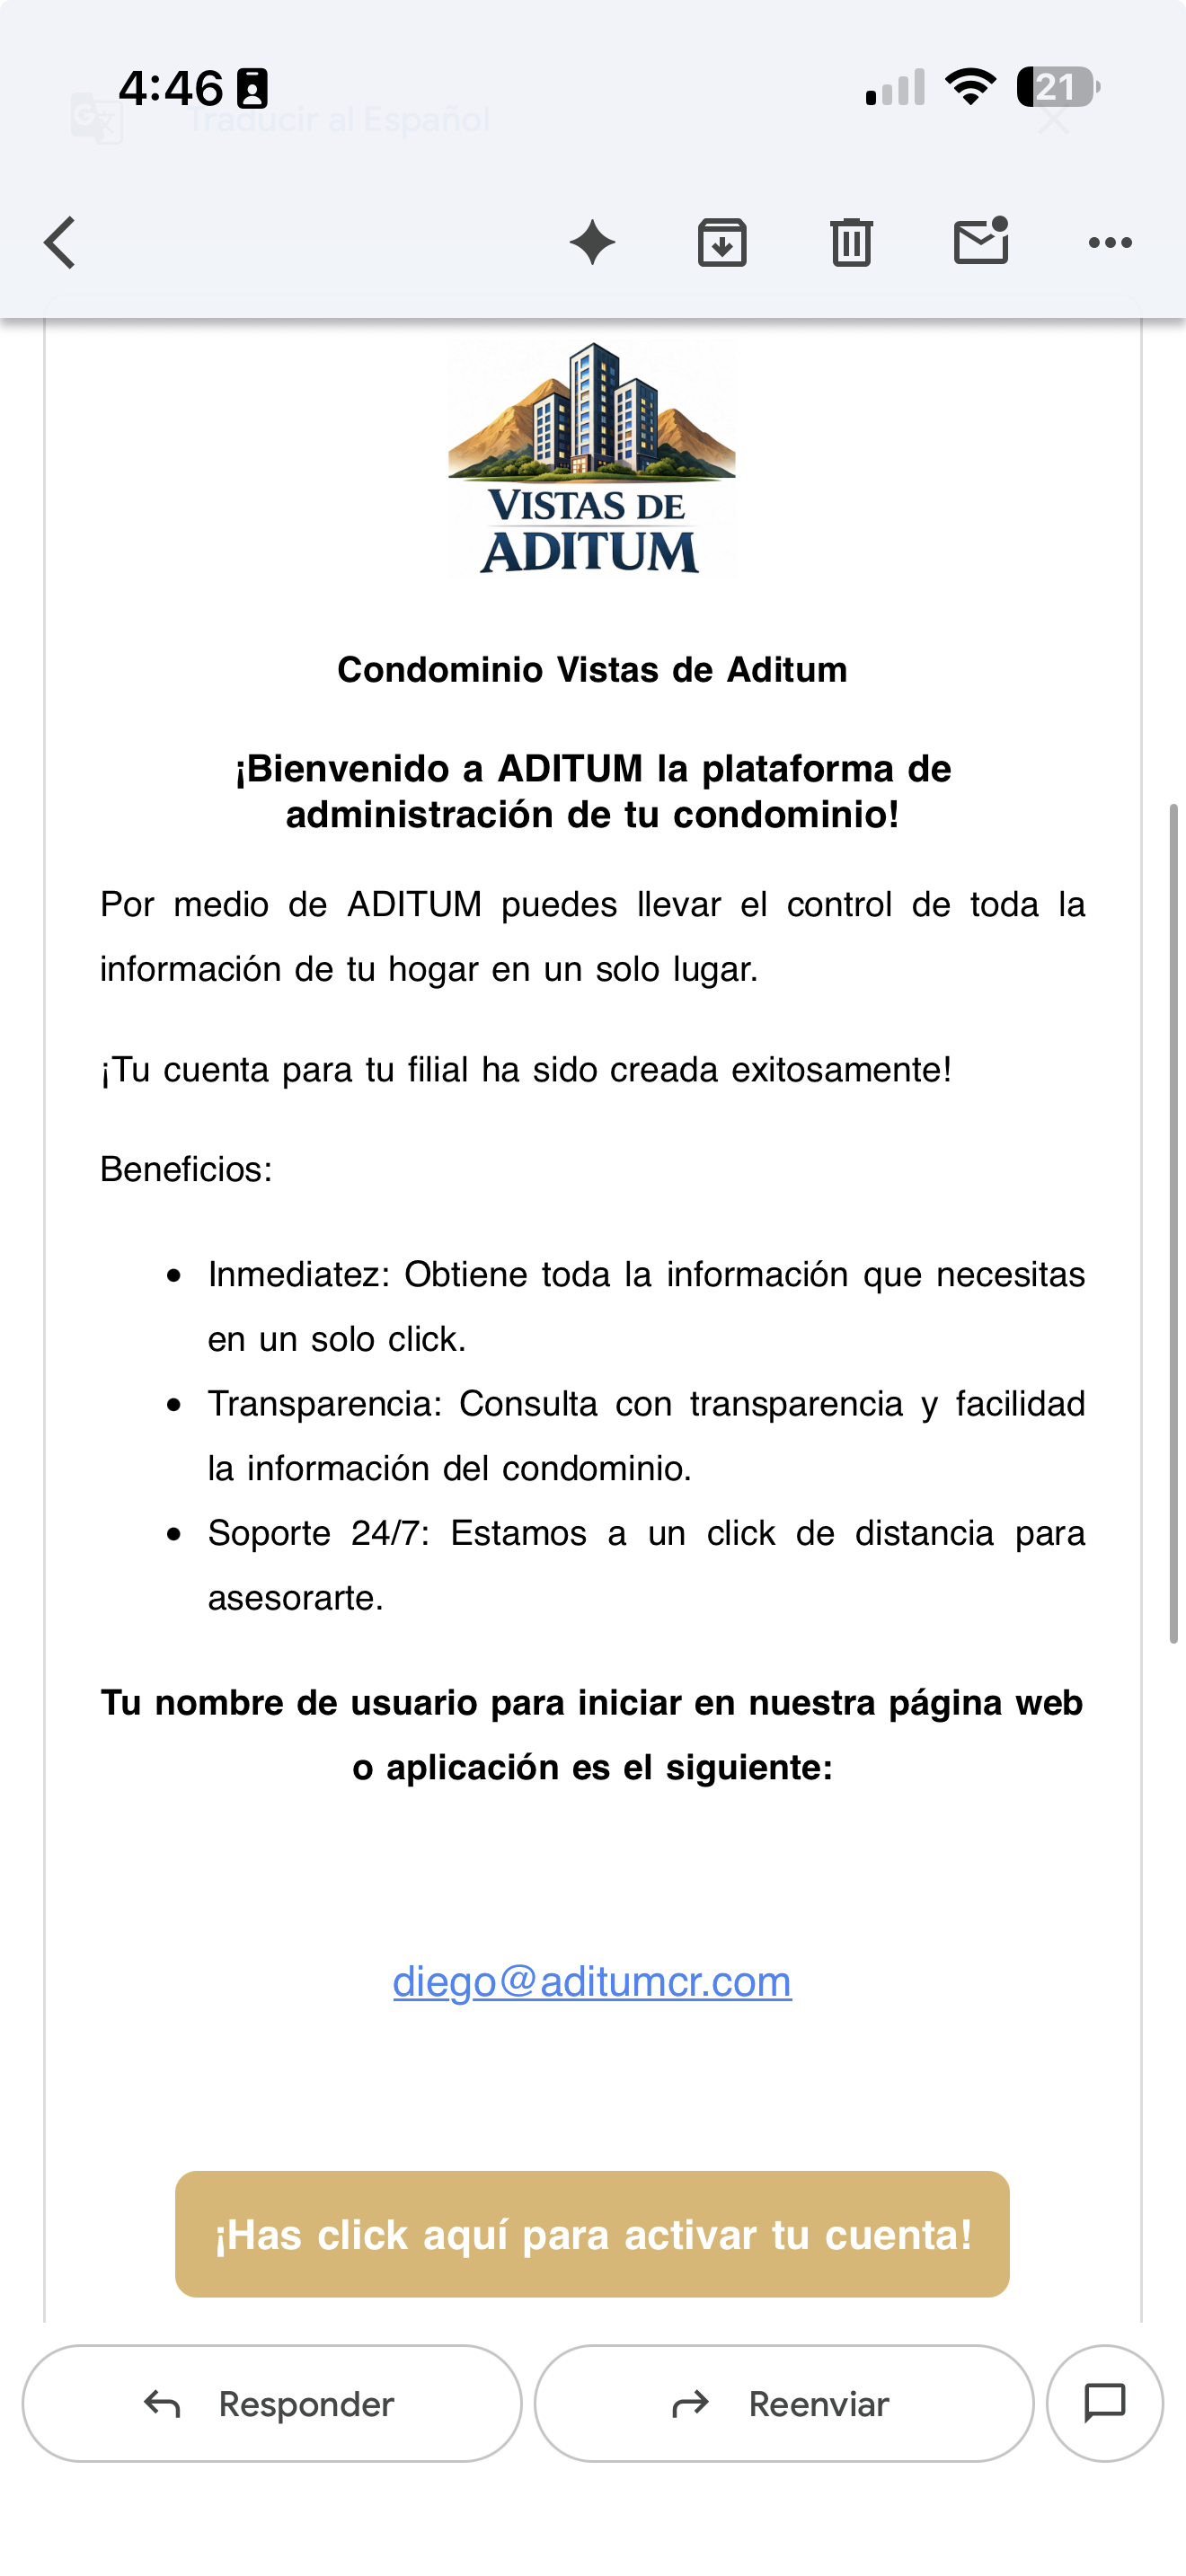
You receive an email from ADITUM with your condominium logo that says "Your account for your unit has been created successfully!".
It shows your username (it is your email address). Then press the gold button "Click here to activate your account!".
01-correo-bienvenida.png
Create your password
The button takes you to the "Choose a new password" screen. Type your new password in New password.
The Password strength bar tells you how strong it is. Repeat it in Confirm new password and press "Validate New Password".

02-crear-contrasena.png
Log in
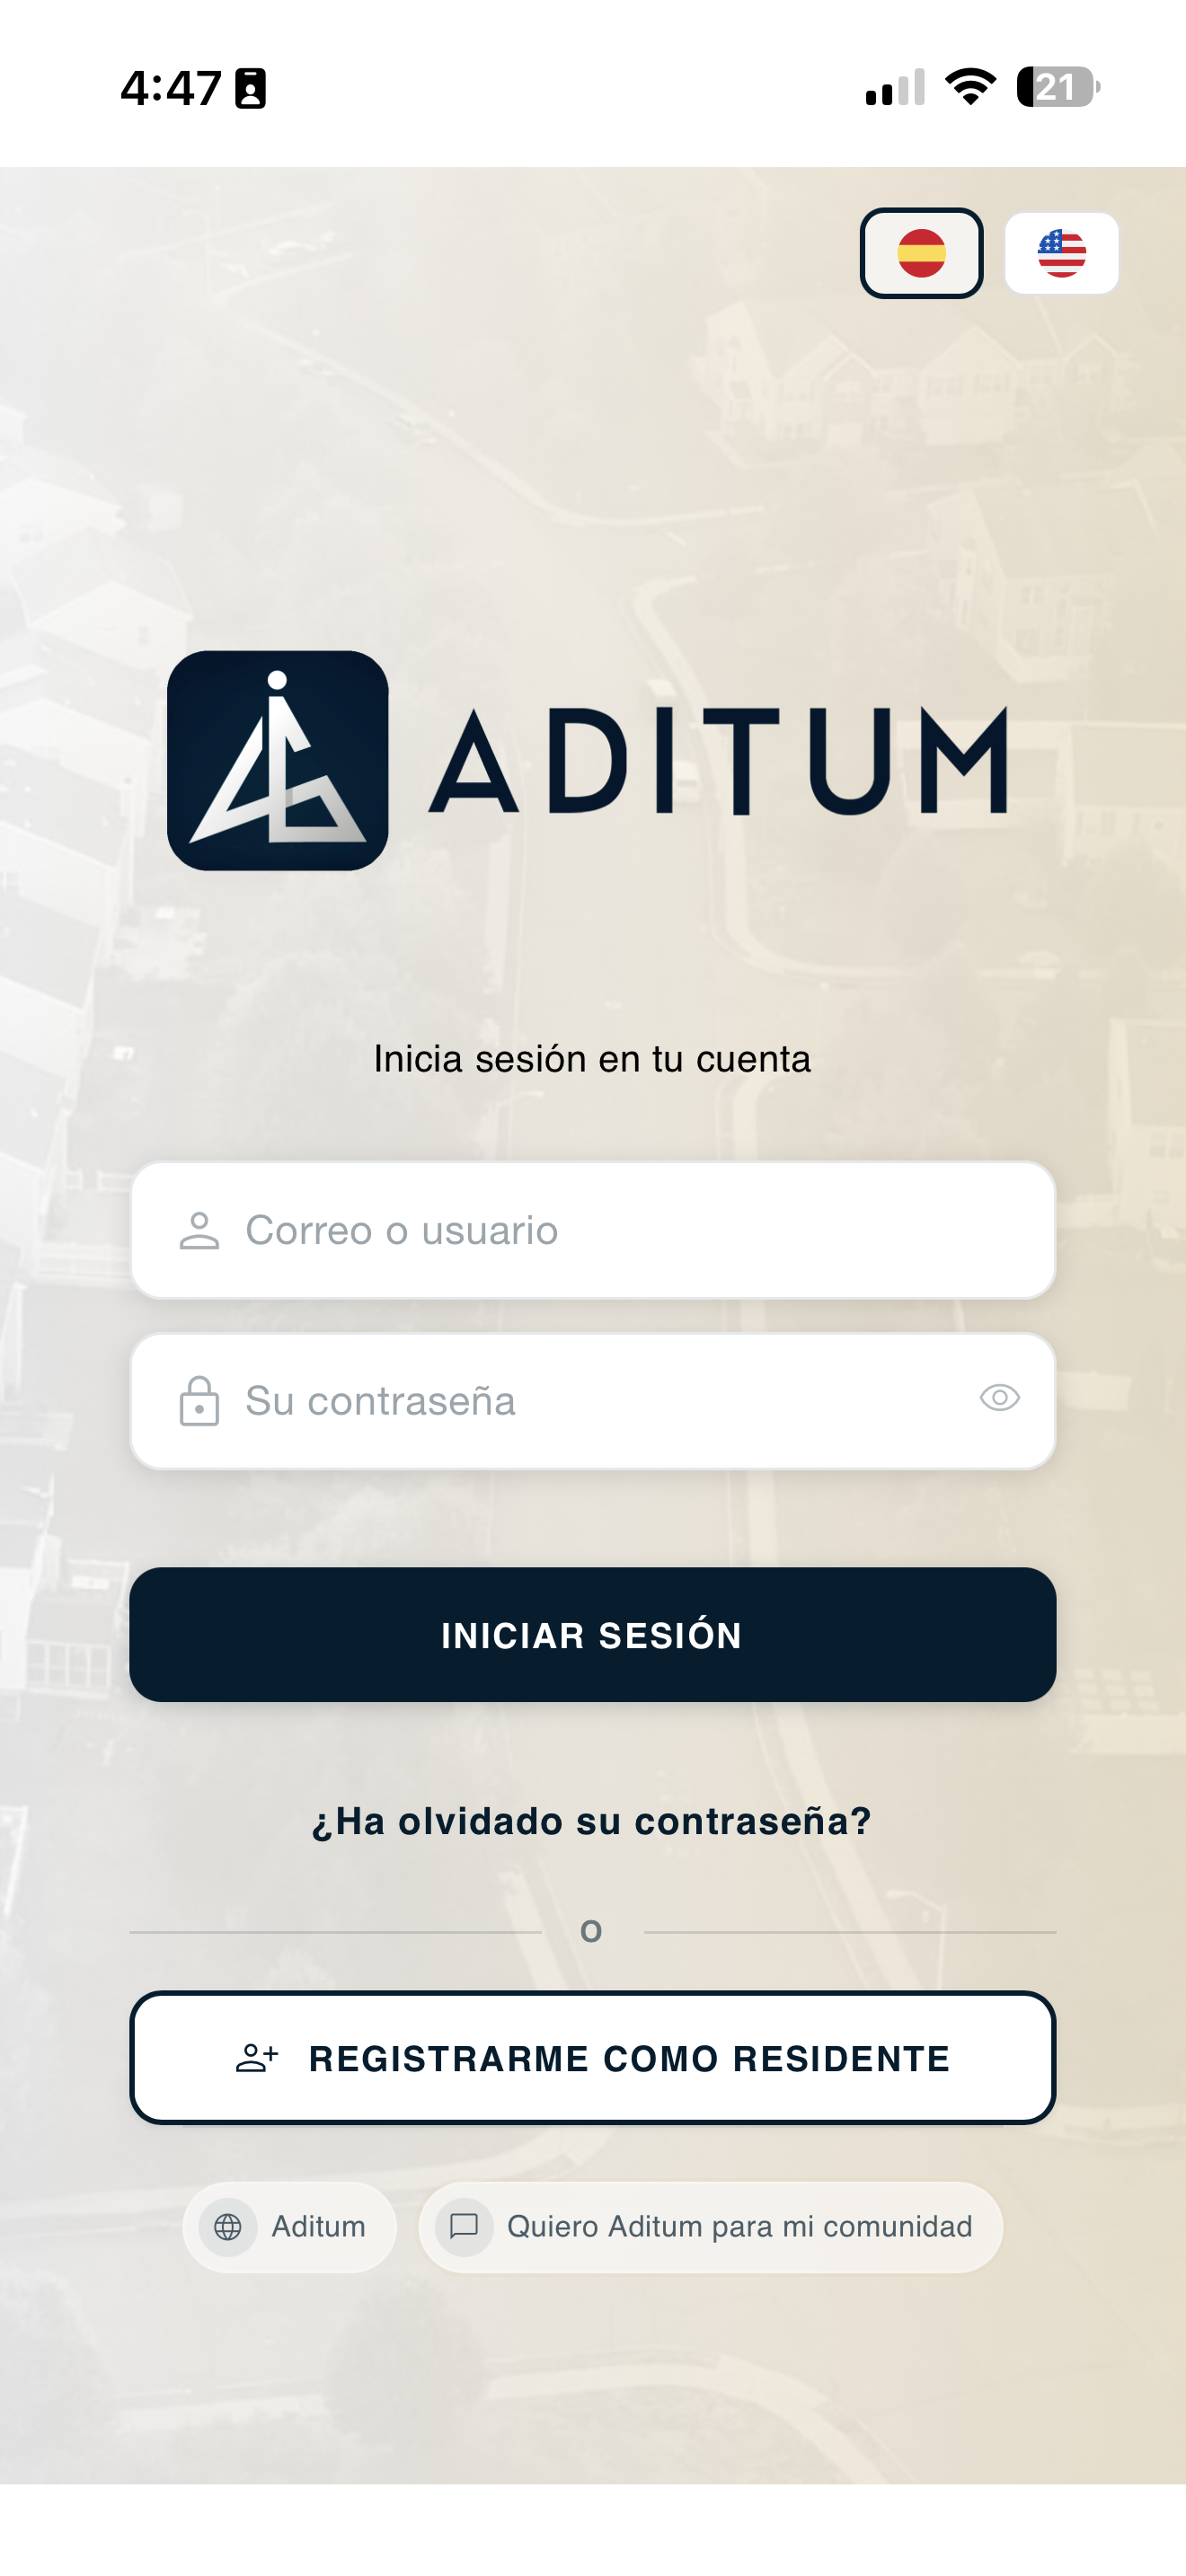
Open the app (or app.aditumcr.com). On "Log in to your account", type your email or username and the password you just created, and press "LOG IN".
Done! You now have access to Aditum. If you forget your password, use "Forgot your password?" on this same screen.
04-iniciar-sesion.png
Recover your password
Forgot your password? Don't worry. In 4 steps you can reset it and get back into Aditum.
Request the reset
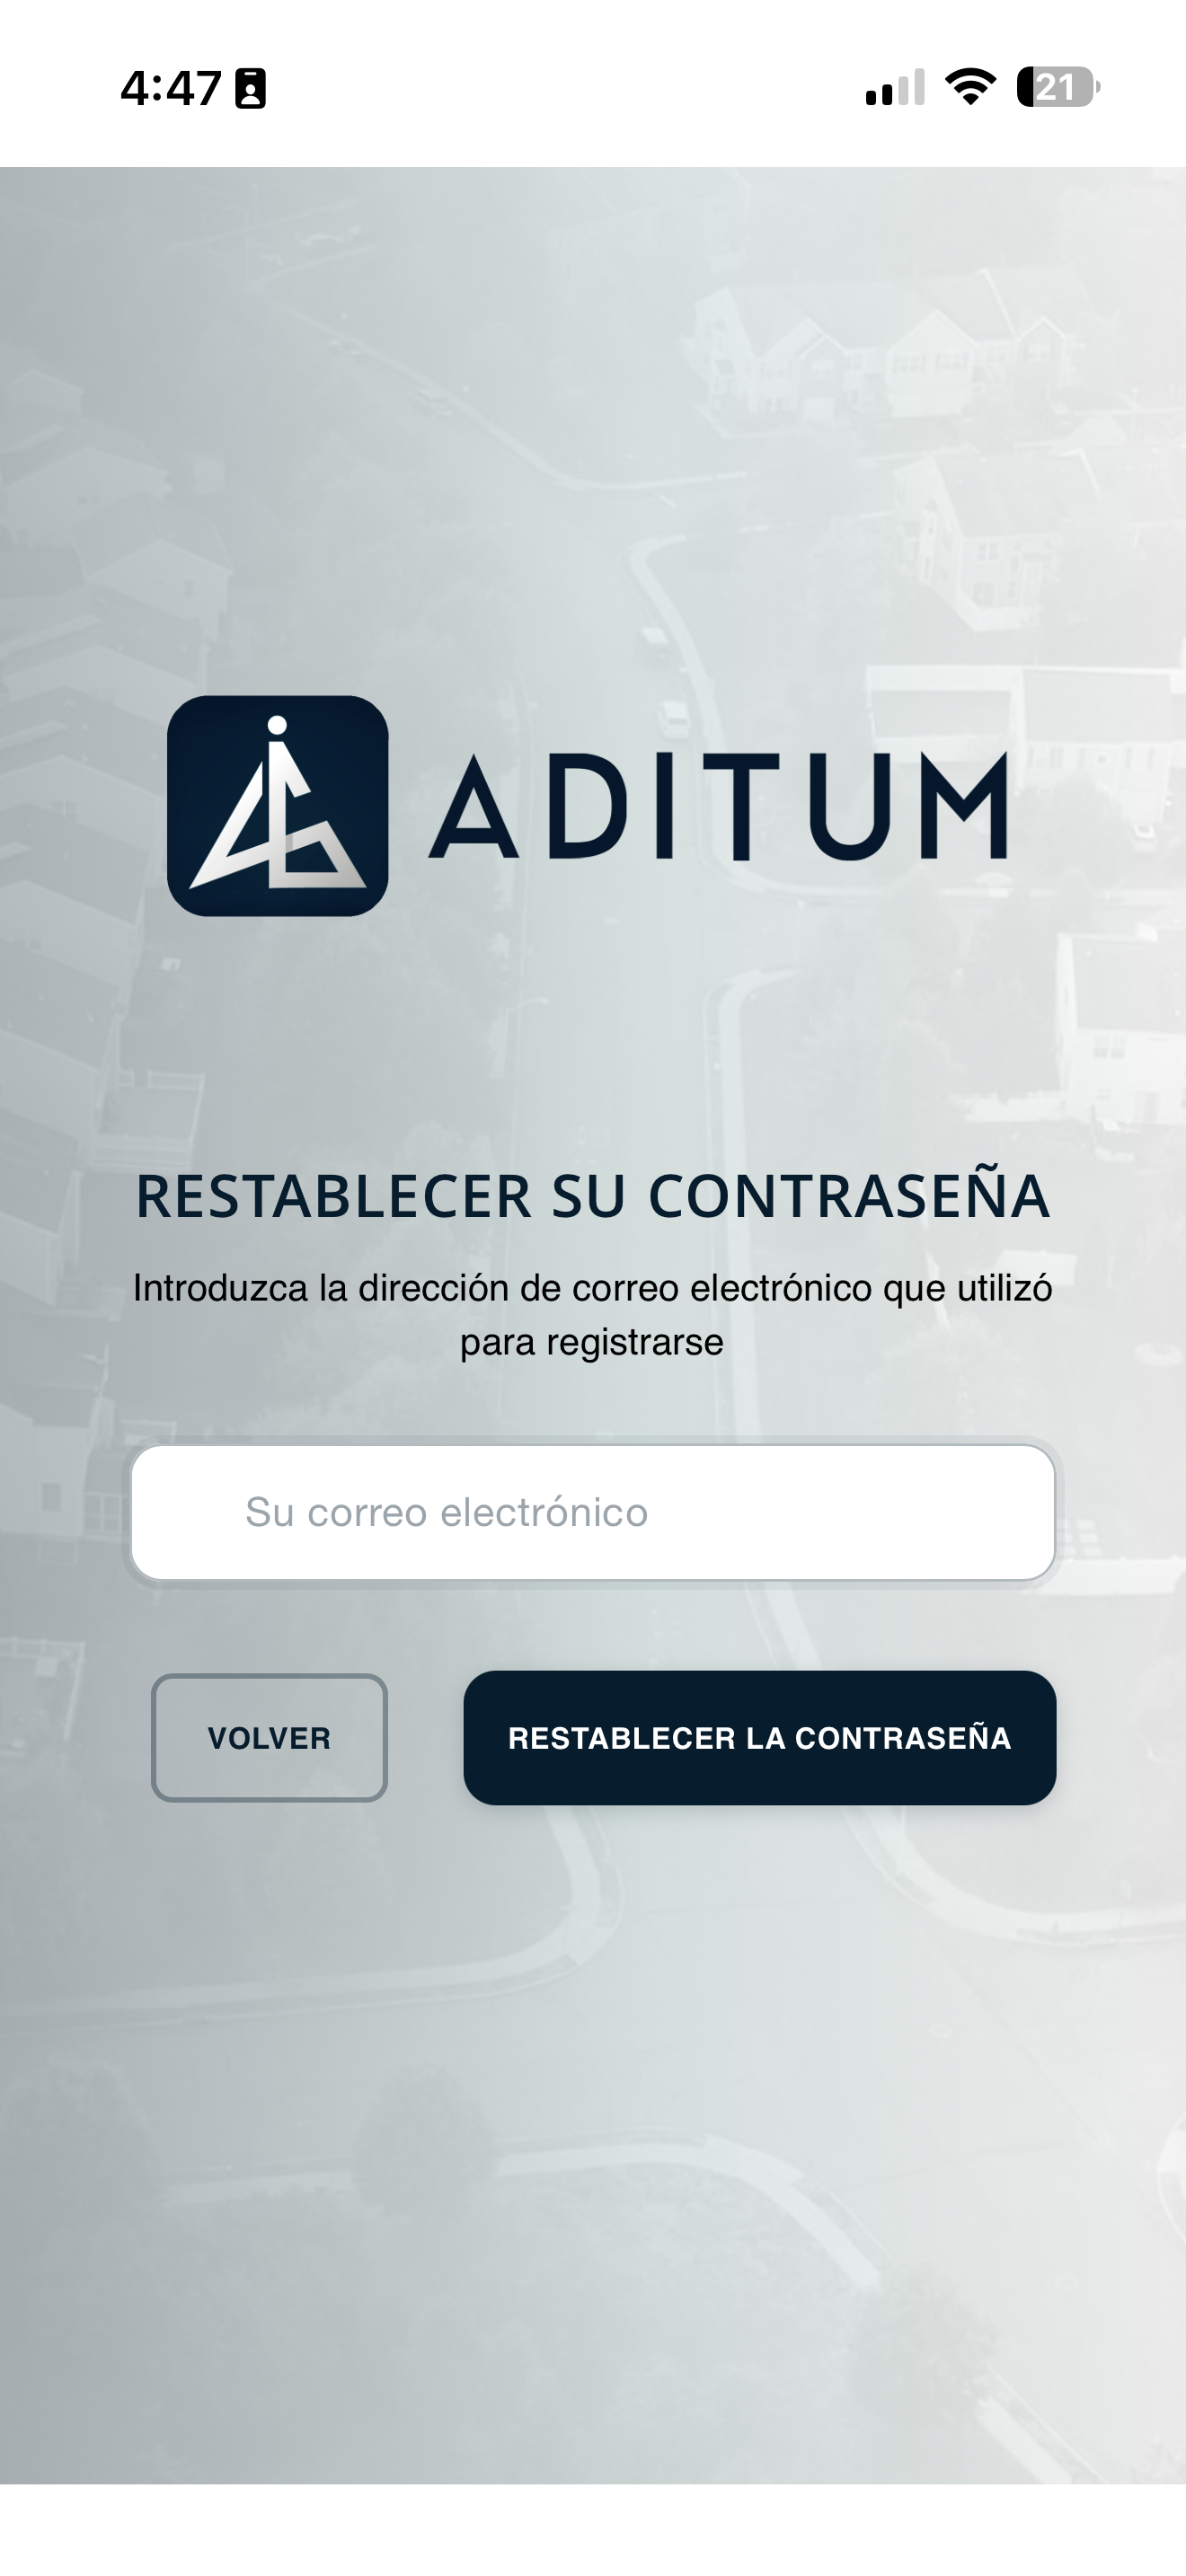
On the login screen, press "Forgot your password?".
The "Reset your password" screen opens. Type the email address you registered with and press "Reset password". (The Back button takes you back to the login.)
recuperar-01-solicitar.png
Open the reset email
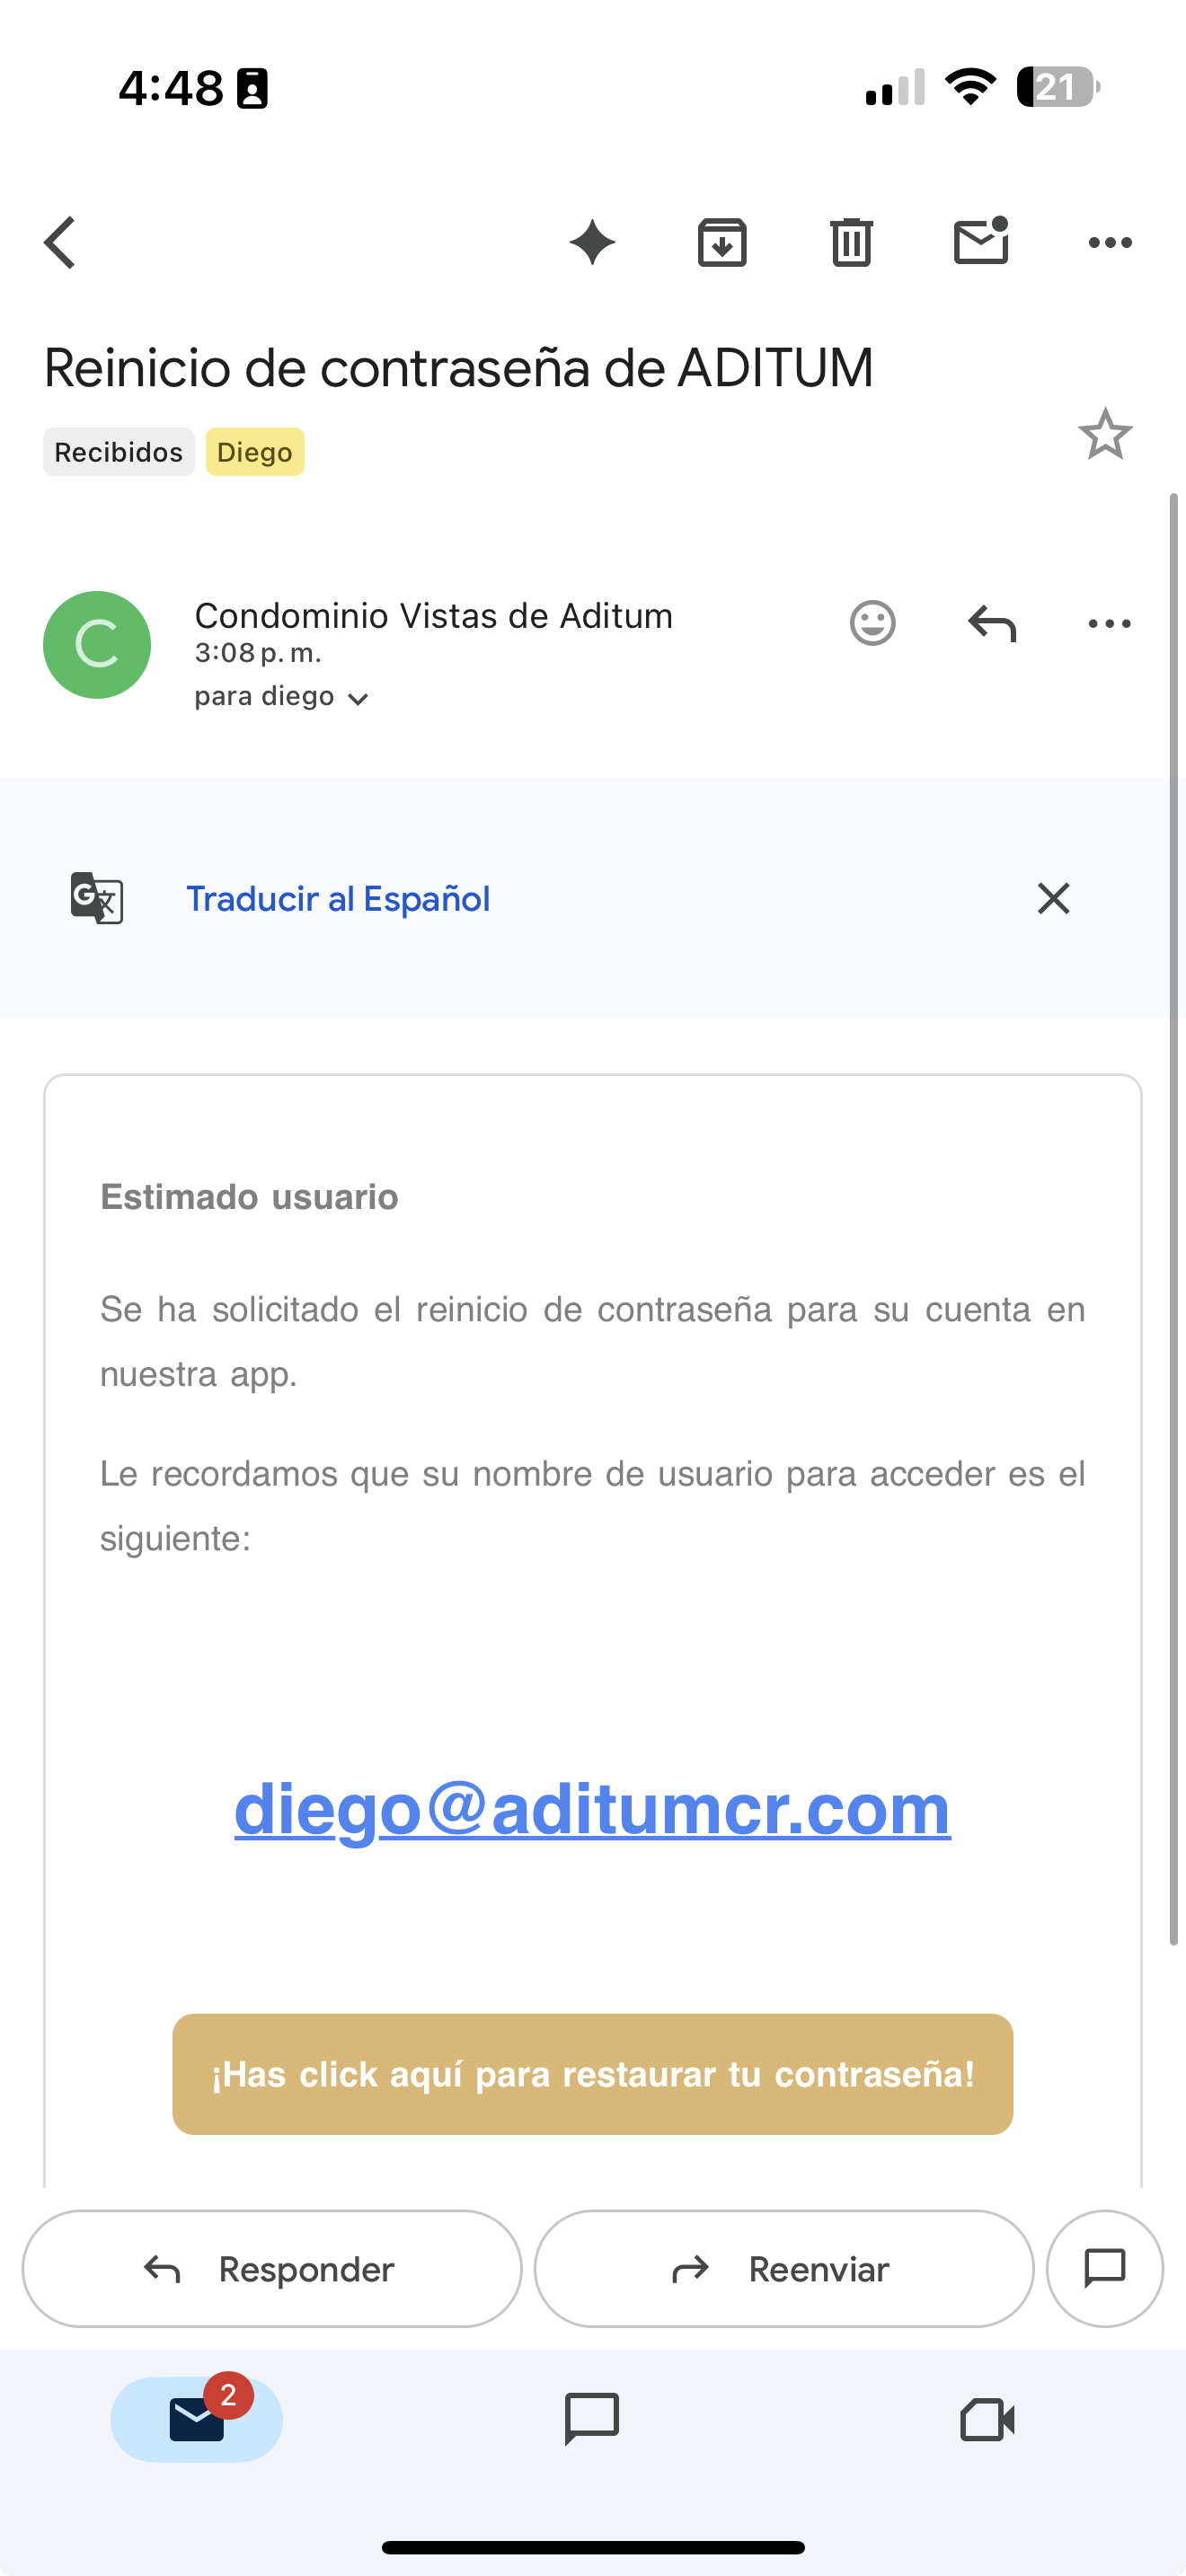
You receive an email titled "ADITUM password reset" that confirms your username (your email).
Press the gold button "Click here to reset your password!".
recuperar-02-correo.png
Create your new password
The button takes you to "Choose a new password". Type the new password, repeat it in Confirm and press "Validate New Password".
02-crear-contrasena.png
Log in with the new password
Go back to the login screen, type your email and your new password, and press "Log in". Done!
04-iniciar-sesion.png
Open your profile
From your profile you can update your details, change your password and choose the app language. Here is how to reach those options.
Tap your profile picture
In the top-right corner of the screen is your profile picture (red box). Tap it to open your account menu.
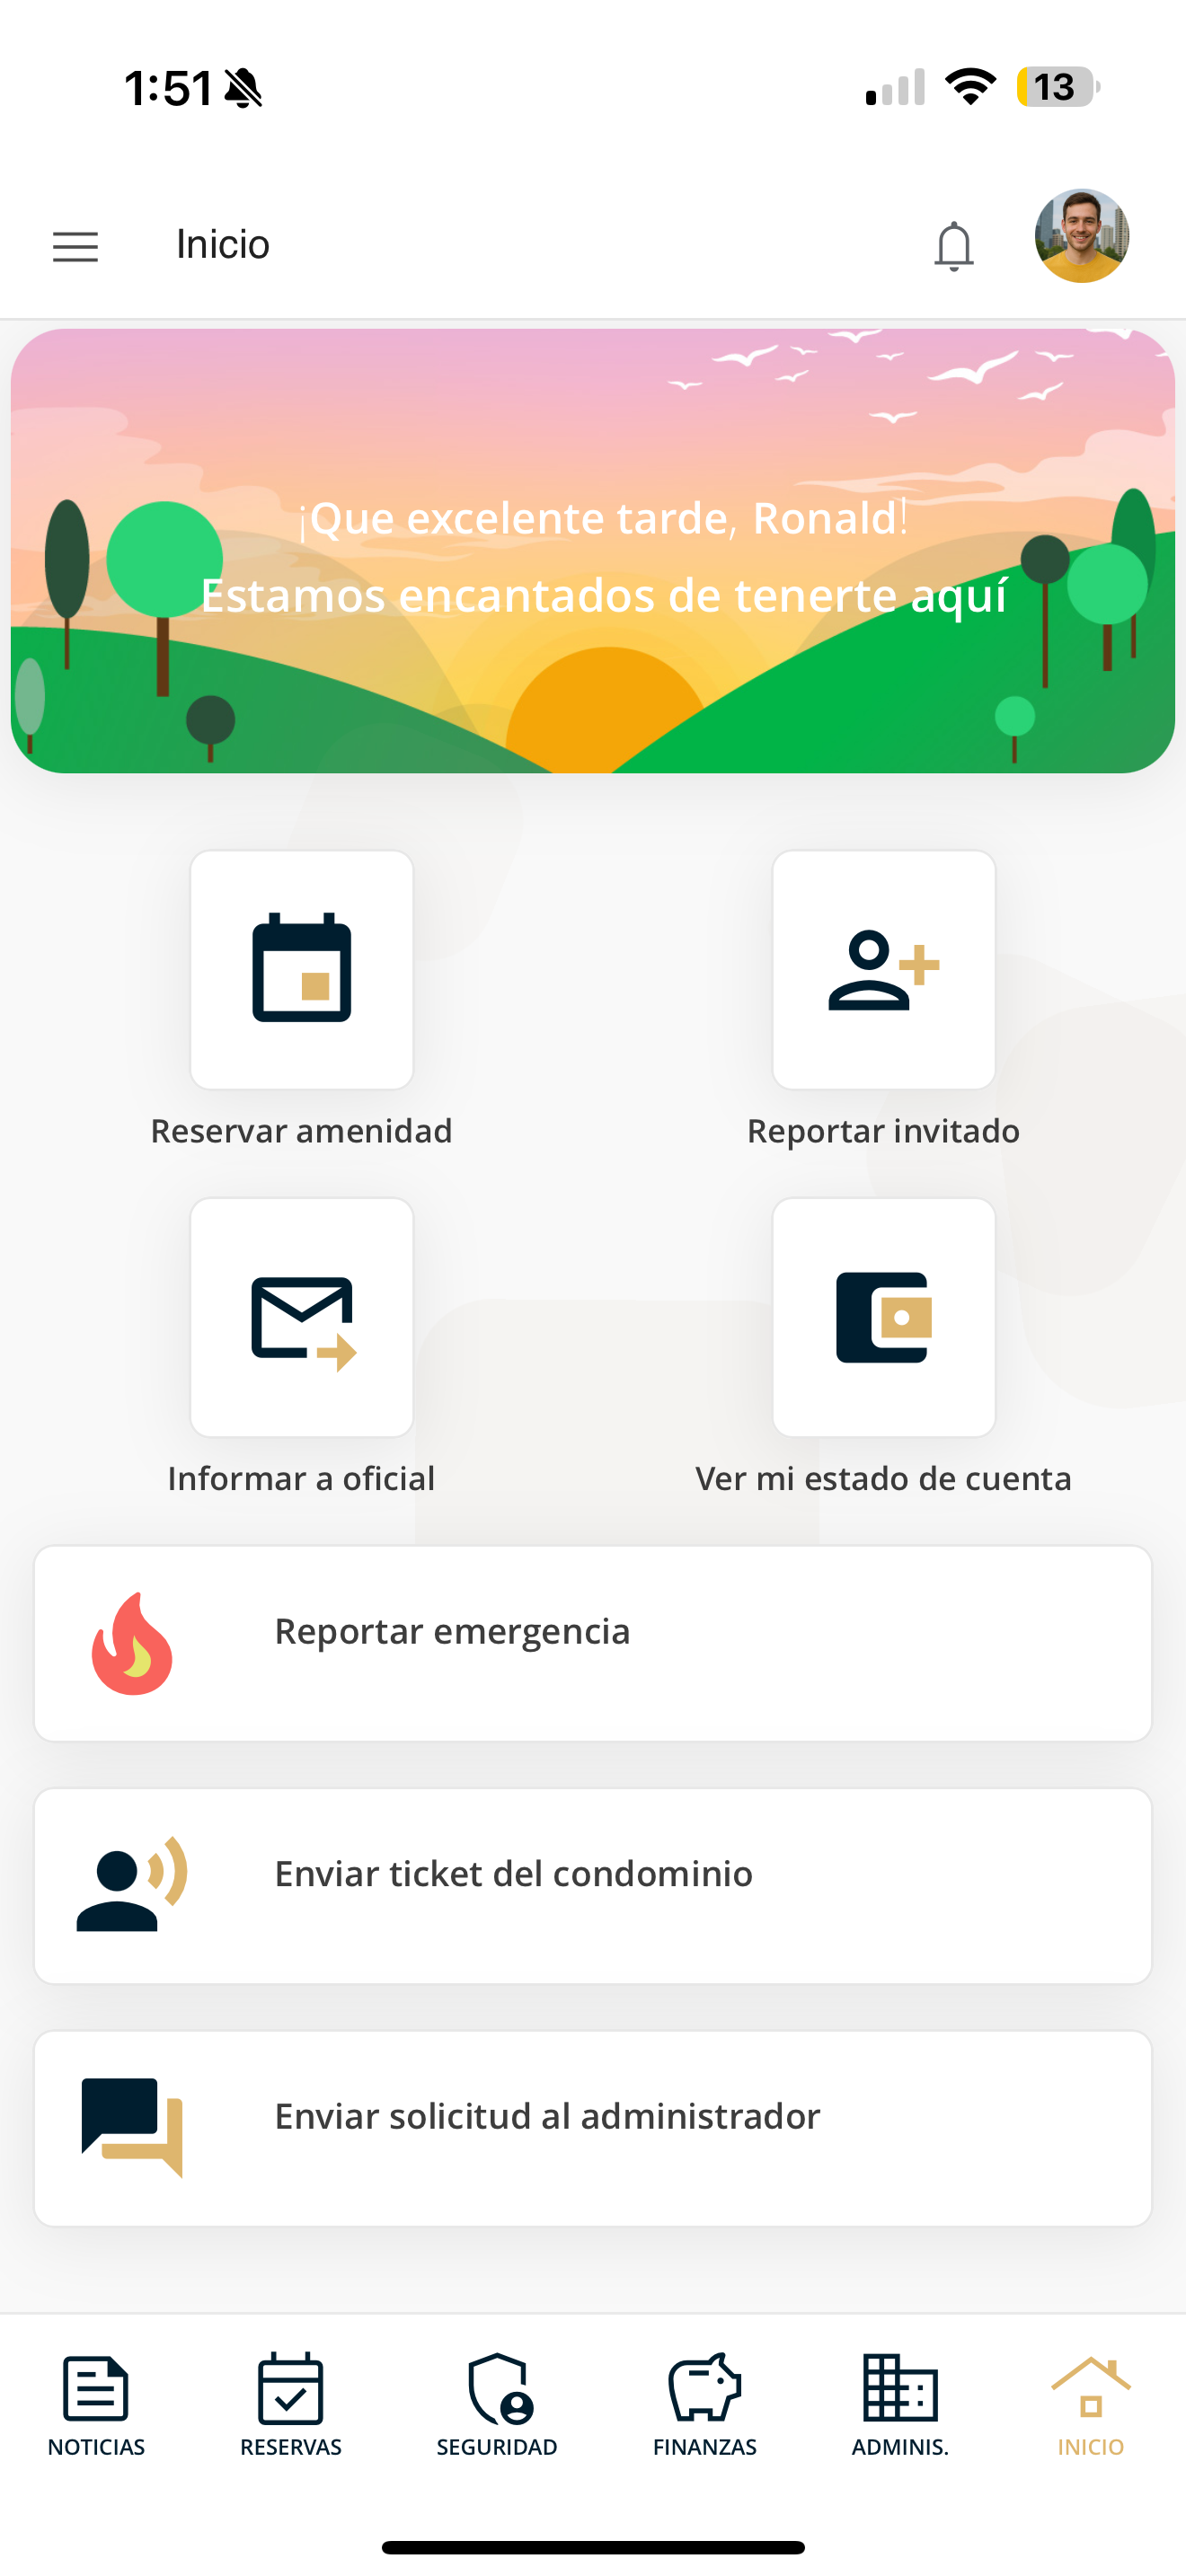
IMG_4774.PNG
Review your account menu
A menu opens with your details (name, condominium, your role —for example Owner— and your email) and these options (red box):
Edit Information, Change password, What's new, Change Language and Log out.
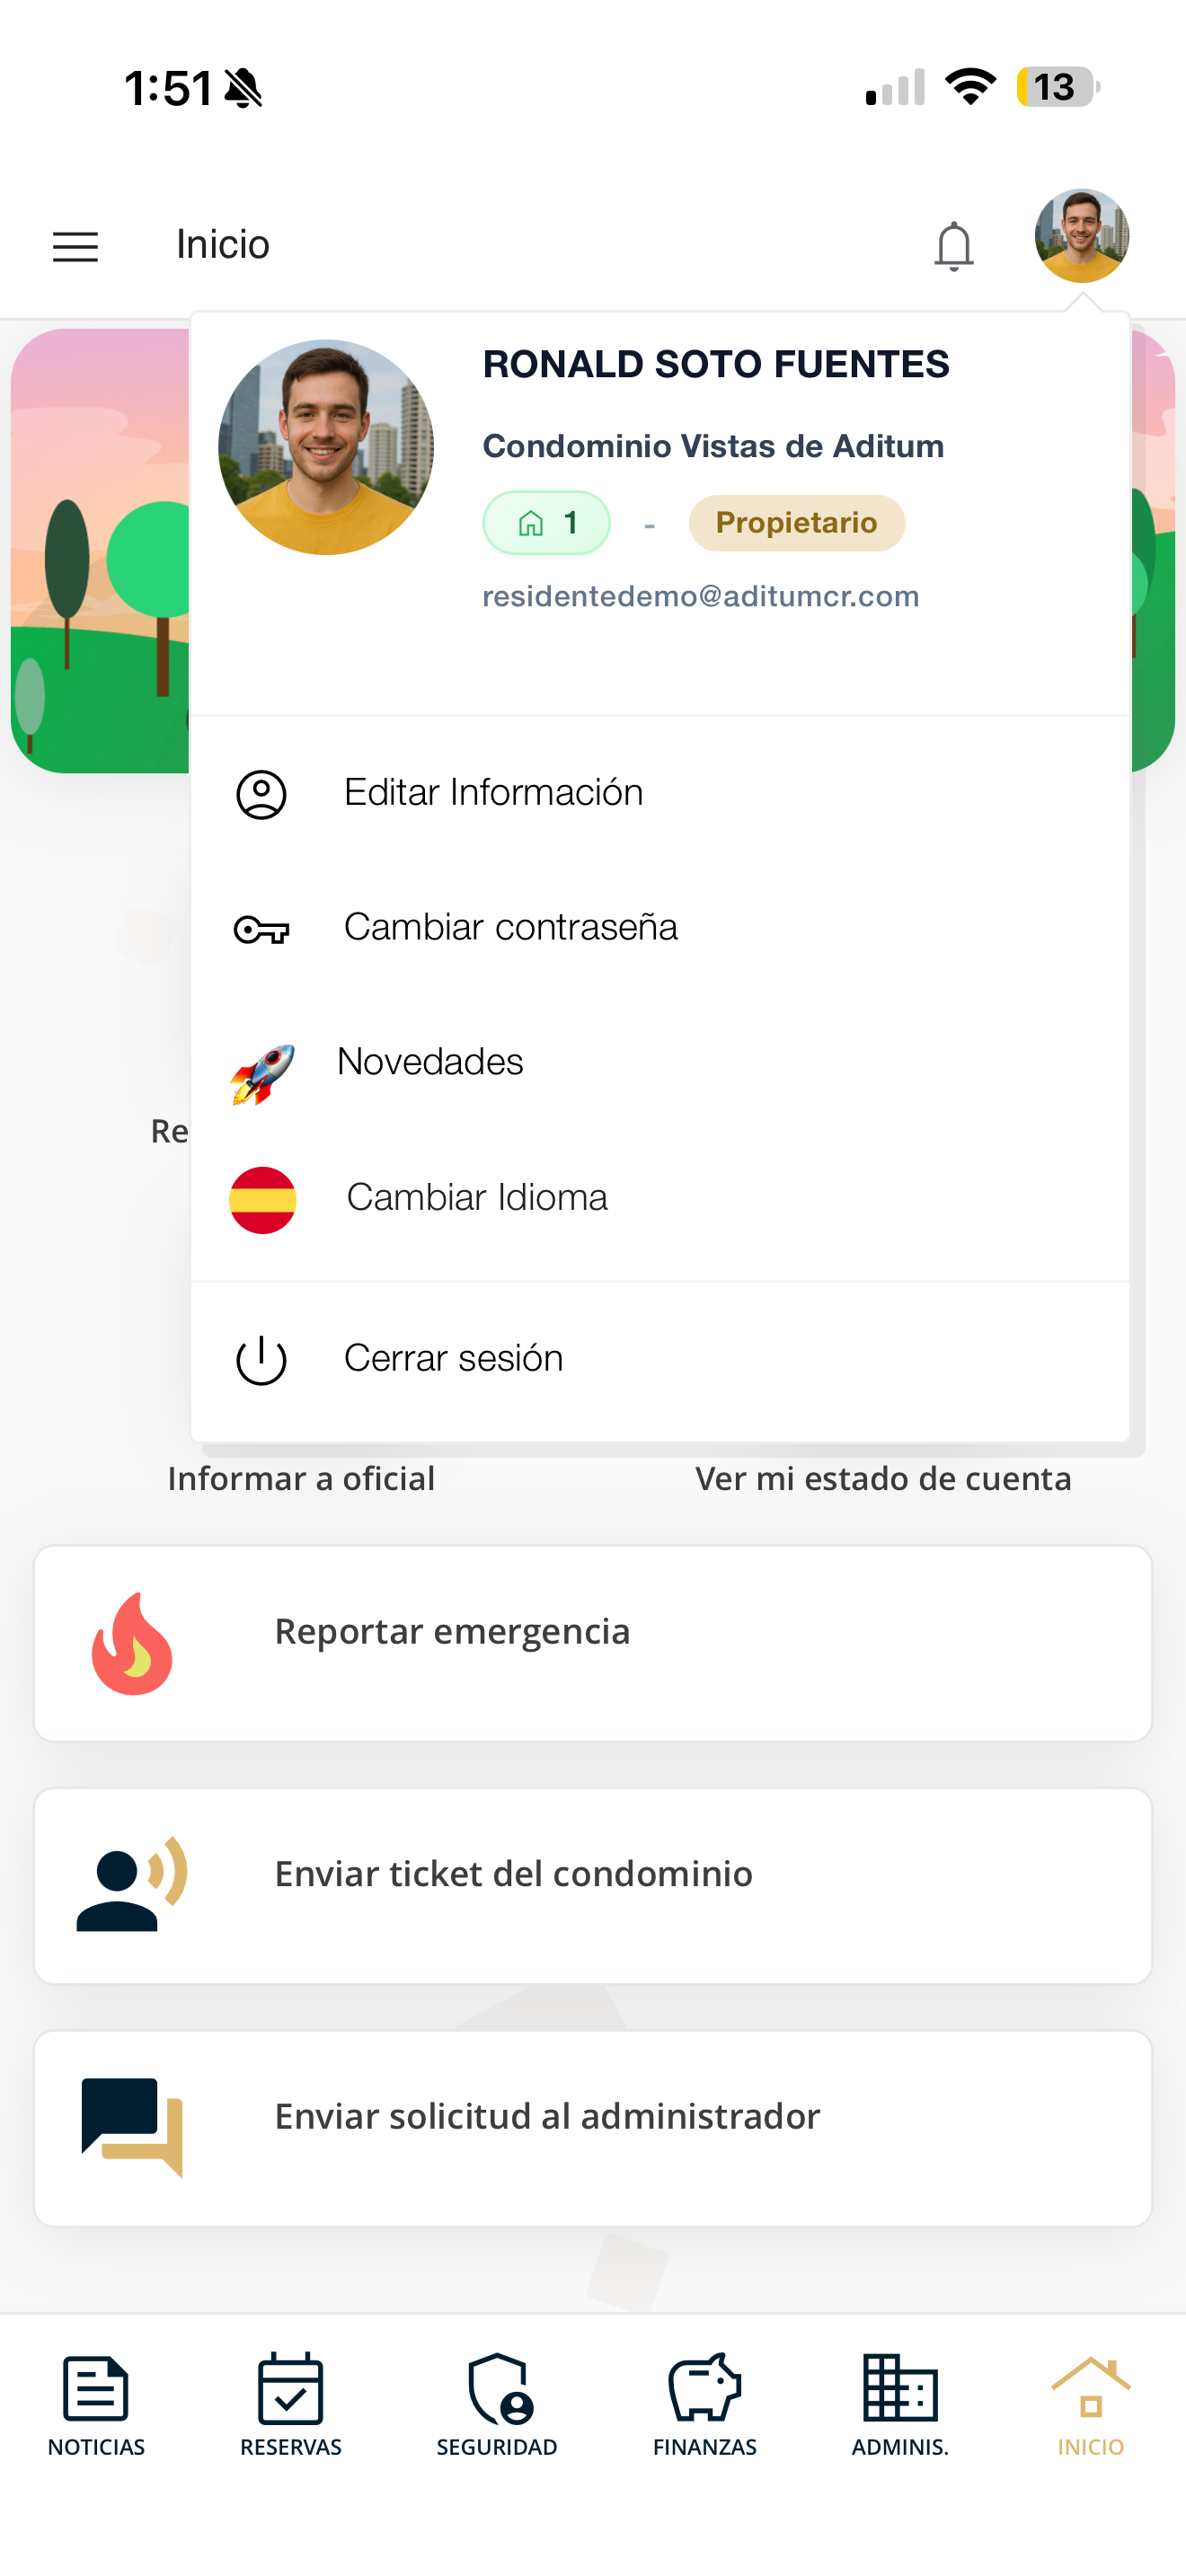
IMG_4775.PNG
Edit your information
Keep your details up to date: your photo, name, ID number, phone and email. Here is how to update your personal information.
Open "Edit Information"
Tap your profile picture at the top right and, in the menu, choose "Edit Information" (red box).
IMG_4775.PNG
Update your photo and details
On the "Edit user" screen you can change your photo with "Upload Image" (red box; use a square image) and review the Personhood type.
Under Personal details, fill in: Nationality, ID number, Name and last names. Under Contact and access, verify your mobile number and your email address.
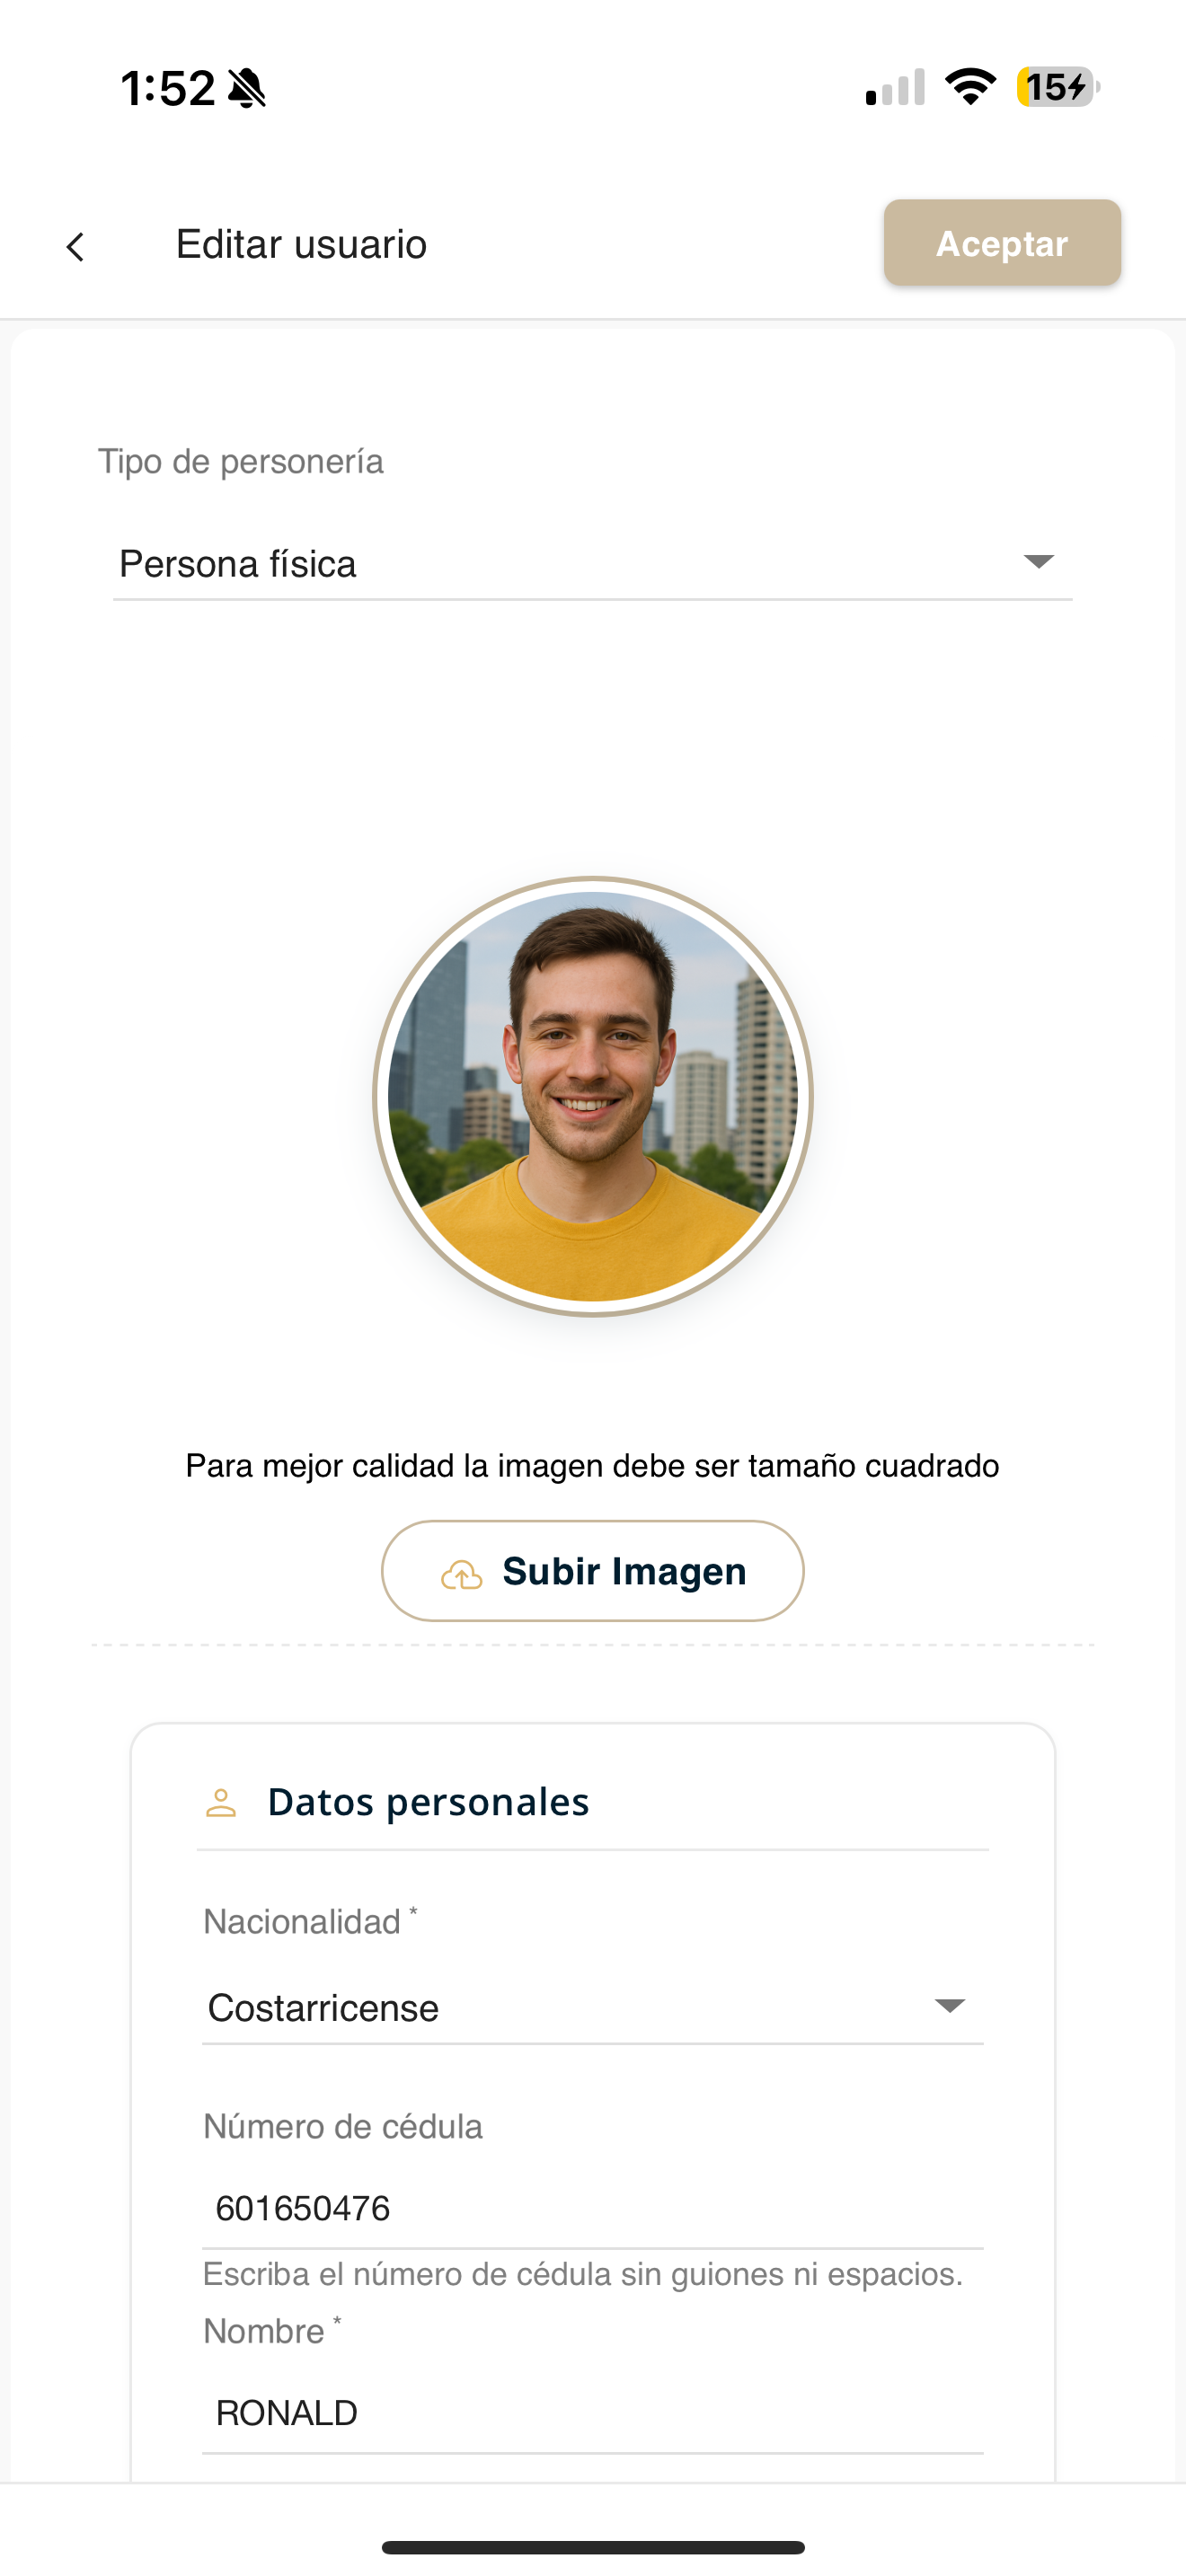
IMG_4778.PNG
Save the changes
When you finish, press "Accept" at the top right of the screen (red box) to save your information.
IMG_4778.PNG
Change your password
If you want to update your password for security, you can do it at any time from your profile.
Open "Change password"
Tap your profile picture at the top right and, in the menu, choose "Change password" (red box).
IMG_4775.PNG
Type and confirm your new password
In New password, type the password you want to use; the "Password strength" bar tells you how strong it is. Repeat it in Confirm password (red box) and press "Accept" at the top right (red box).
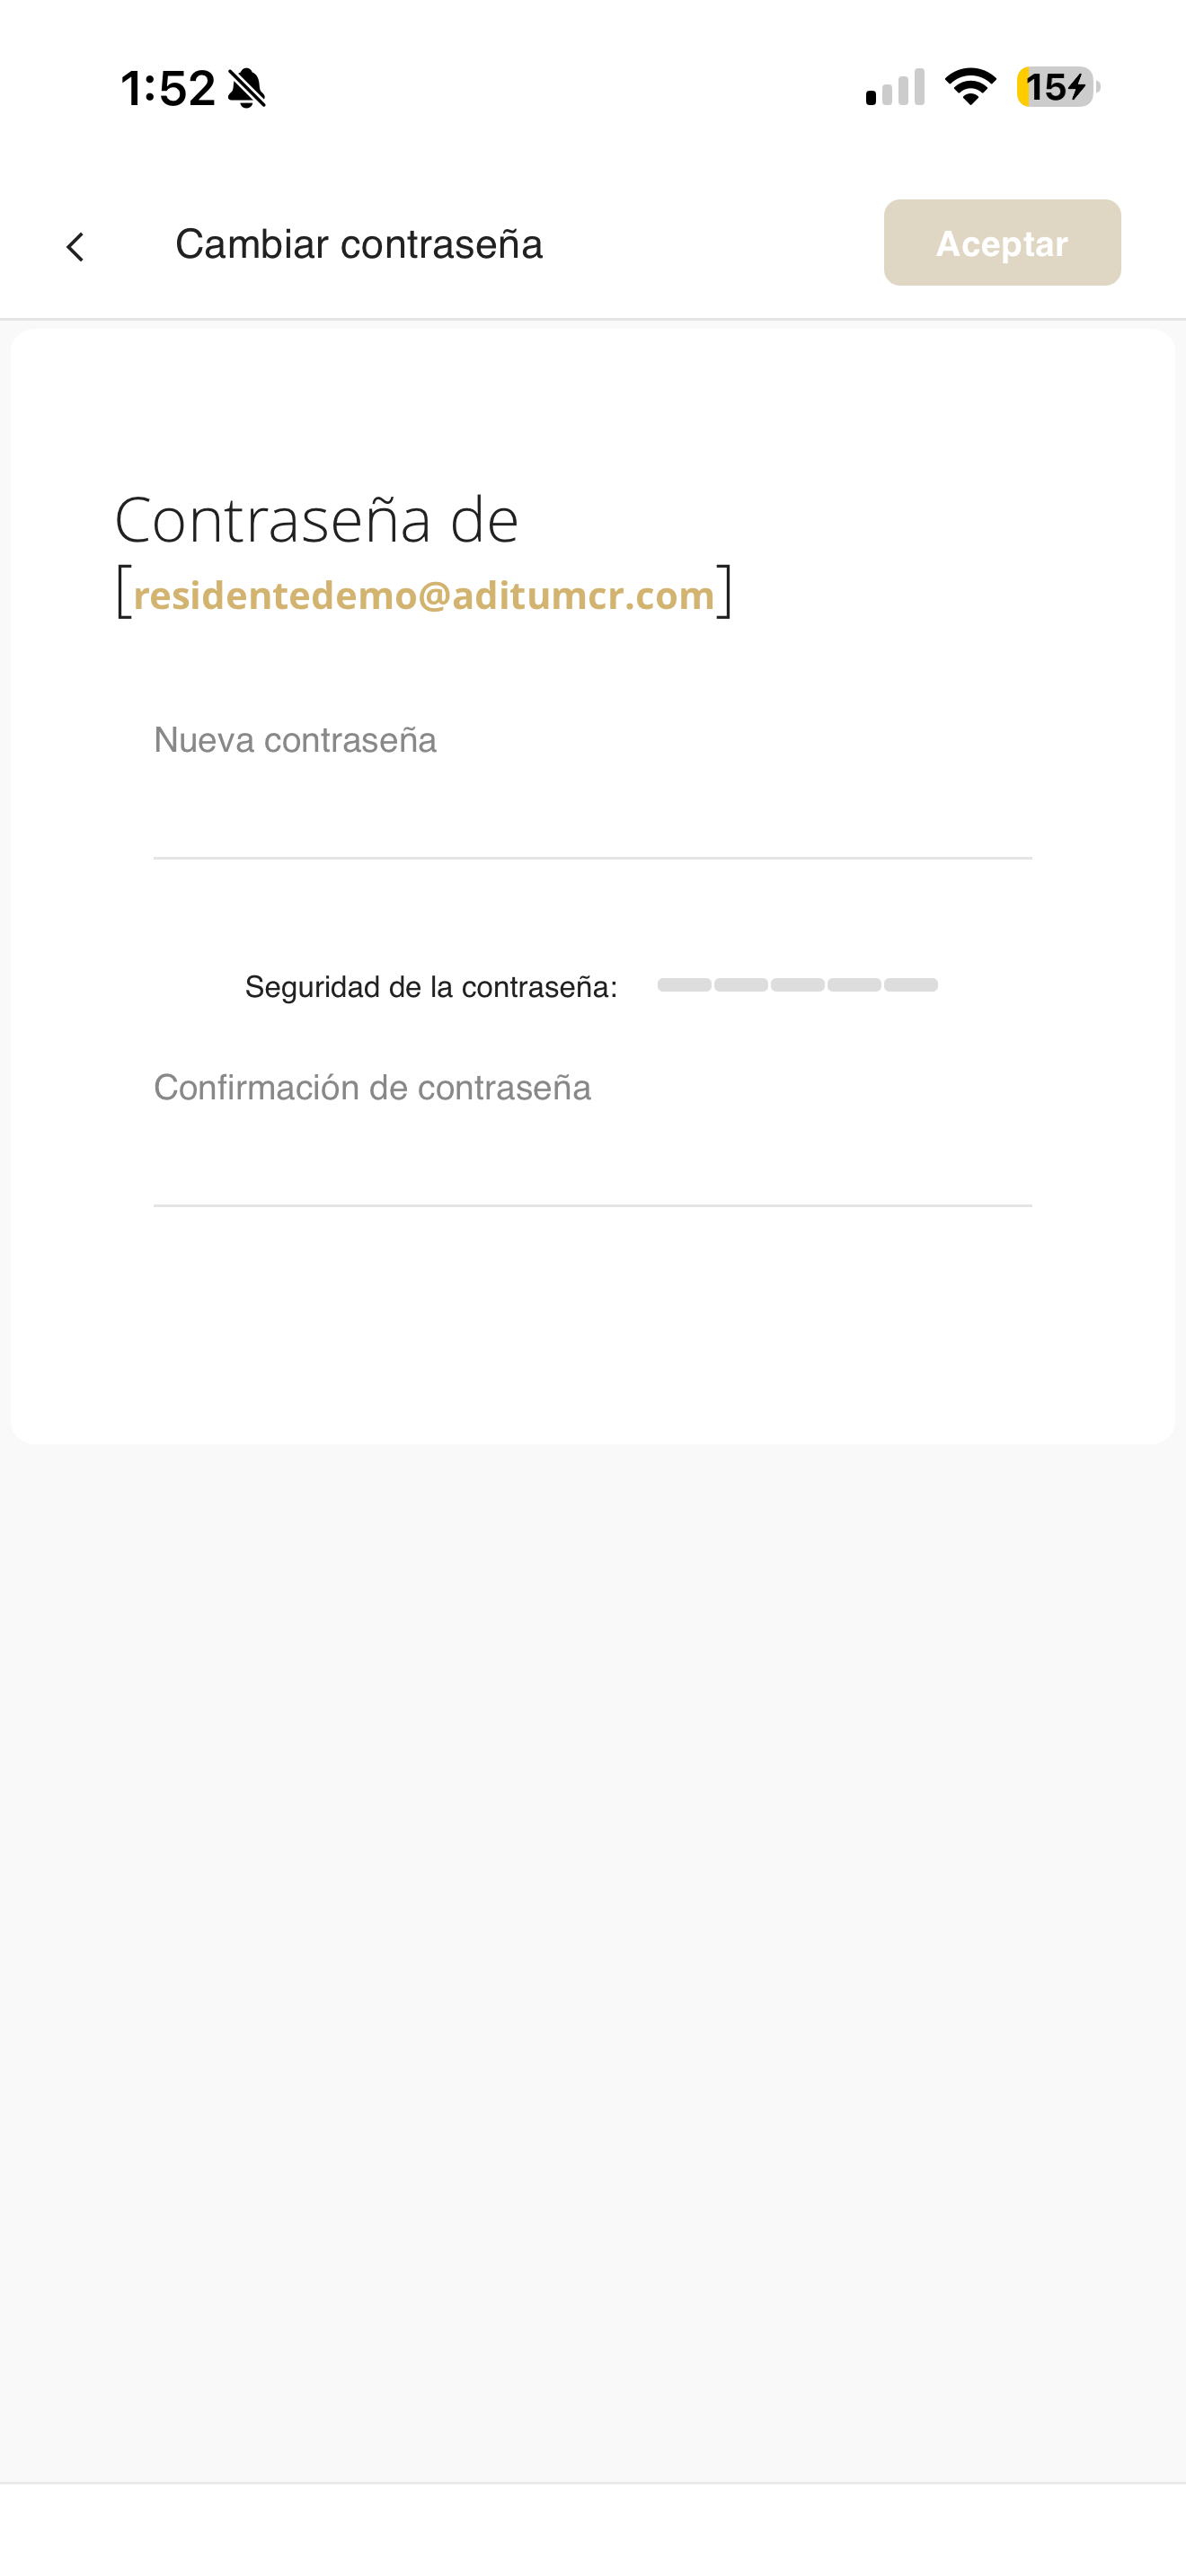
IMG_4779.PNG
Change the language
You can use Aditum in Spanish or English. Here is how to change the app language.
Open "Change Language"
Tap your profile picture at the top right and, in the menu, choose "Change Language" (red box).
IMG_4775.PNG
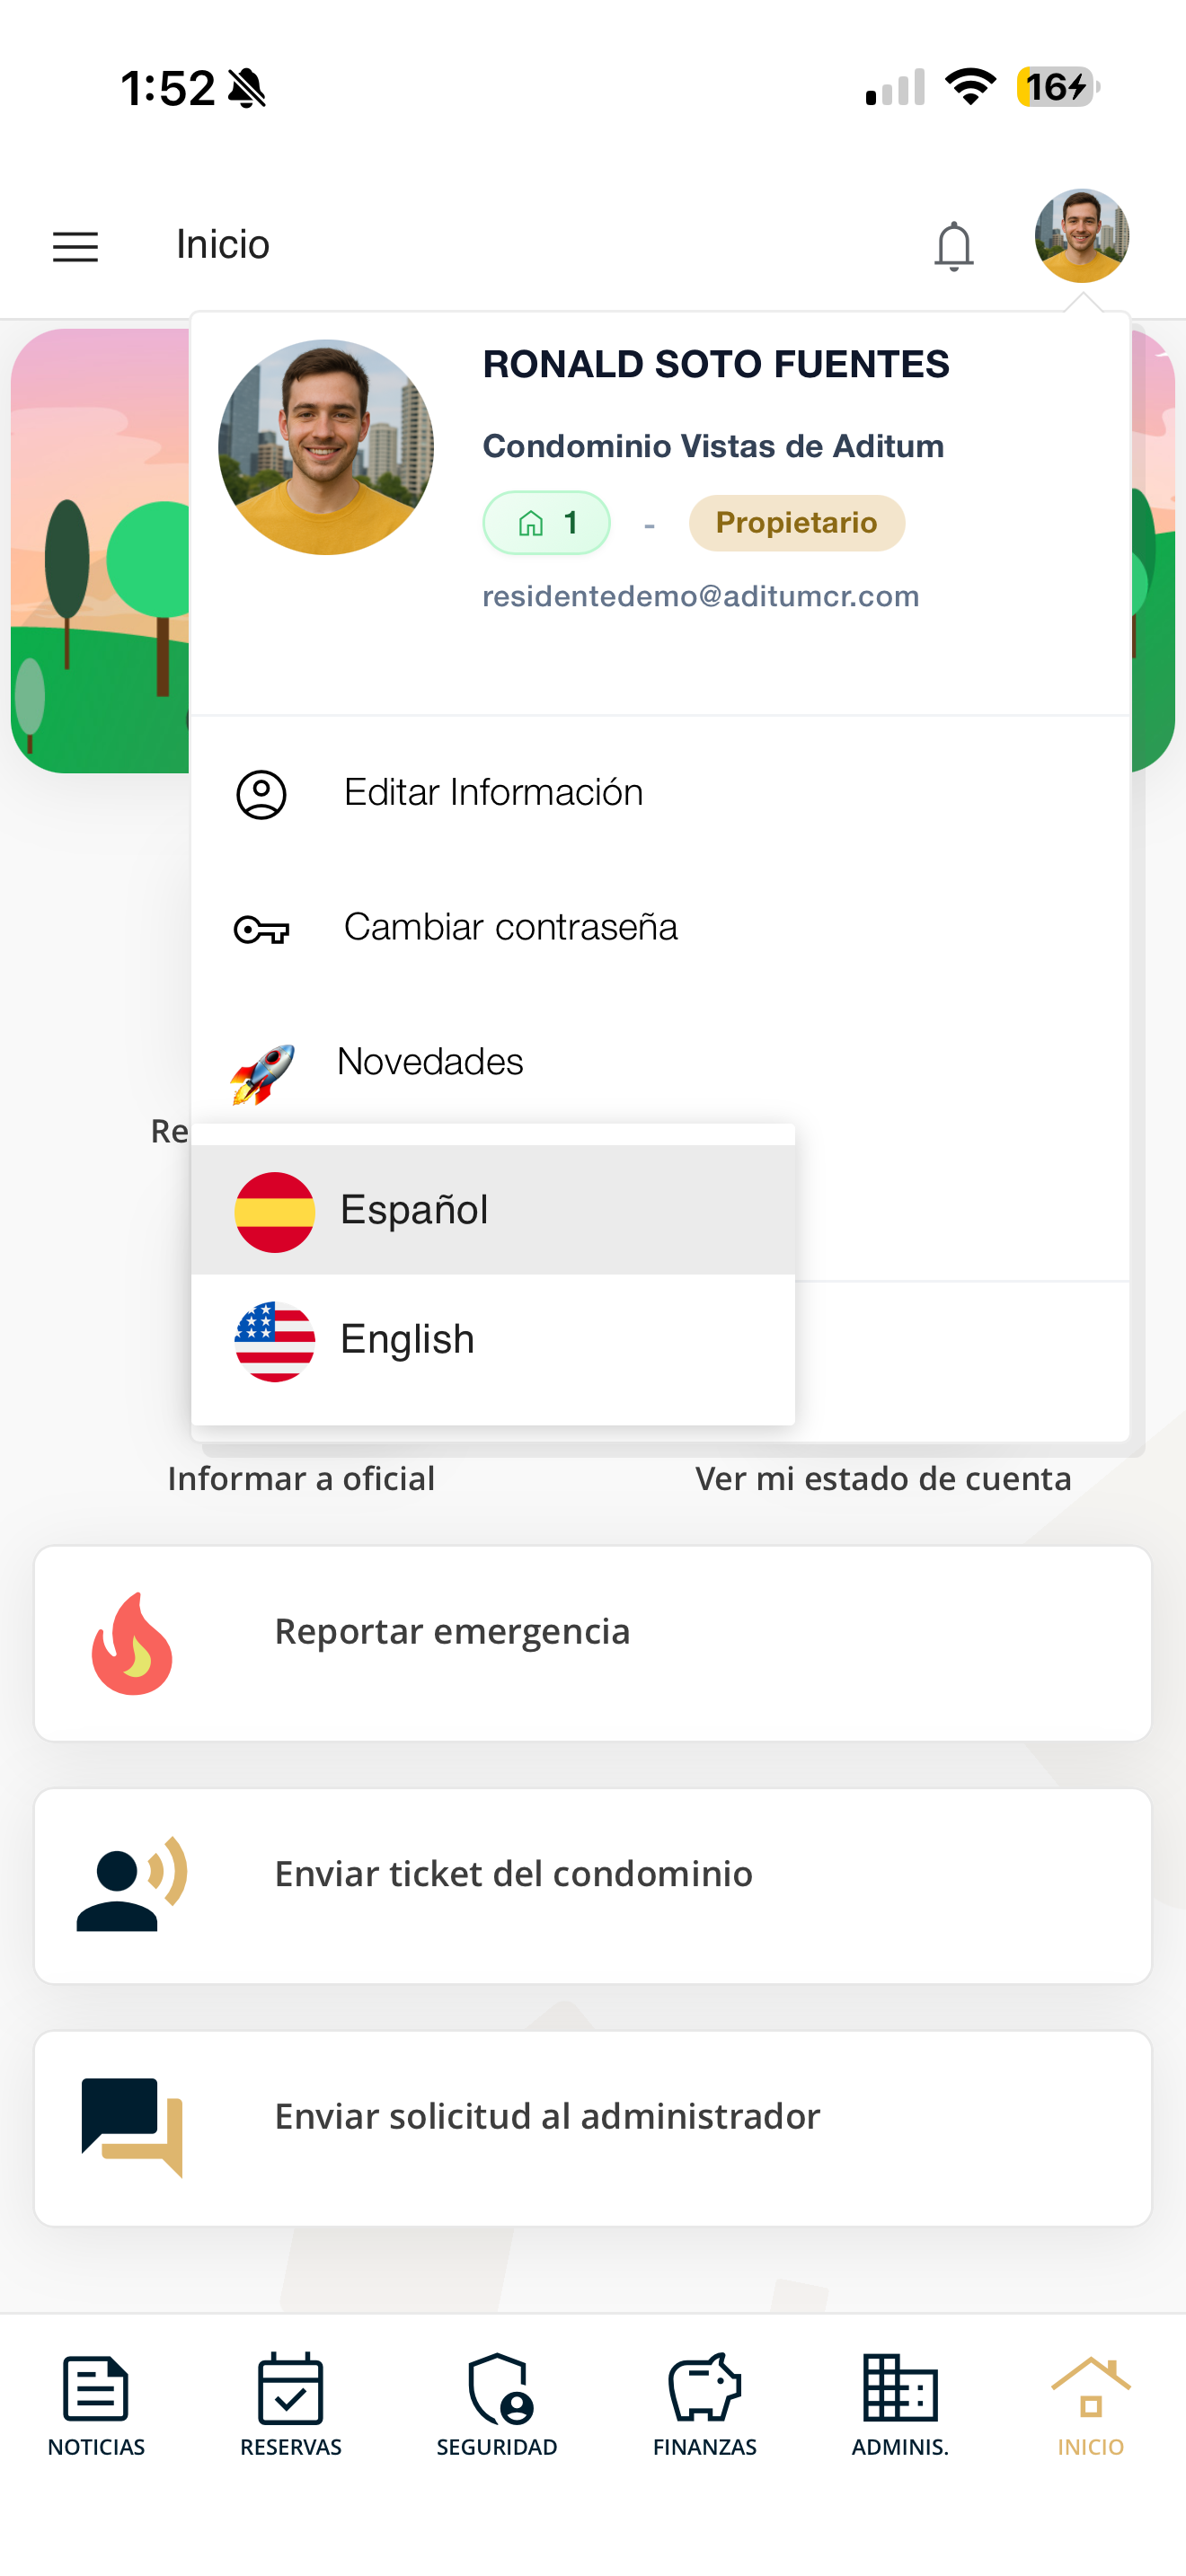
Choose your language
A list appears with the options Español and English (red box). Tap the language you prefer and the app will change right away.
IMG_4780.PNG
Switch condominium or unit
If your account belongs to more than one condominium or has several units (properties), you can move between them from the side menu.
Open the side menu
Tap the ☰ icon in the top-left corner. A panel opens with "Select condominium" and "Select unit" (red box).

IMG_4782.PNG
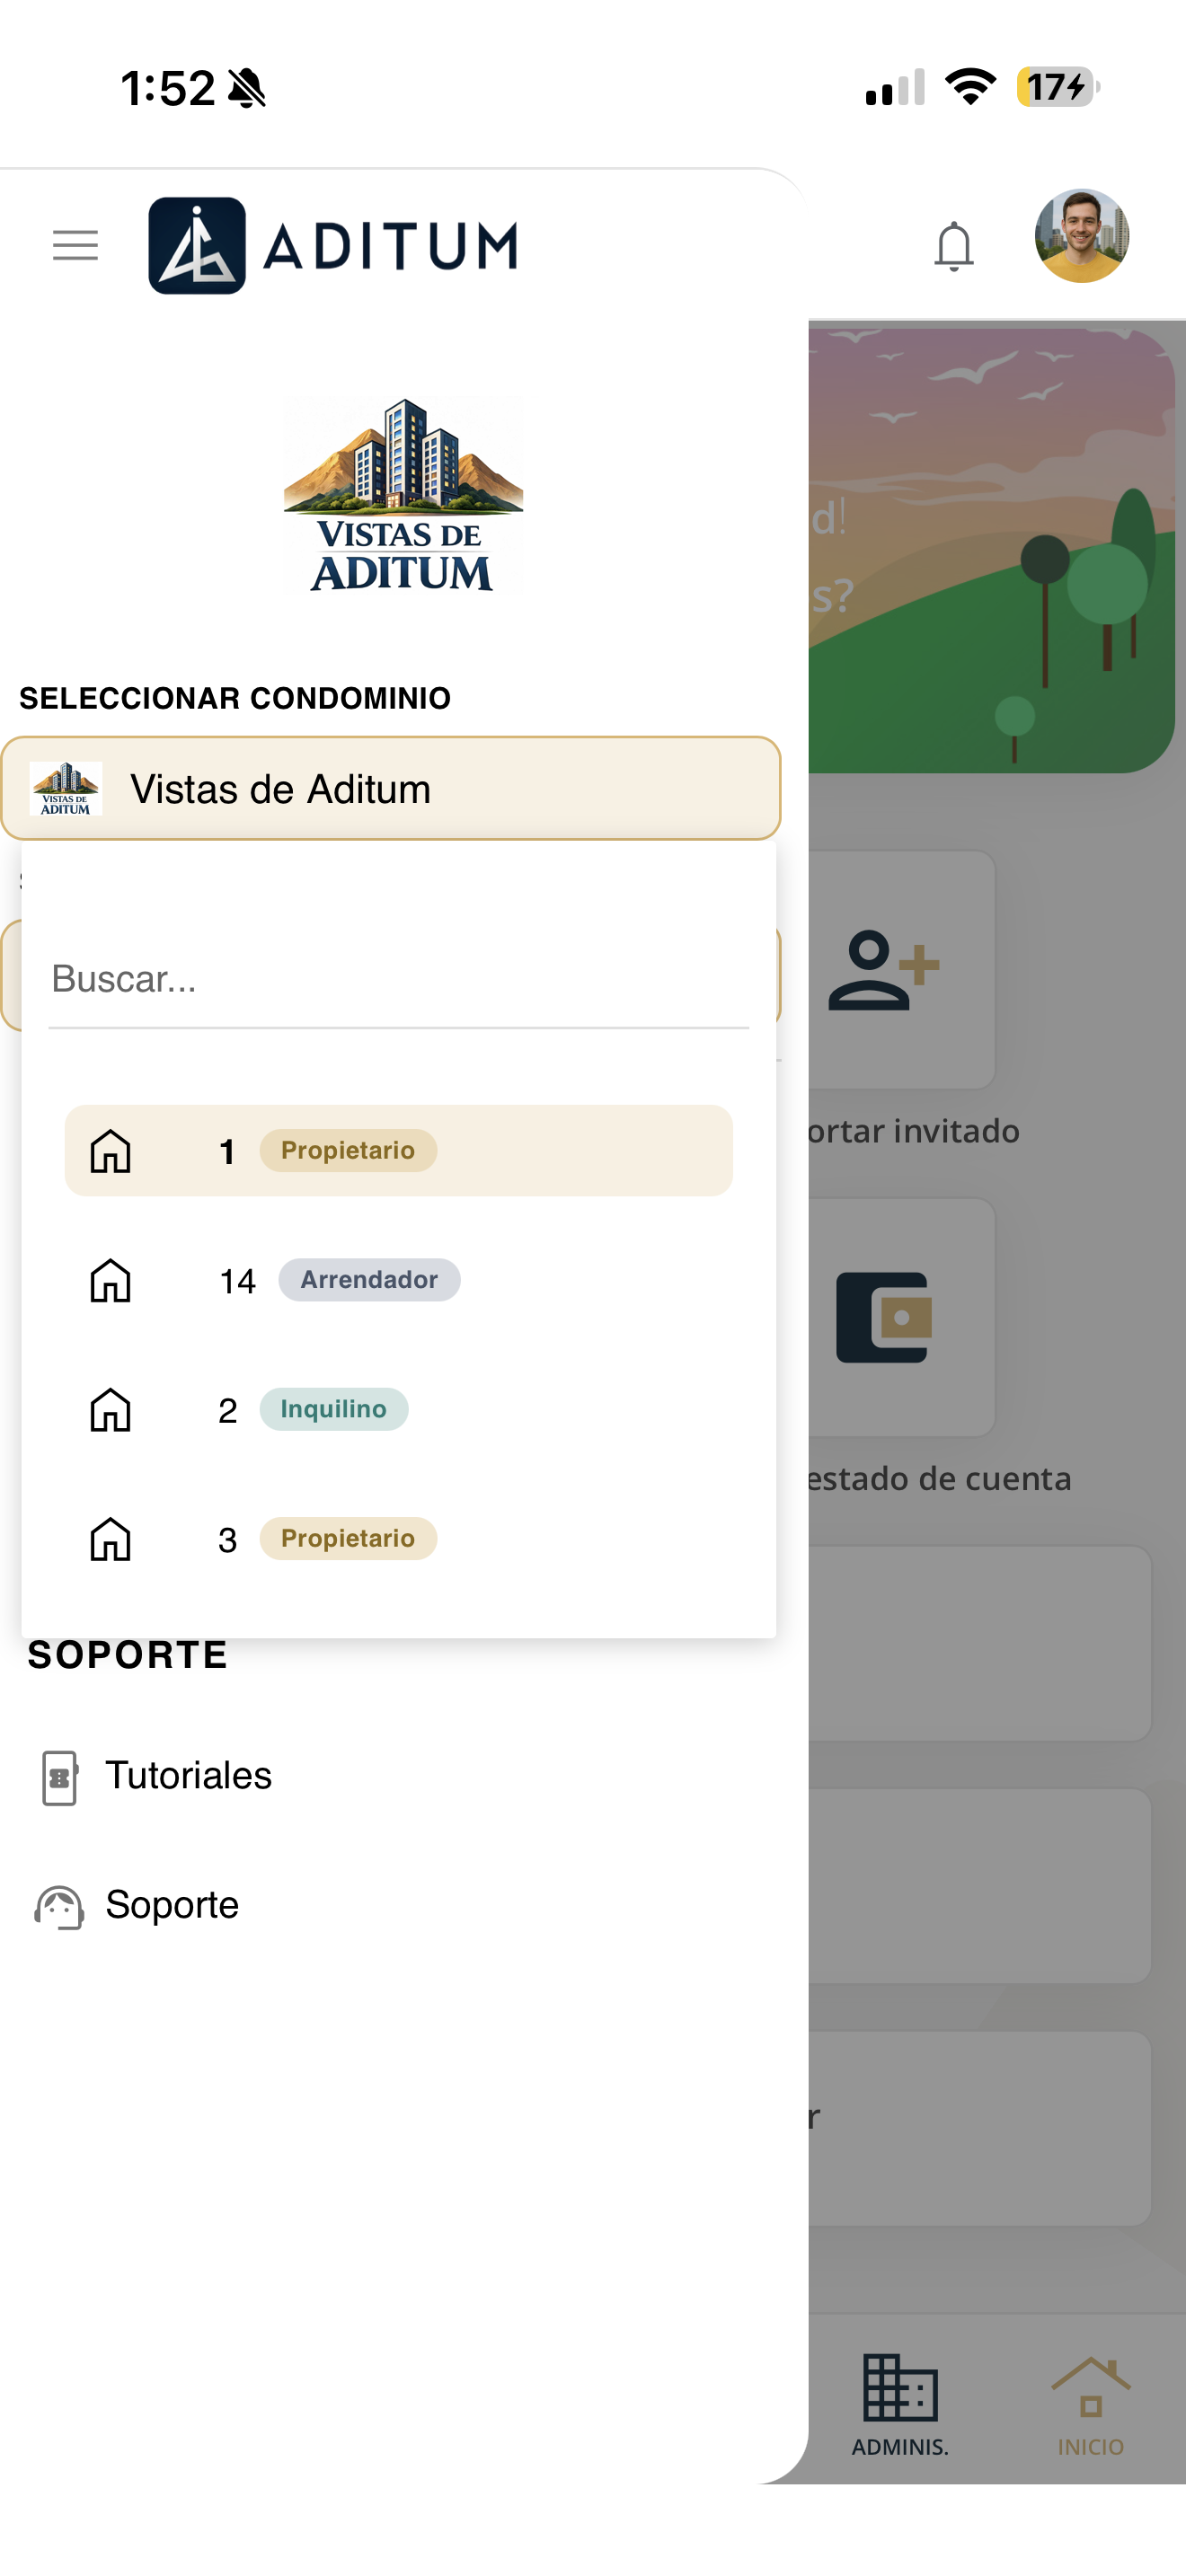
Switch condominium
Tap "Select condominium". A search box and the list of available condominiums appear (red box). Tap the one you want to enter it.

IMG_4783.PNG
Switch unit
Tap "Select unit" to see your units (properties) (red box). Each one shows its number and your role in it (Owner, Tenant or Landlord). Tap the one you want to use.
IMG_4784.PNG
View your activity
The Activity screen gathers the recent events for your unit, such as visitor entries and exits.
Tap the bell
At the top of the screen, tap the bell 🔔 icon (red box) to open Activity.
IMG_4774.PNG
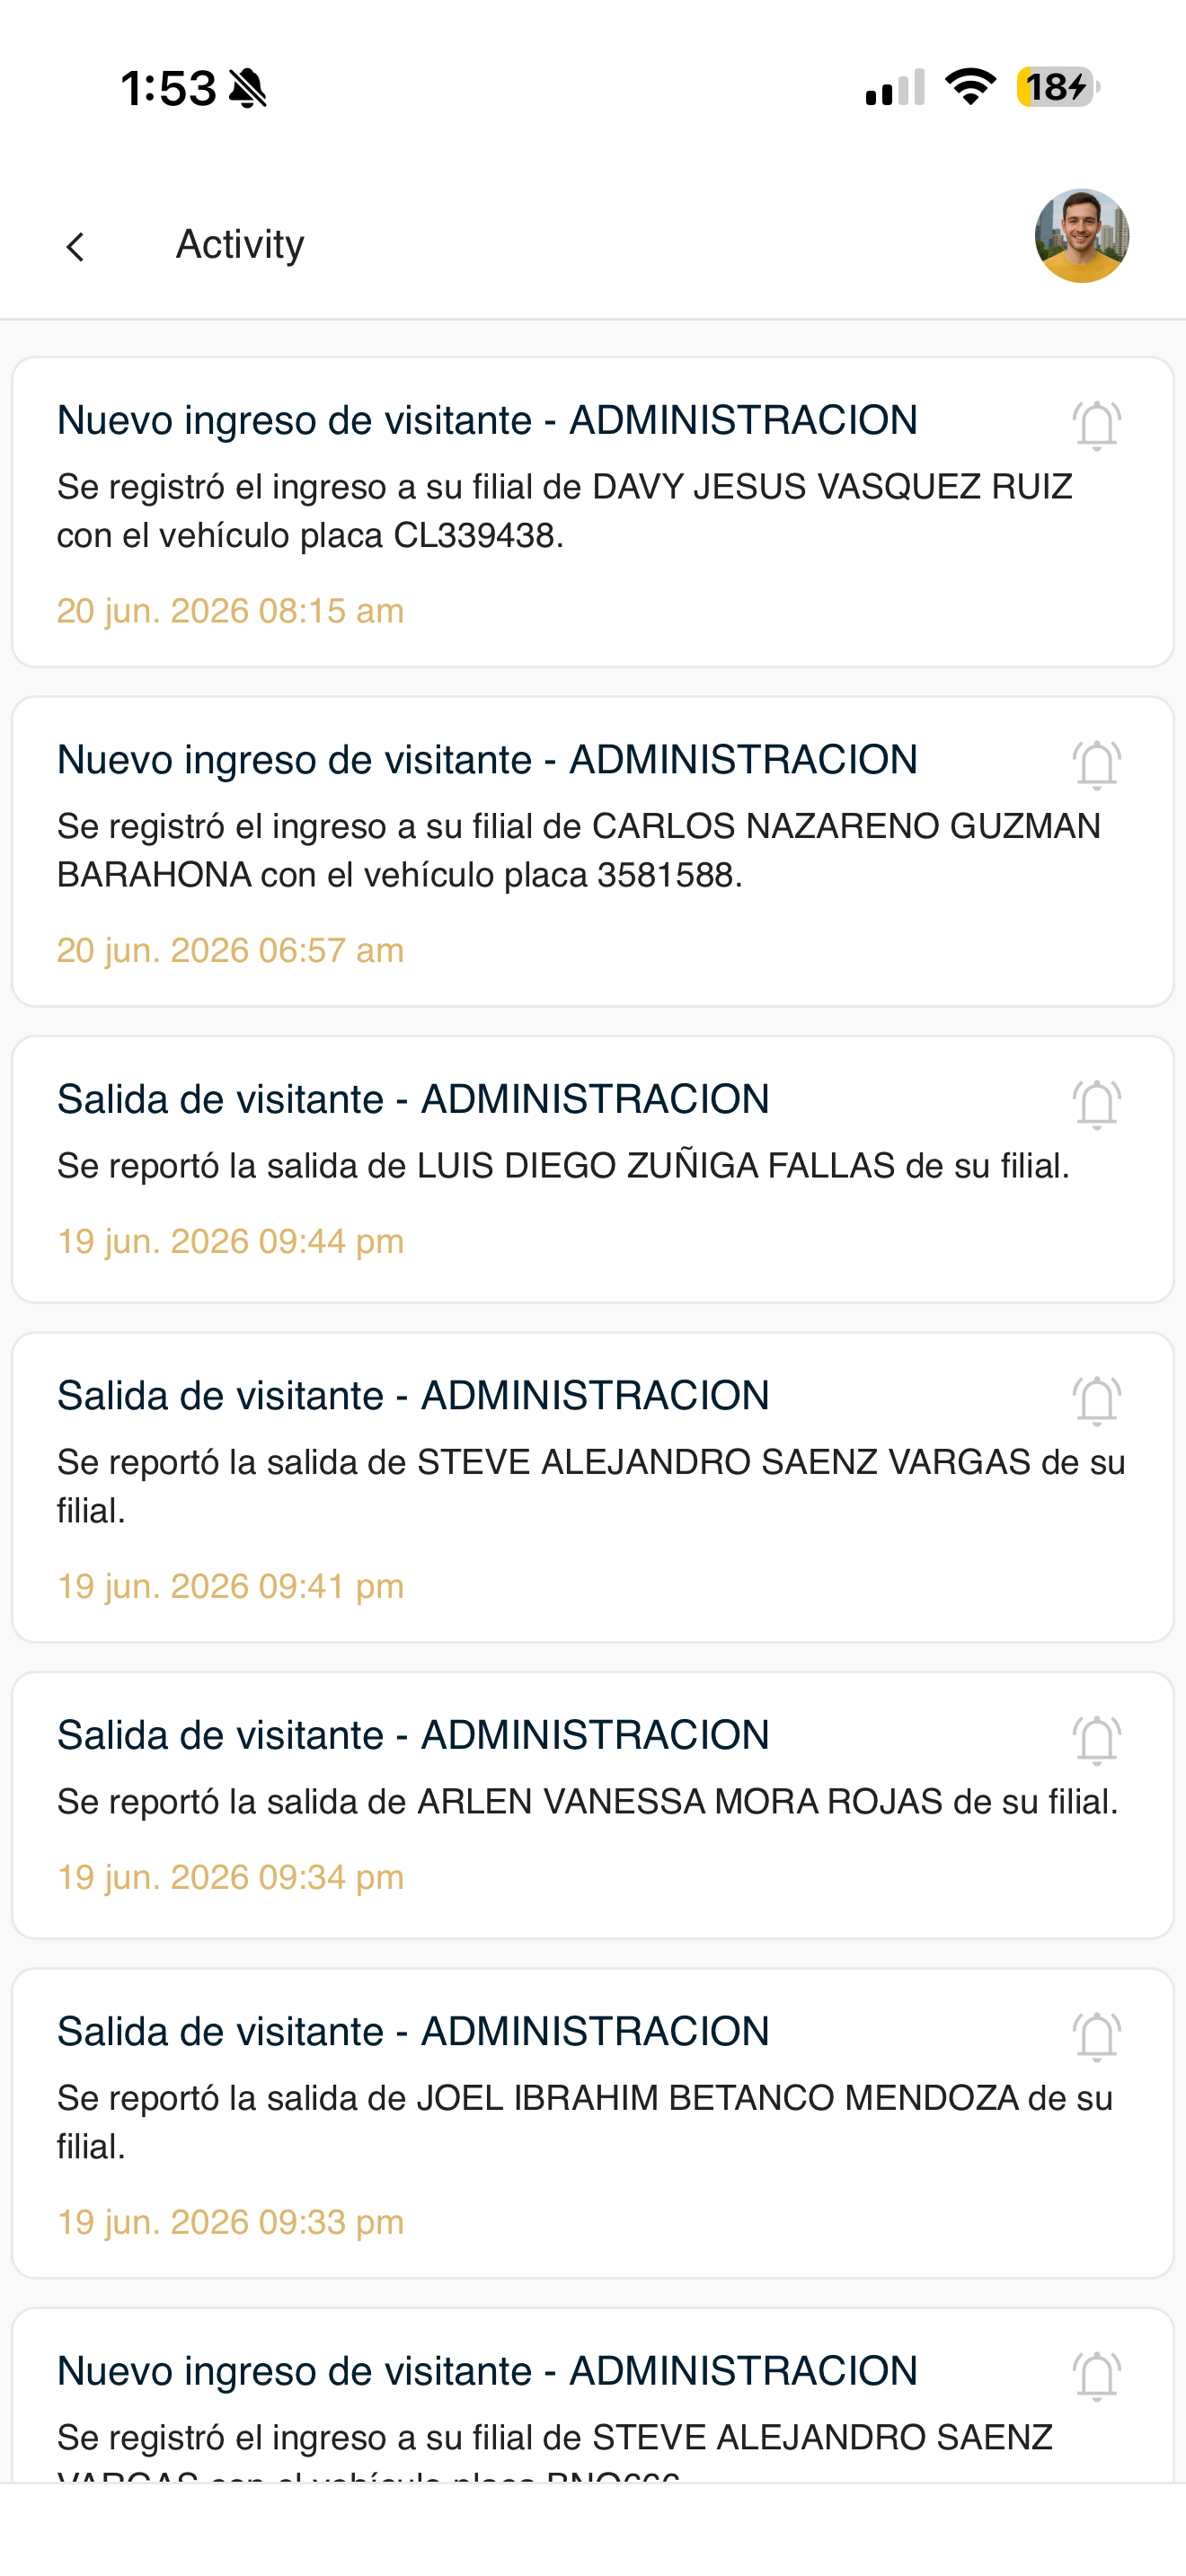
Review your activity
You will see a list of events such as "New visitor entry" and "Visitor exit". Each one (red box) shows the name, the detail (for example, the vehicle license plate) and the date and time.
IMG_4785.PNG
View announcements
News is Aditum's home screen. Here management posts the condominium's announcements and notices.
Open the News section
When you log in, you go straight to News. If you are in another section, come back by tapping "News" in the bottom bar, or open it from the ☰ menu at the top left.
noticias-01-inicio.png
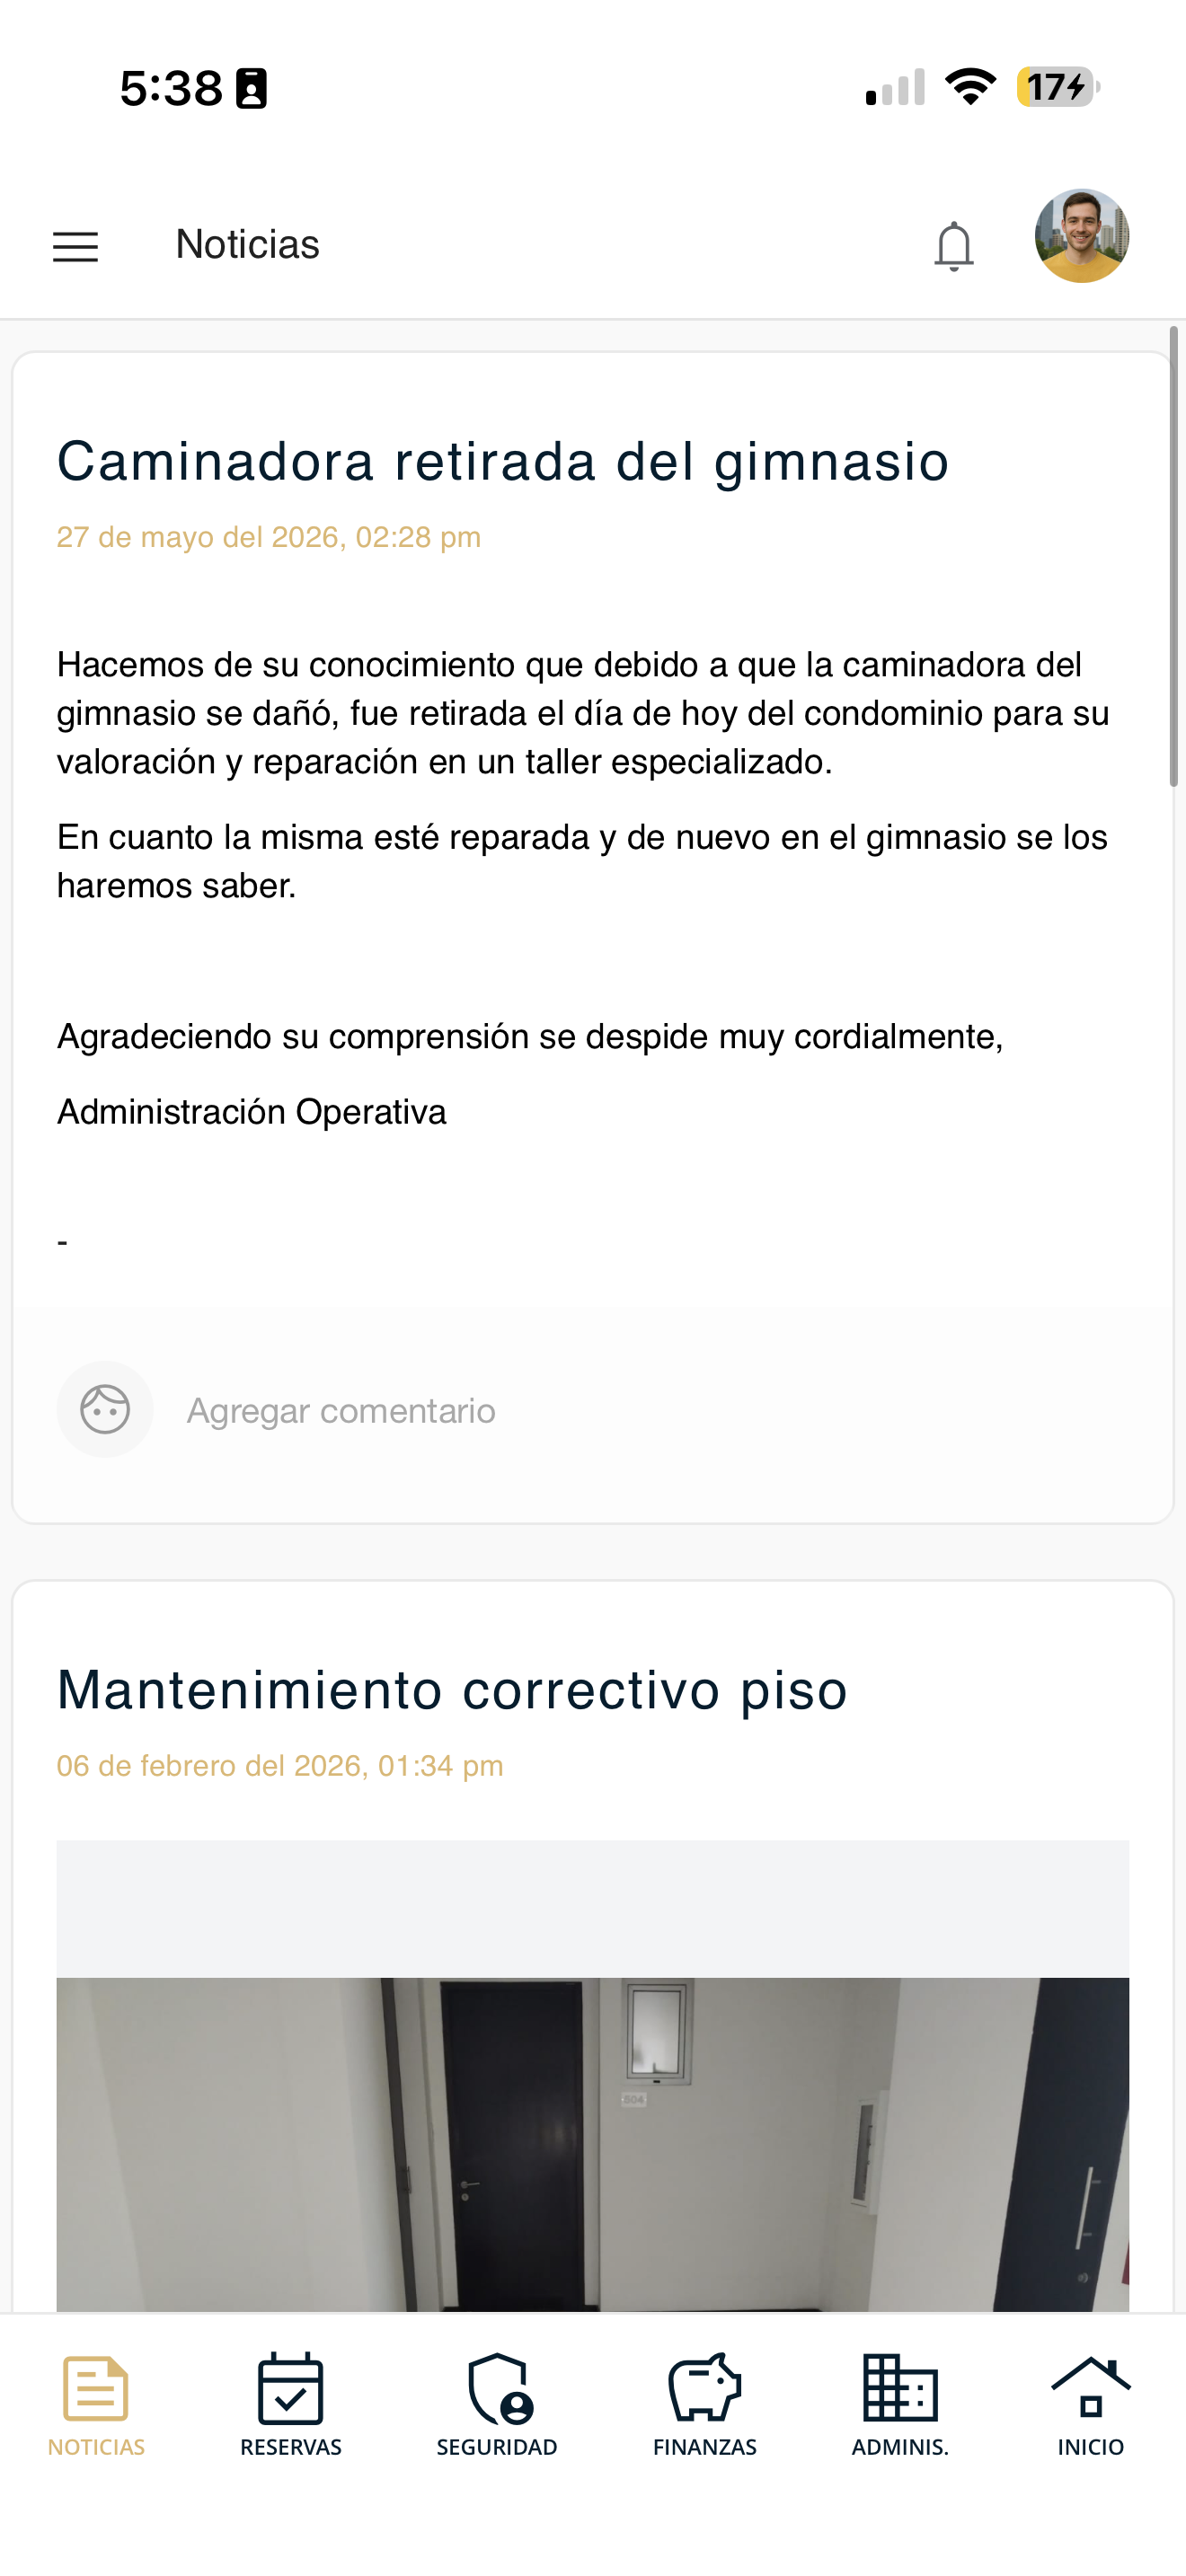
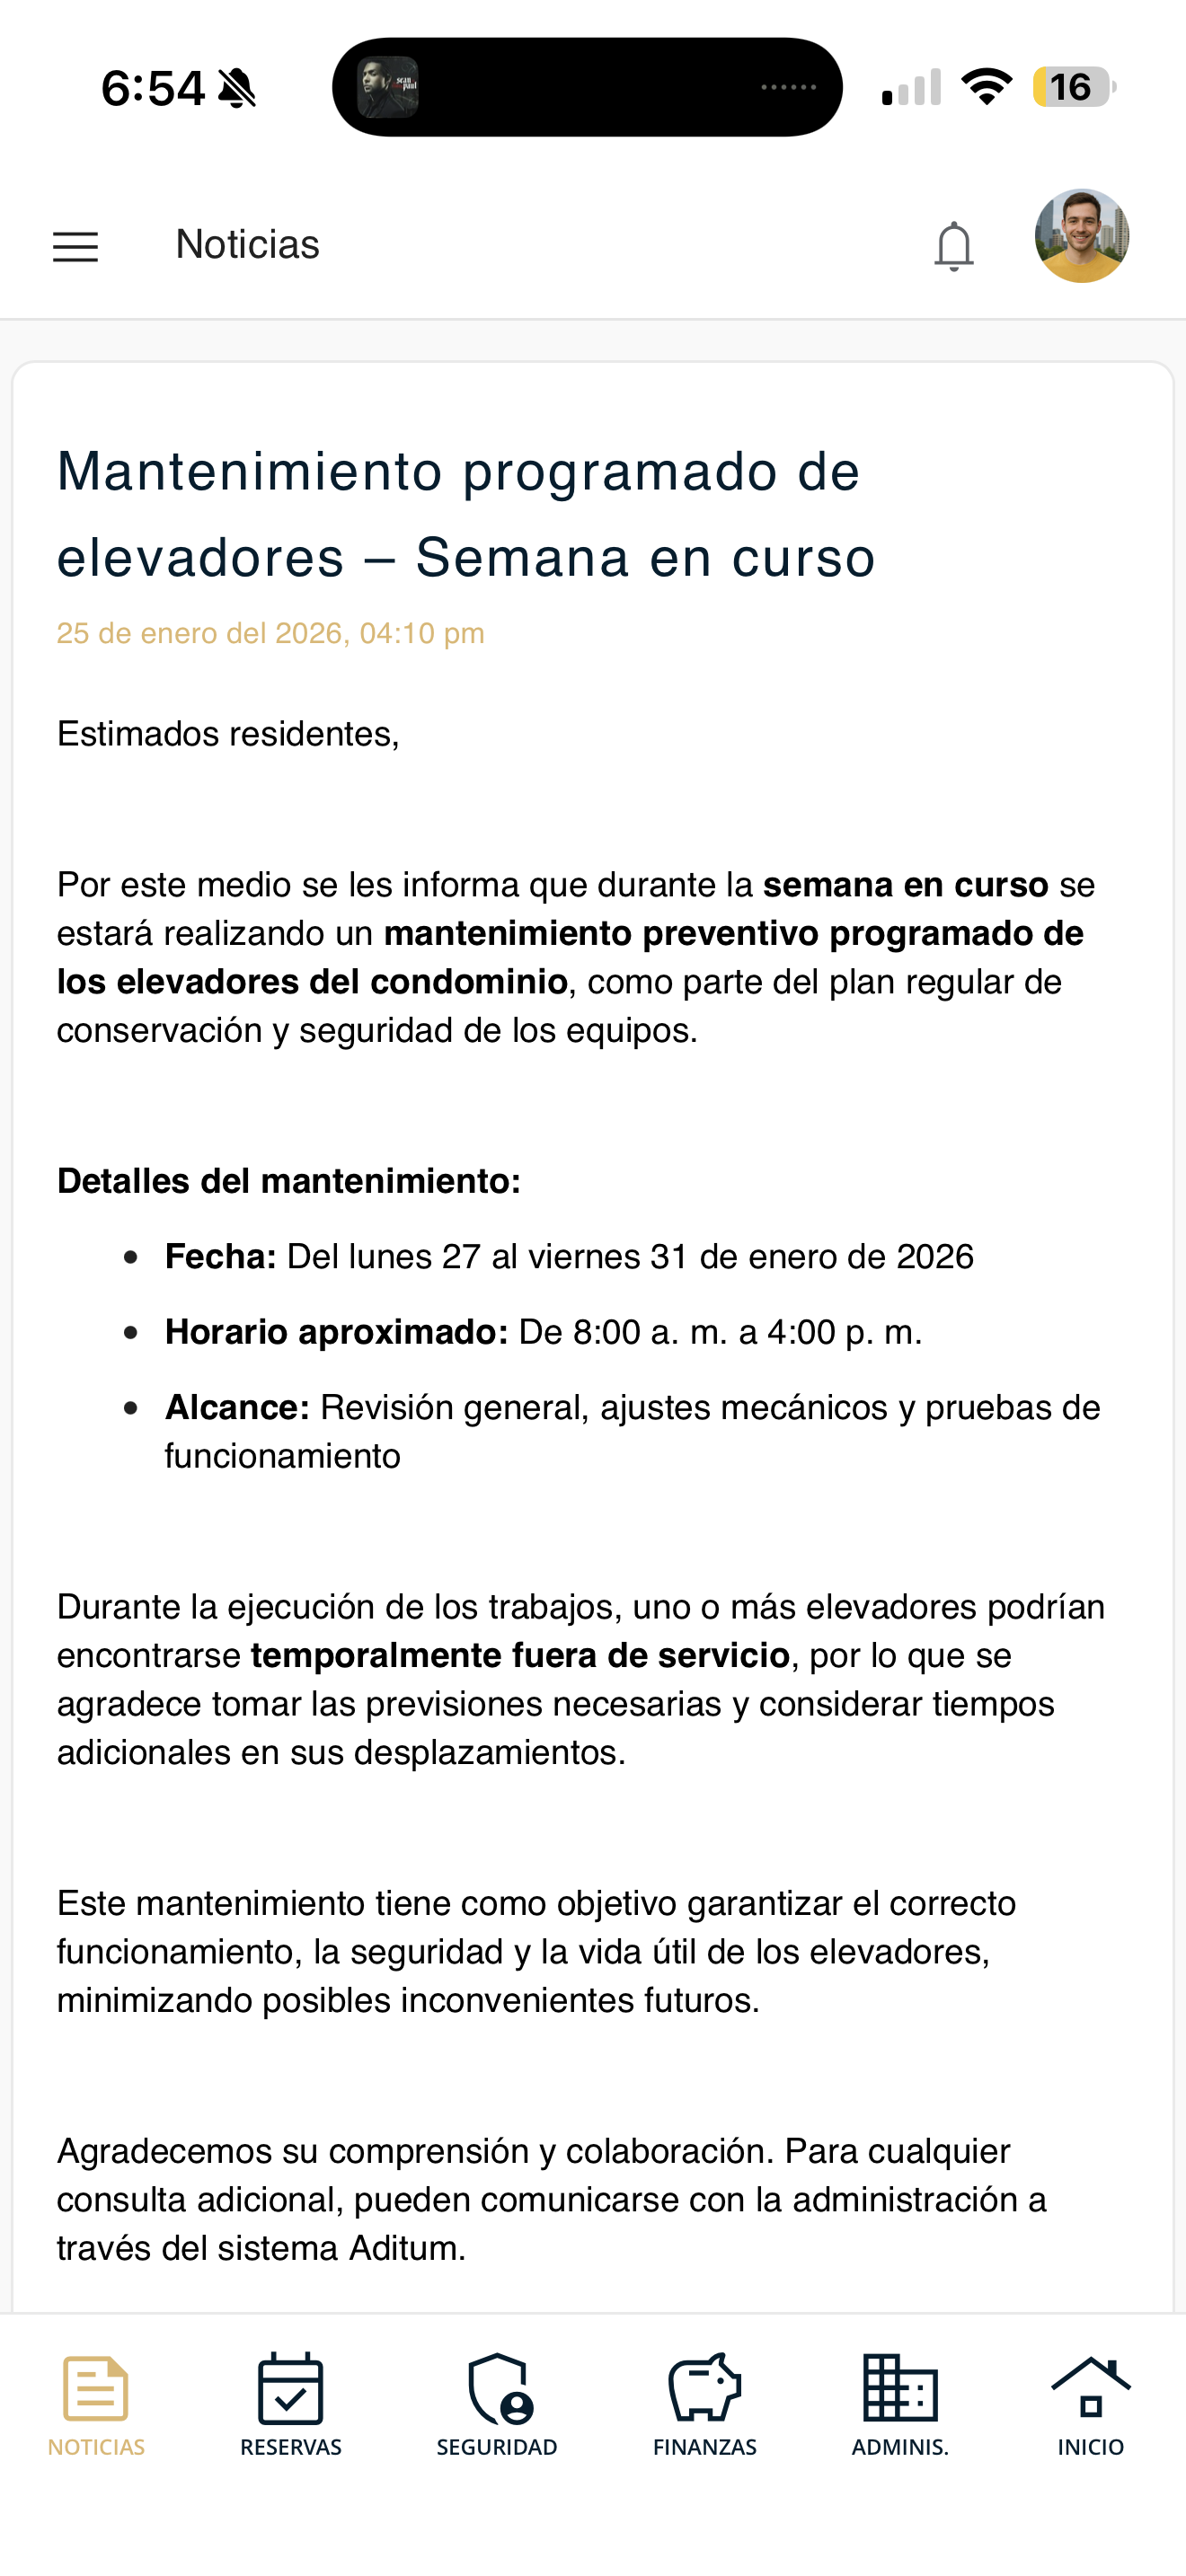
Read each announcement
Each announcement shows its title, the date and time it was posted and the message. Some include images or flyers.
Swipe down to see previous announcements.
noticias-02-comunicado.png
Comment on a news item
You can leave a comment on any announcement to reply to or ask management a question.
Tap "Add comment"
Below the news item you are interested in, tap the "Add comment" field.

noticias-03-agregar-comentario.png
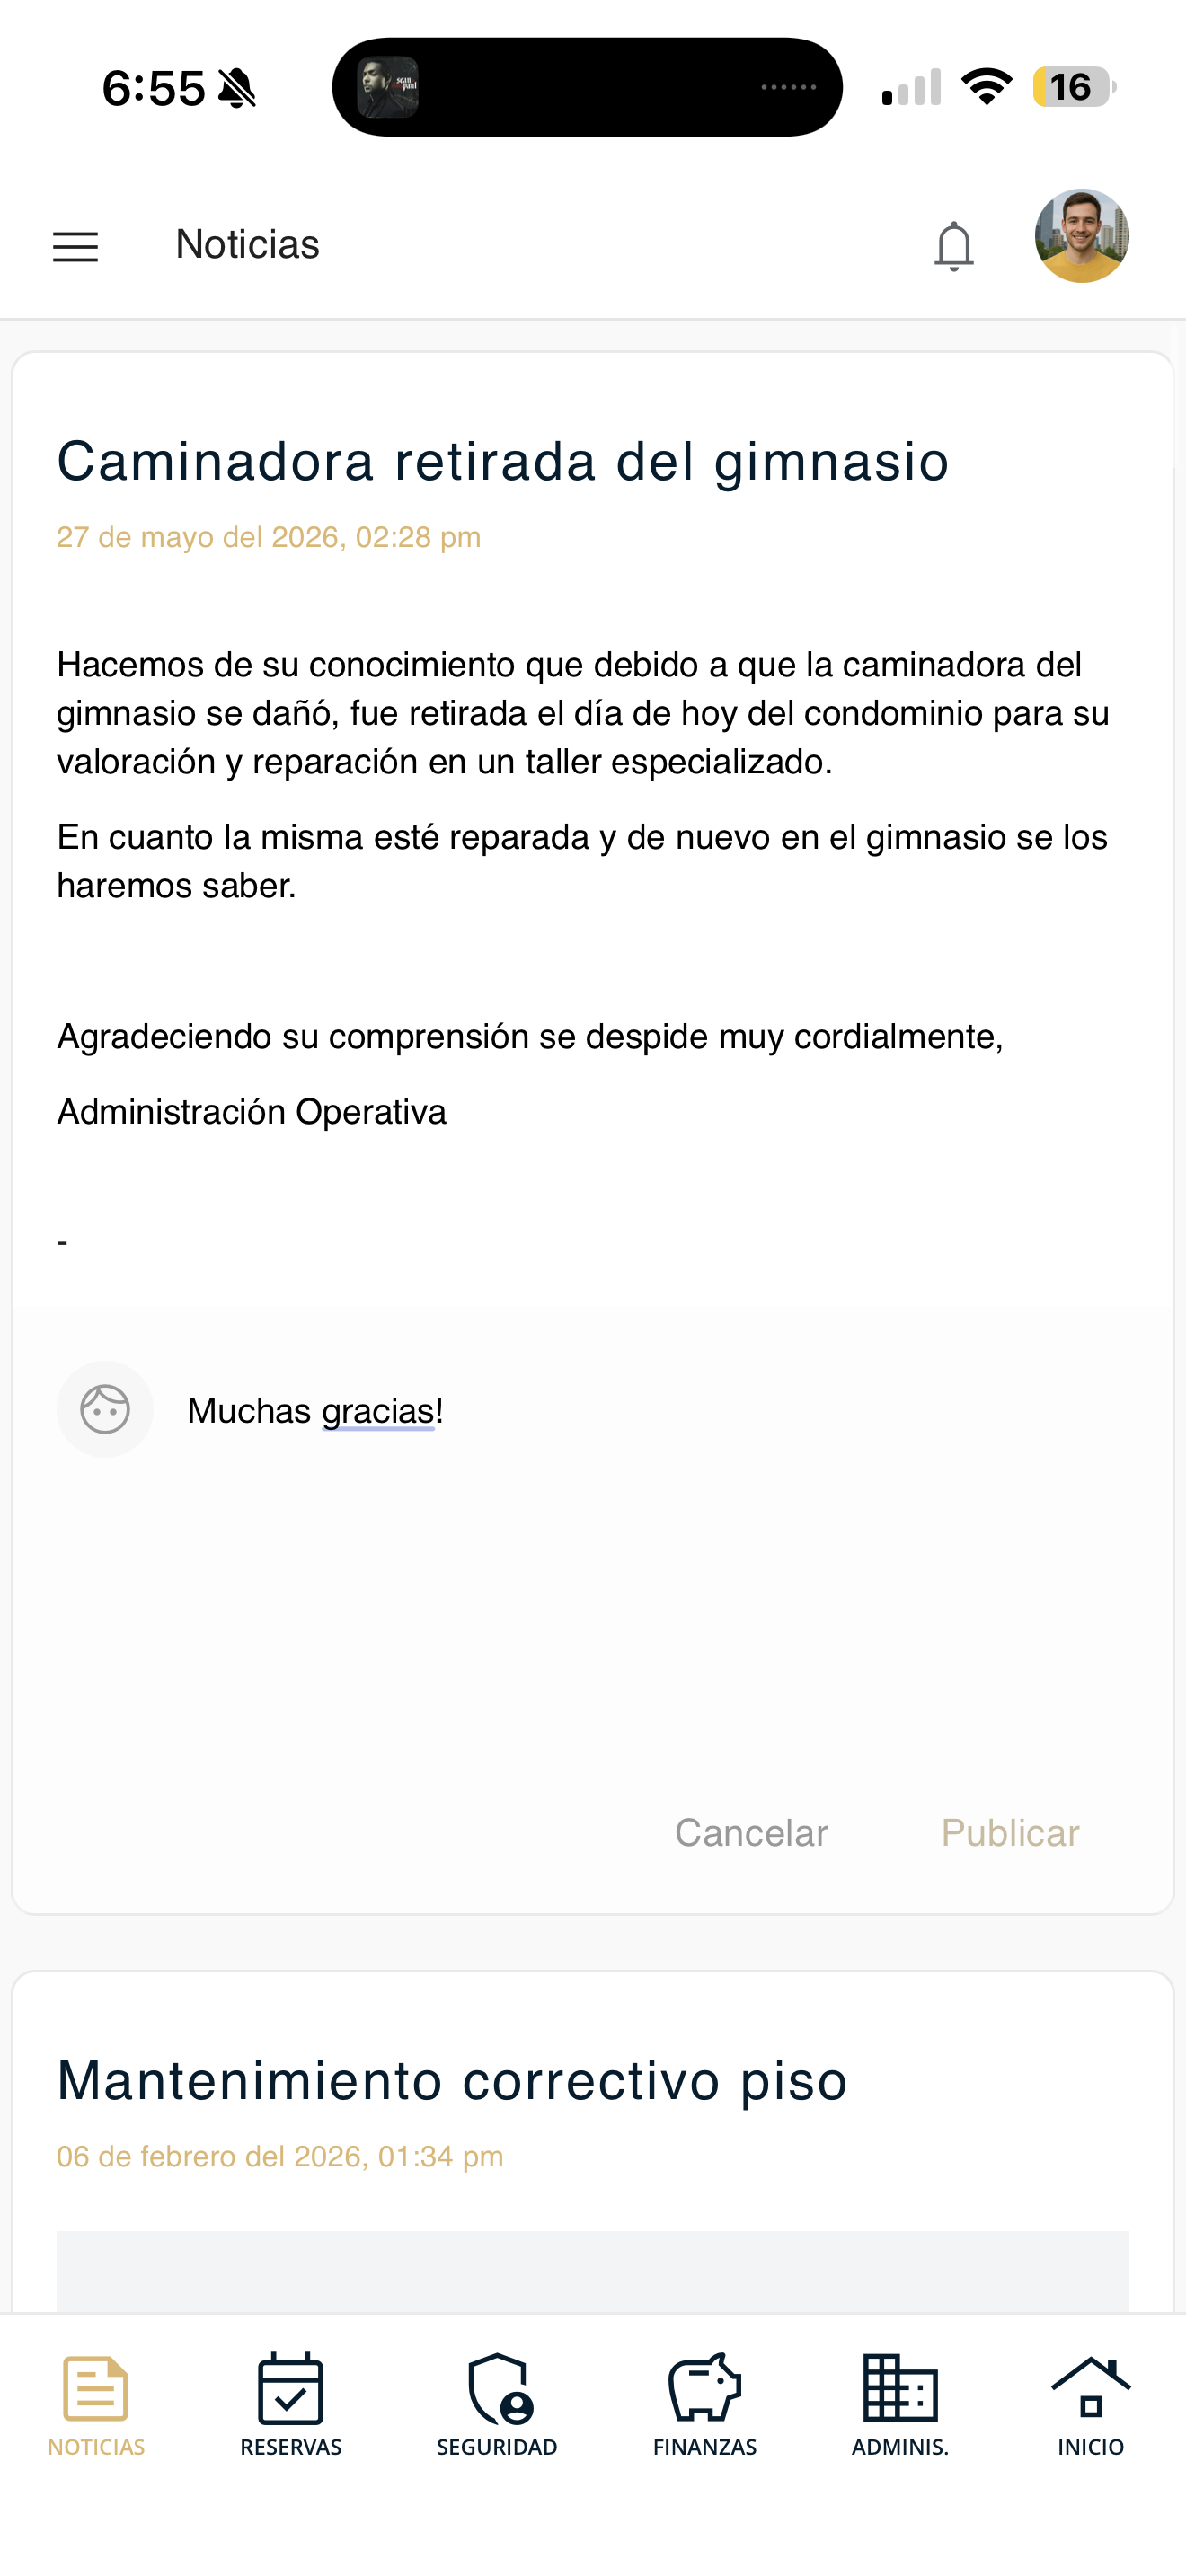
Write and post
Type your comment. The "Cancel" and "Post" buttons will appear. Press "Post" to send it (or "Cancel" if you change your mind).
noticias-04-publicar.png
Make a reservation
Reserve a common area (pool, hall, BBQ, etc.) with the 4-step wizard: choose the area, the date, the time slot and confirm.
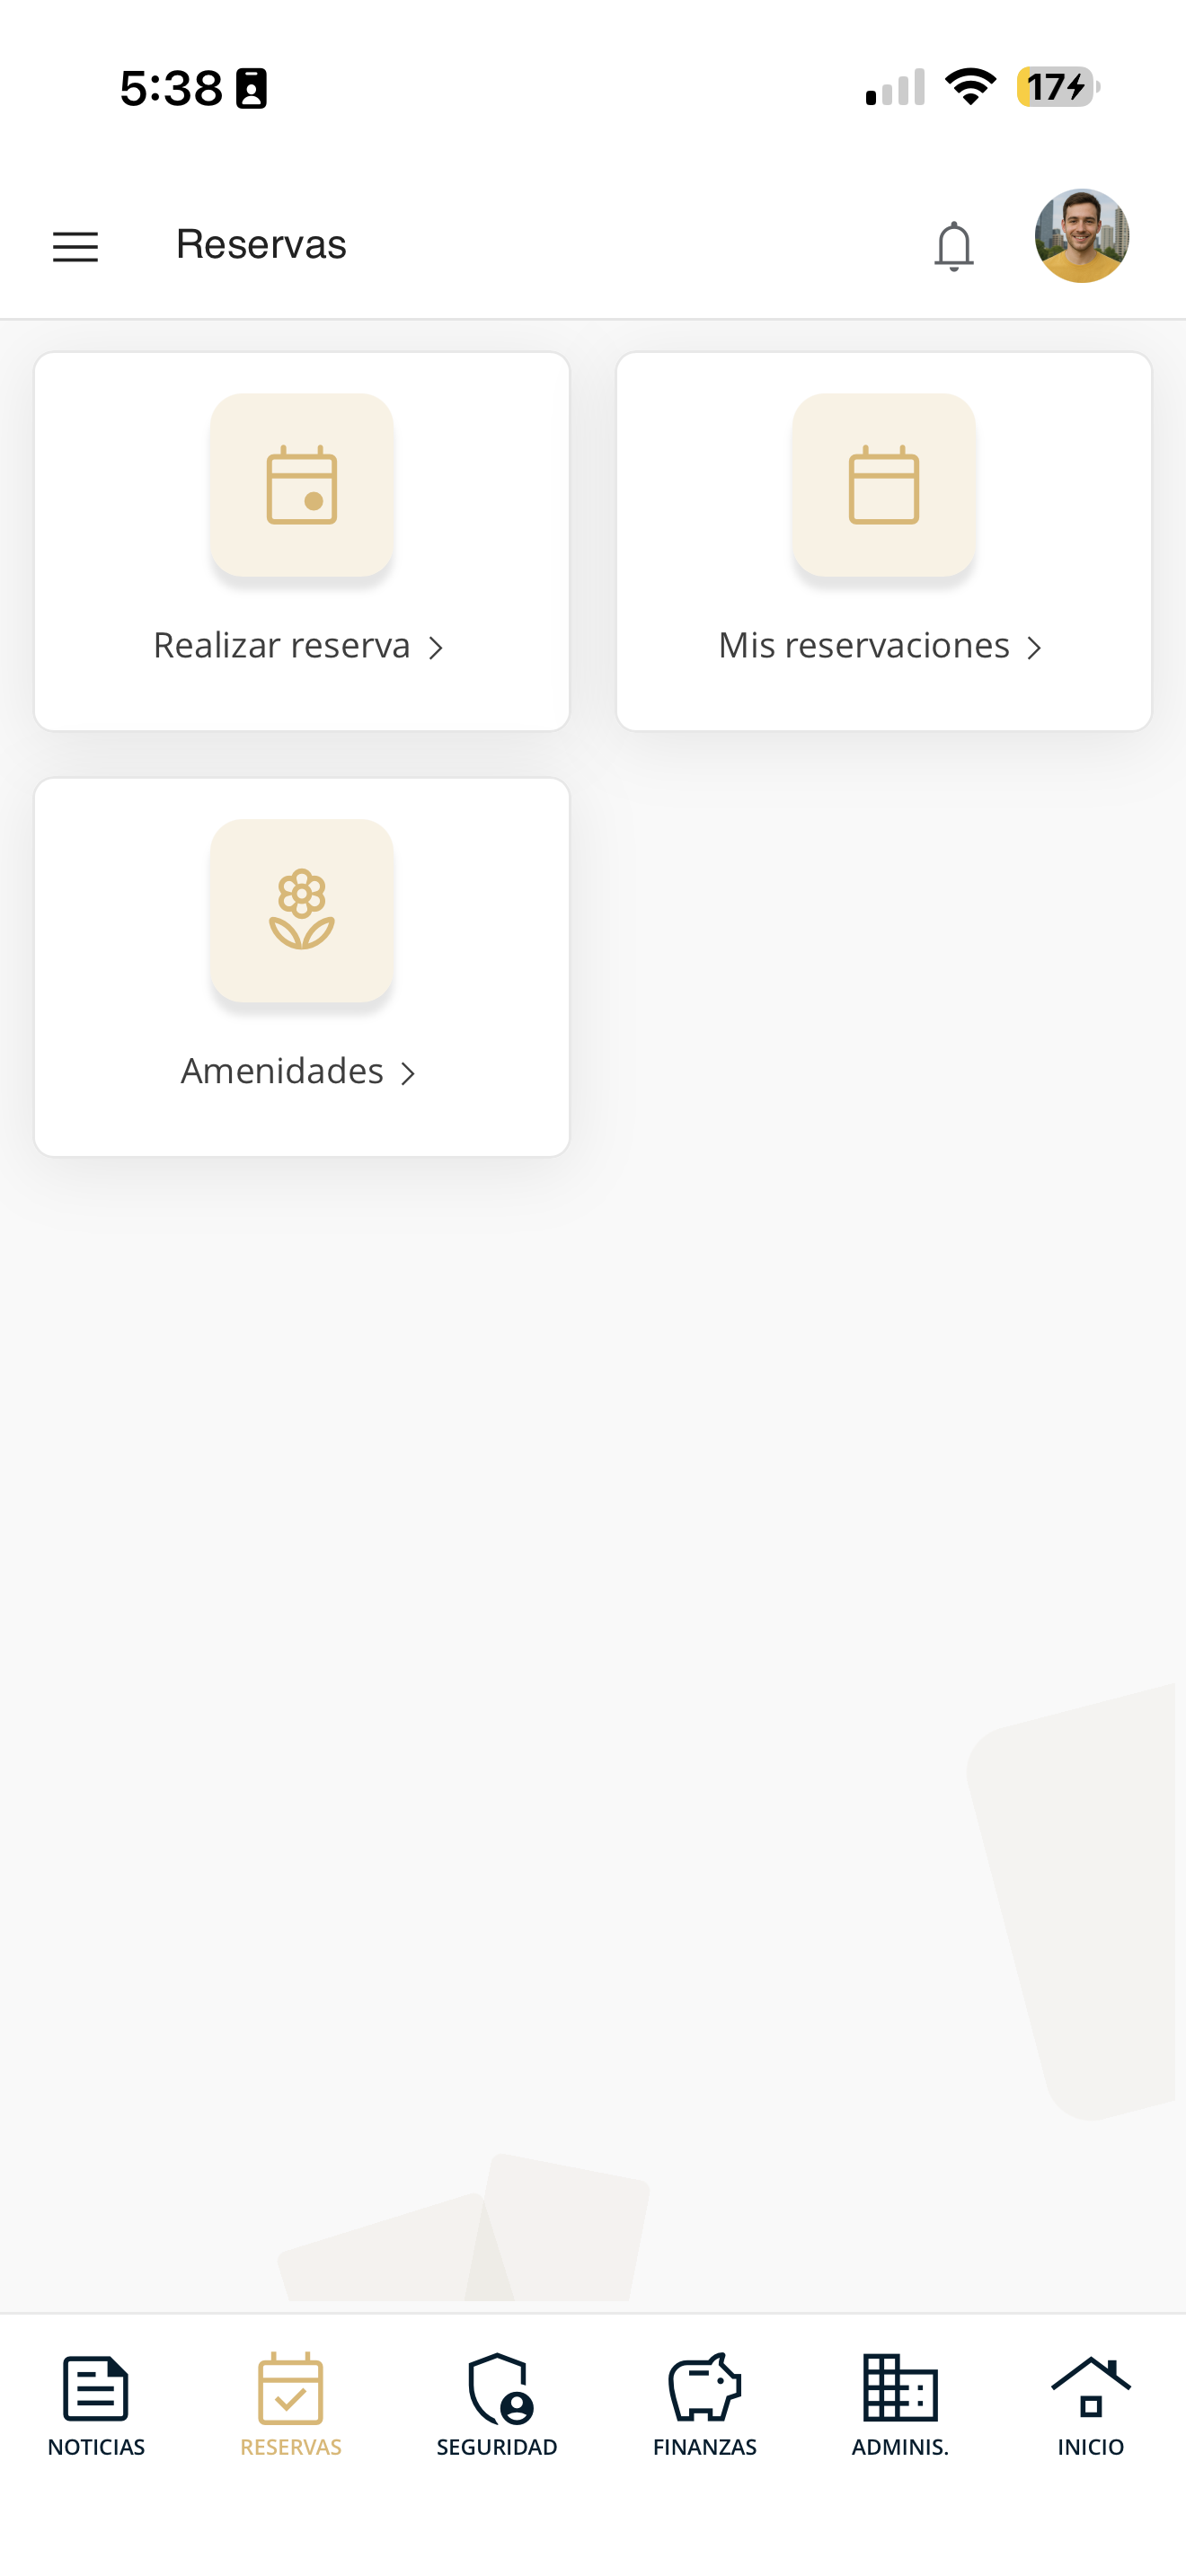
Go to "Make reservation"
Open Reservations in the bottom bar and tap "Make reservation". (You can also enter from My reservations with the "+" button or "Create new reservation".)
areas-reservar-01-menu.png
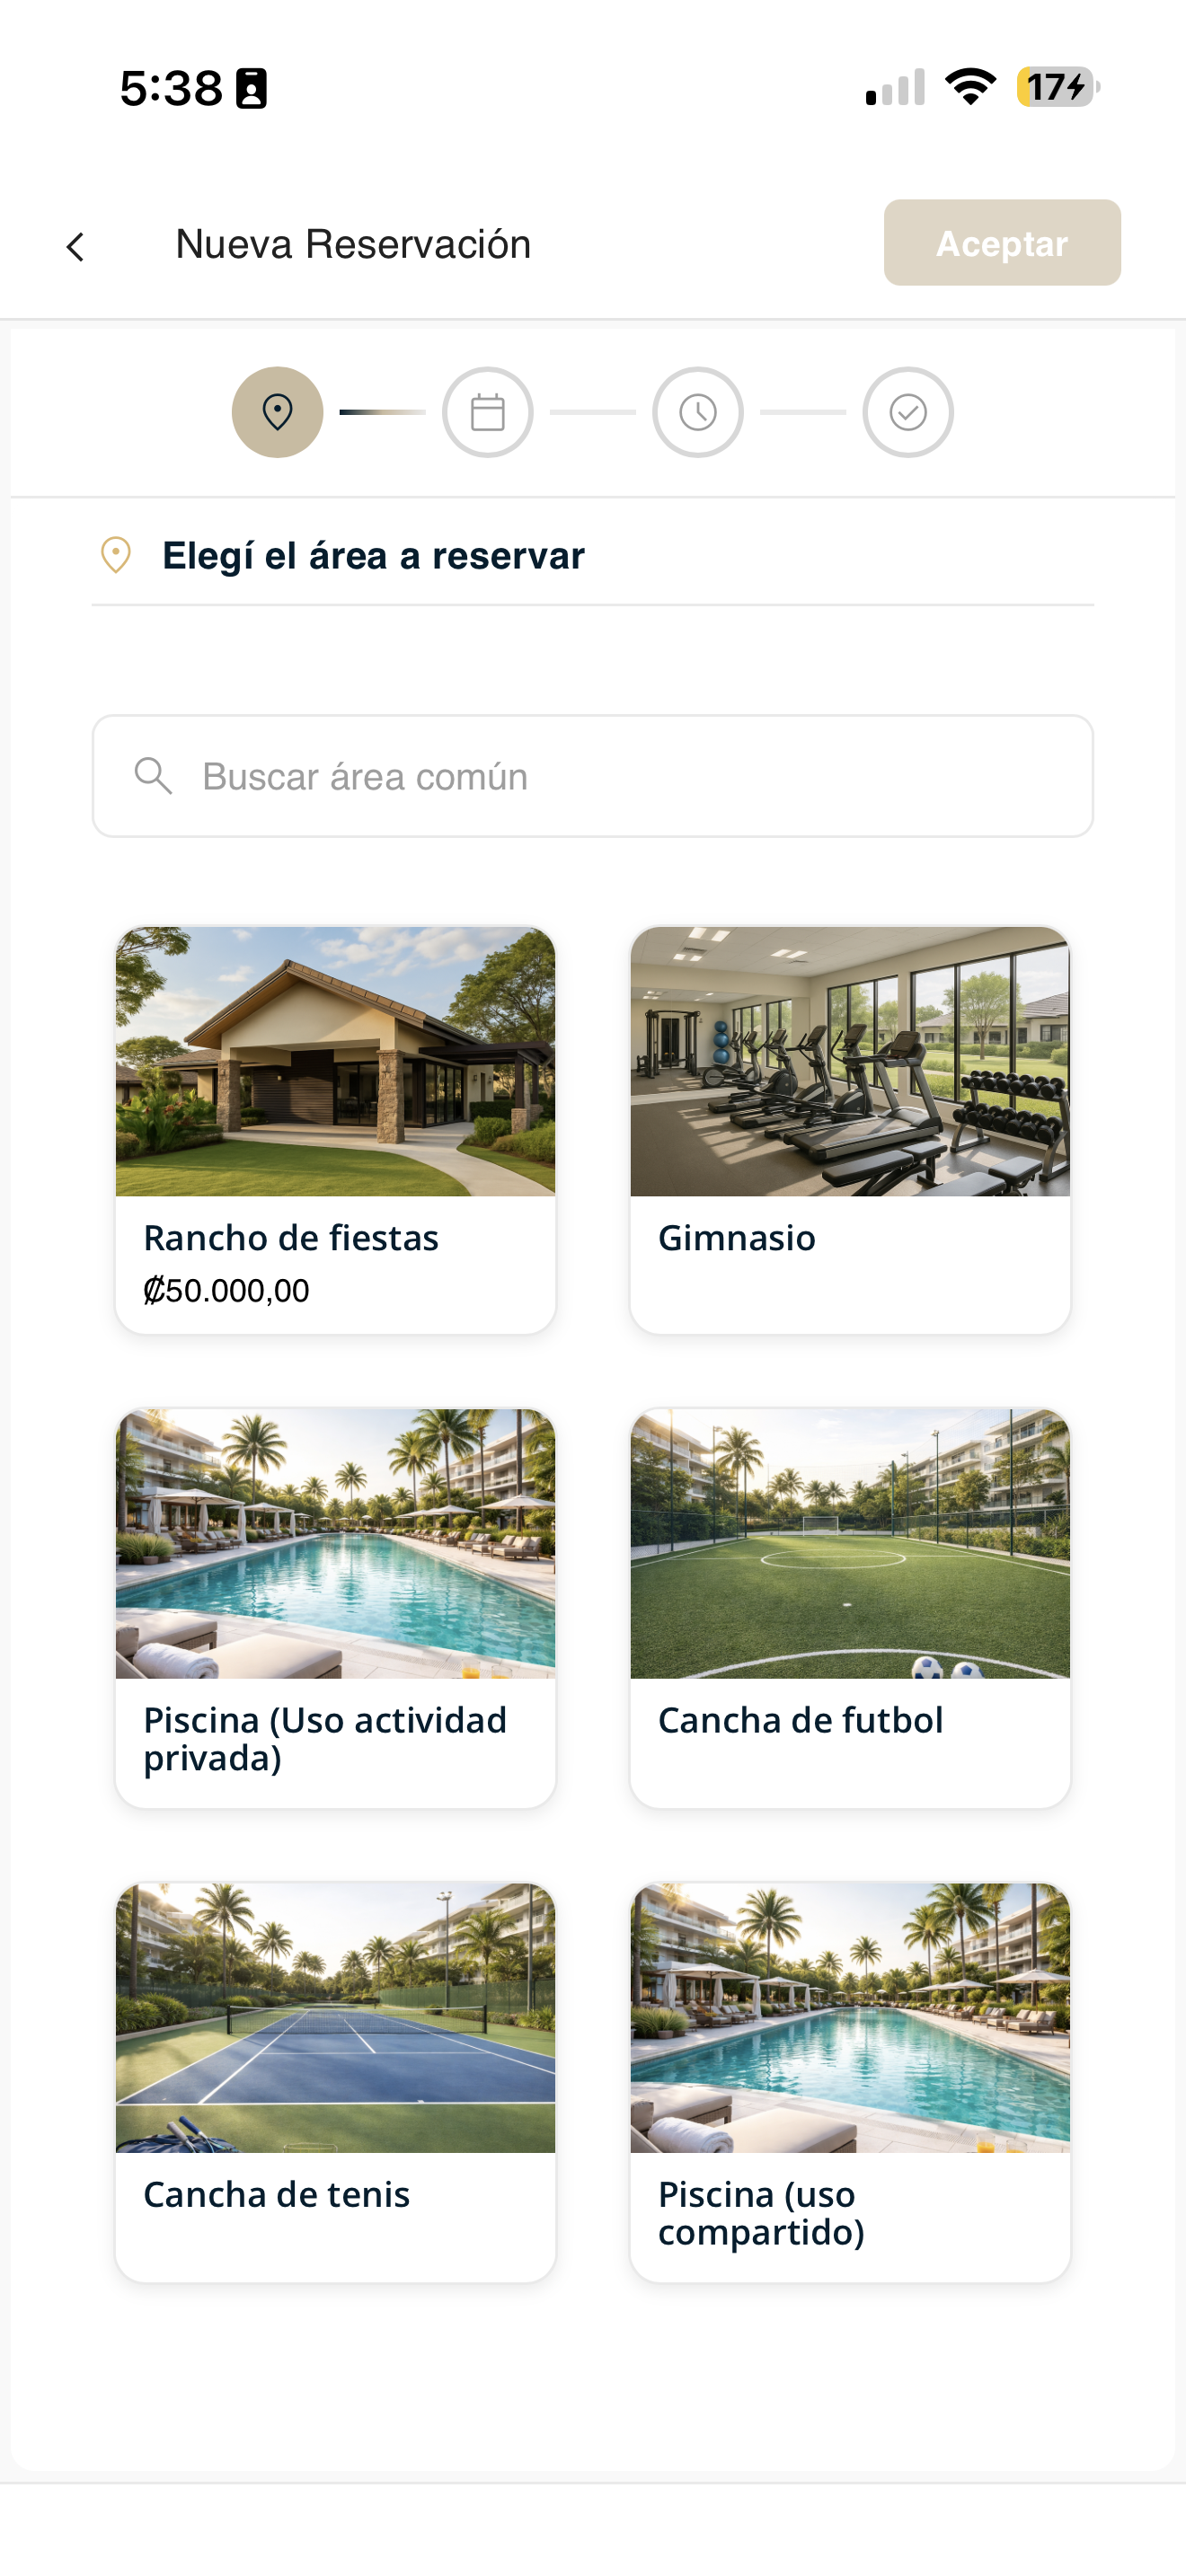
Choose the area to reserve
At the top you will see the progress in 4 steps. On "Choose the area to reserve", search with "Search common area" or tap the card for the area you want (gym, pool, hall, courts, etc.).
areas-reservar-02-area.png
Choose the date
On the calendar, select the available day for your reservation and continue.
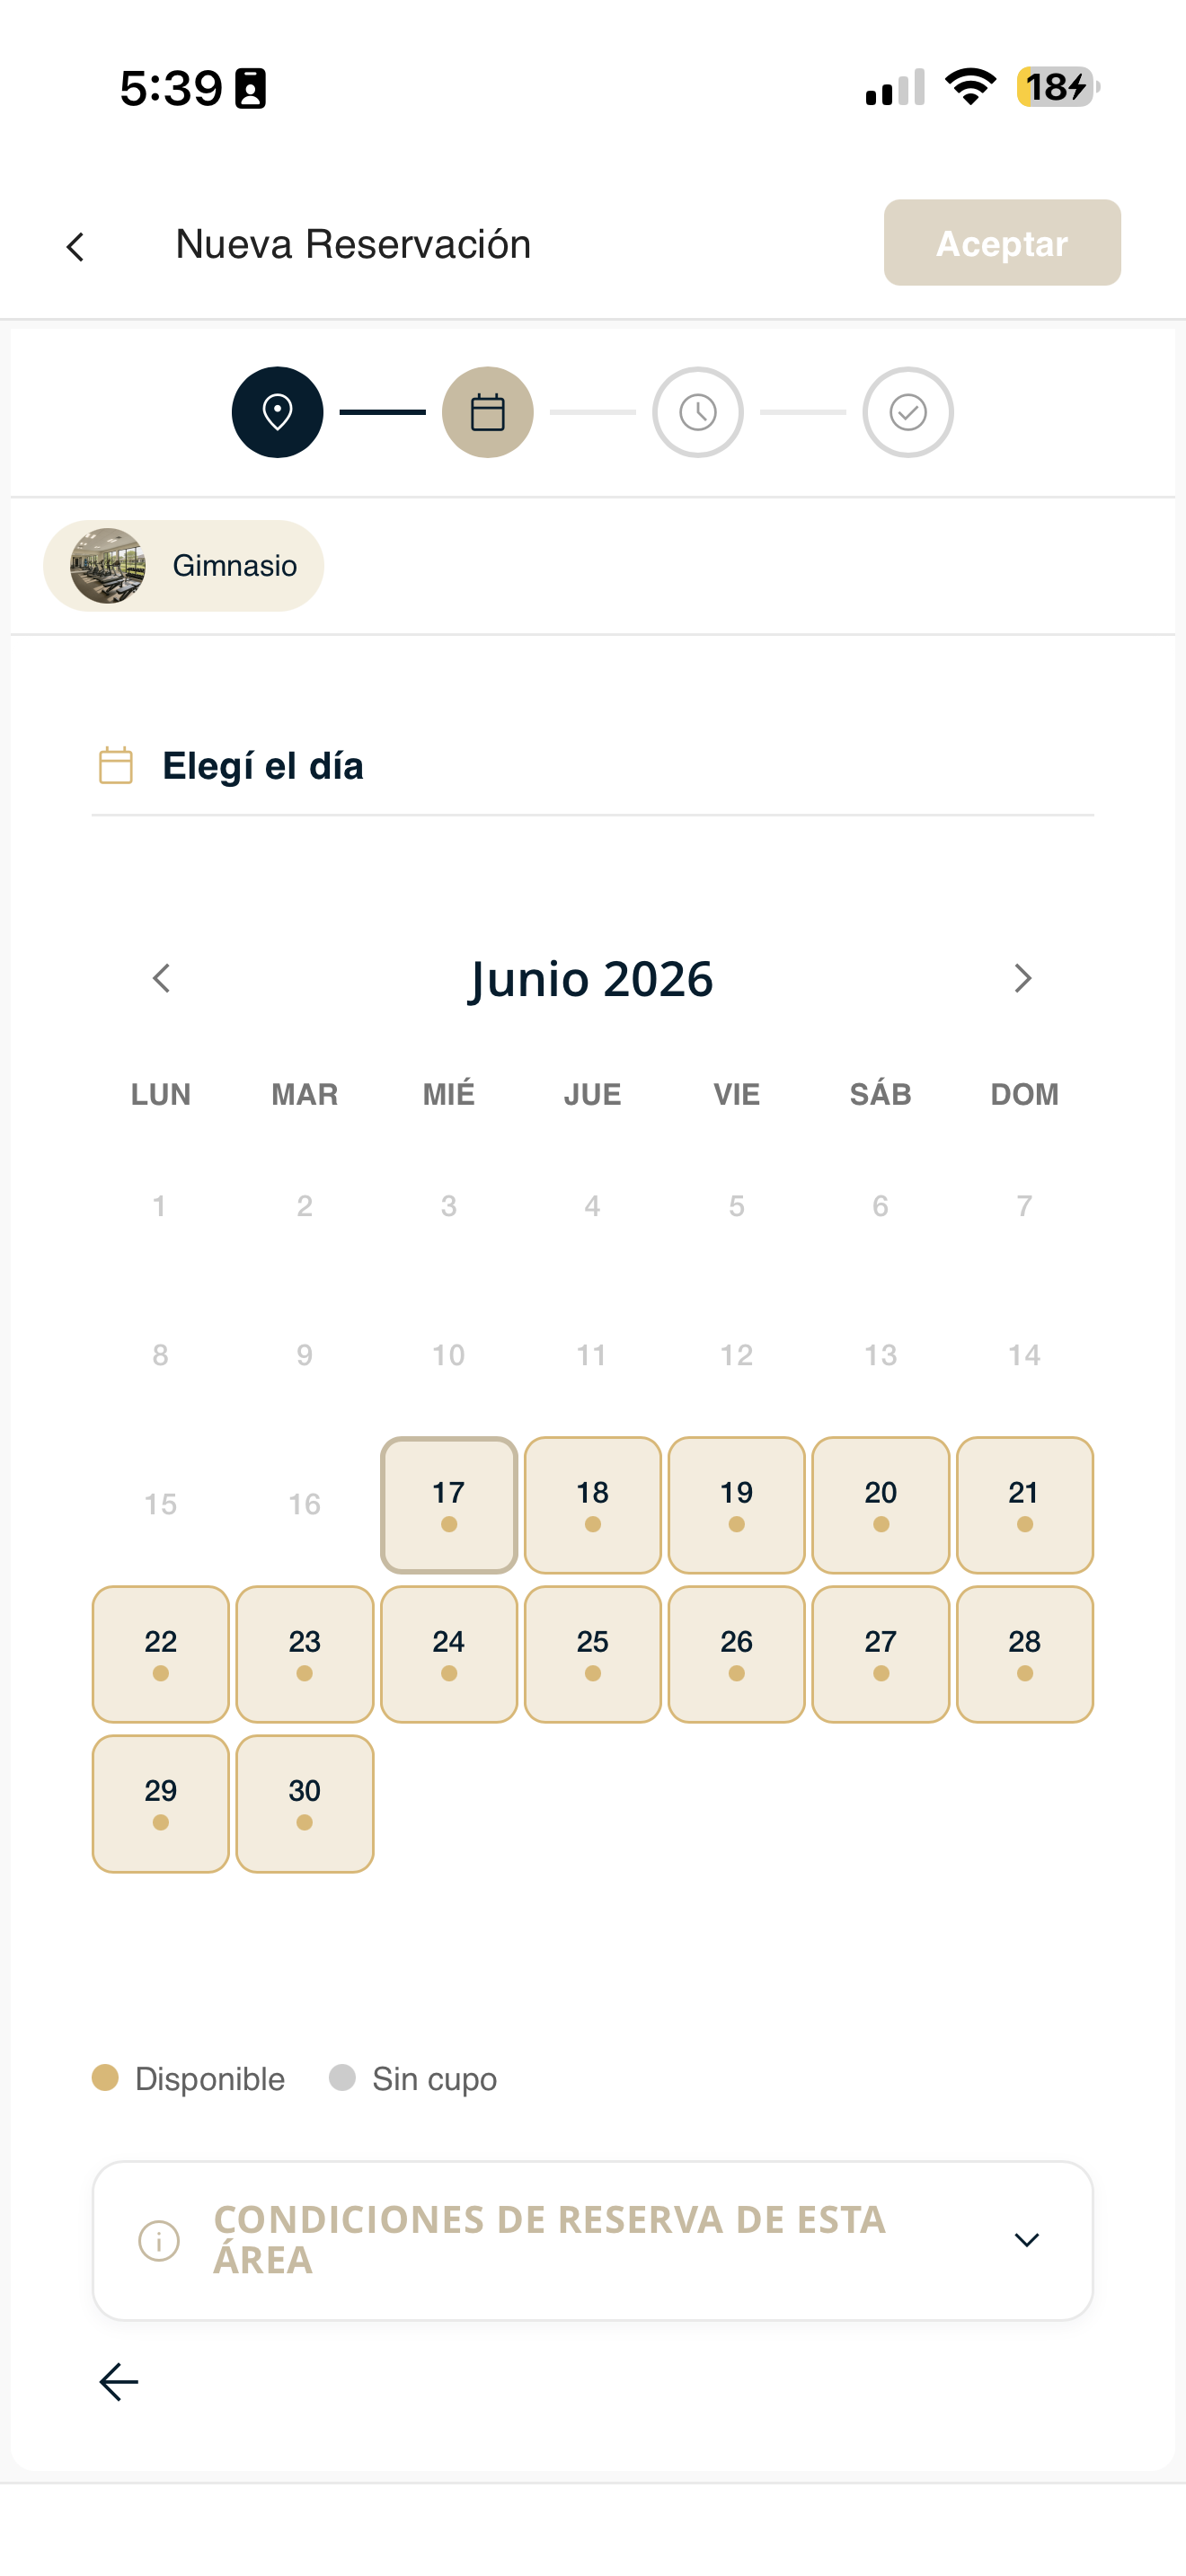
areas-reservar-03-fecha.png
Choose the time slot
Select the available time slot for that day.
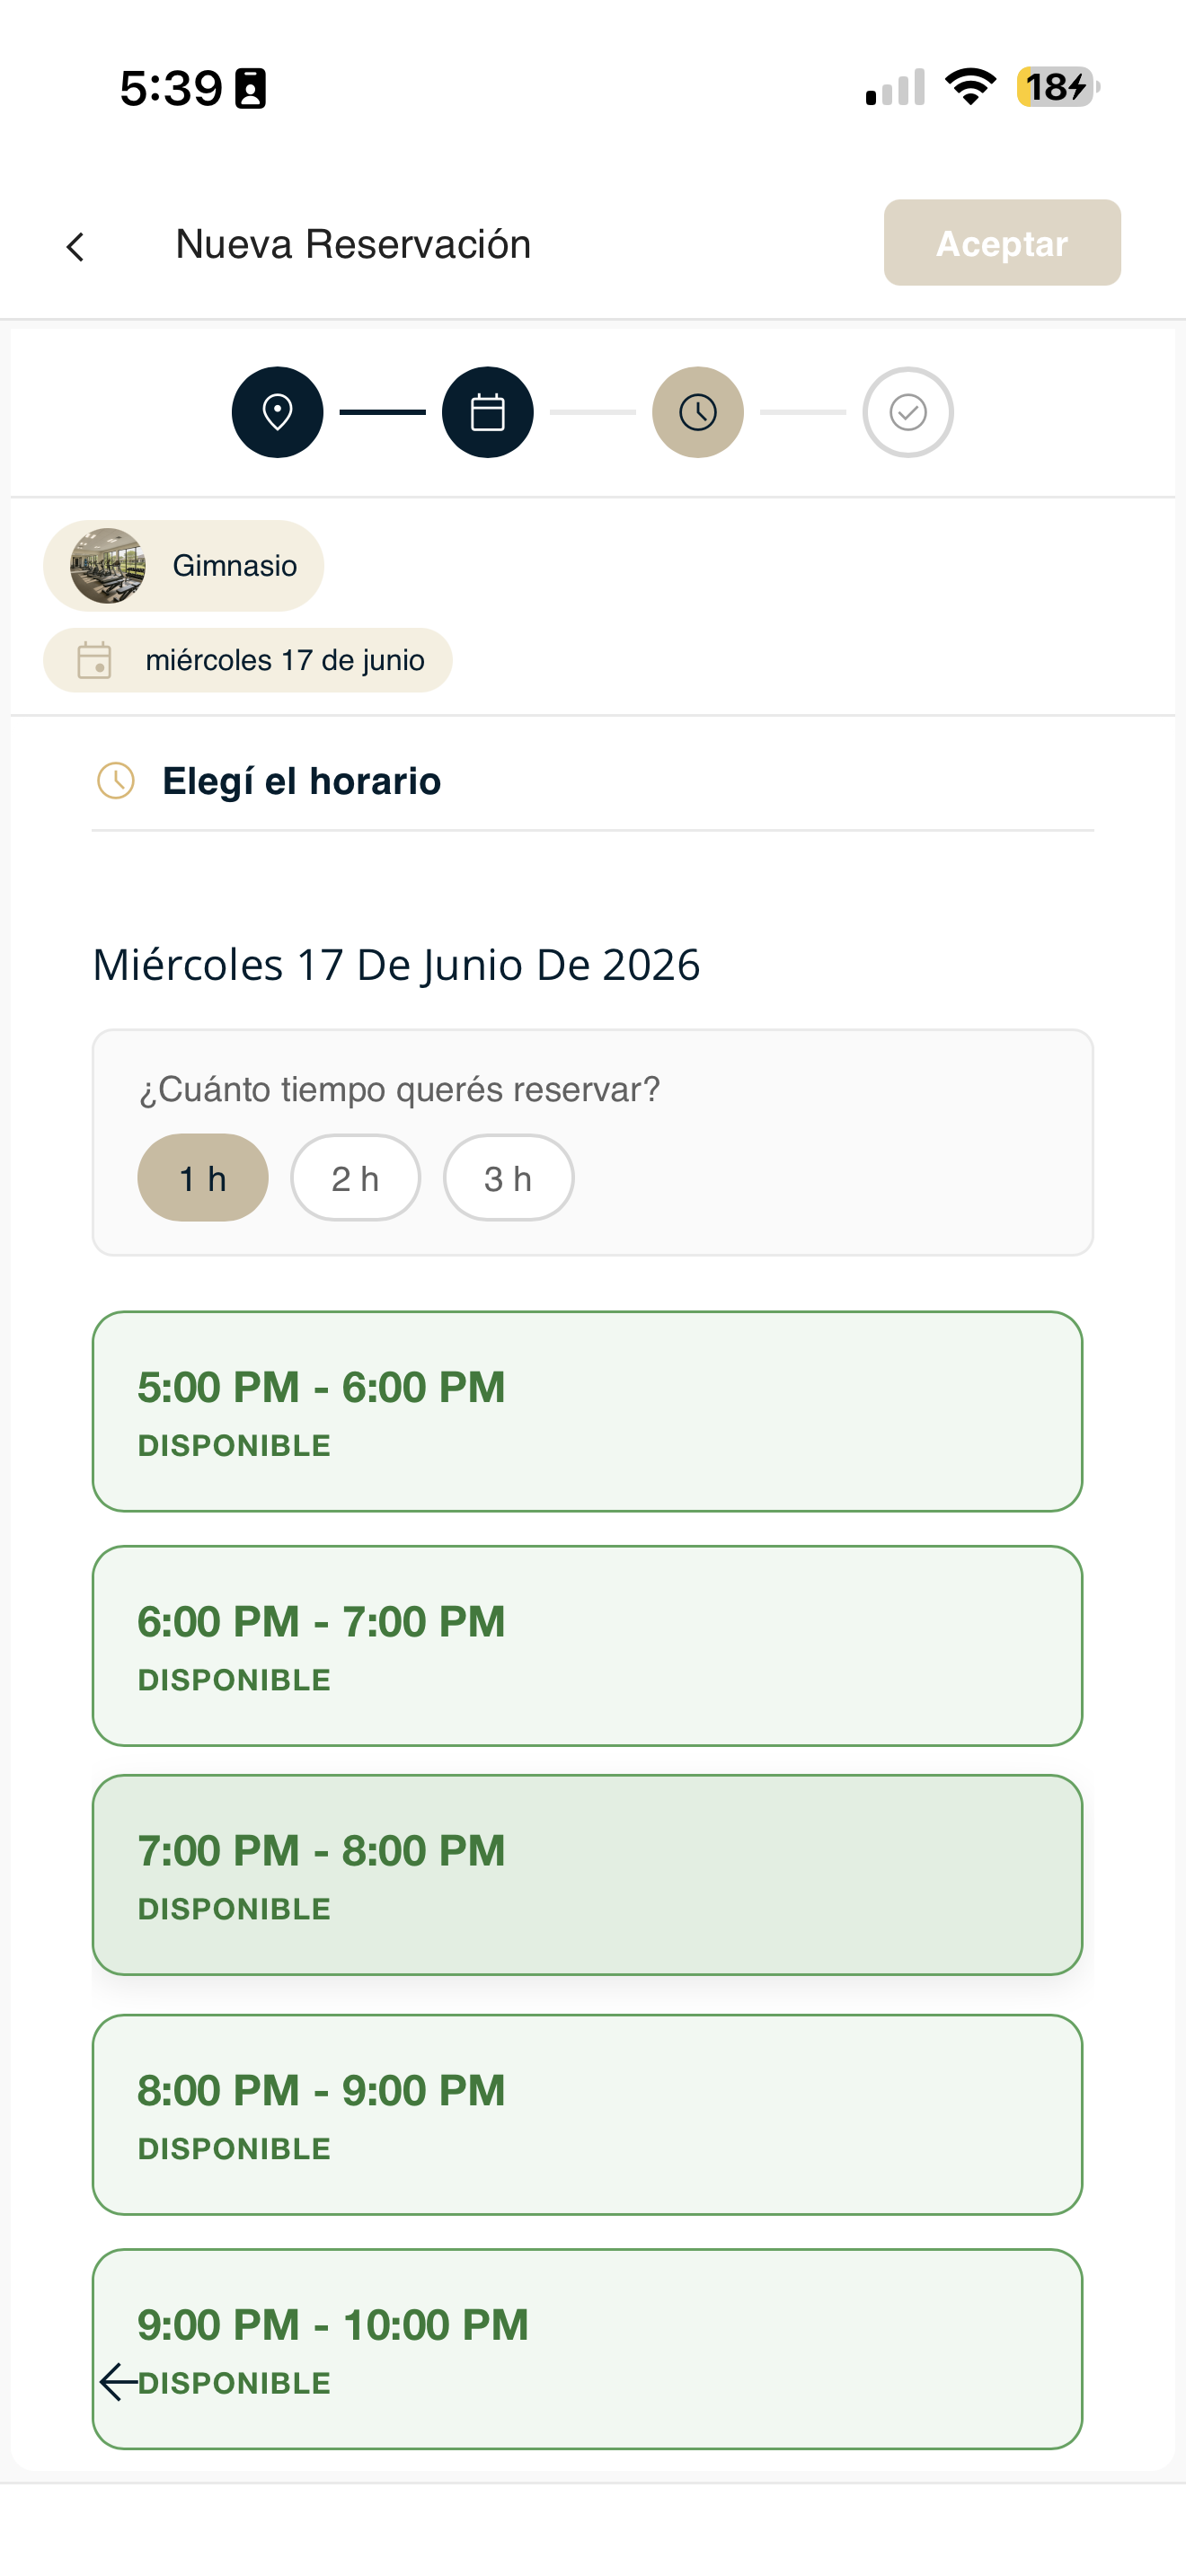
areas-reservar-04-horario.png
Review the summary
You will see the Summary with the area, day and time. Select the co-owner, enter the total attendance (residents + guests) and, if you want, add a comment. Then press "Accept".
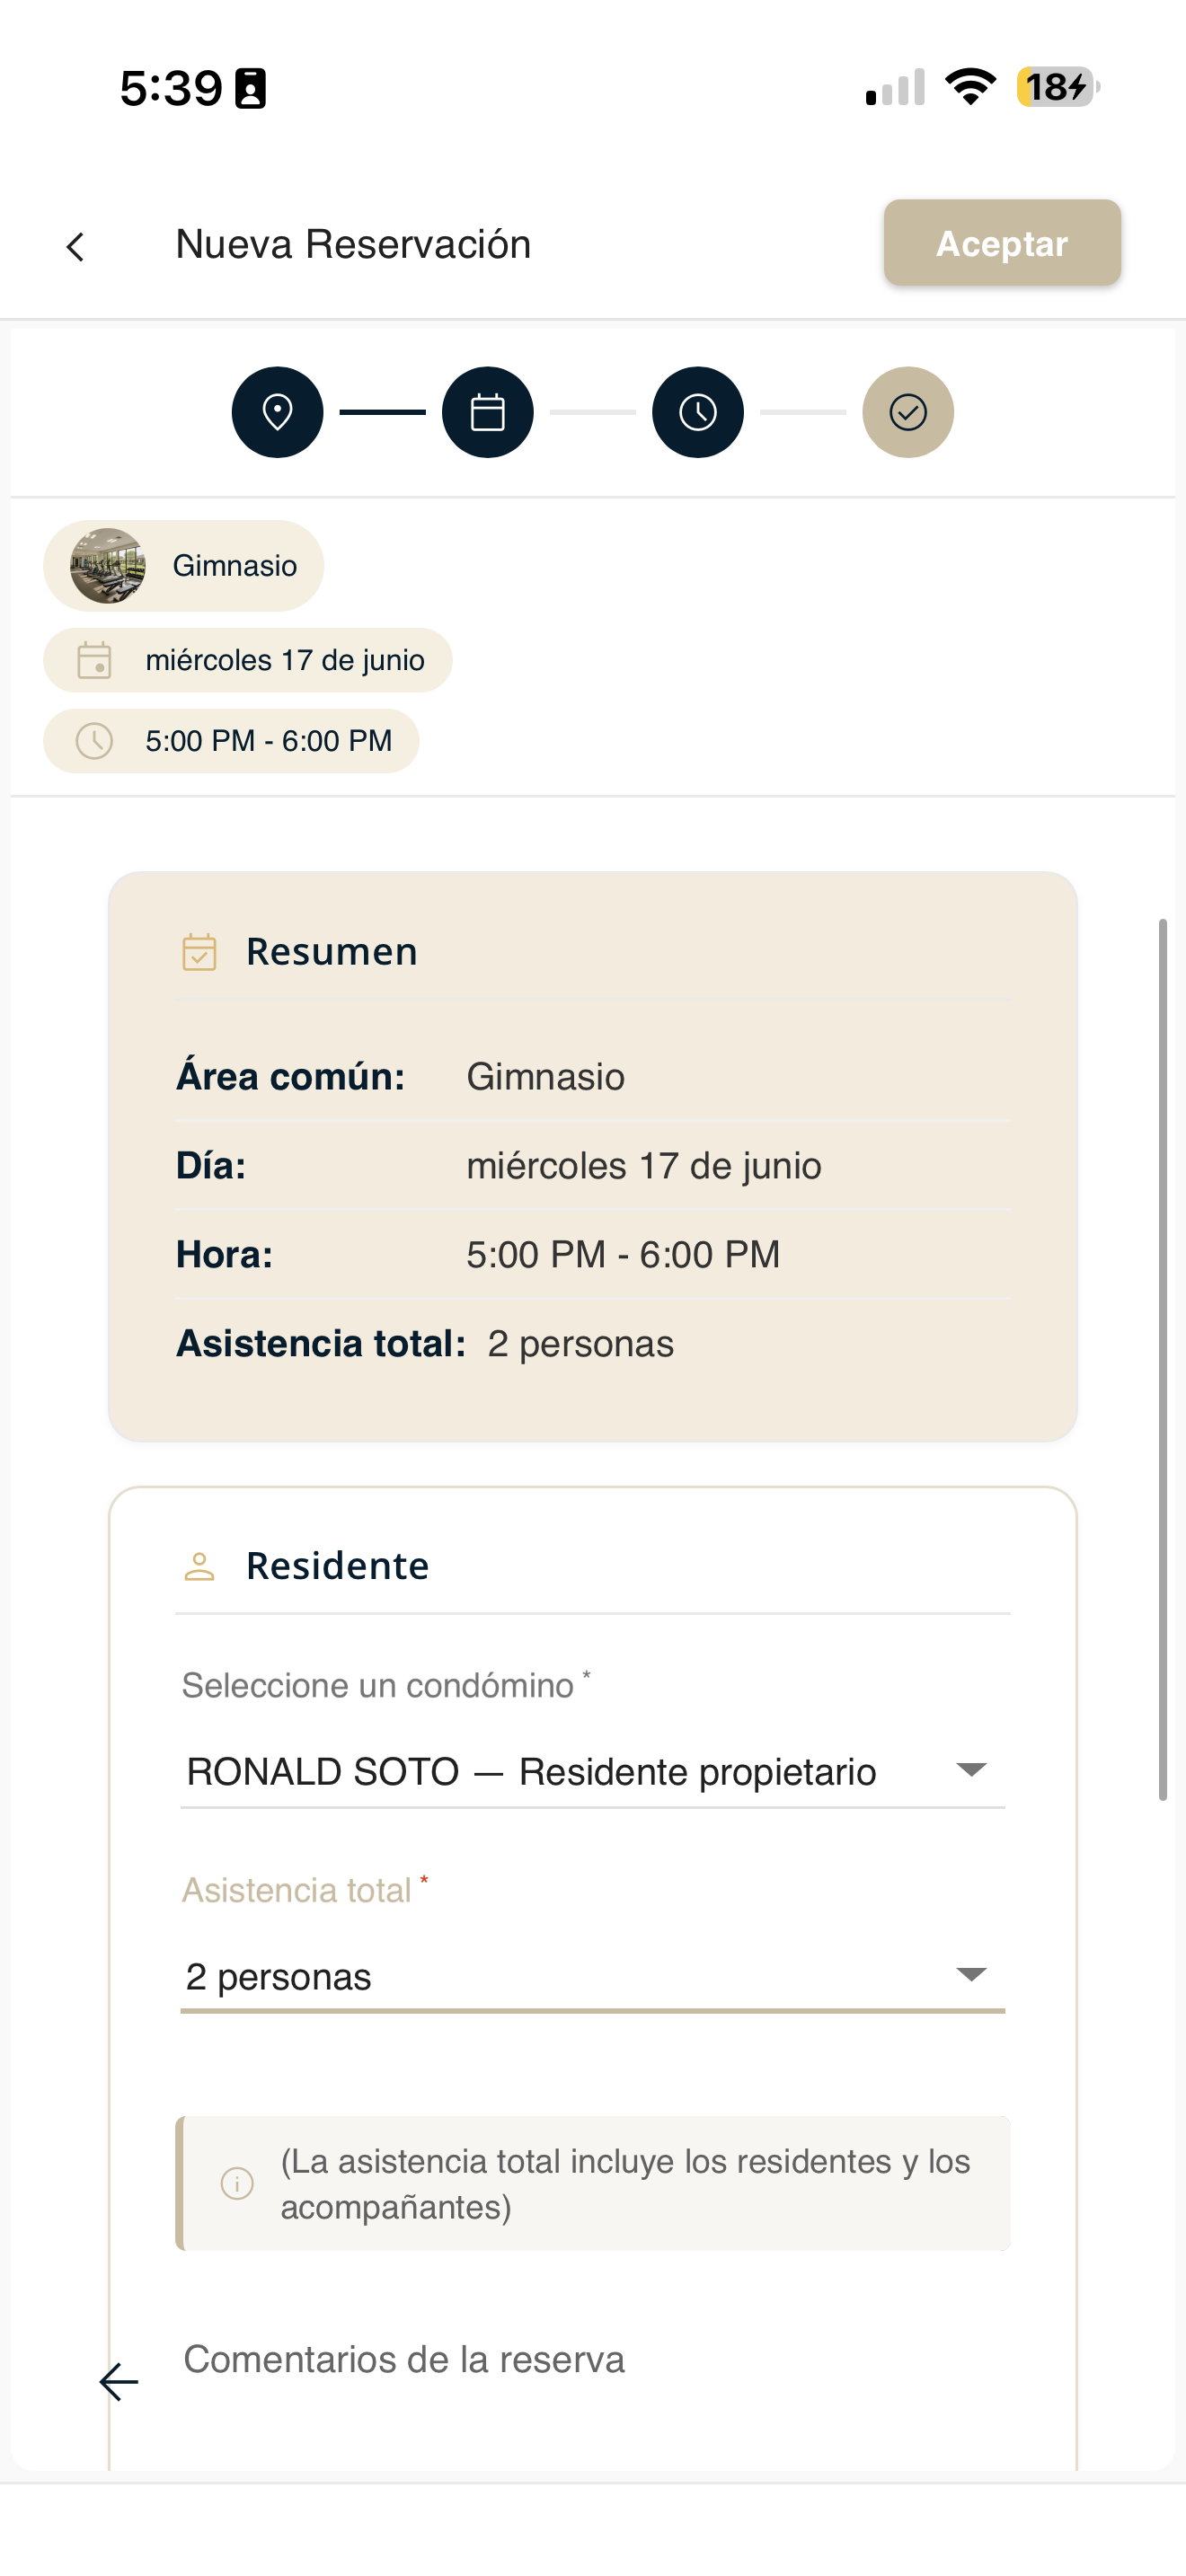
areas-reservar-05-confirmar.png
Confirm the reservation
A box appears "Do you want to confirm your reservation?" with the details. Check "I have read and agree to the terms and conditions" and press "Reserve".
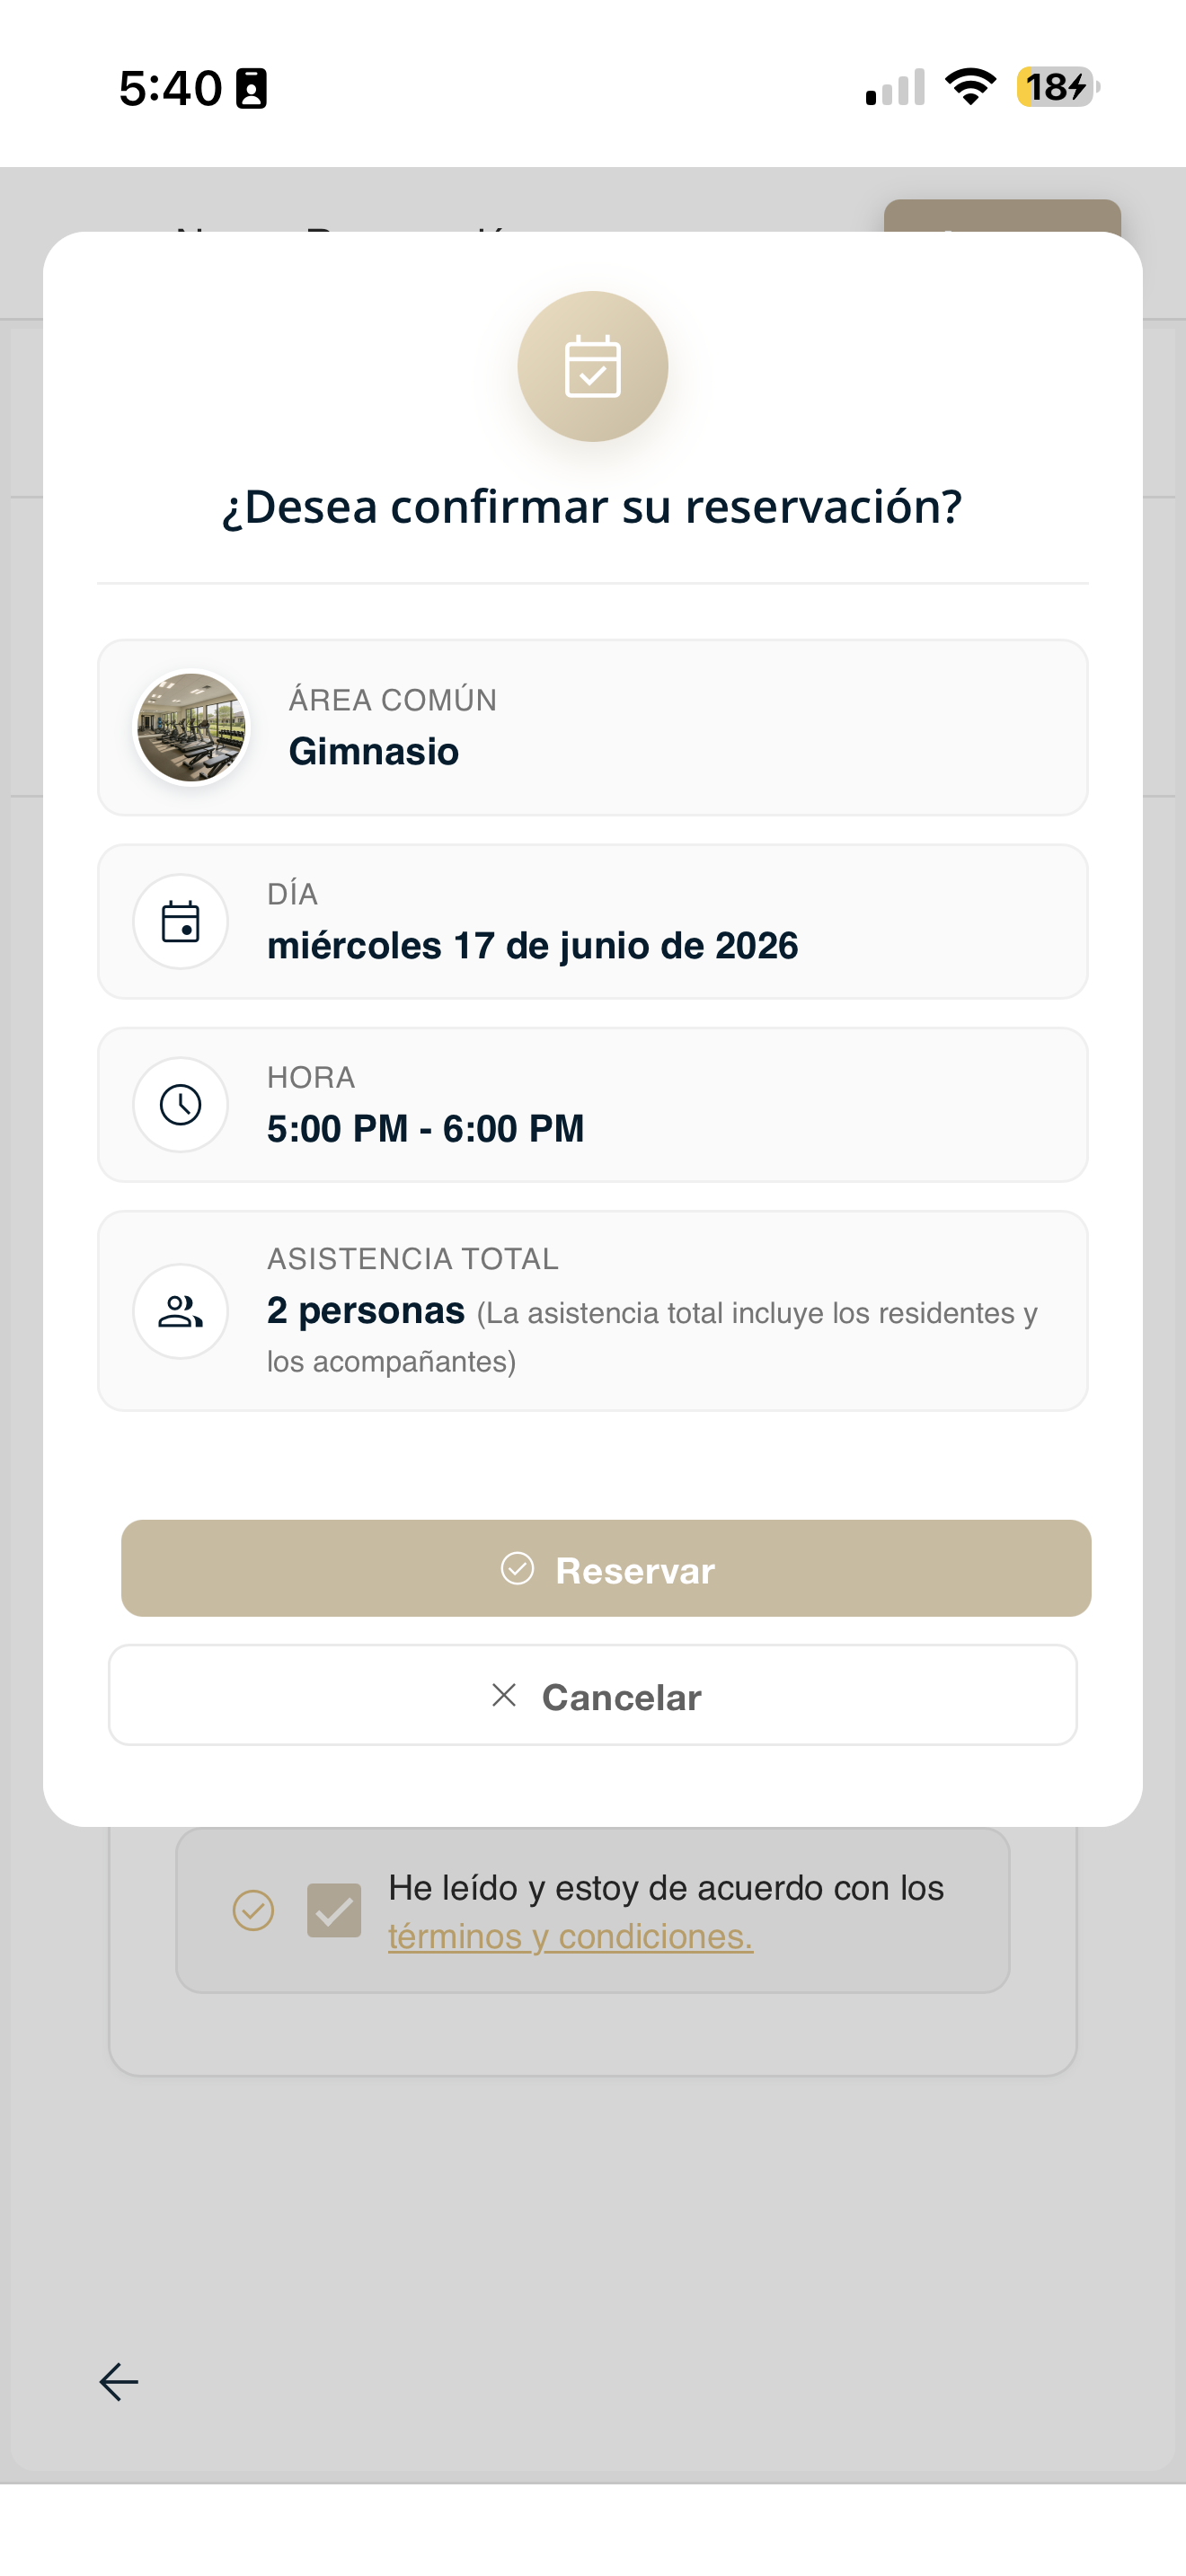
areas-reservar-06-modal.png
Check a reservation
Review all the reservations you have made and check the details of each one.
Go to Reservations
Open Reservations in the bottom bar and tap "My reservations".
areas-reservar-01-menu.png
Review your reservations list
You will see the list of your reservations with their area, date, time slot, person responsible and guests. If you do not have any yet, "No reservations recorded" appears.
Use "Search reservation" or "Filter" to find a specific reservation.

areas-mis-01-lista.png
Check the details
Tap the eye 👁️ icon on a reservation to see its full details.
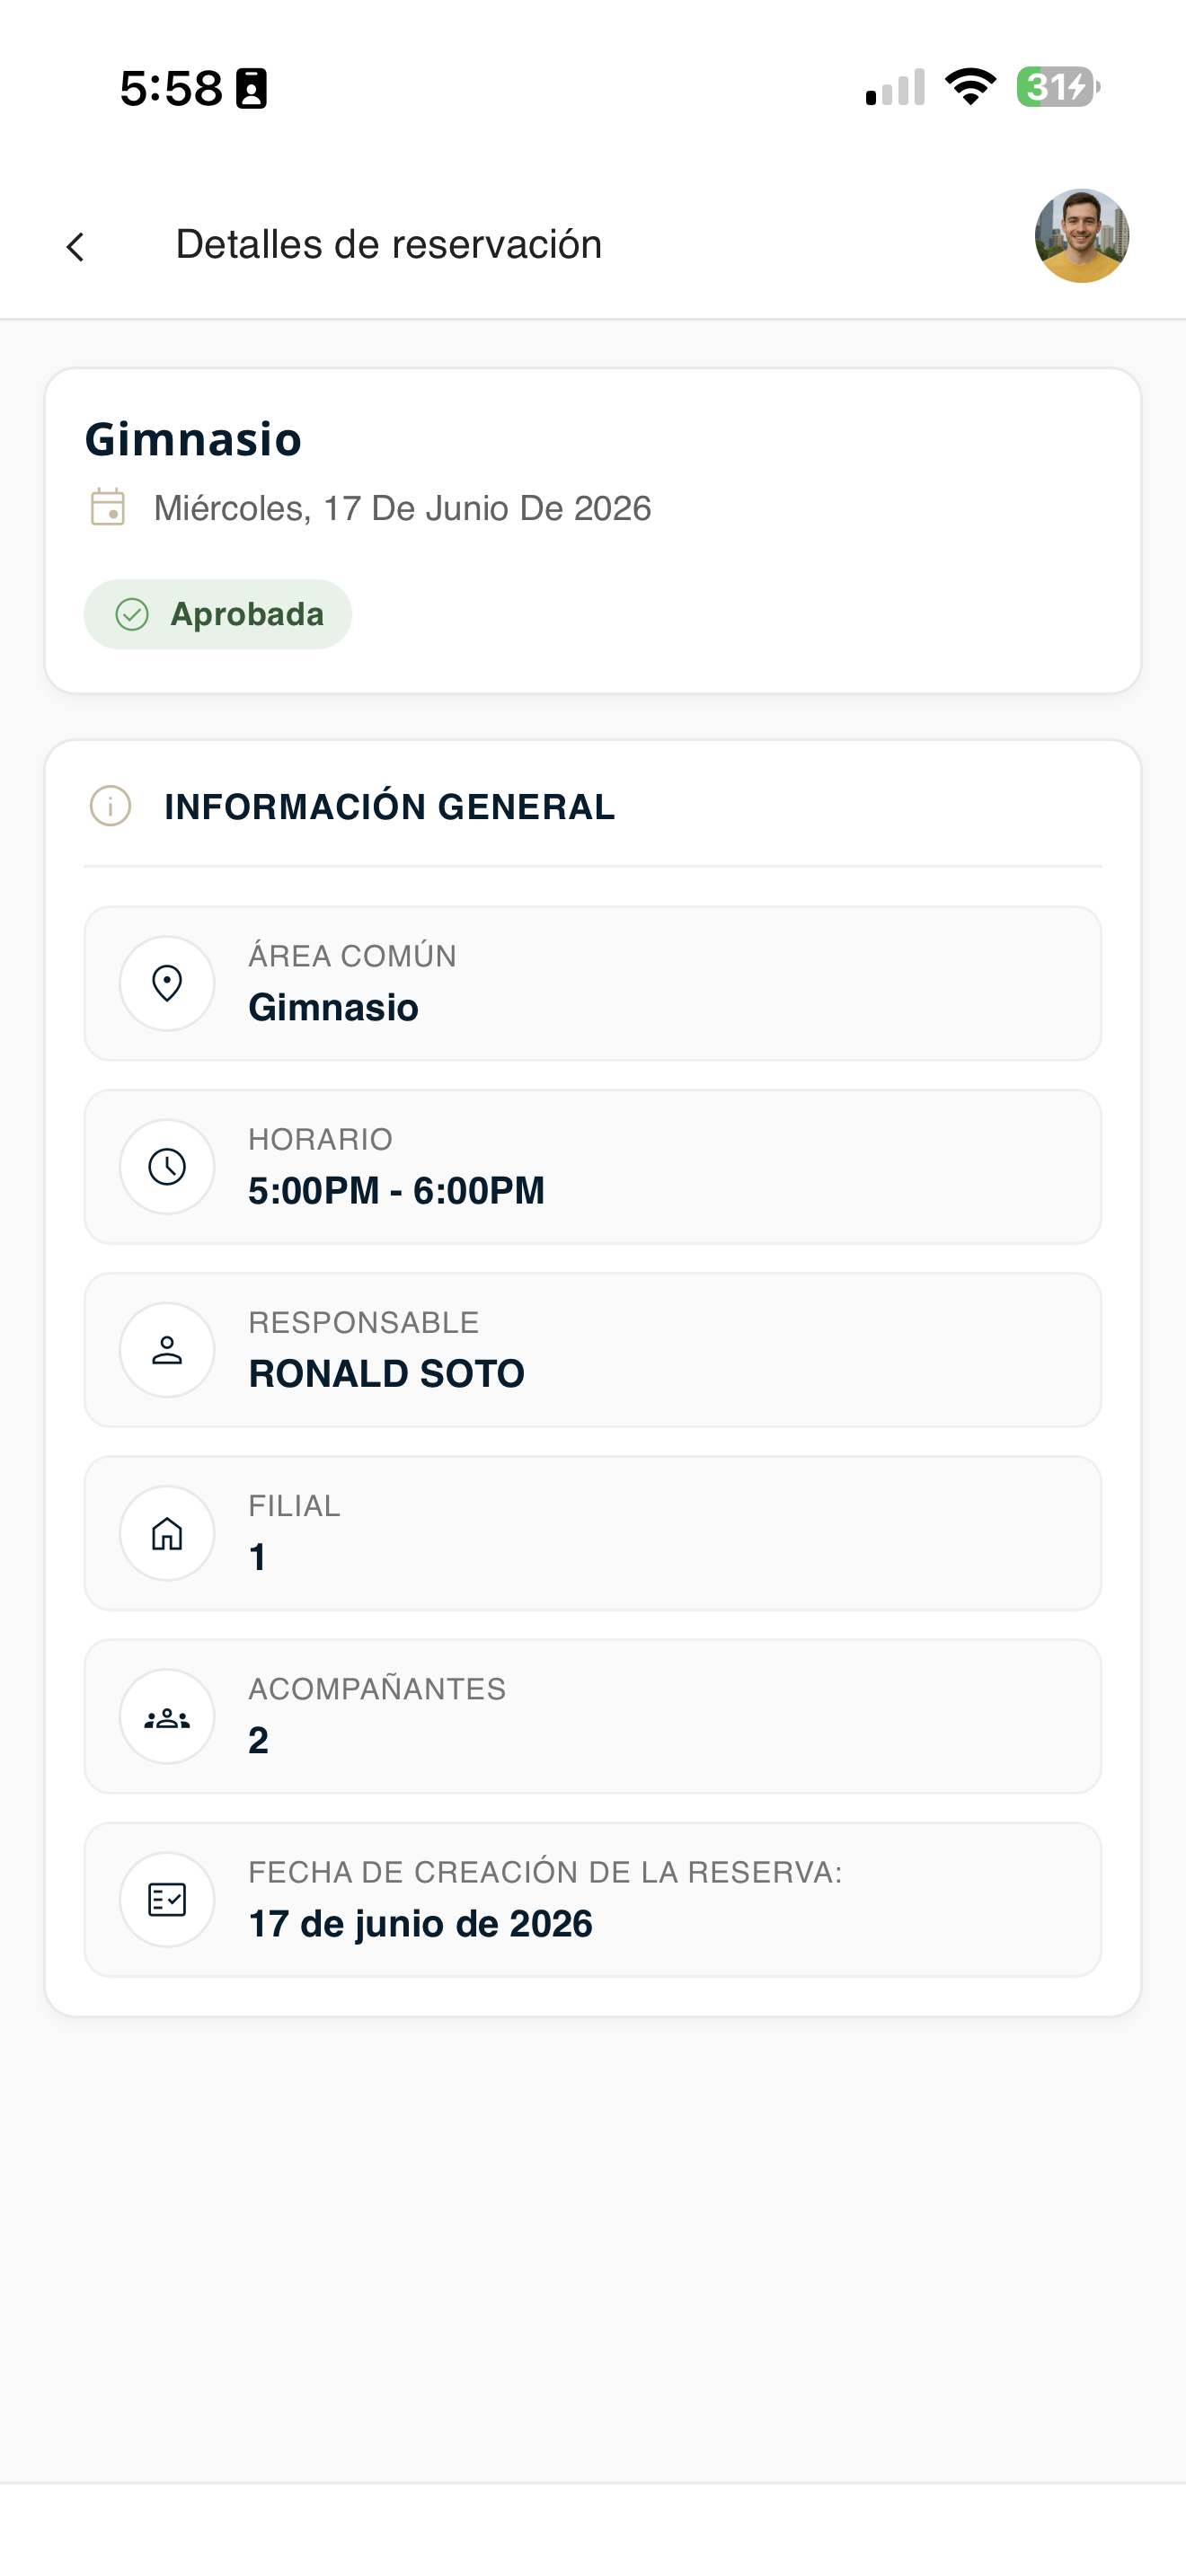
areas-mis-02-detalle.png
Cancel a reservation
If you no longer need a reservation, you can cancel it from "My reservations".
Go to Reservations
Open Reservations in the bottom bar and tap "My reservations".
areas-reservar-01-menu.png
Locate the reservation
In the My reservations list, find the reservation you want to cancel.
areas-mis-01-lista.png
Cancel the reservation
Tap "Cancel reservation" on that reservation and confirm. The reservation will be removed from your list.
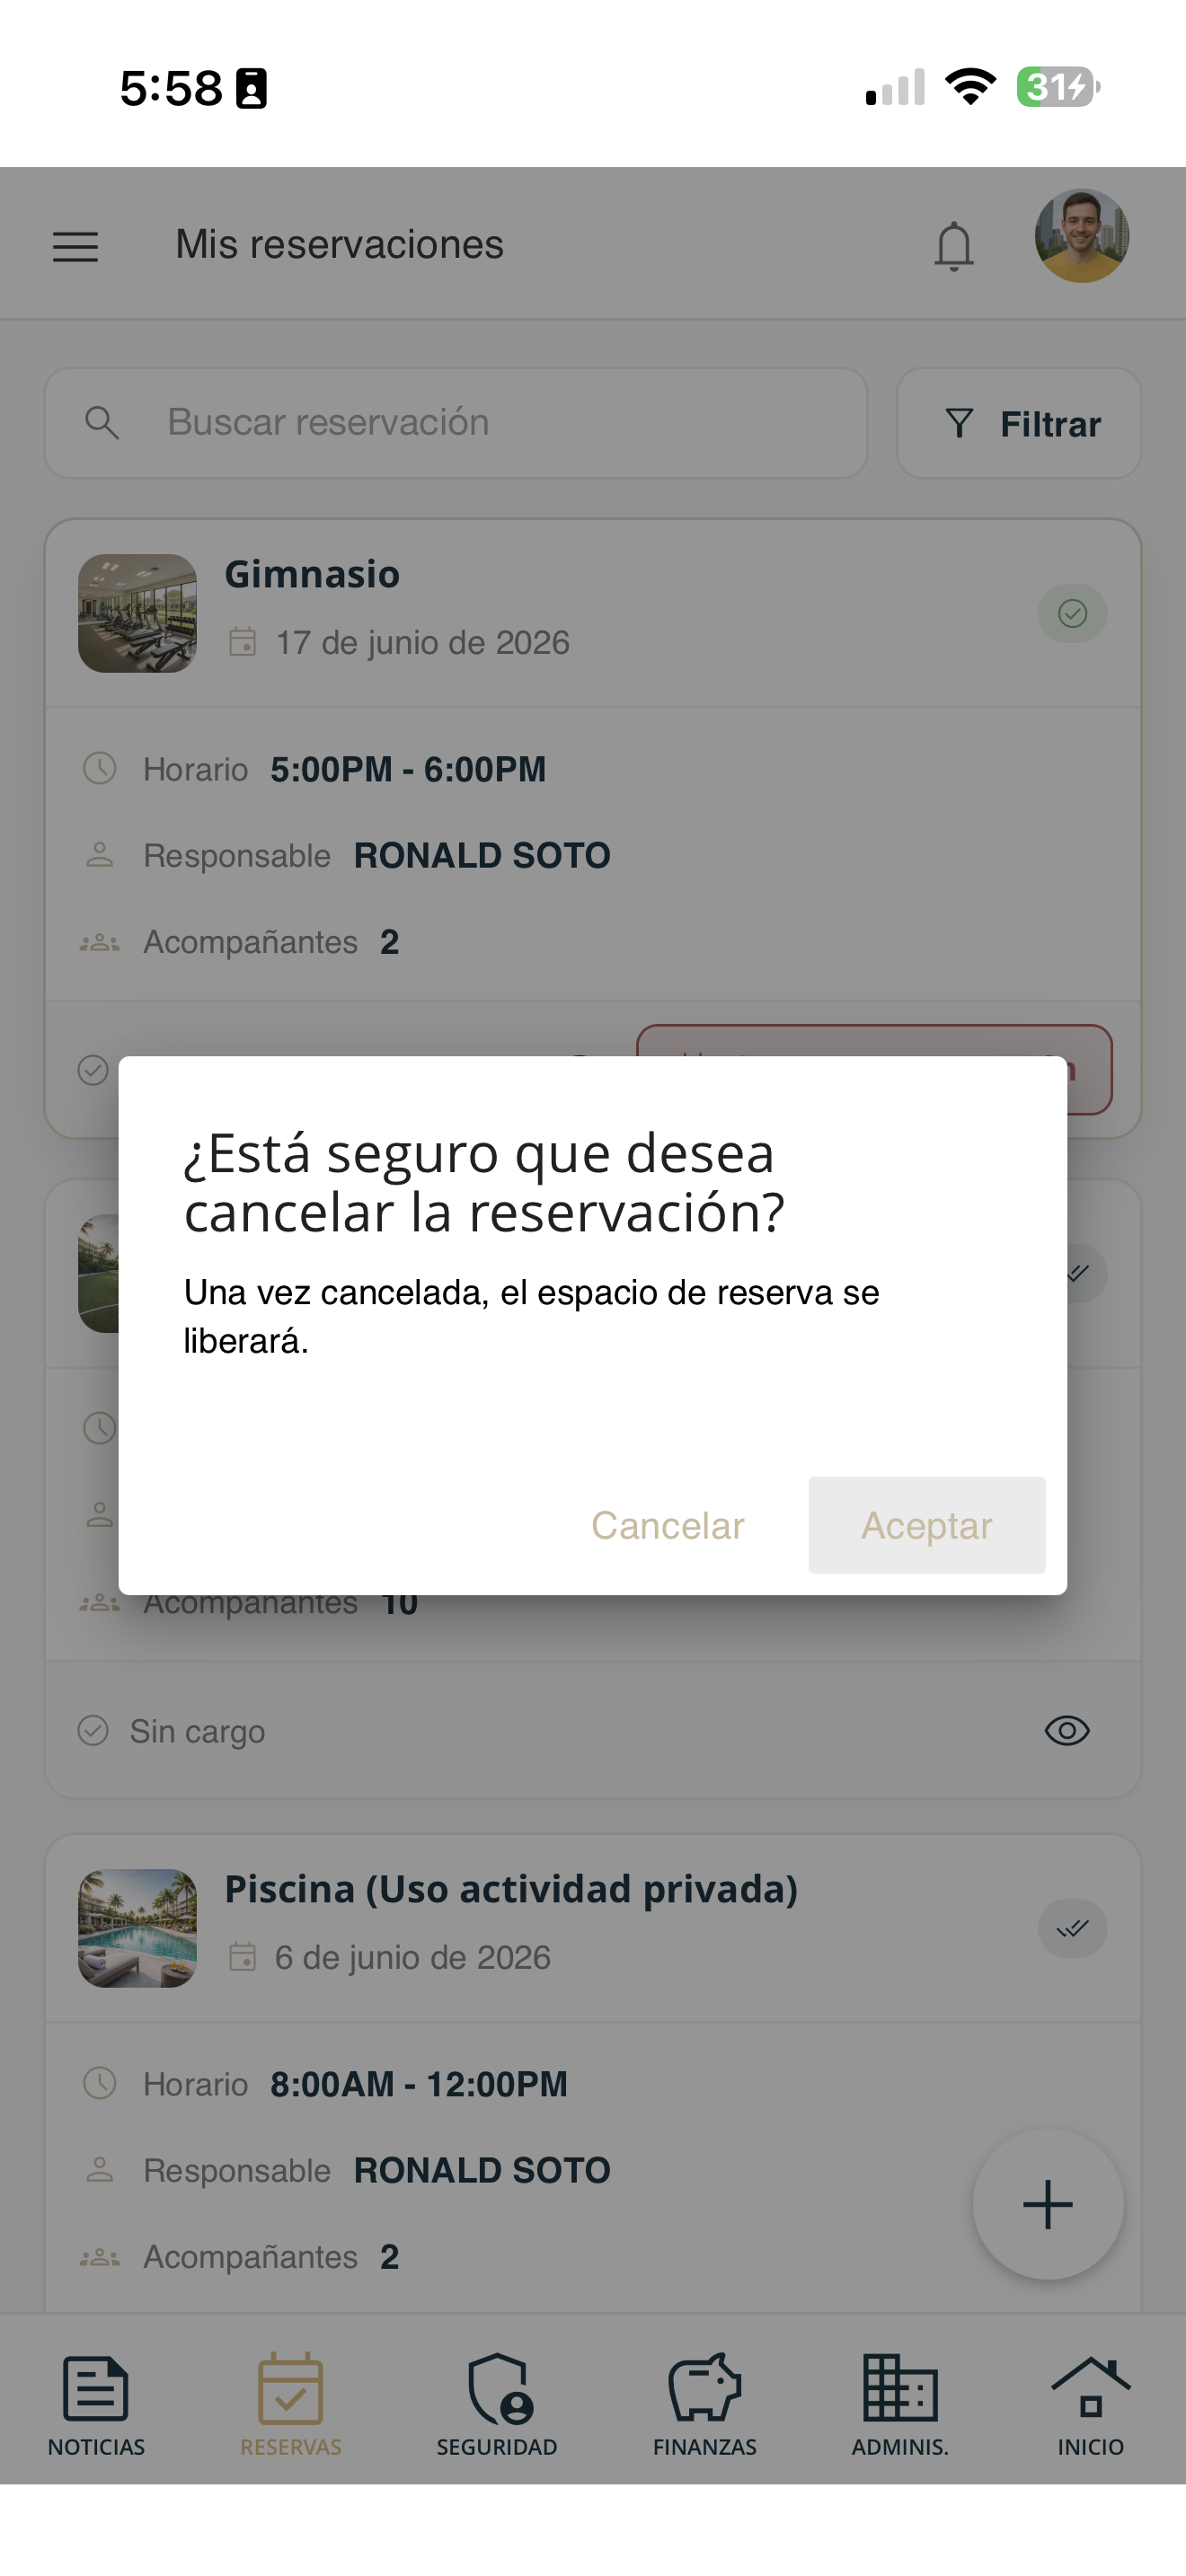
areas-mis-03-cancelar.png
Amenities
Check the common areas and amenities available in your condominium and their information.
Go to Reservations
Open Reservations in the bottom bar and tap "Amenities".
areas-reservar-01-menu.png
Review the available amenities
You will see the list of available common areas (pool, gym, hall, courts, etc.).
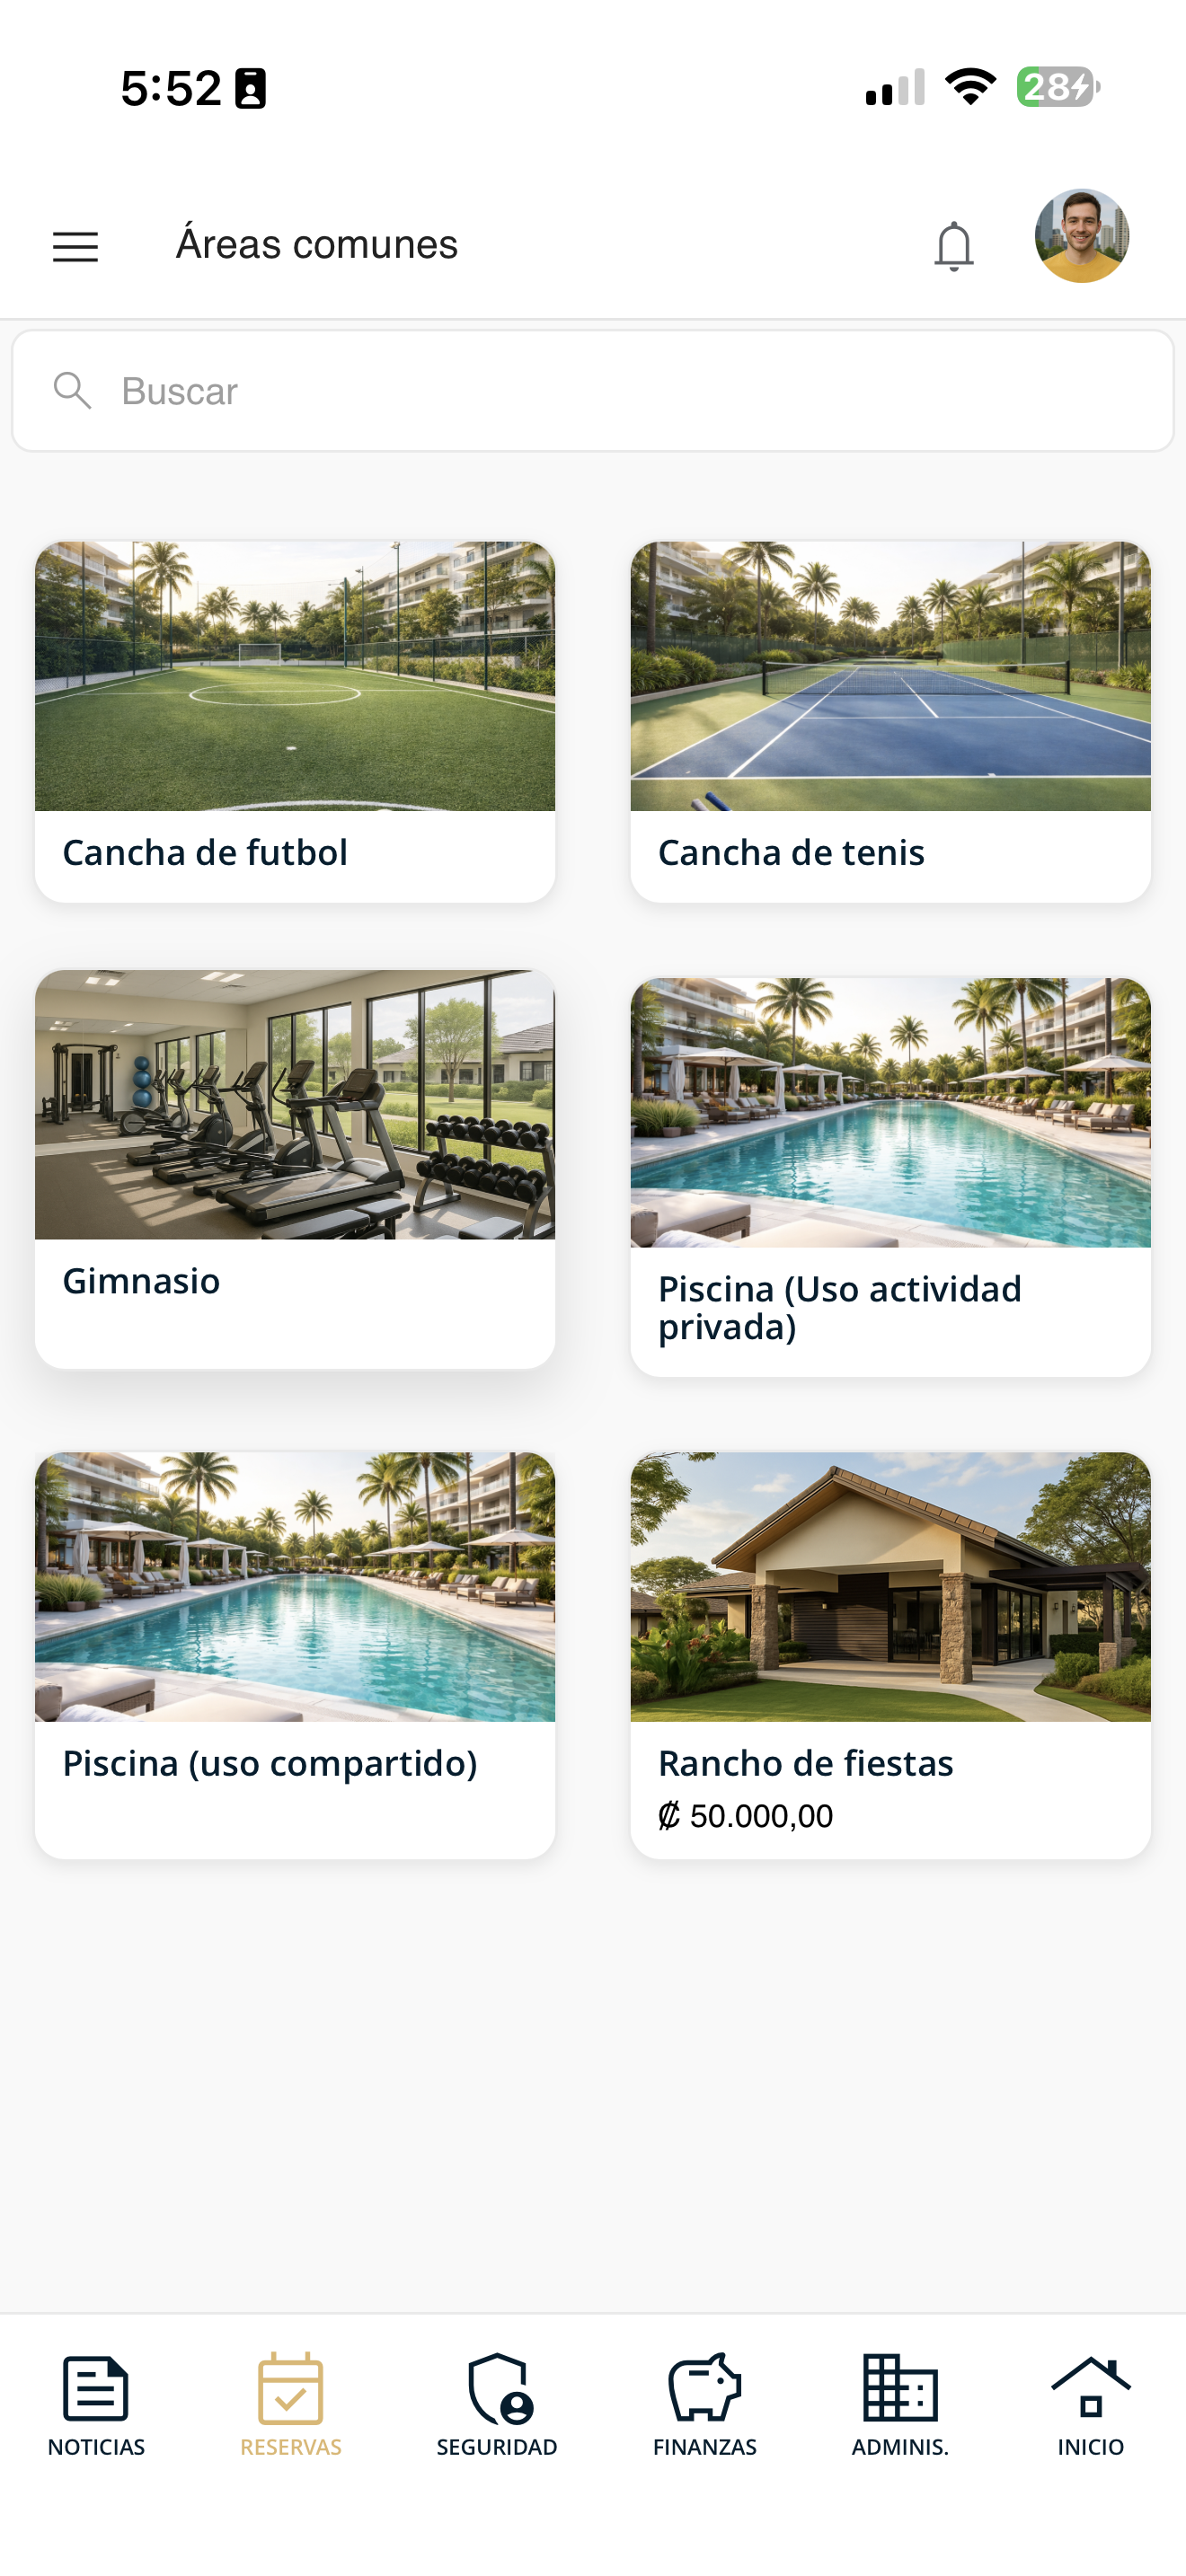
areas-amenidades-01.png
Check availability
Tap an amenity to see its availability by day and time (each block indicates whether it is available or not). This way you know when you can reserve it before starting the process.
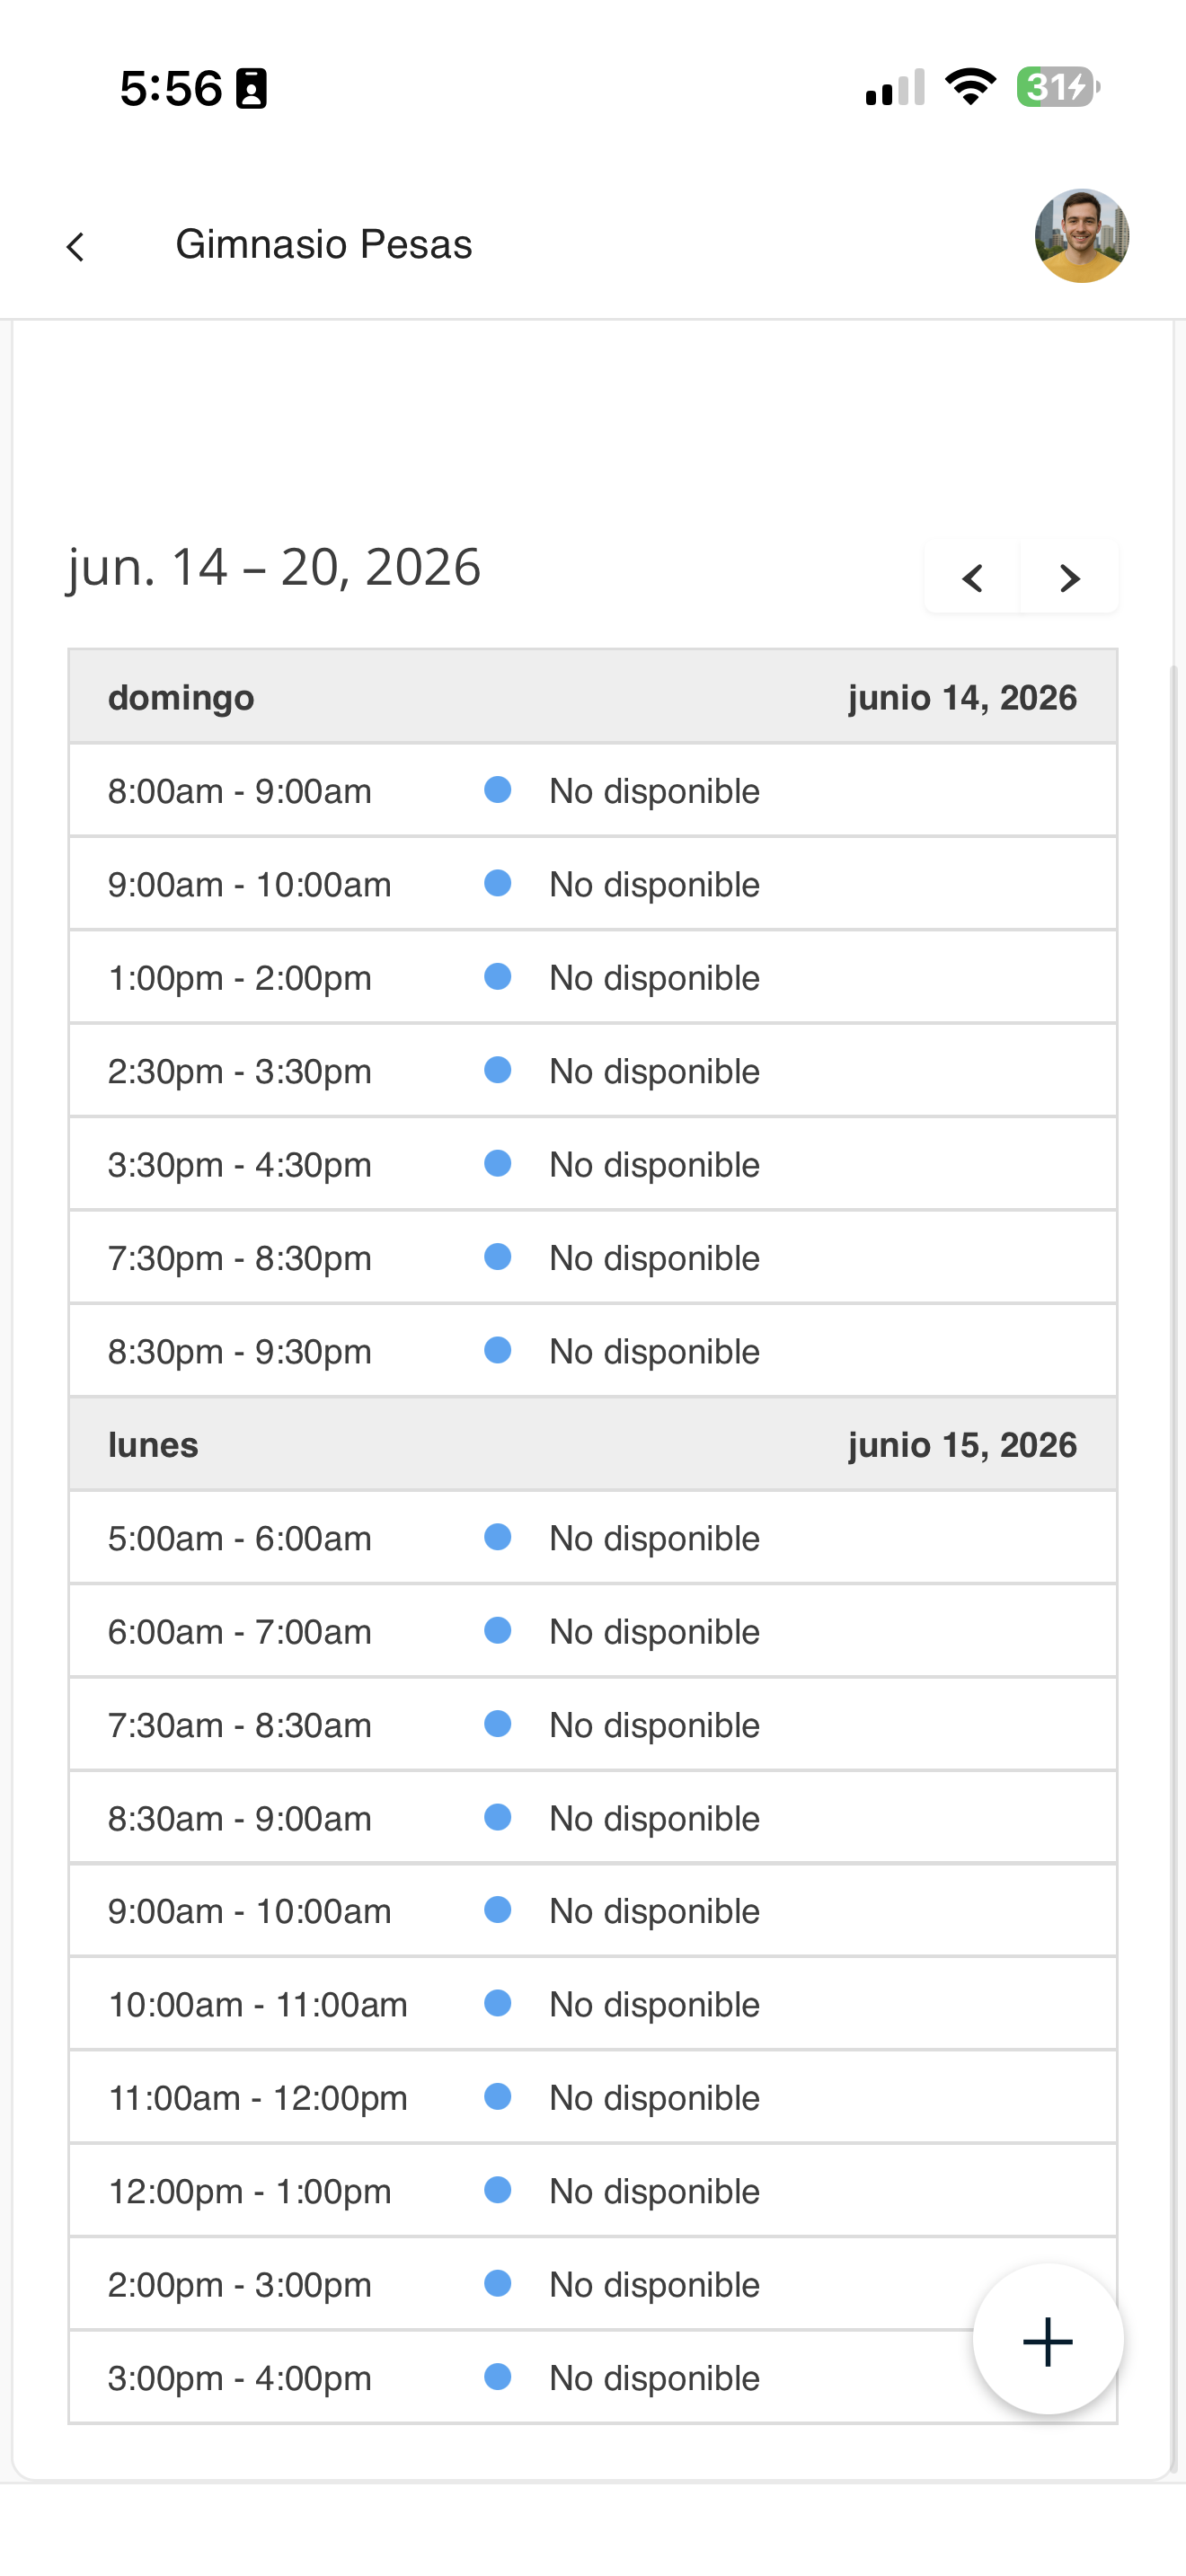
areas-amenidades-02-detalle.png
Report a guest
Register your visitors so the guardhouse lets them in. It is a 4-step wizard: visitor type, details, settings and confirmation.
Go to "Report guest"
Open Security in the bottom bar and tap "Report guest".
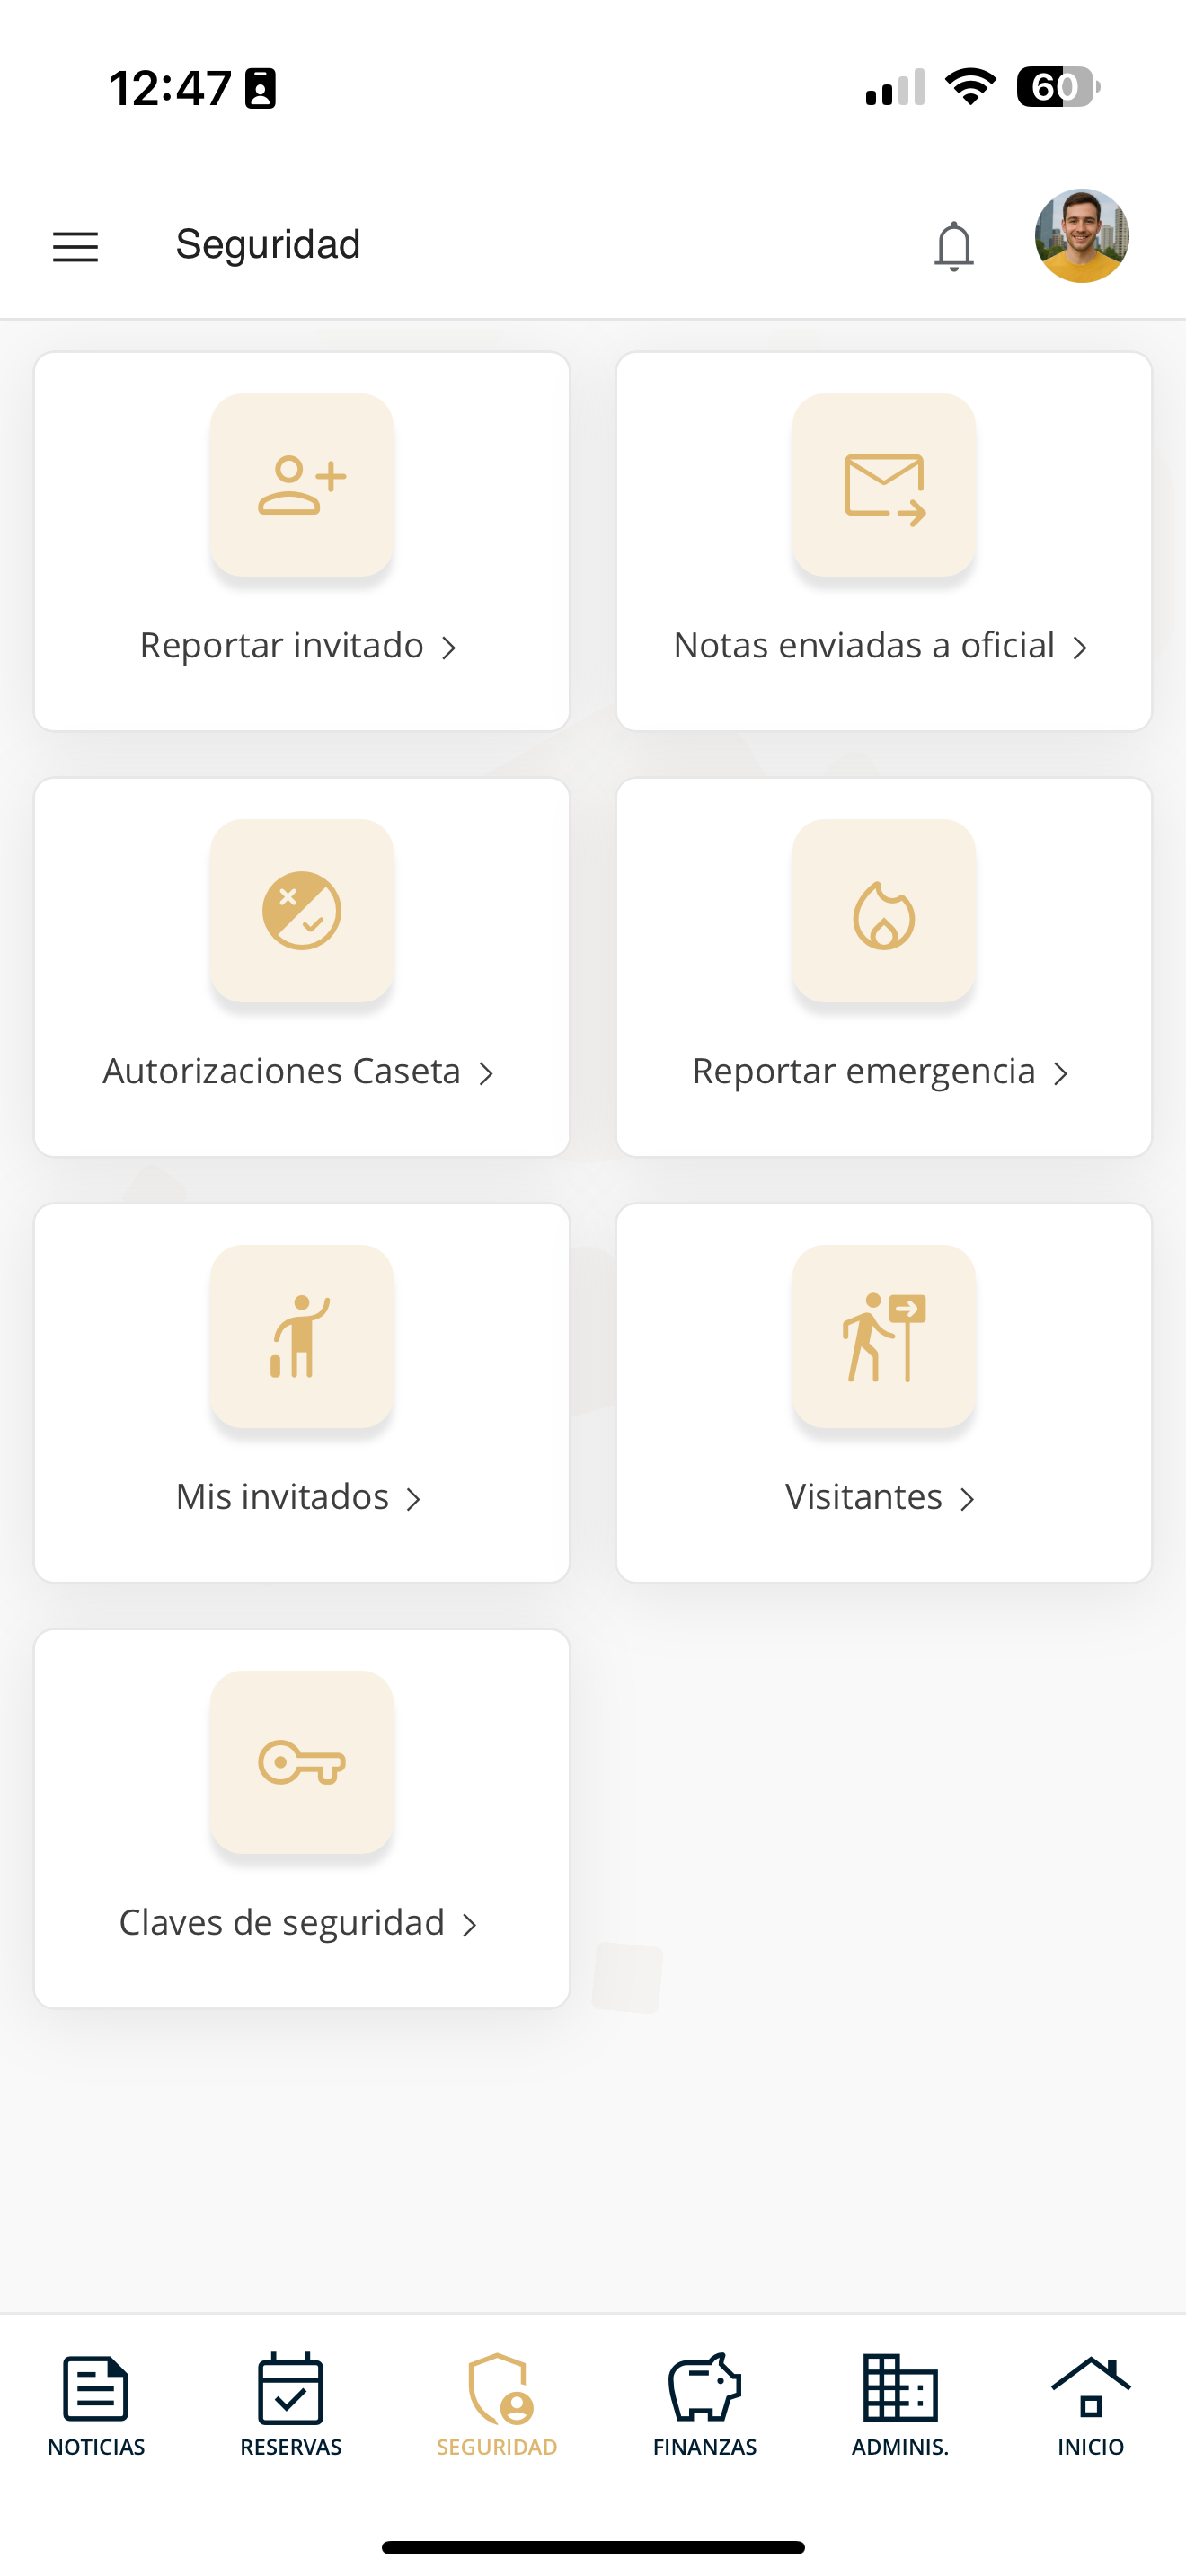
seg-reportar-01-menu.png
Choose the visitor type
Select the type based on the visit: Temporary (occasional with an end date), Permanent (fixed access with photo), Express (quick entry), Vacation, Employee (weekly schedule) or Transport / Bus.
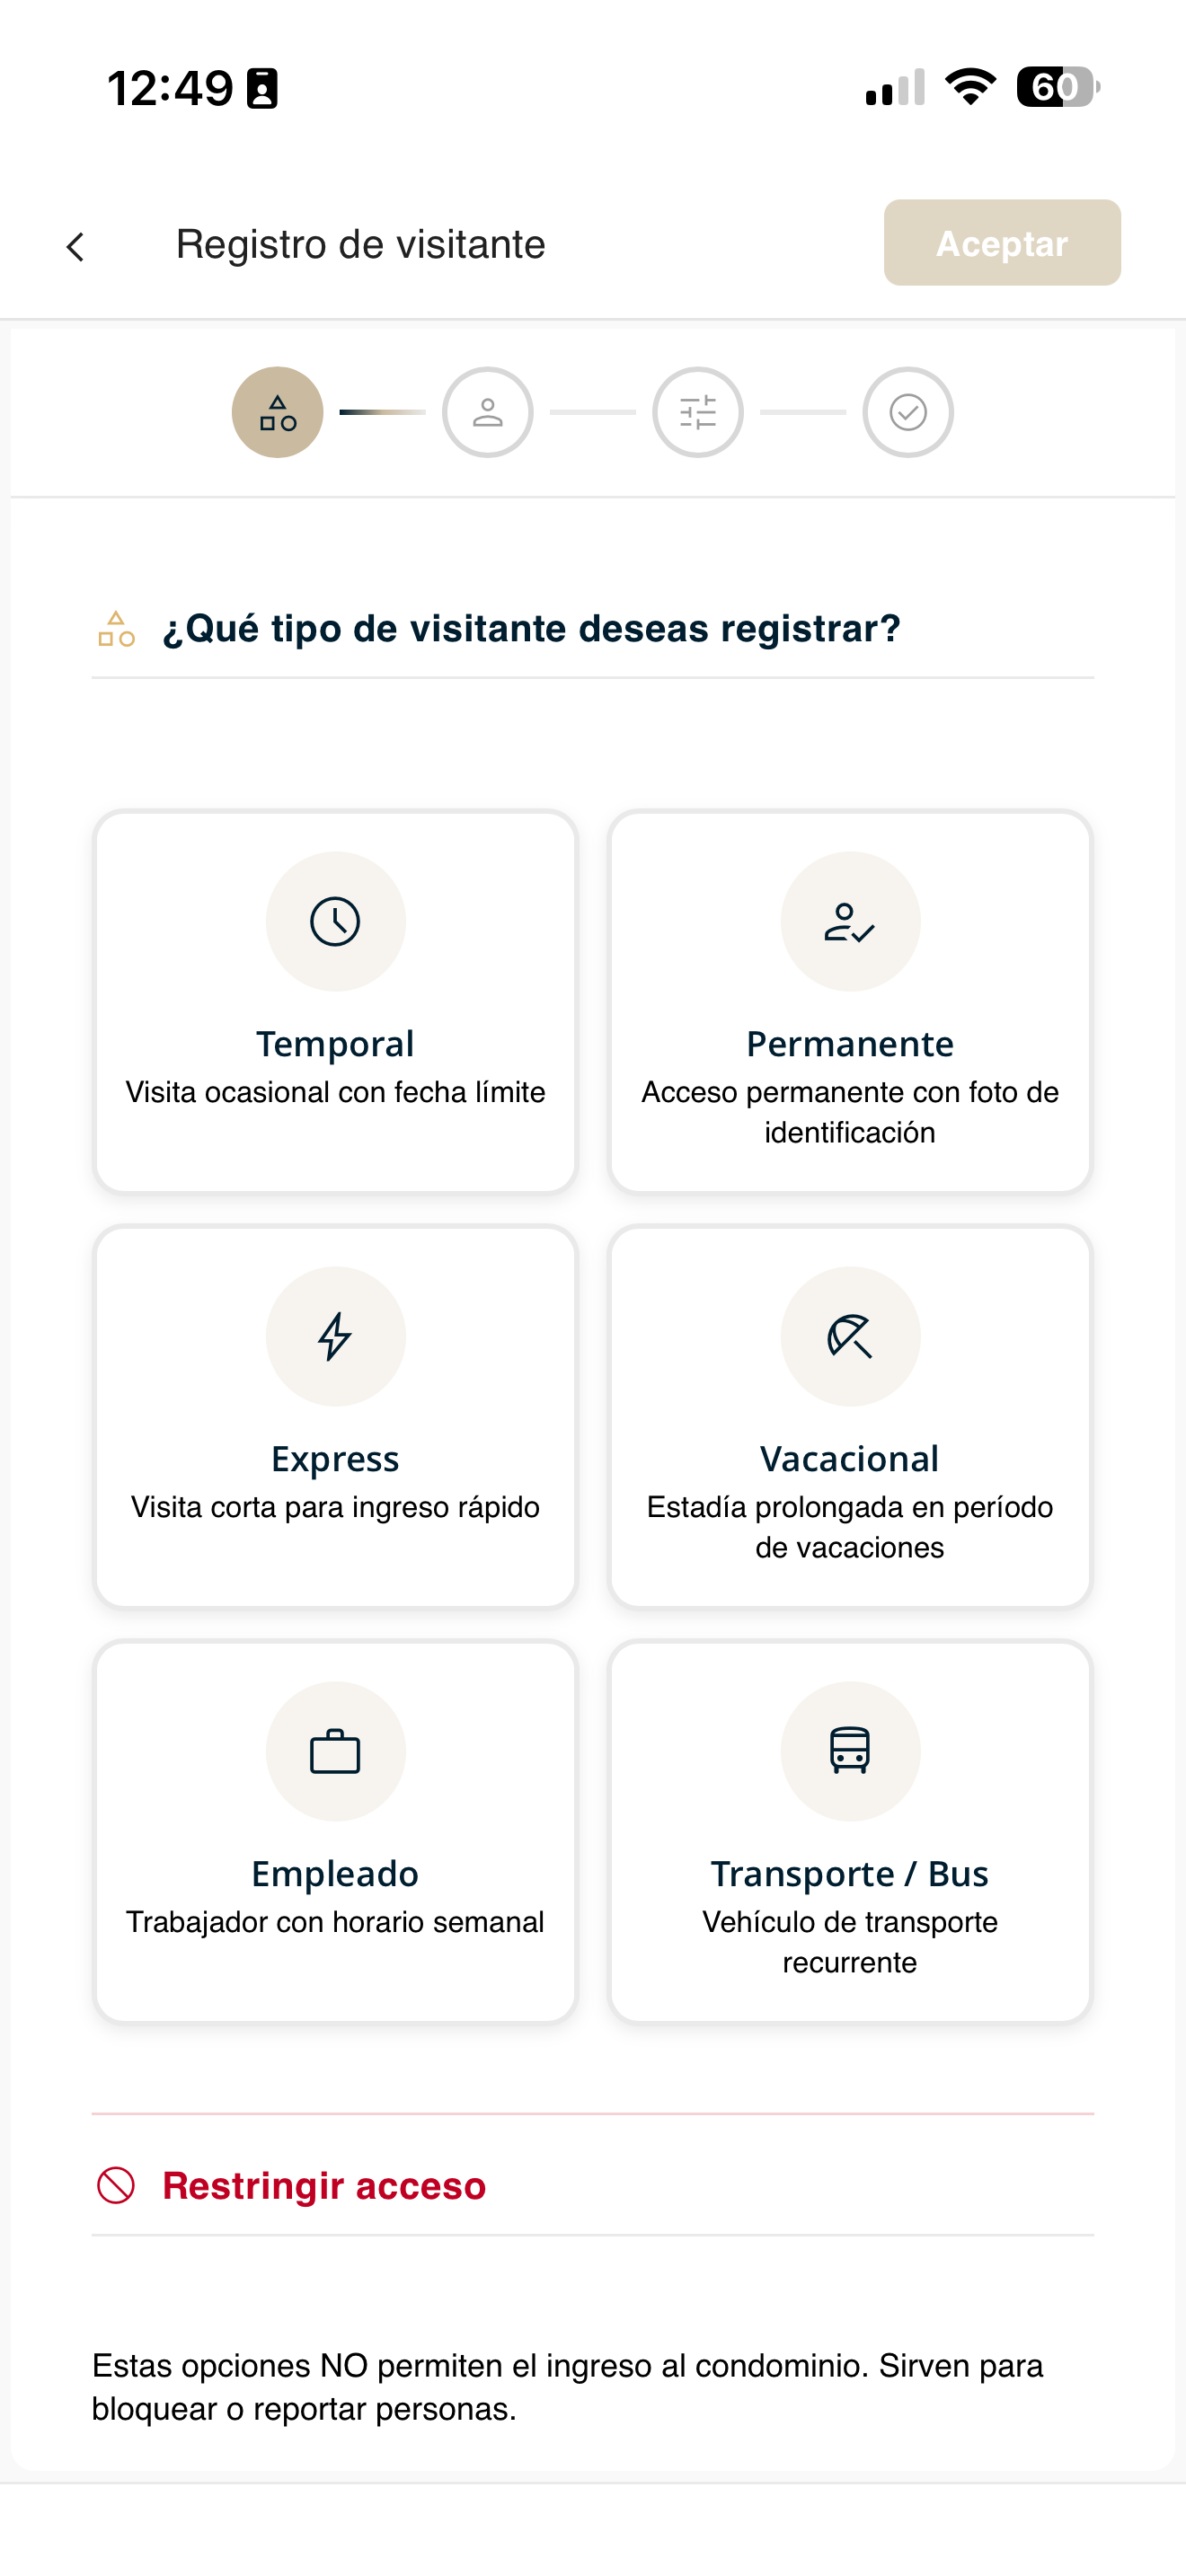
seg-reportar-02-tipo.png
Enter the visitor's details
Fill in your guest's details: first name, last names and ID (and vehicle license plate if applicable).
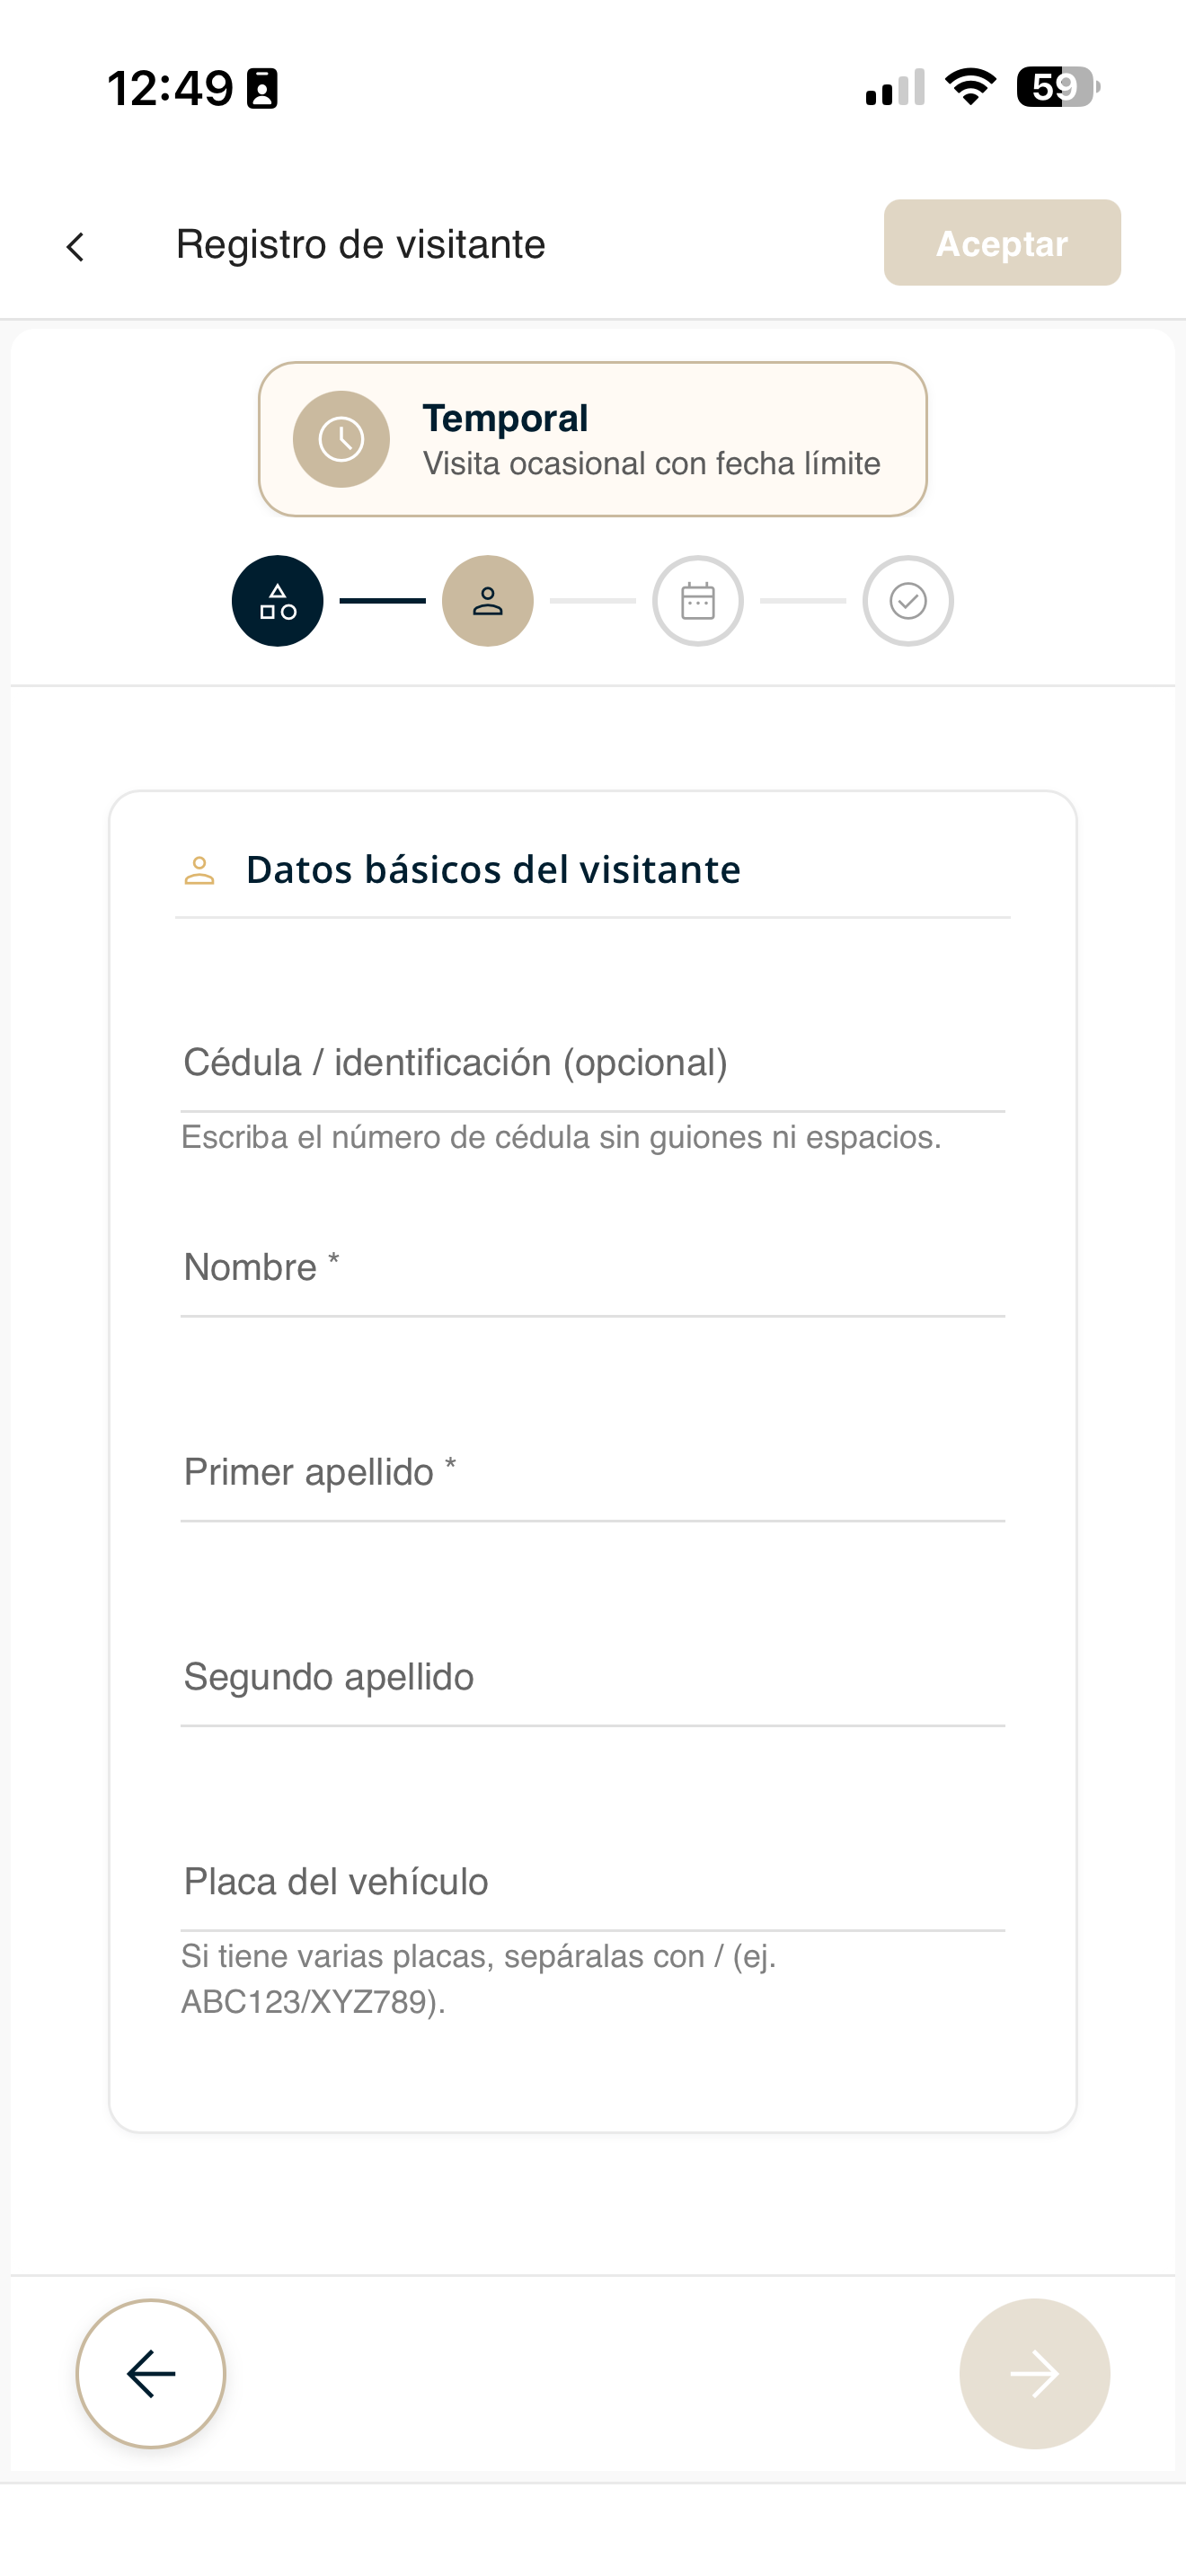
seg-reportar-03-datos.png
Configure the details
Define the visit settings: entry date and time, validity period, and any additional instructions depending on the visitor type.

seg-reportar-04-ajustes.png
Confirm the registration
Review the summary and press "Accept". Your guest will be registered and will appear in "My guests".
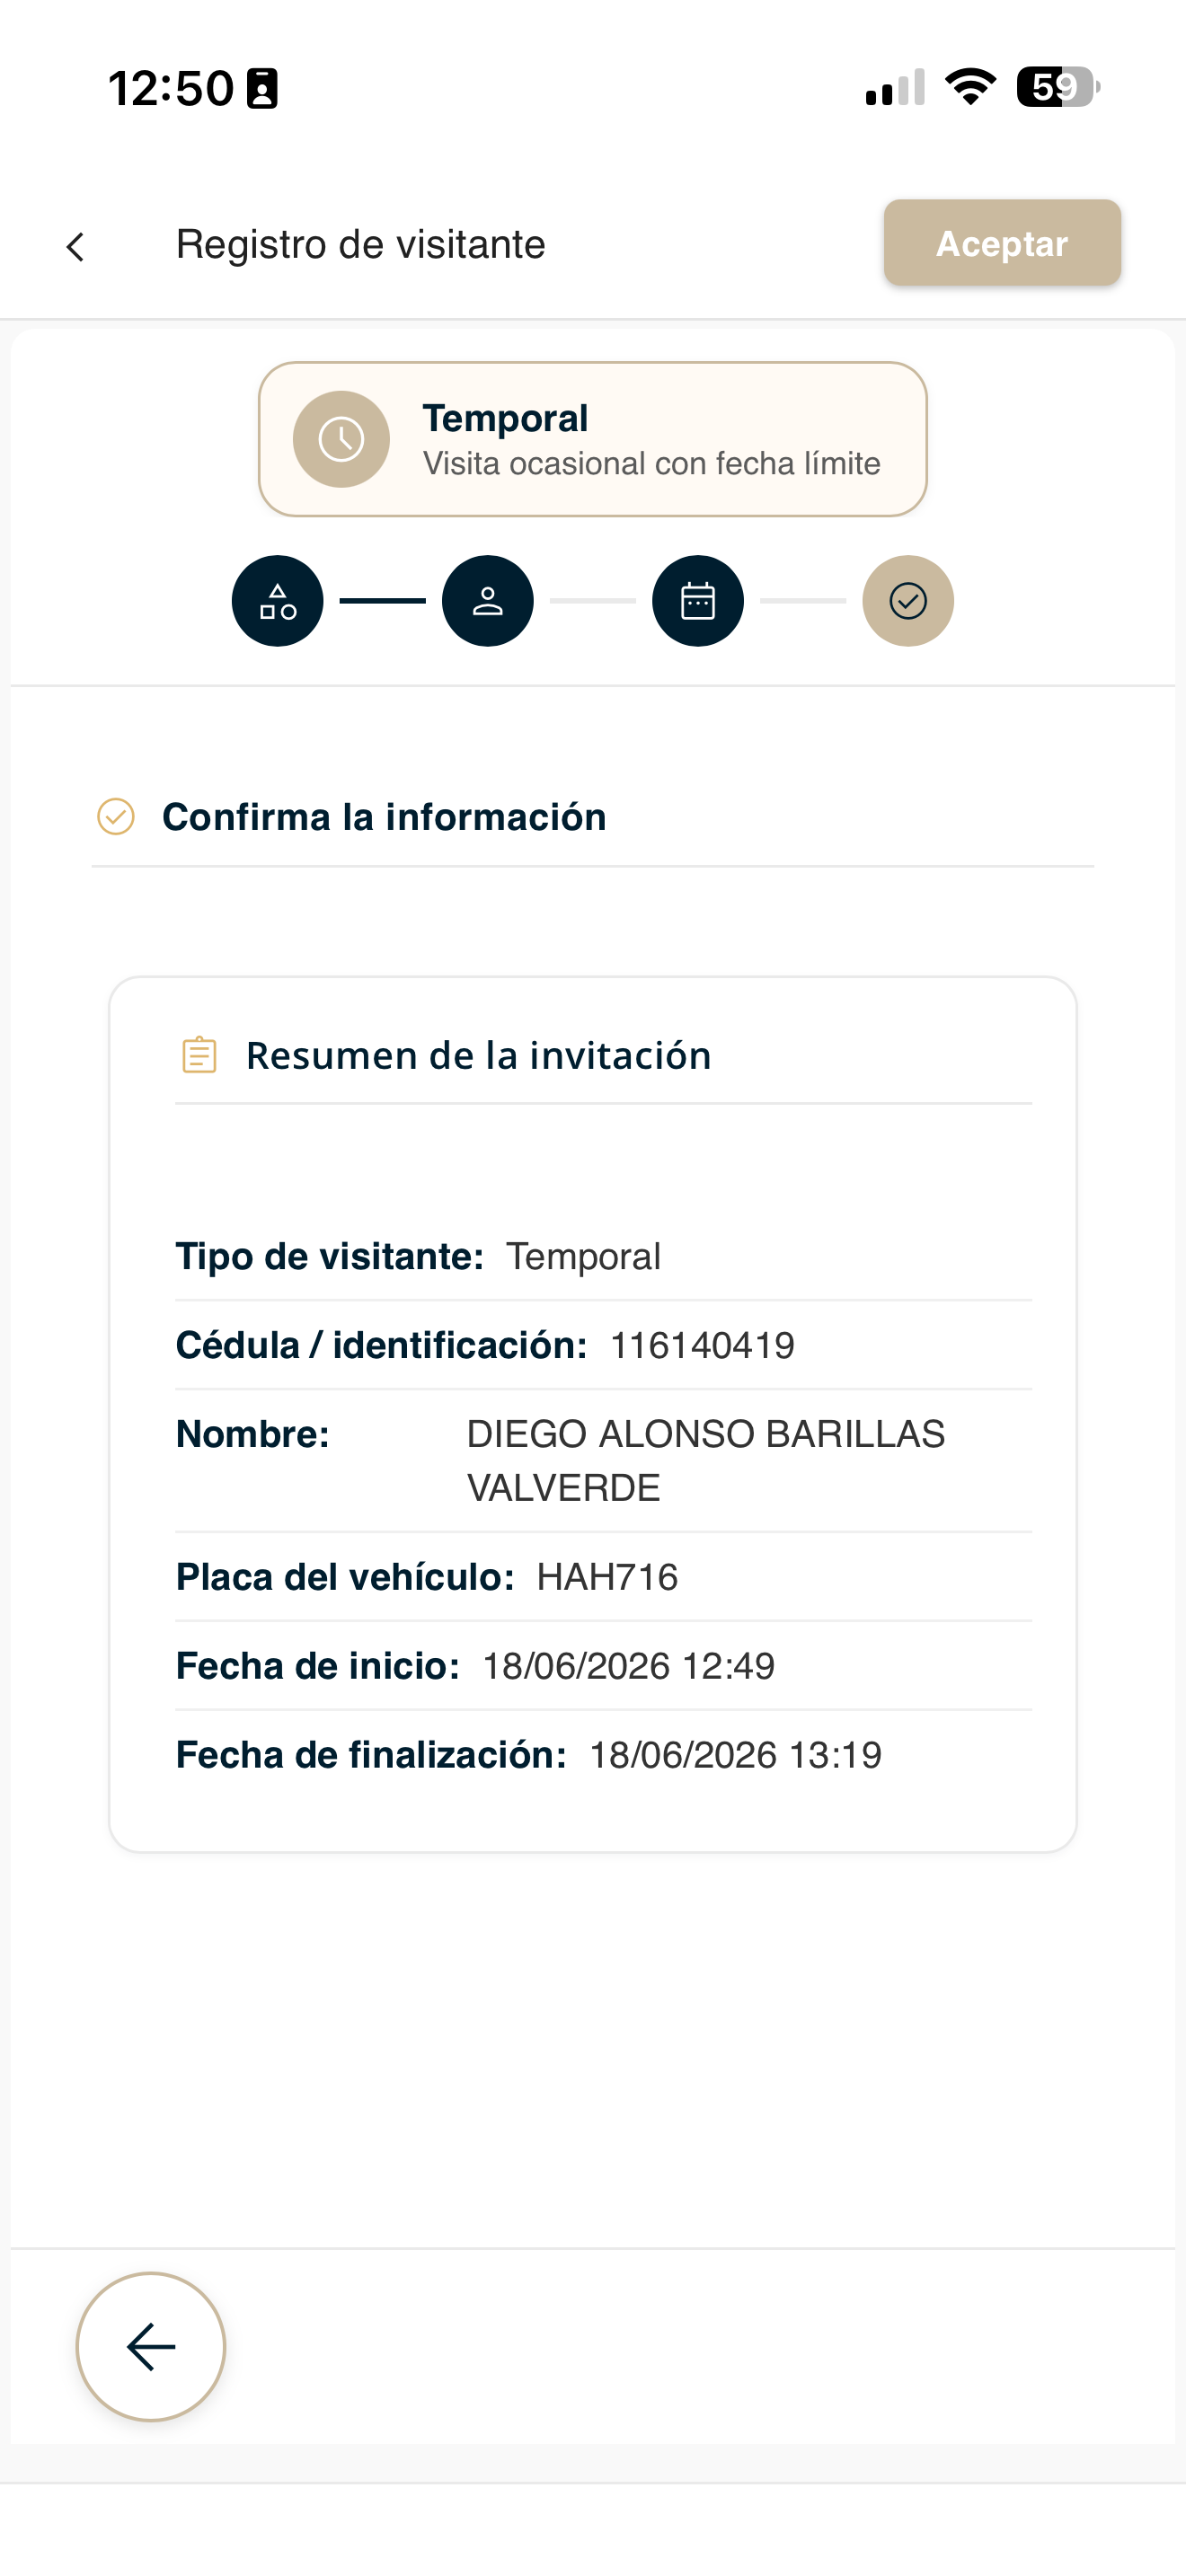
seg-reportar-05-confirmar.png
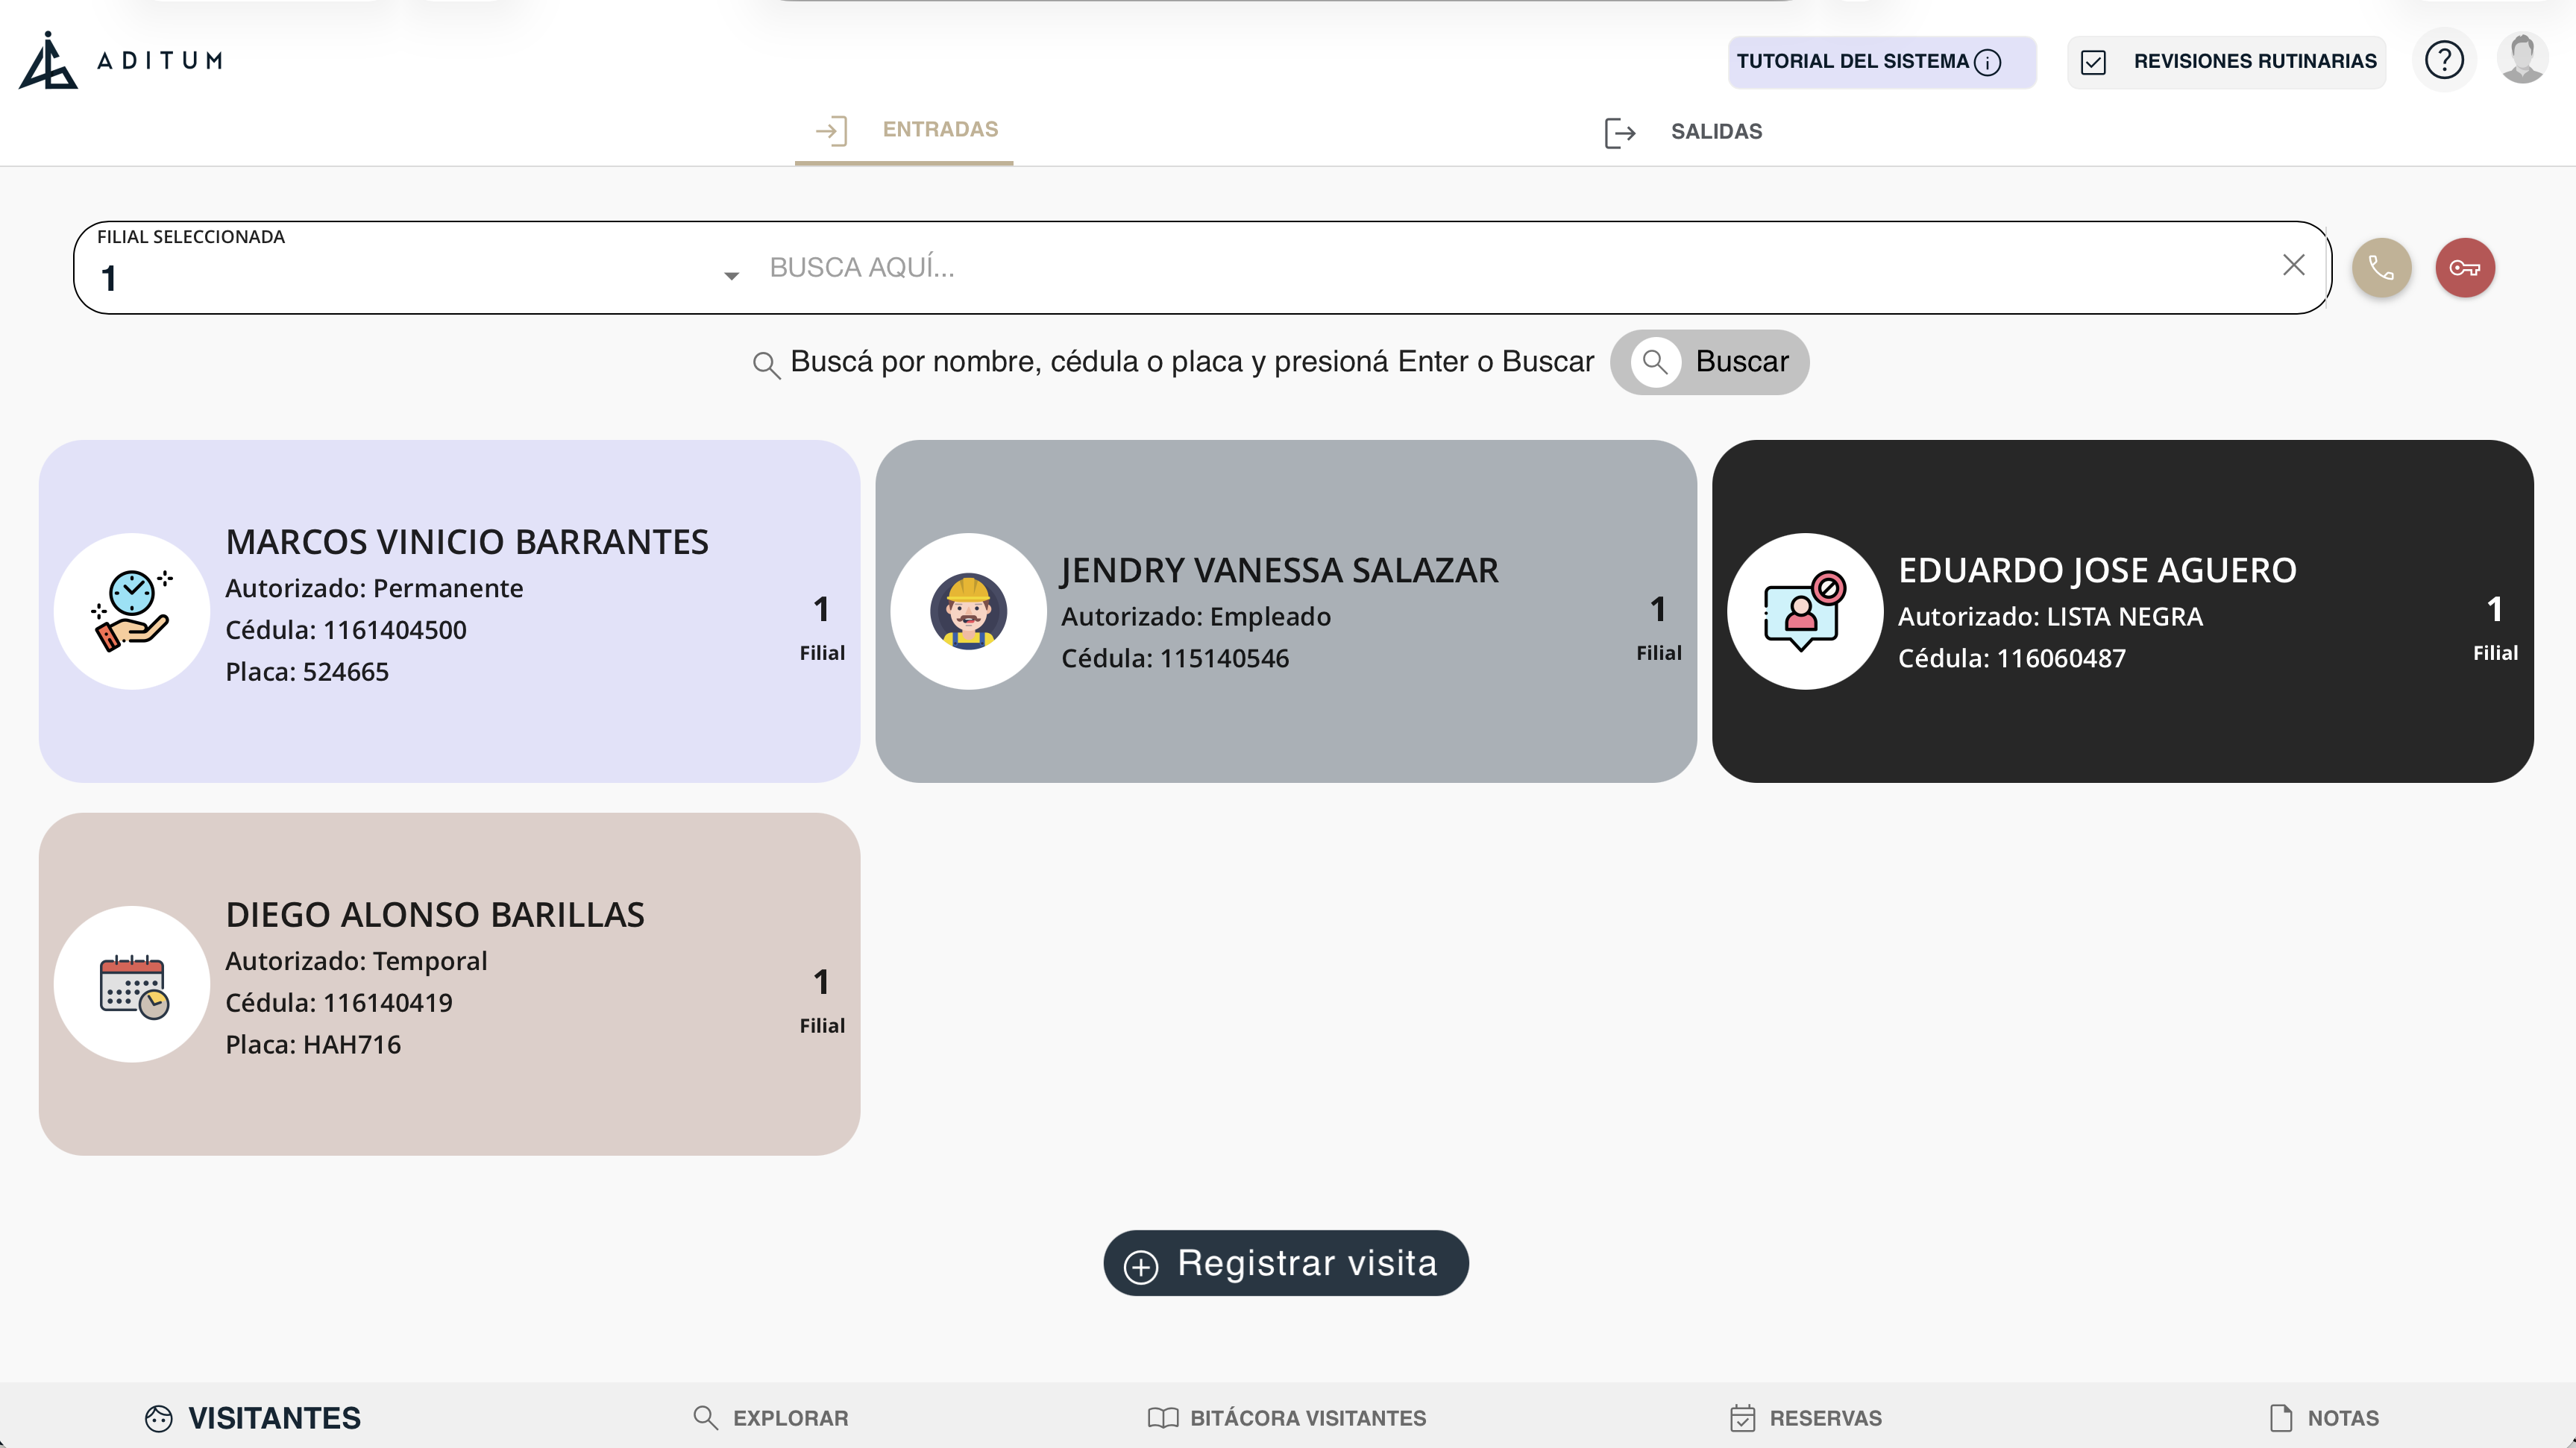
The guard will see it at the guardhouse
Once registered and authorized, your guest automatically appears for the security guard in the guardhouse app. When they arrive at the condominium, the guard will see them in the authorized visitors list and can grant entry.
Send QR invitation
Share a QR code with your guest so they can enter automatically through the entrance reader, without the guard having to register them manually.
Register the guest first
The start is the same as in Report guest: open Security, tap "Report guest" and complete the registration (type, details, settings and confirm).
seg-reportar-01-menu.png
Go to "View my guests"
Go back to the Security menu and open "My guests" to locate the guest you just registered.
seg-reportar-01-menu.png
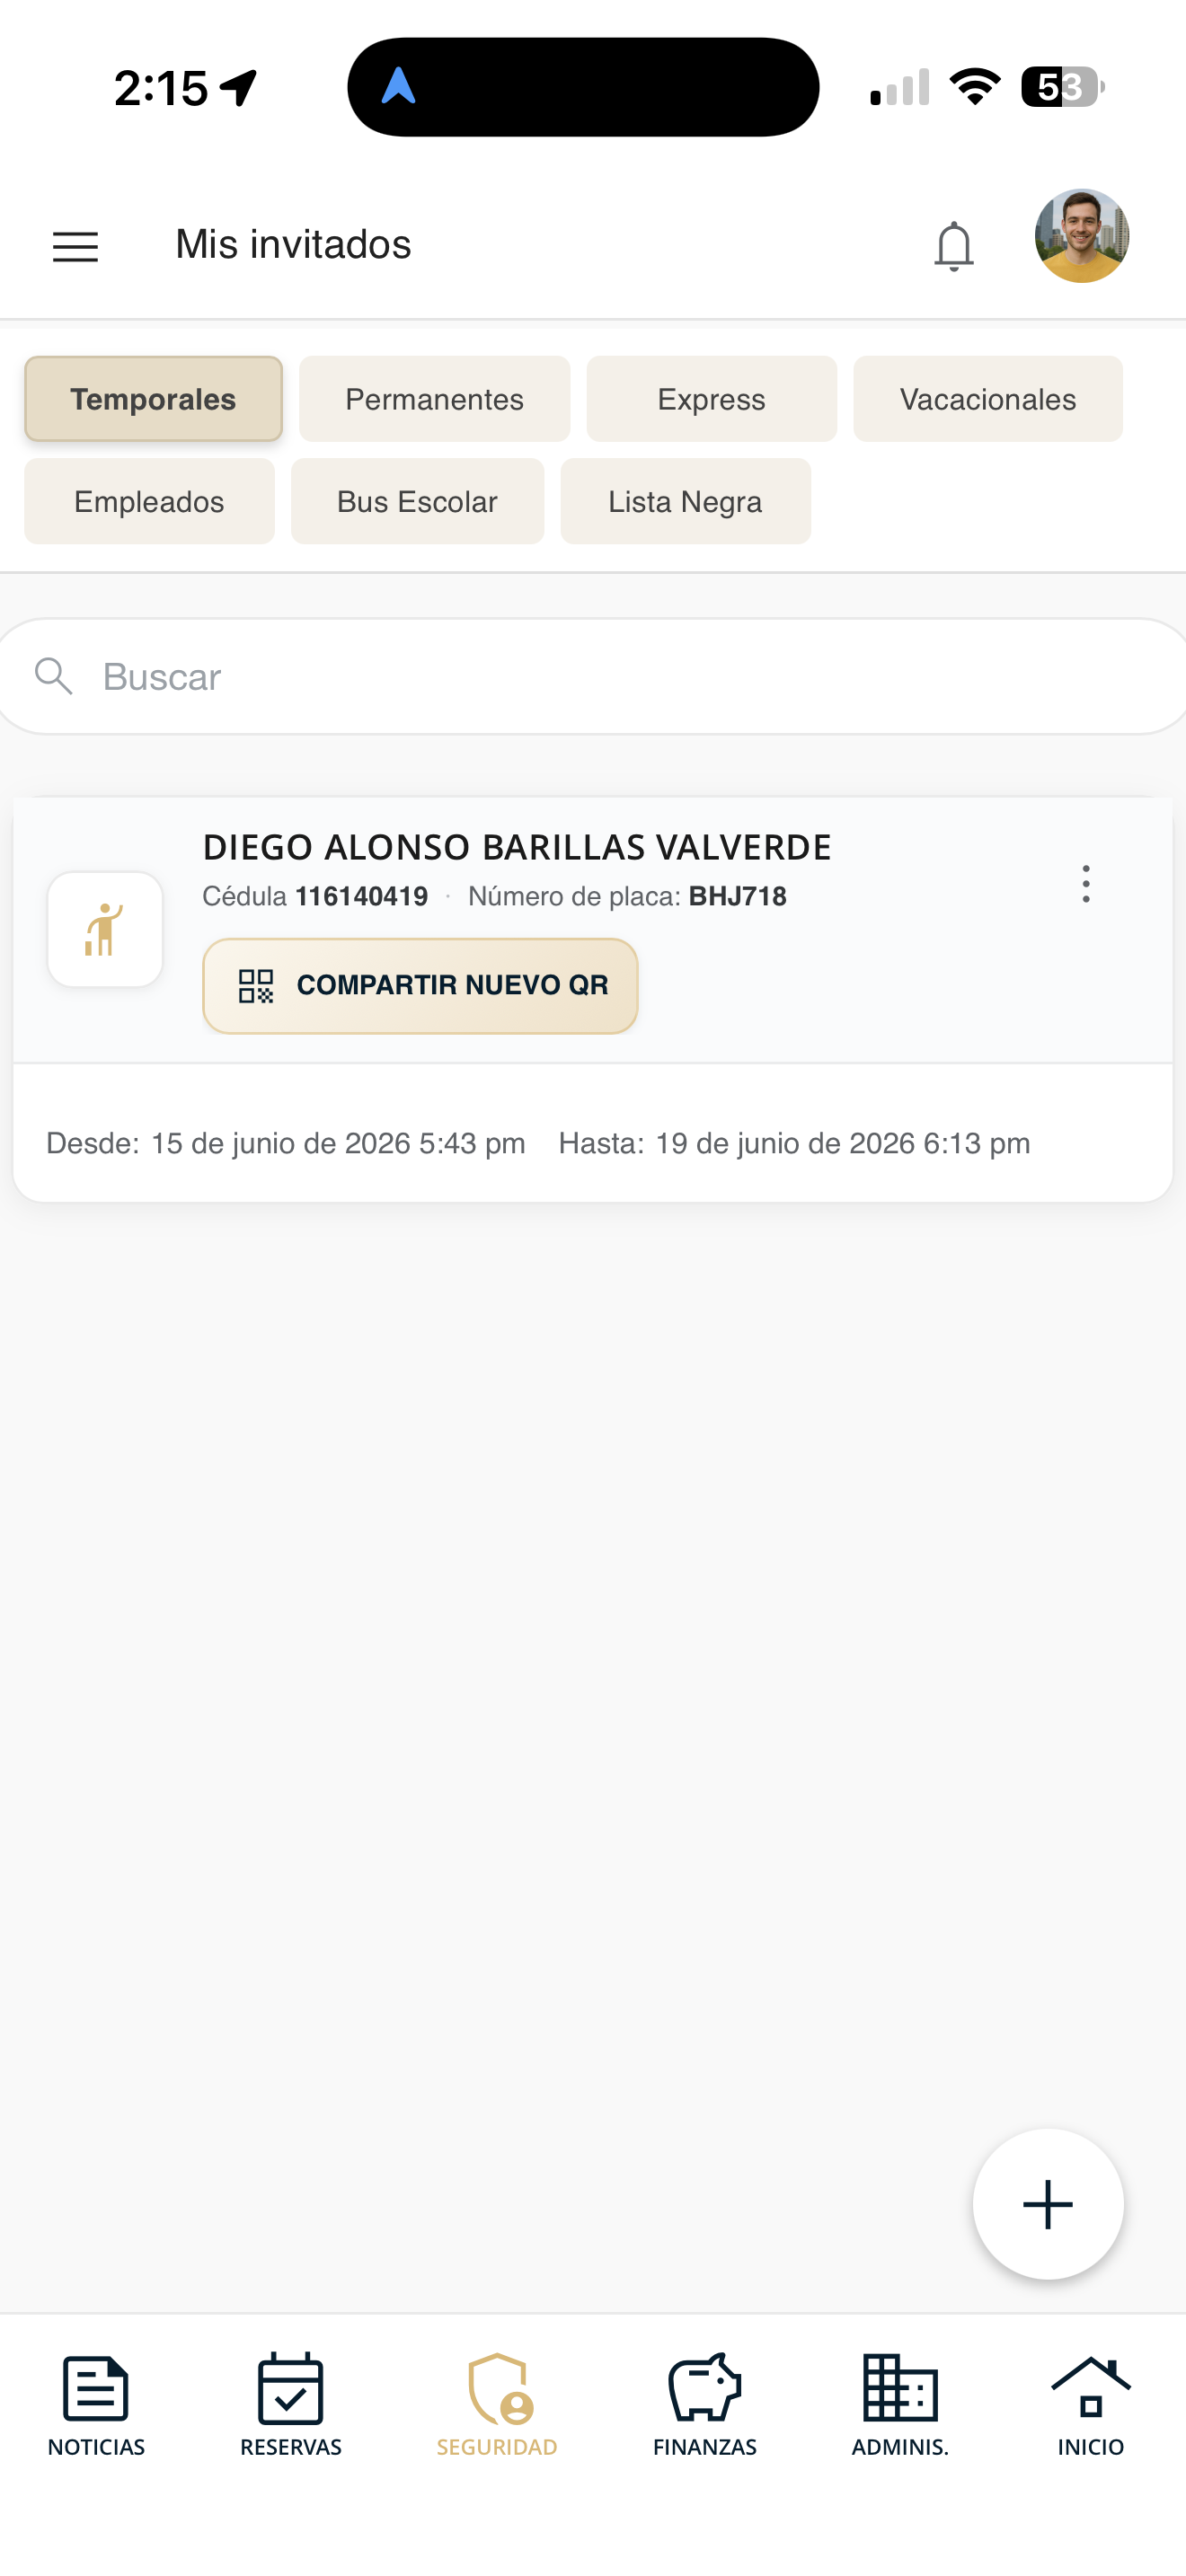
Tap "Share new QR"
On the guest's card, the "Share new QR" button appears. Tap it to generate the code.
qr-01-boton.png
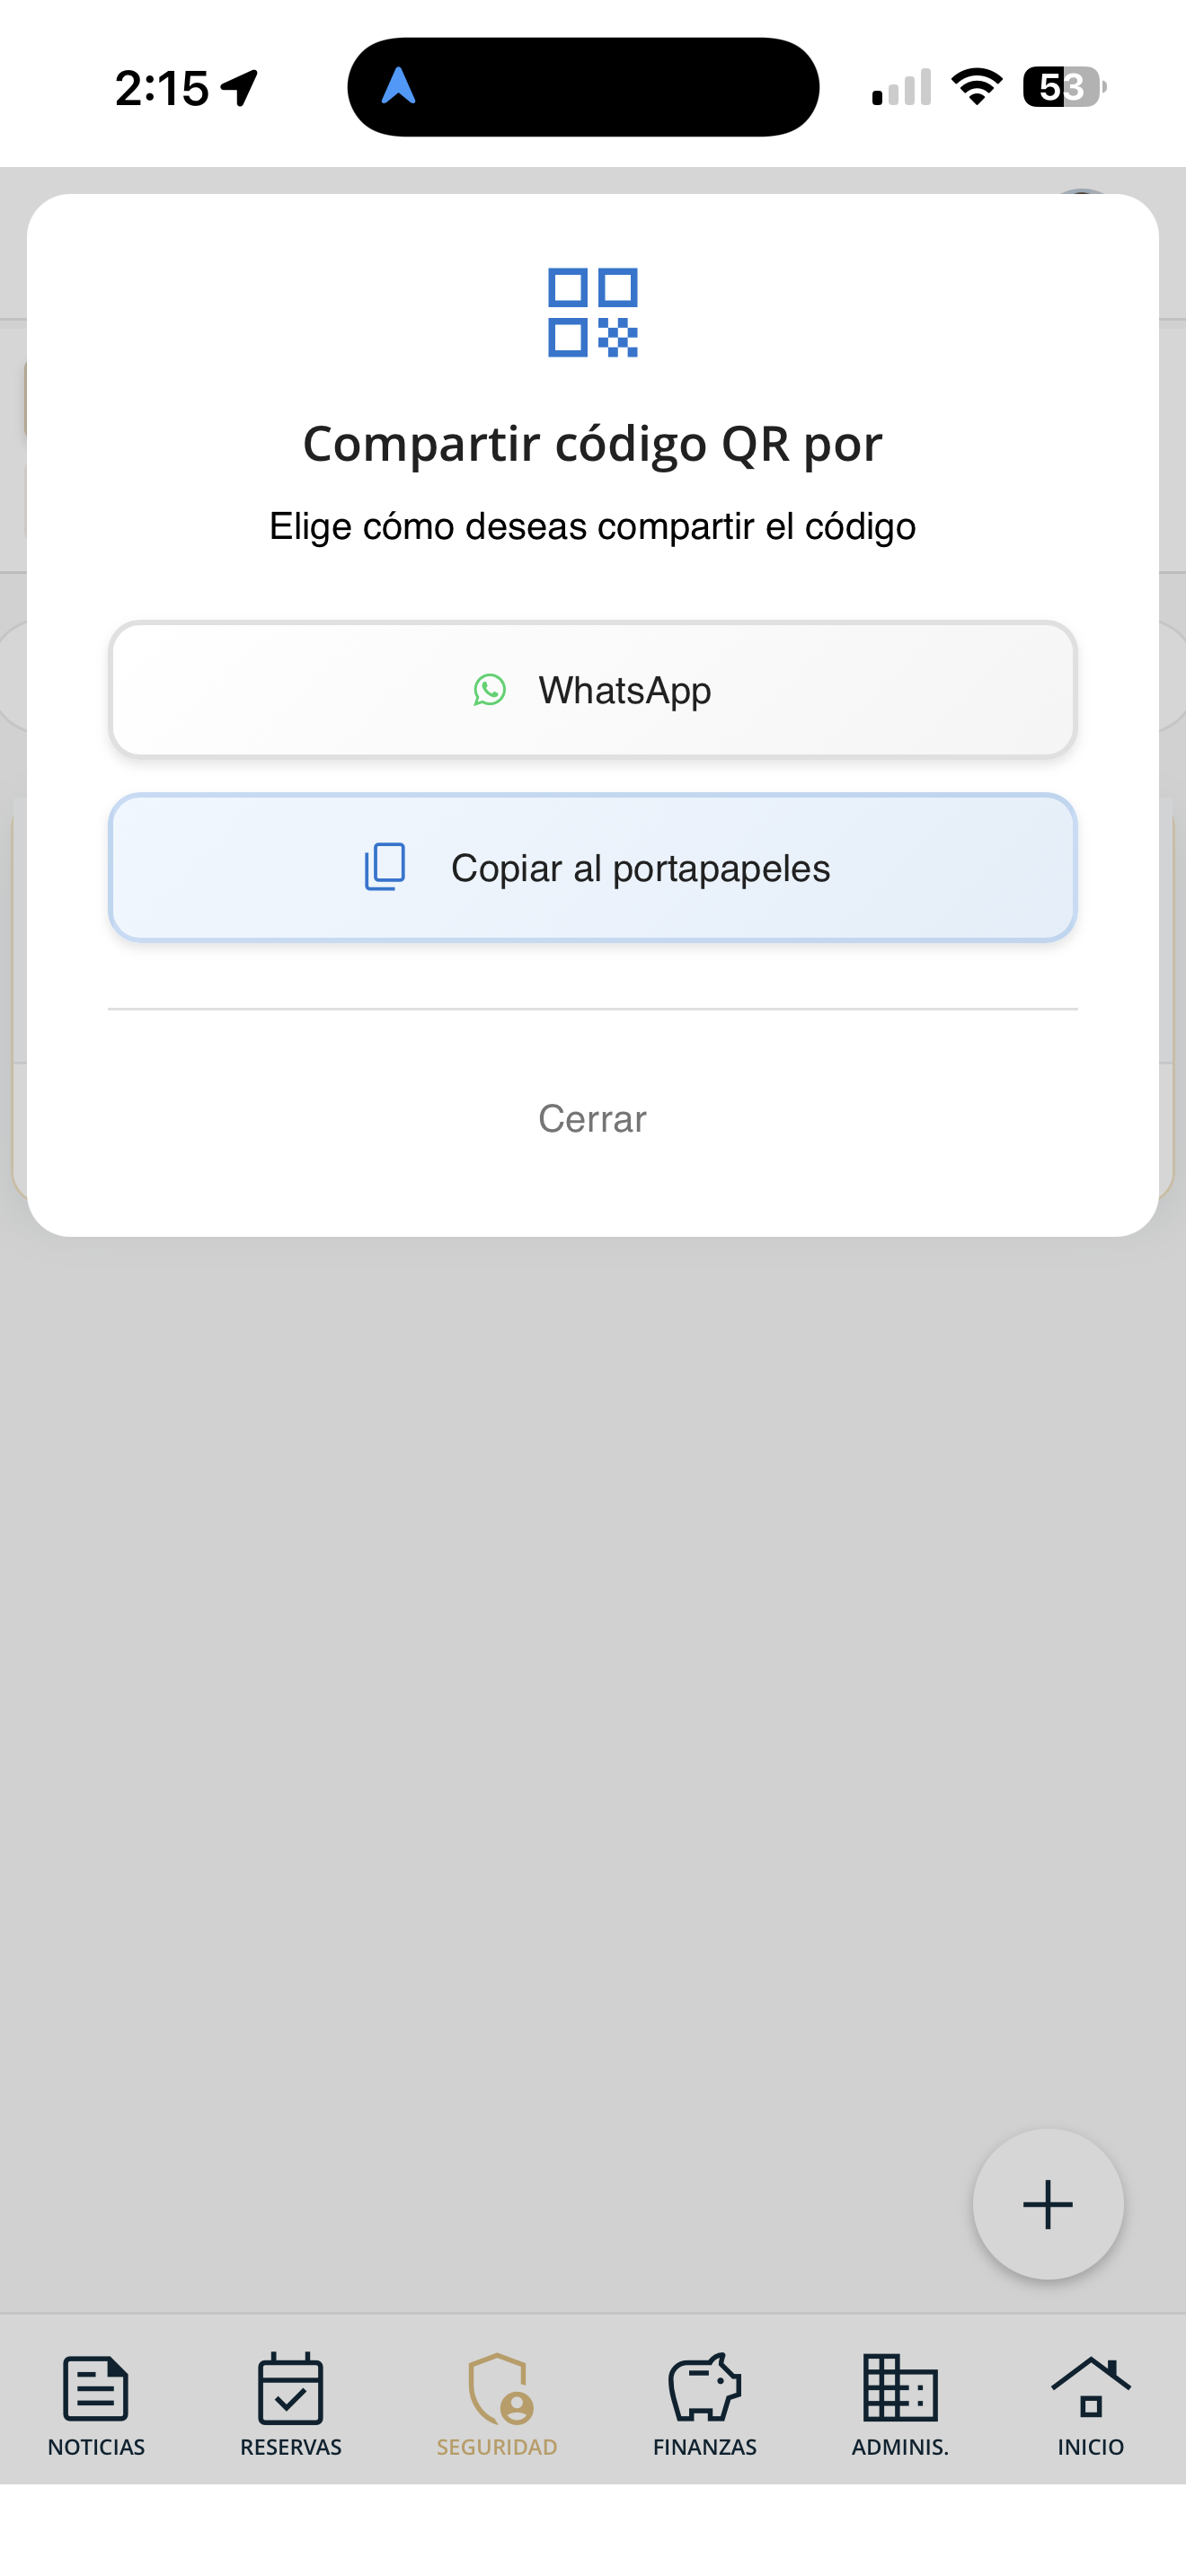
Choose how to share it
"Share QR code via" opens. Choose WhatsApp to send it directly, or Copy to clipboard to paste it wherever you want.
qr-02-compartir.png
The guest receives the link
Your guest receives a message with the entry link. When they open it, they get their QR code and just need to hold it up to the entrance reader to enter automatically. The message also includes the location via Waze.

qr-03-whatsapp.png
The visitor enters with their QR
When they open the link, your guest gets their QR code. They just need to hold it up to the reader at the condominium entrance and access opens automatically.
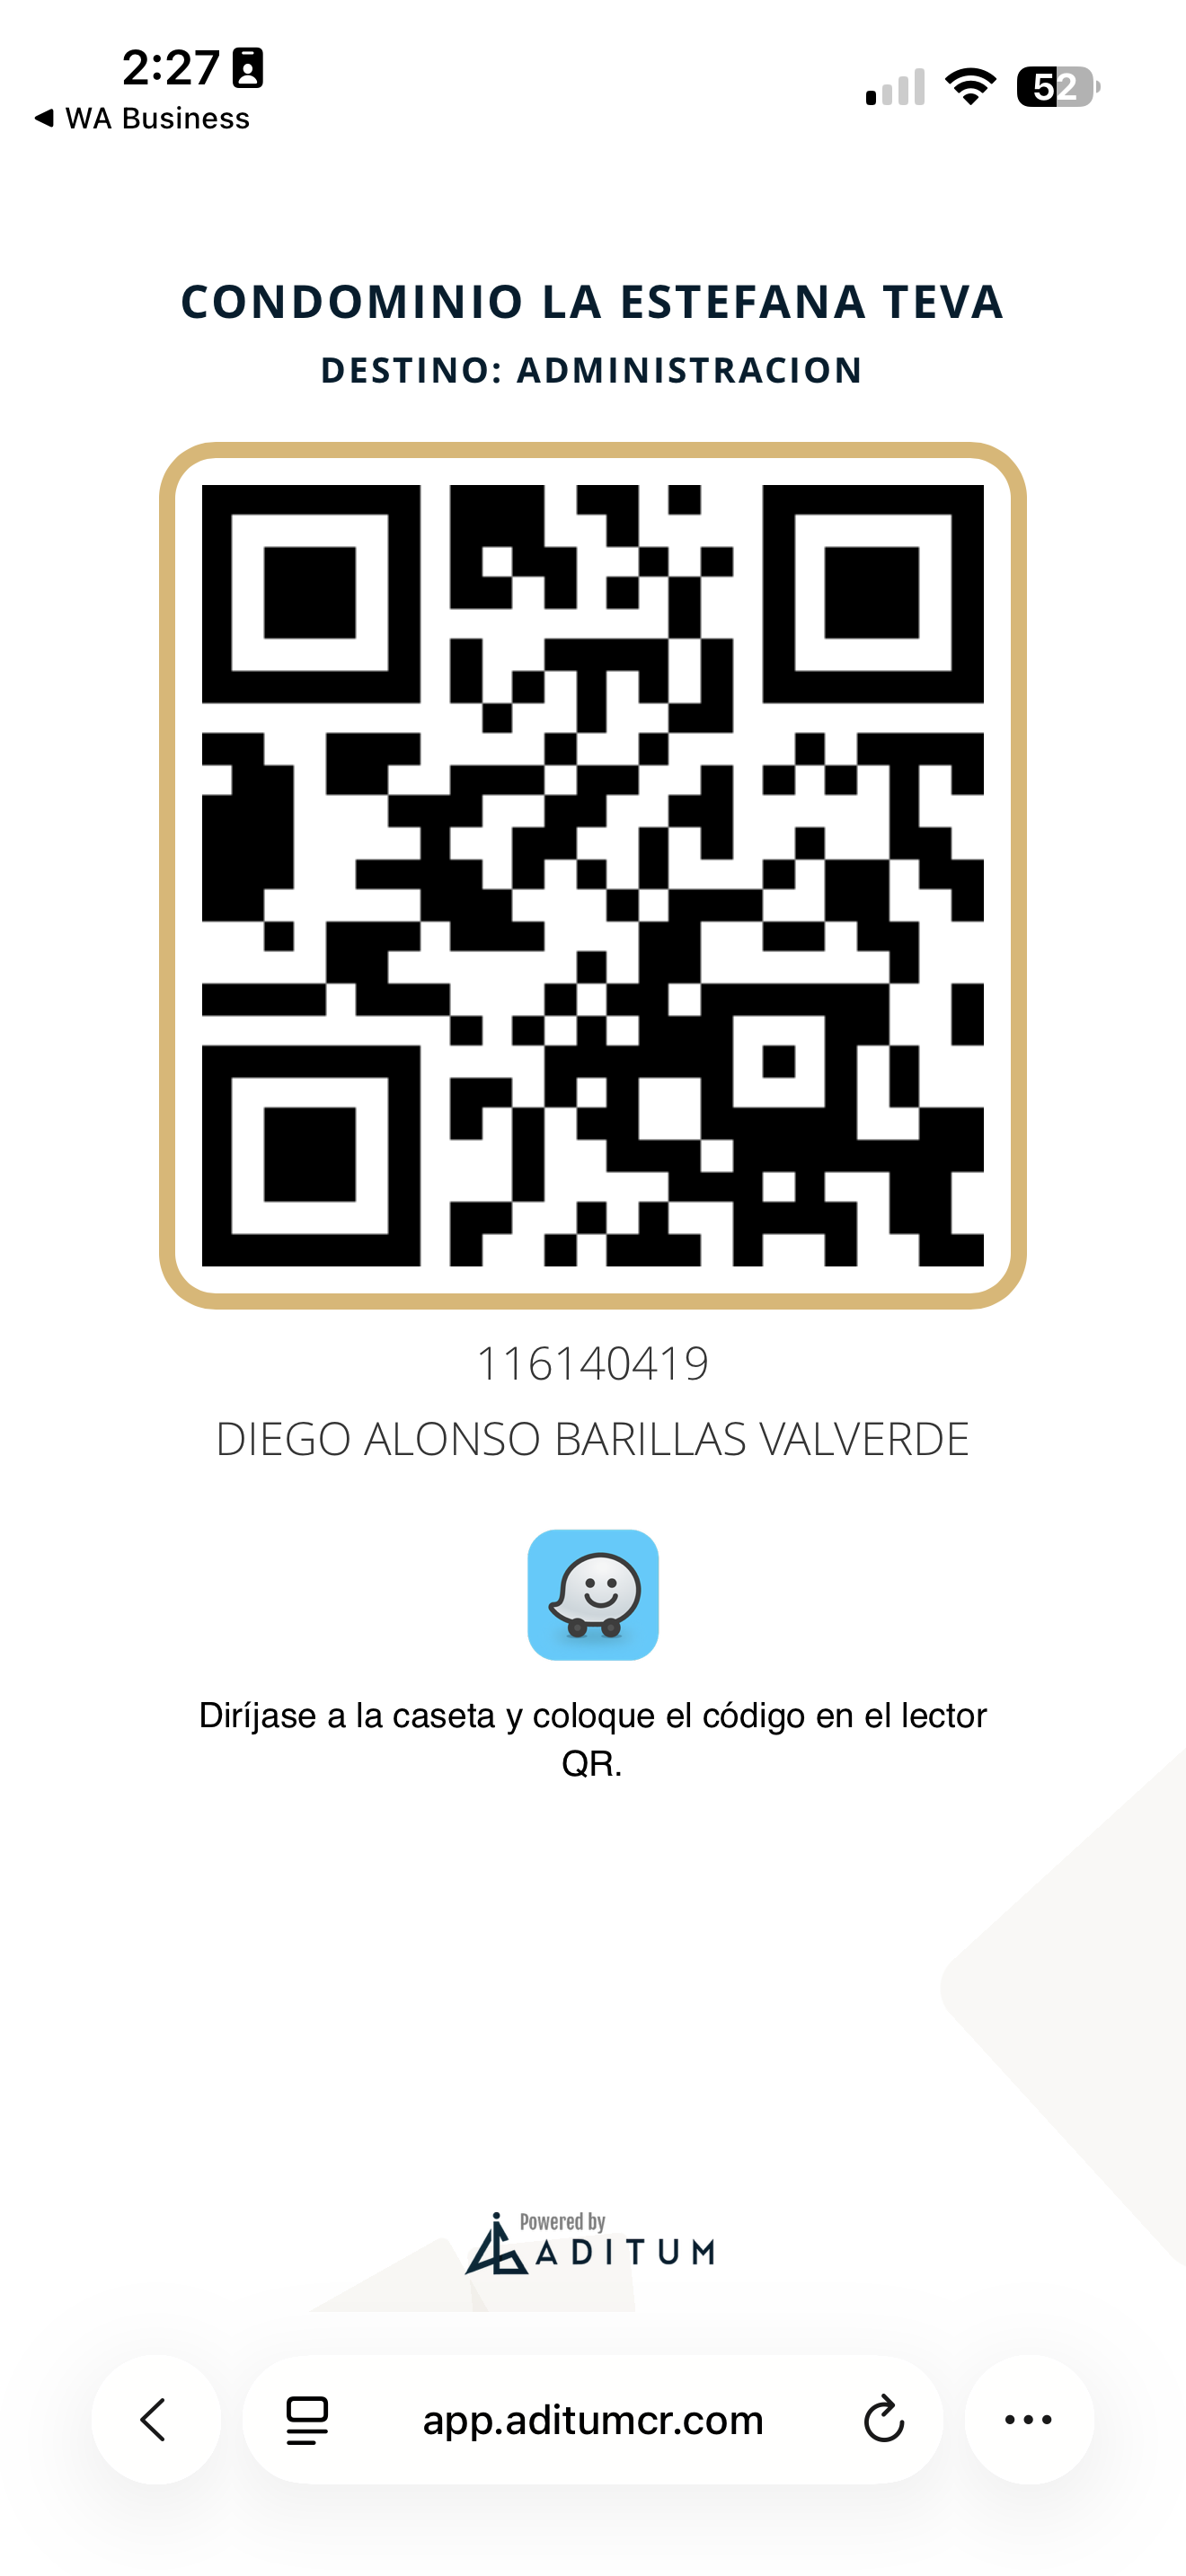
qr-04-codigo.png
Notes sent to guard
Send messages or instructions to the guardhouse officer (for example, "let my taxi through") and review the notes you have already sent.
Go to Security
Open Security in the bottom bar and tap "Notes sent to guard".
seg-reportar-01-menu.png
Review your notes
You will see the notes you have sent, with the guard's reply. You can refresh or view the archived ones.
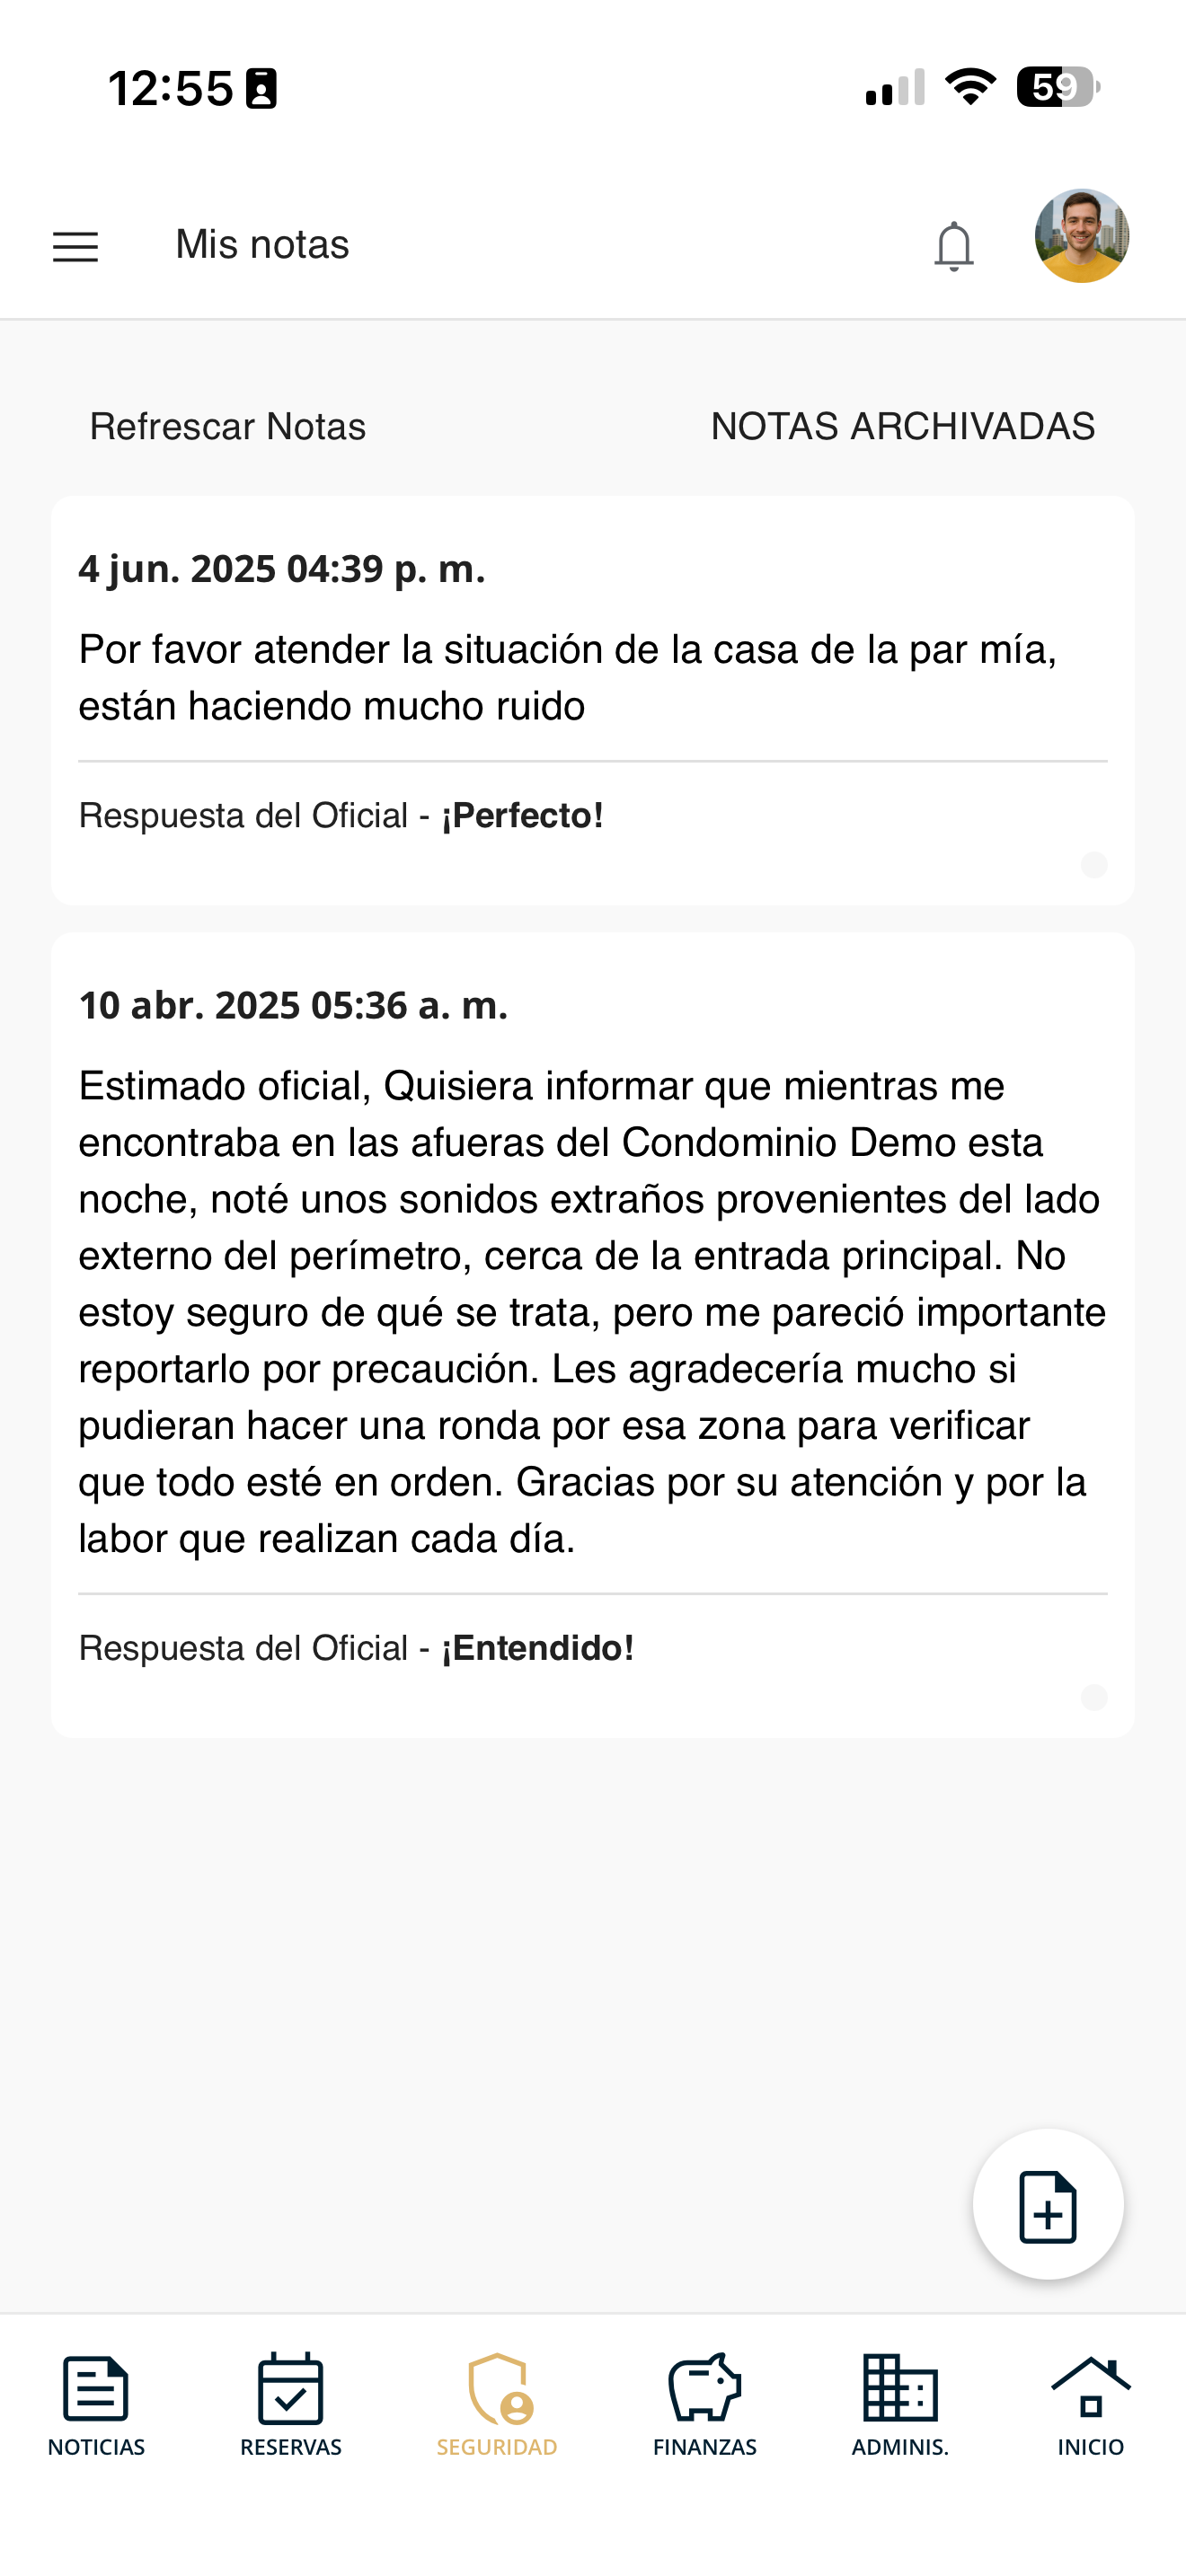
seg-notas-01-lista.png
Write and send a note
With the "+" button you create a new note. Type your message in Description ("What do you want to tell them?") and press "Accept". It reaches the guard in real time.
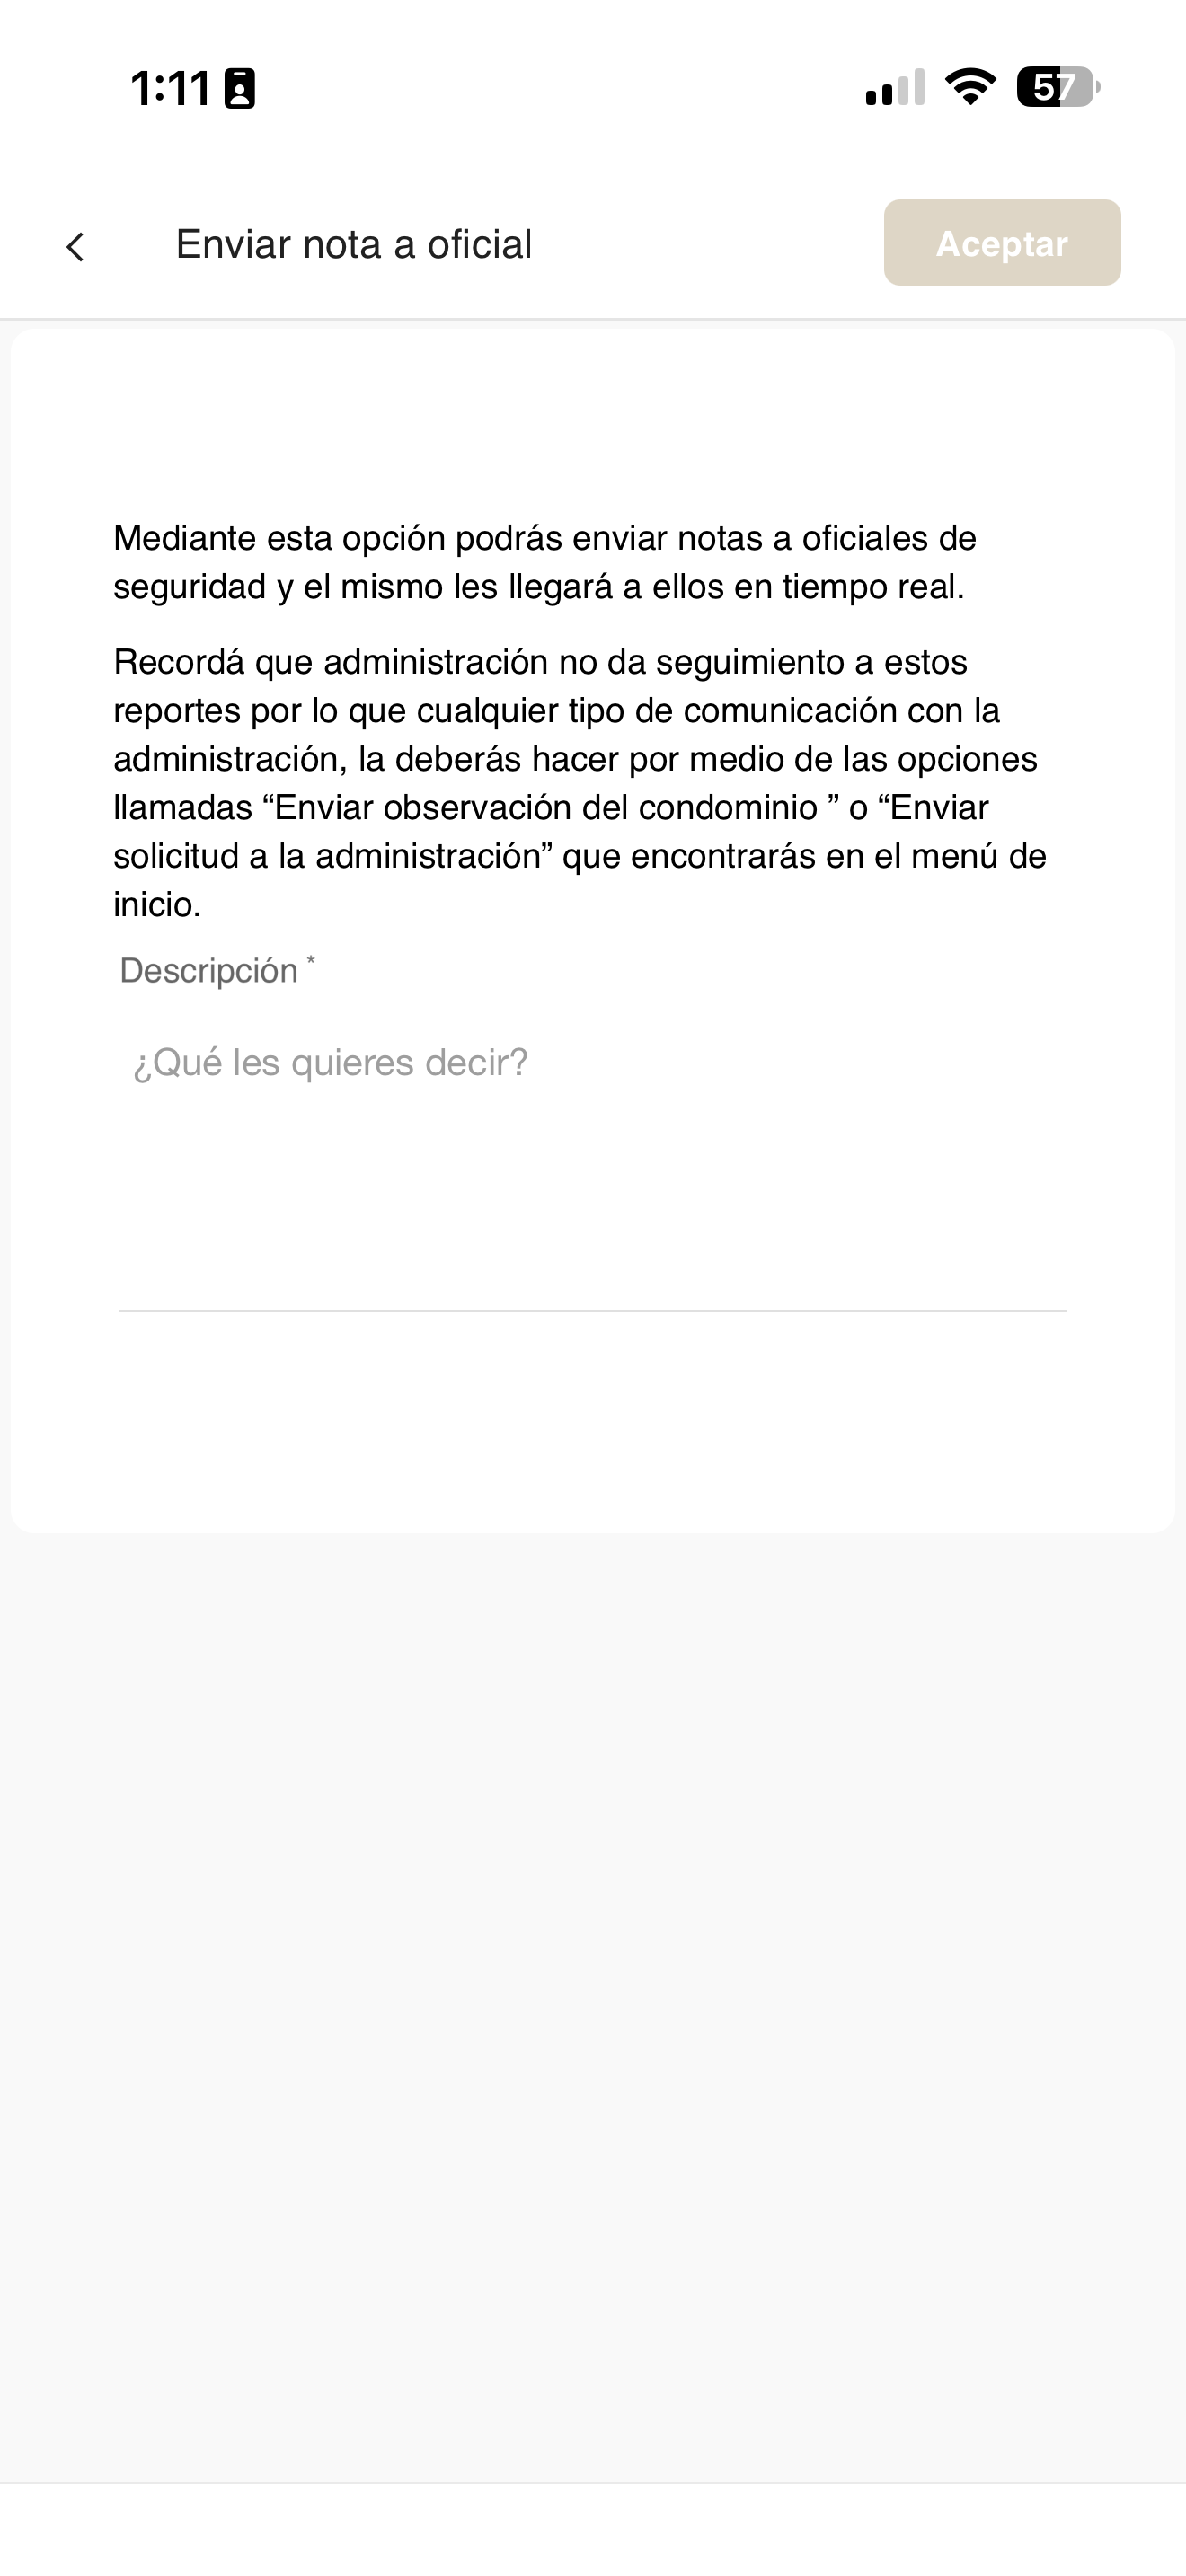
seg-notas-02-nueva.png
Report an emergency
Quickly alert security and management about an emergency in the condominium.
Go to Security
Open Security in the bottom bar and tap "Report emergency".
seg-reportar-01-menu.png
Select the type and report
Mark the type of emergency: Fire, Physical assault, Health problems, Life at risk or Other. Then press "Report Emergency". The security guards will attend to your unit immediately.
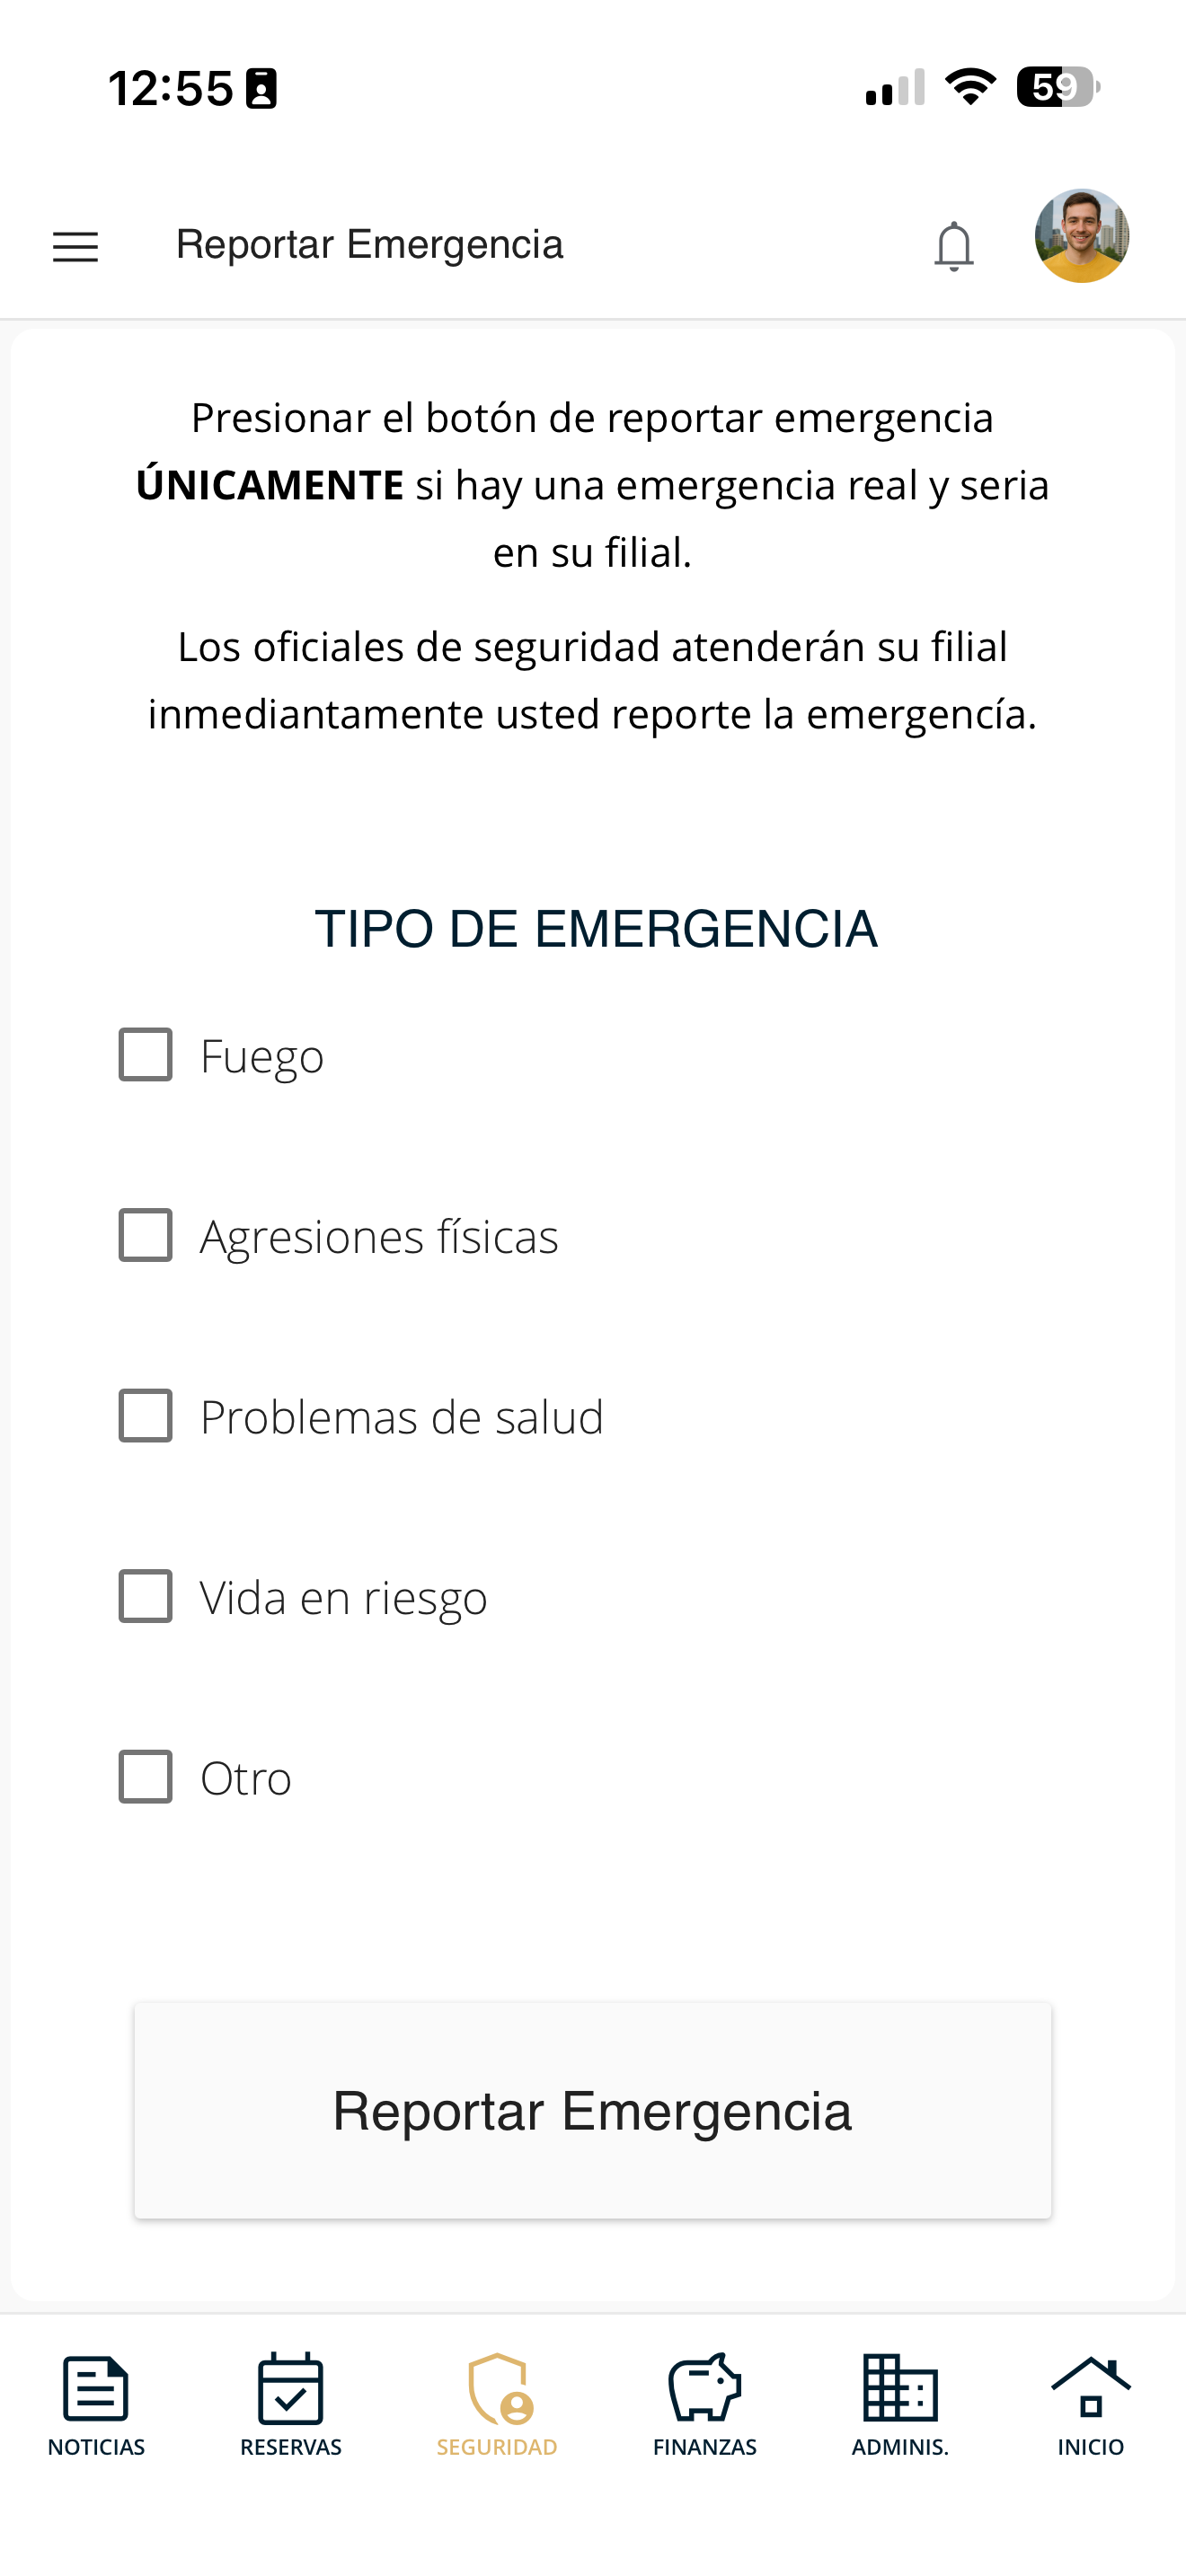
seg-emergencia-01.png
View my guests
Check the list of guests you have registered, with their information, validity period and status.
Go to Security
Open Security in the bottom bar and tap "My guests".
seg-reportar-01-menu.png
Review your guests
You will see the list of visits you have reported, with their ID, license plate, validity period and dates. At the top you can filter by type (Temporary, Permanent, Express, Vacation, Employees, School Bus, Blacklist) or use the search box.
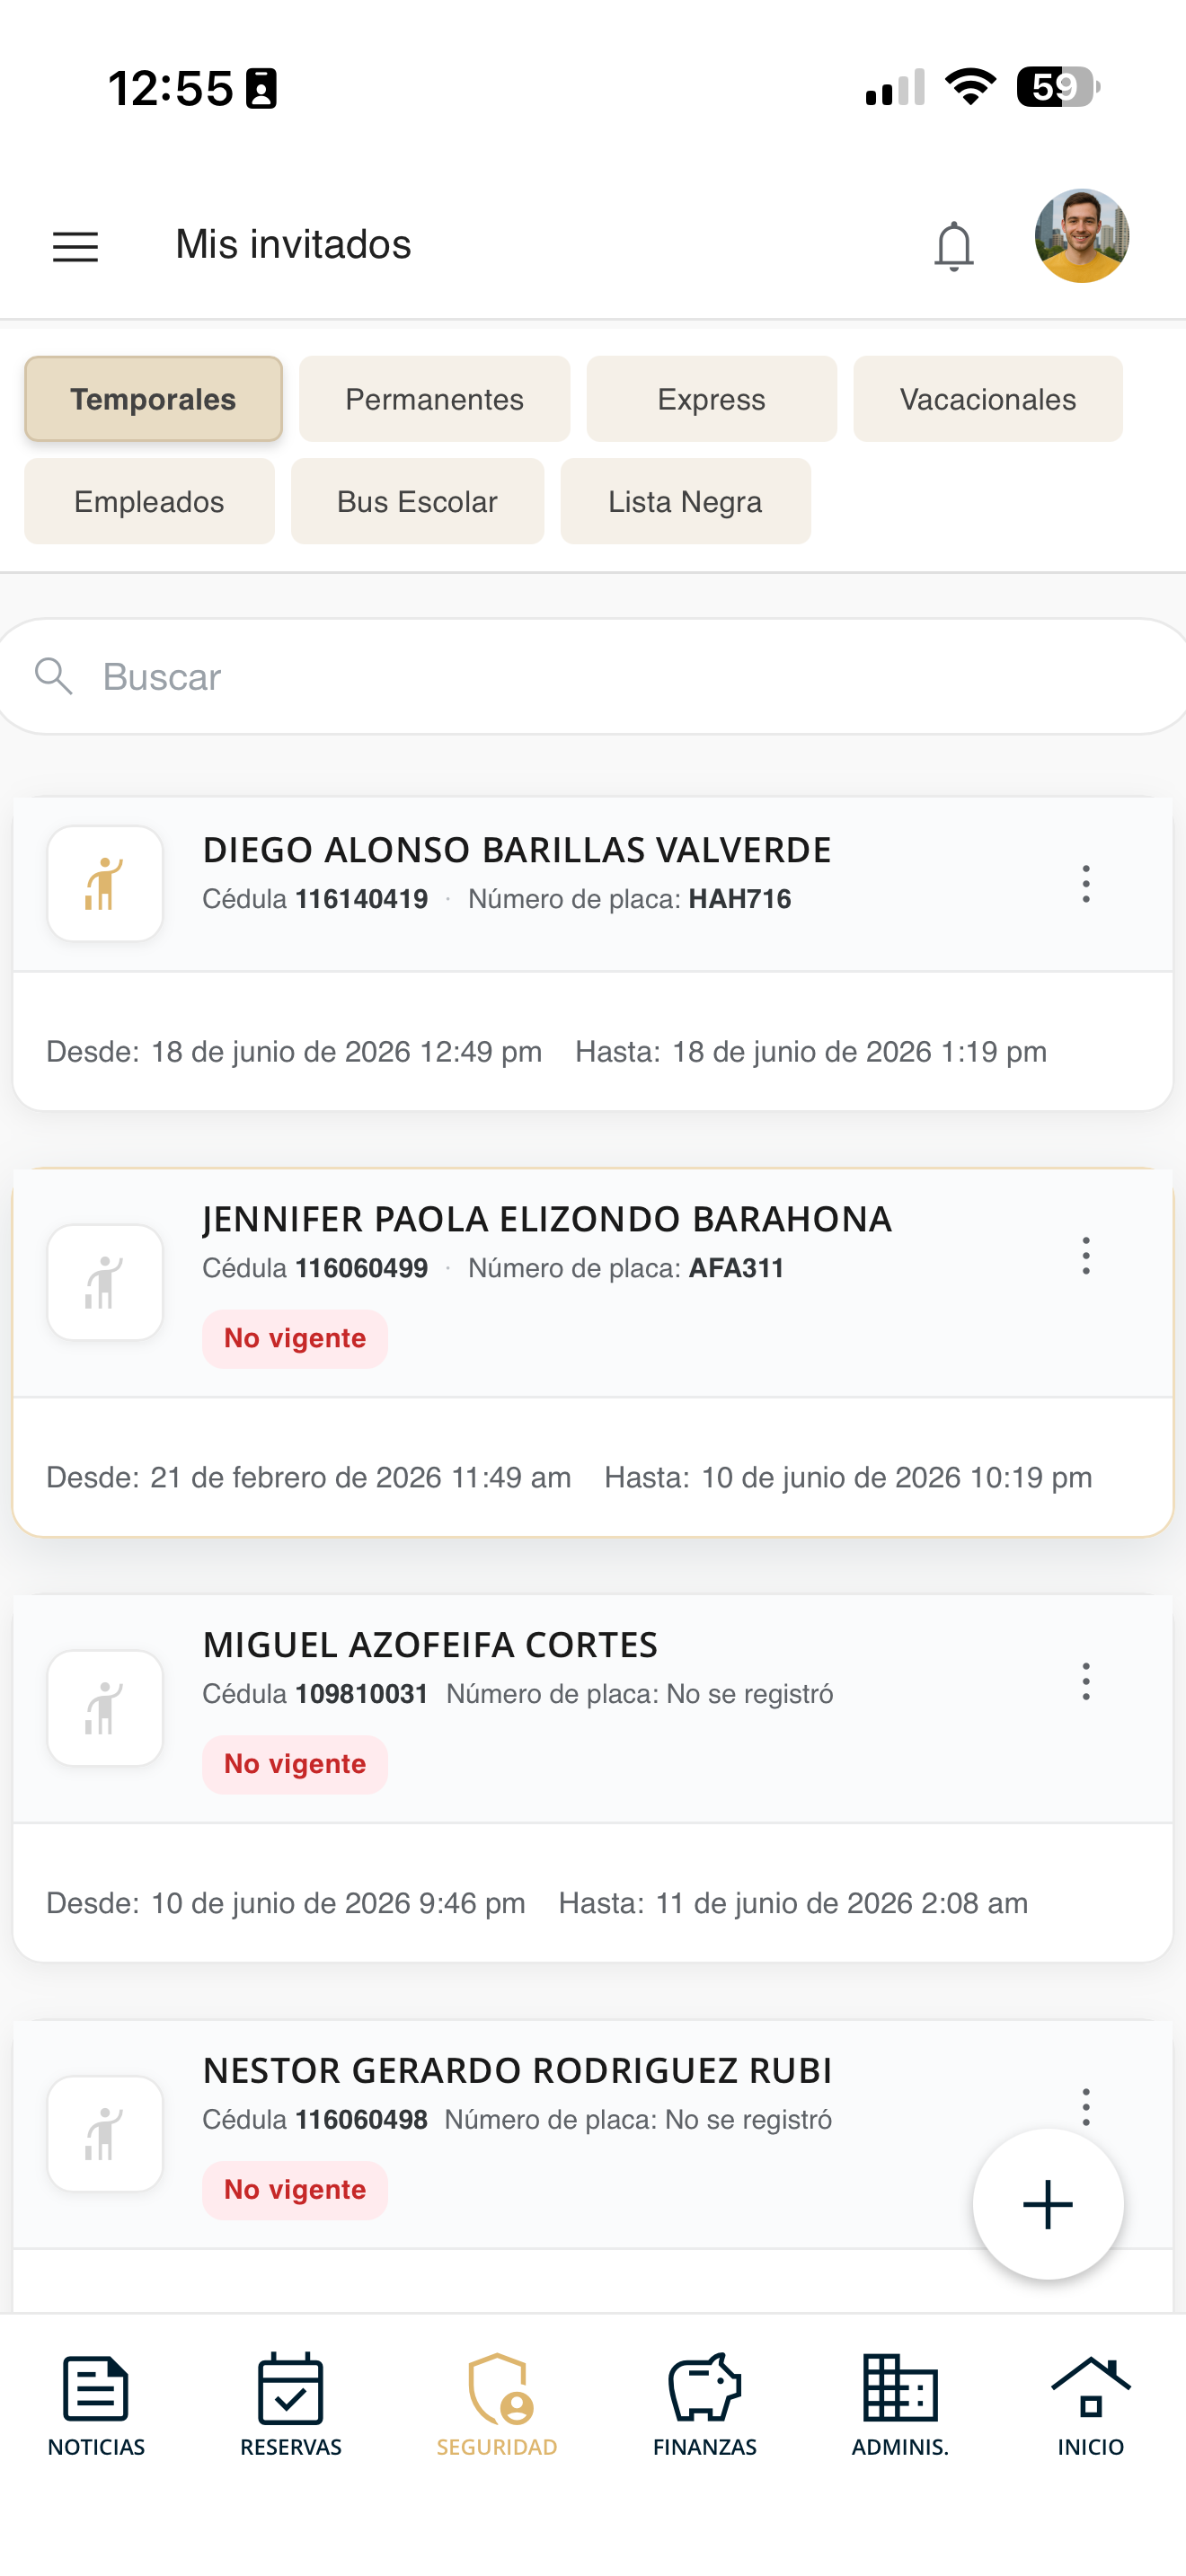
seg-mis-invitados-01.png
Edit a guest
Modify the details or validity period of an invitation you already registered.
Go to Security
Open Security in the bottom bar and tap "My guests".
seg-reportar-01-menu.png
Locate the guest
In the My guests list, find the invitation you want to modify (you can filter by type or use the search box).
seg-mis-invitados-01.png
Choose "Edit Invitation"
Tap the three dots (⋮) on the guest and select "Edit Invitation".
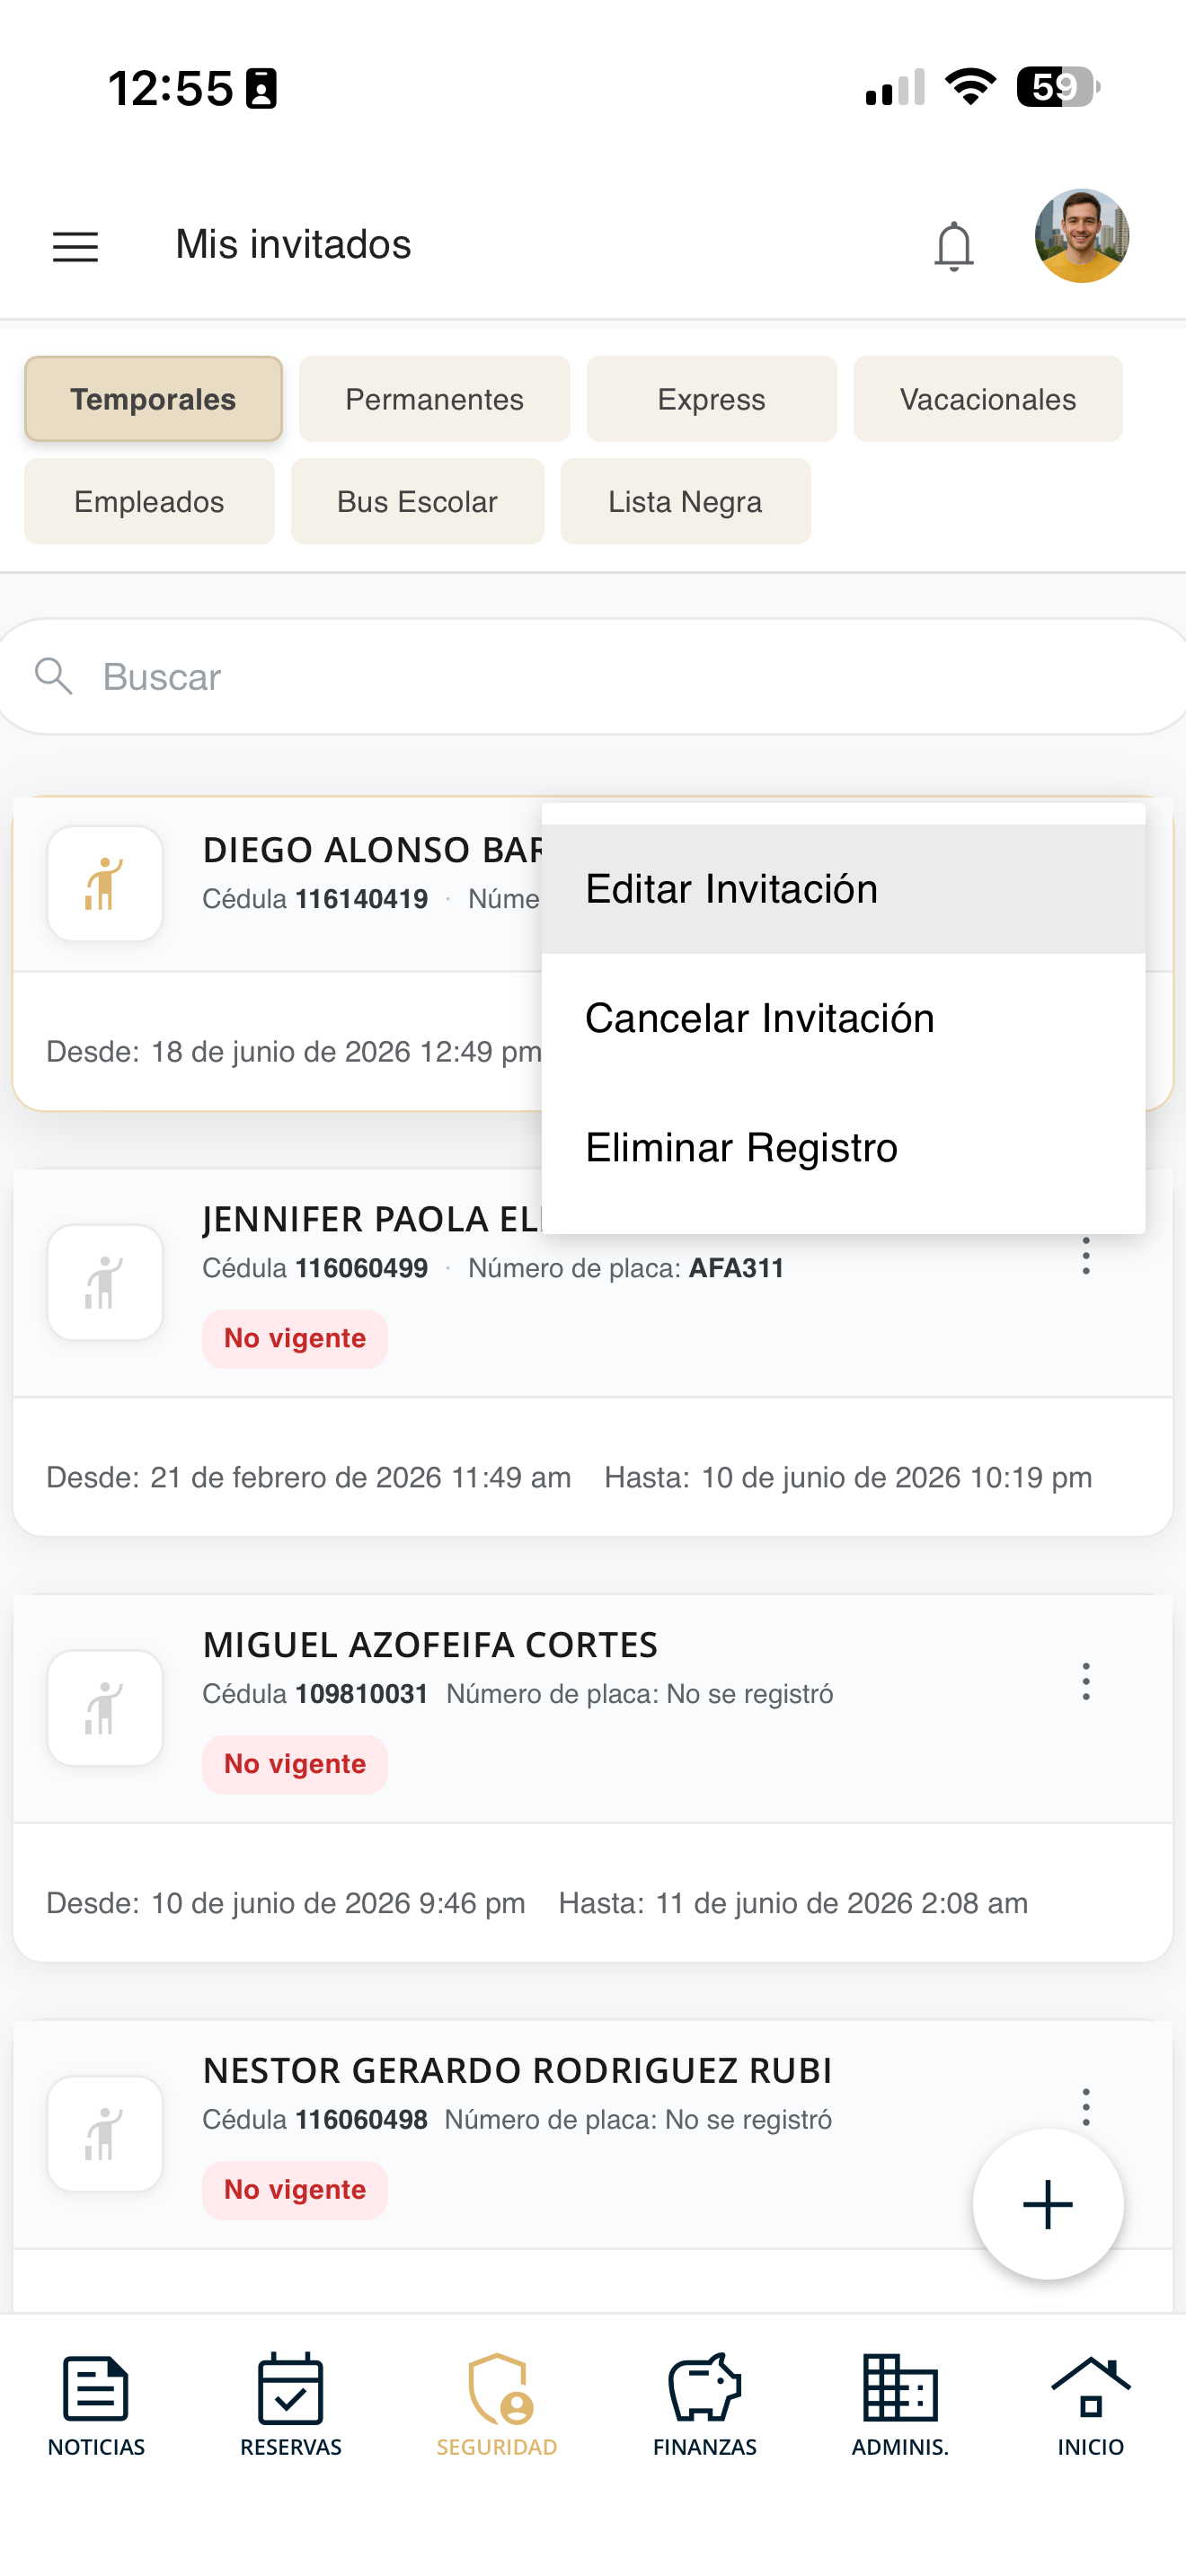
seg-mis-invitados-02-acciones.png
Edit the details
Adjust the description and the dates and times from/until which the visitor can enter. Then continue with the → arrow.

seg-editar-invitado-form.png
Confirm the changes
Review the invitation summary (type, ID, name, license plate and dates) and press "Accept" to save.

seg-editar-invitado-confirm.png
The guard will see it at the guardhouse
Once the changes are saved, the updated invitation becomes visible to the security guard in the guardhouse app. When the visitor arrives, the guard will see them with their details and validity up to date to grant entry.
Renew a guest
When an invitation becomes "Not valid" (expired), you can renew it to grant access again without registering it from scratch.
Go to Security
Open Security in the bottom bar and tap "My guests".
seg-reportar-01-menu.png
Locate the "Not valid" guest
In the list, find the guest marked as "Not valid" (their invitation has expired).

seg-renovar-01-lista.png
Choose "Renew Invitation"
Tap the three dots (⋮) on the guest and select "Renew Invitation".
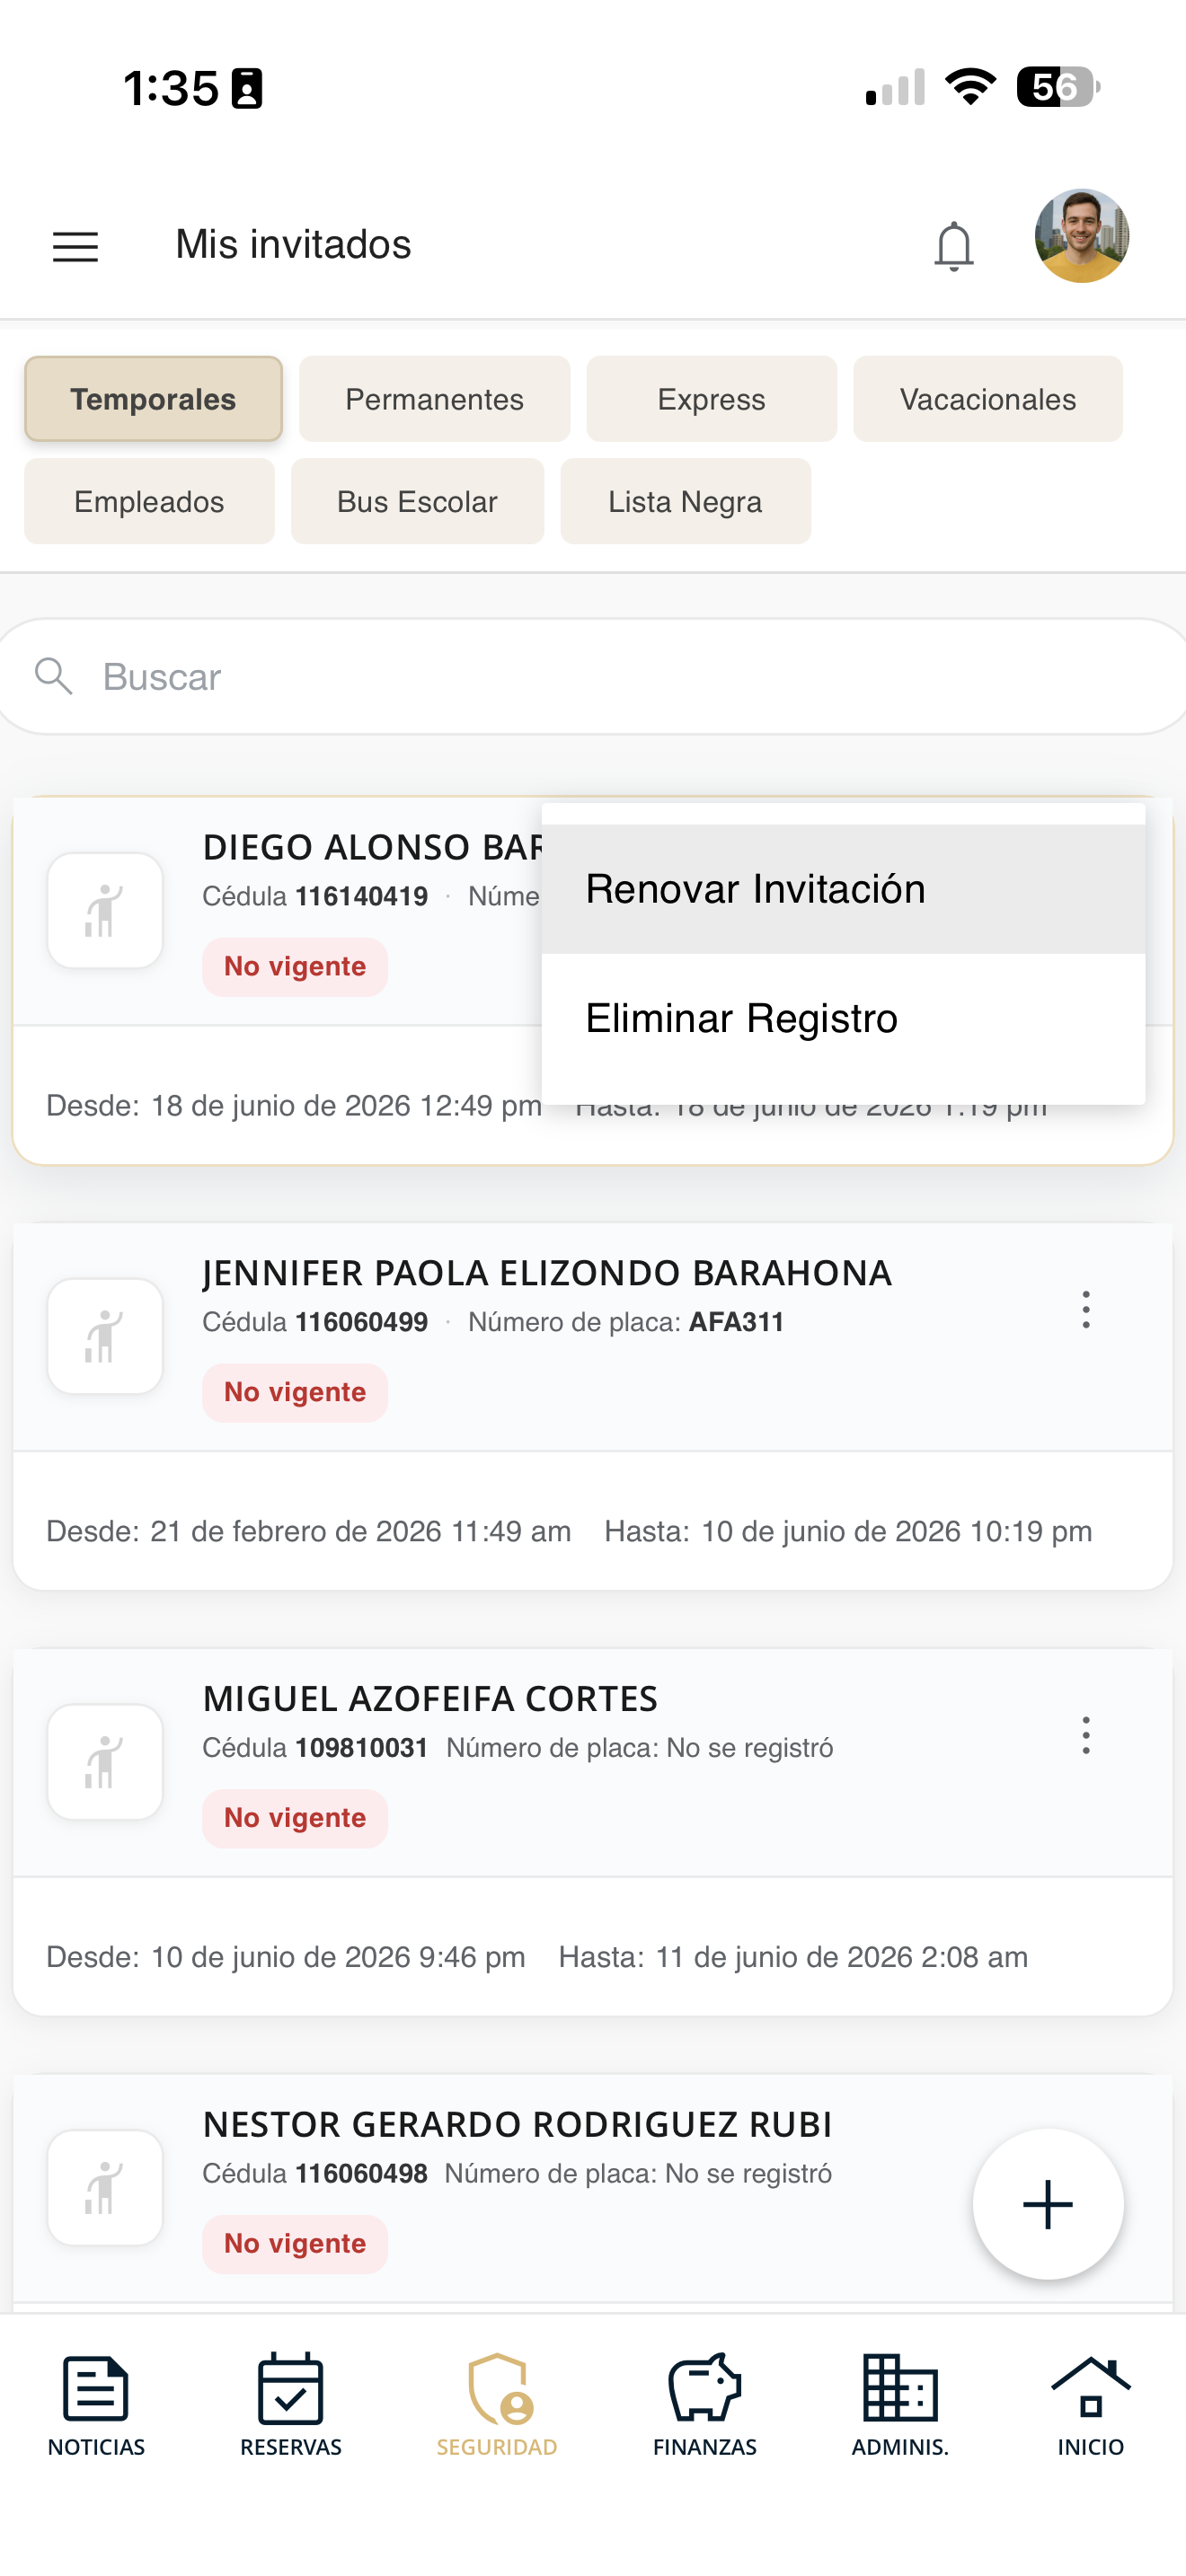
seg-renovar-02-menu.png
Set the new validity period
Adjust the new dates and times when the guest can enter and confirm. The invitation will become valid again.
seg-editar-invitado-form.png
The guard will see it at the guardhouse
With the invitation renewed and valid again, the guest reappears for the security guard in the guardhouse app. On arrival, the guard will see them as an authorized visitor and can grant entry.
Delete a guest
Delete an invitation you no longer need from your list.
Go to Security
Open Security in the bottom bar and tap "My guests".
seg-reportar-01-menu.png
Locate the guest
In the My guests list, find the invitation you want to delete.
seg-mis-invitados-01.png
Choose "Delete Record"
Tap the three dots (⋮) on the guest and select "Delete Record". (You can also use "Cancel Invitation" if you only want to void it.)
seg-mis-invitados-02-acciones.png
Confirm the deletion
Confirm when the app asks you. The invitation will disappear from your list.
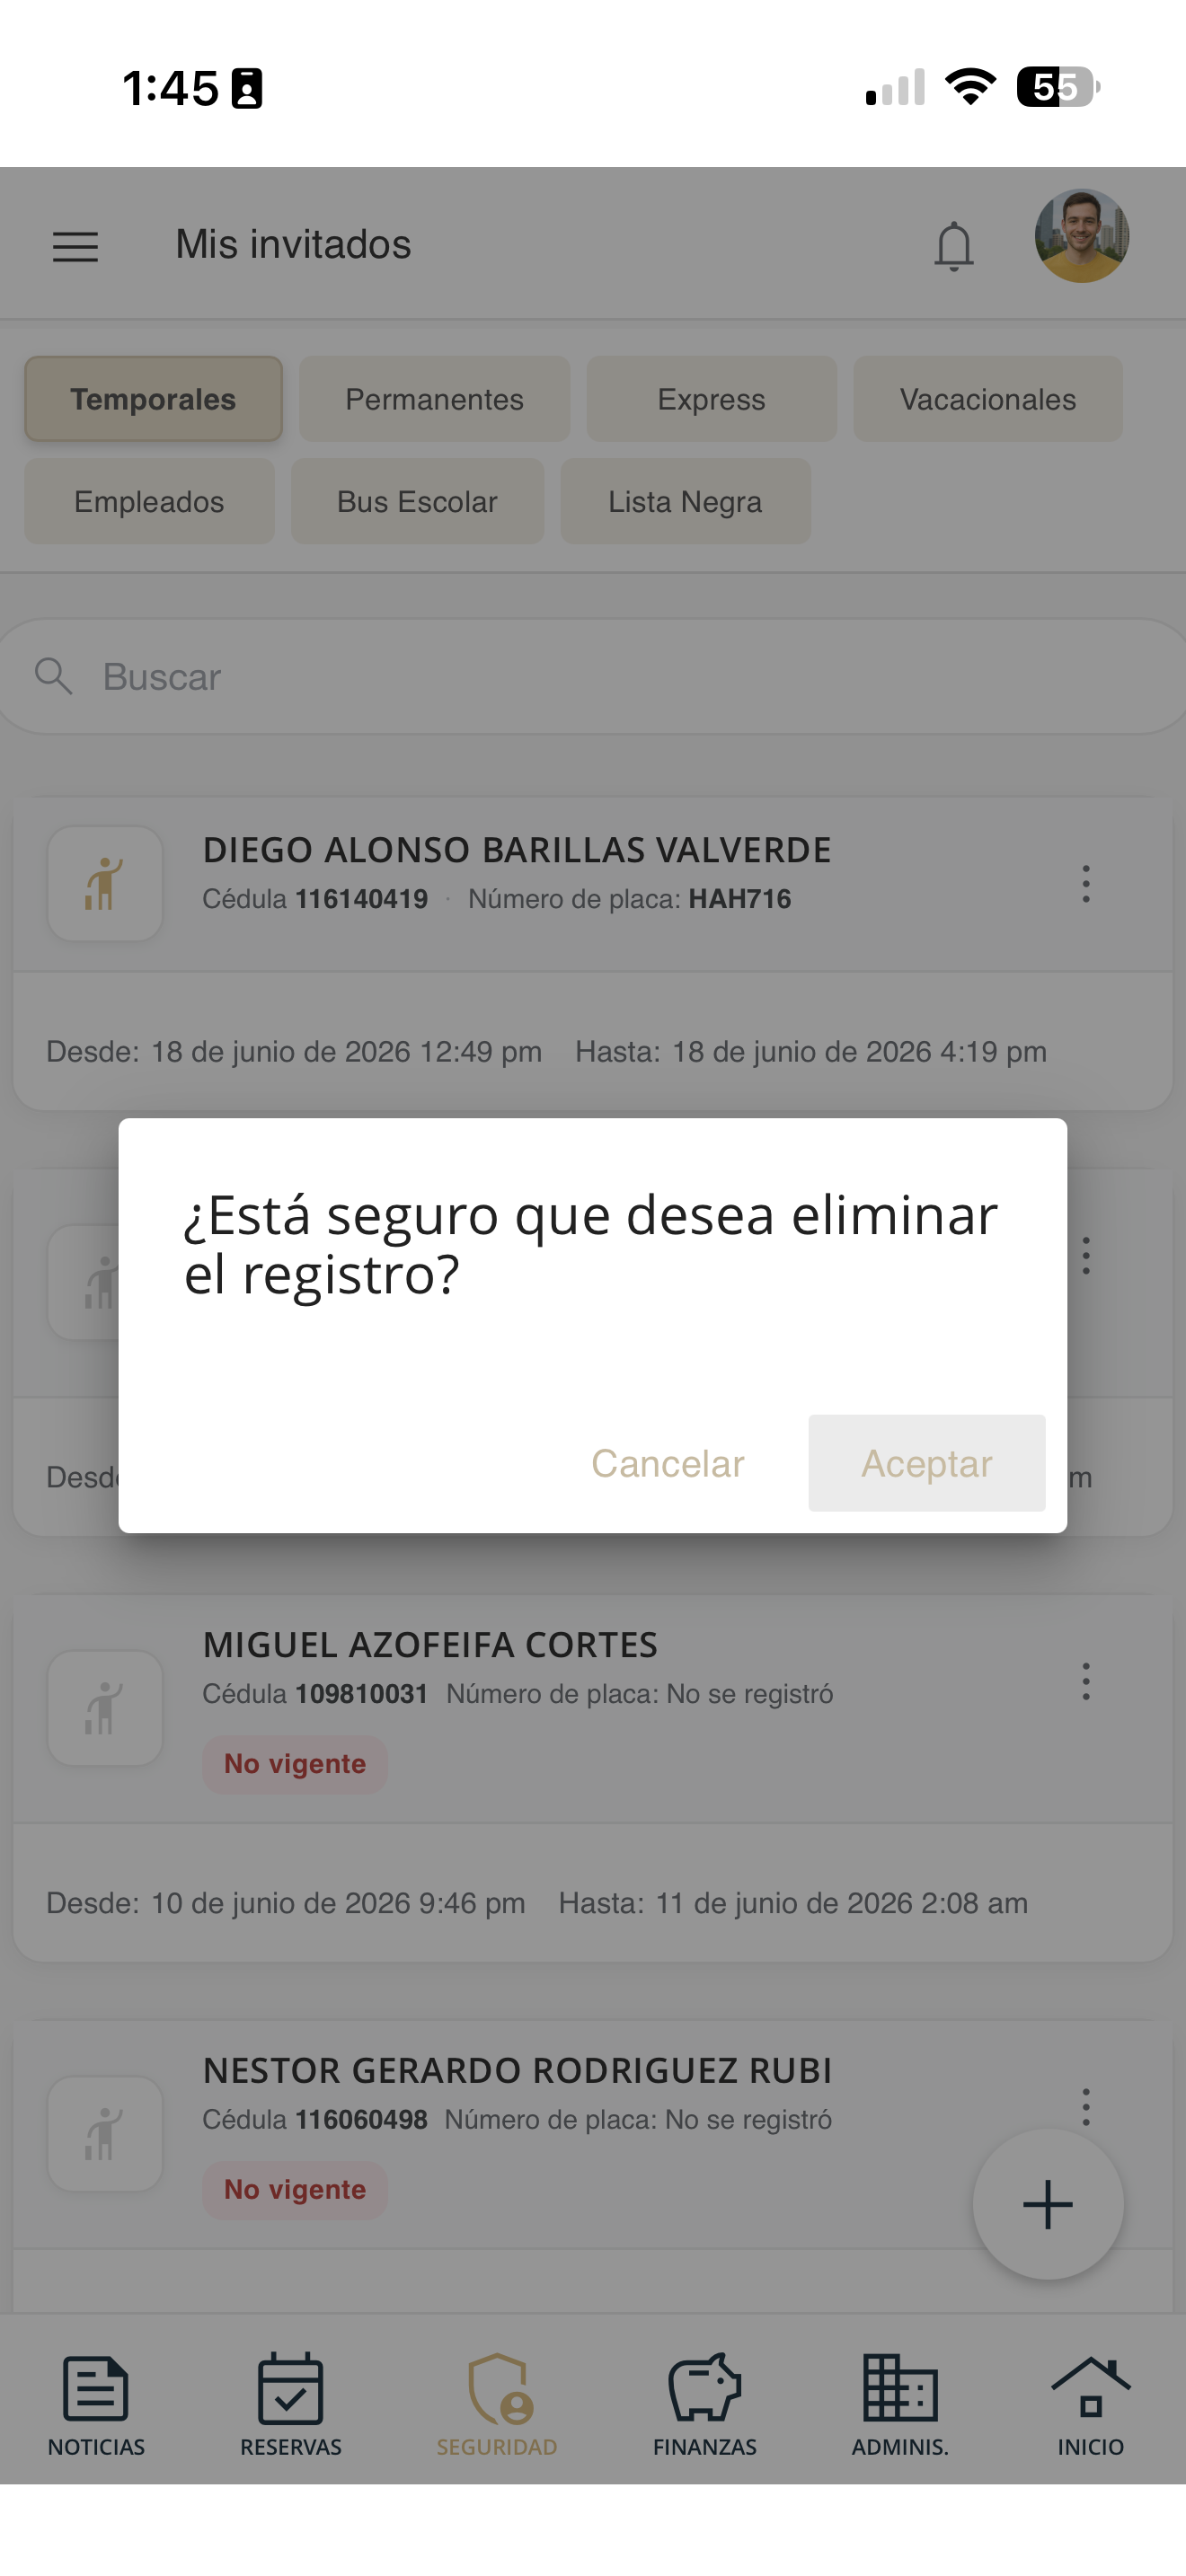
seg-eliminar-invitado-confirm.png
Visit log
Review the history of visitors who have entered your unit.
Go to Security
Open Security in the bottom bar and tap "Visitors".
seg-reportar-01-menu.png
Review the history
You will see the entry history for your unit: each visitor with their type, entry/exit notes, date and time (or "Has not left yet").
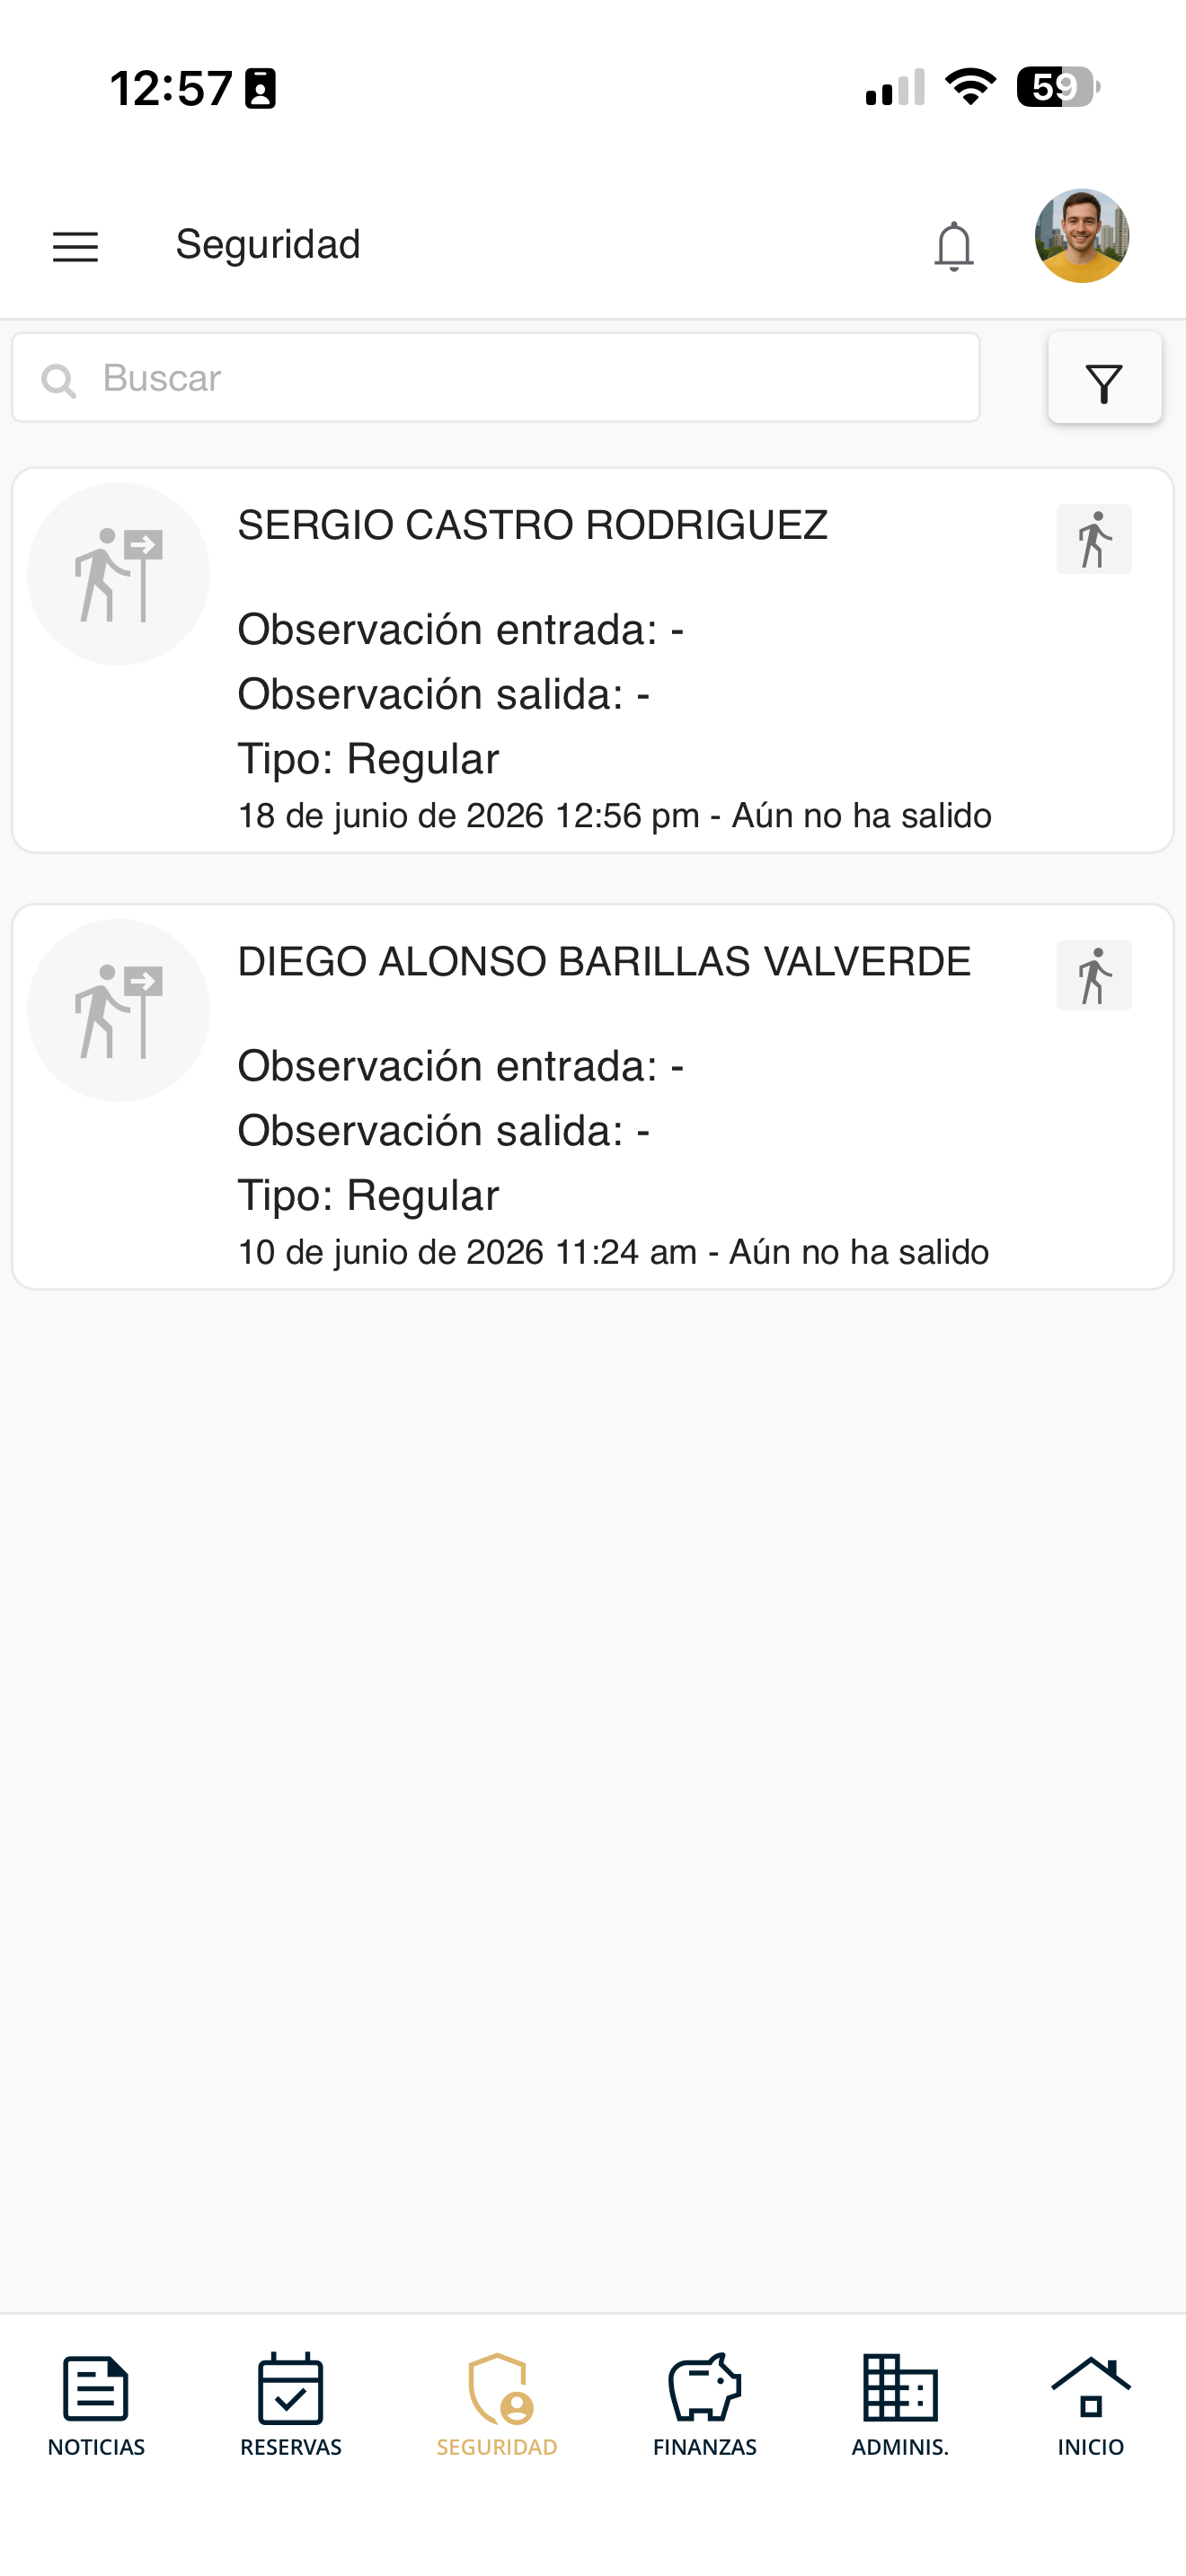
seg-visitantes-01.png
Security keys
Check or set up your security key, used to verify your identity with the guardhouse.
Go to Security
Open Security in the bottom bar and tap "Security keys".
seg-reportar-01-menu.png
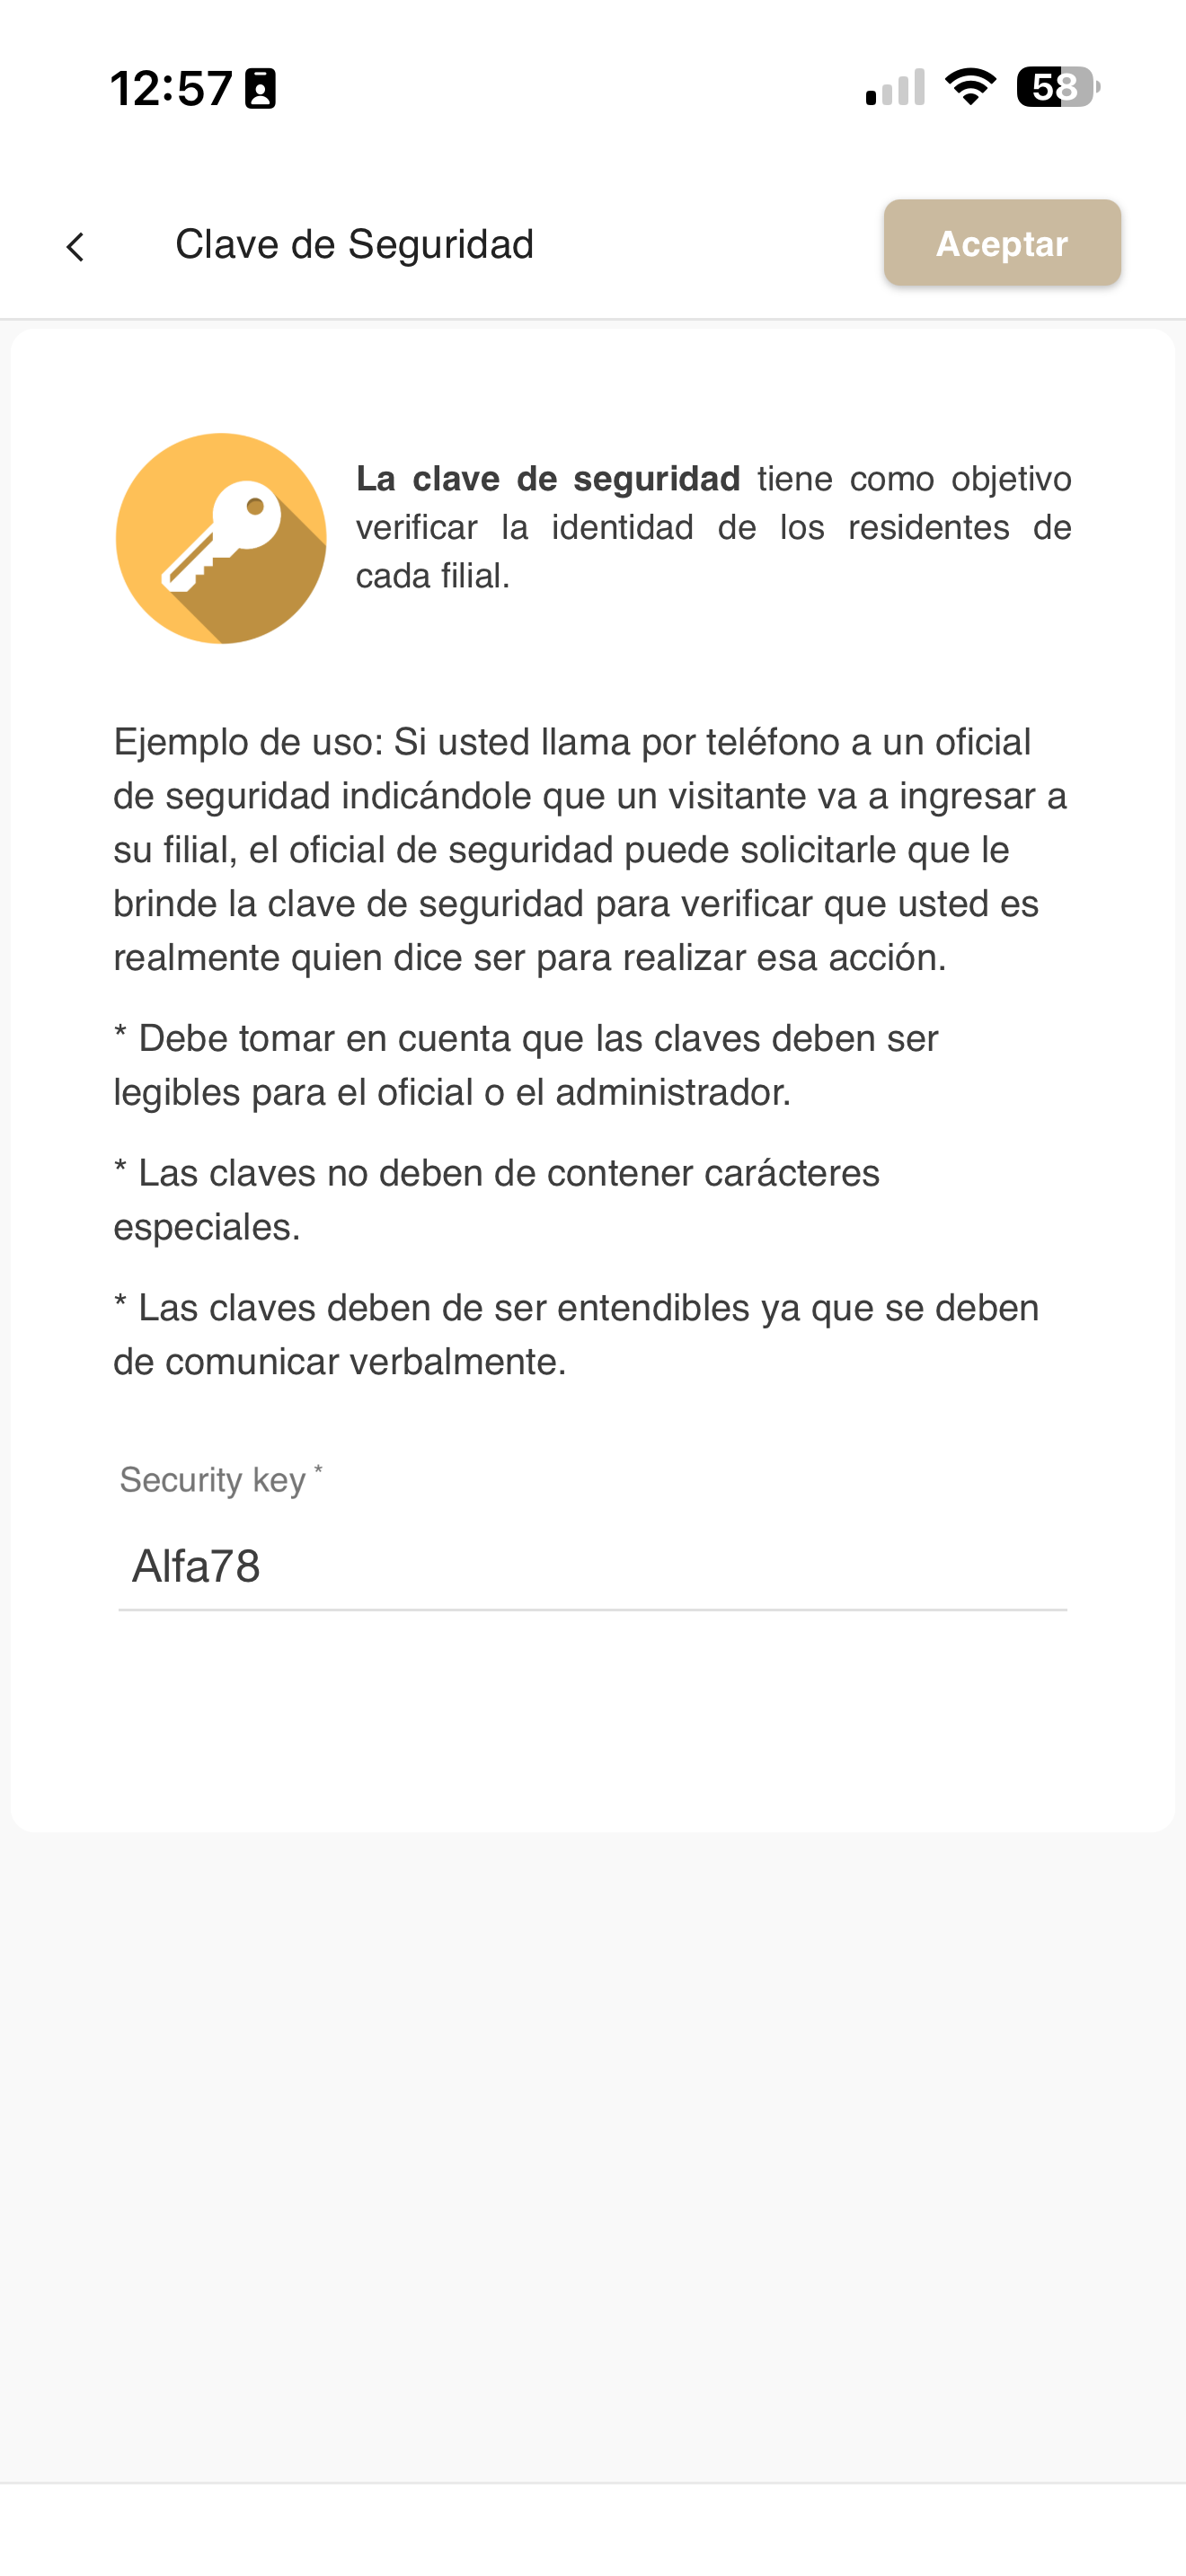
Set your key
You will see the explanation and the "Security key" field where you set your key. Type it and press "Accept". It must be legible, without special characters and easy to say out loud.
seg-claves-01.png
Use it with the guardhouse
It is used to verify your identity: for example, if you call the guard to authorize an entry, they may ask for your key to confirm it is you. Keep it private and share it only when necessary.
seg-claves-01.png
My account statement
Check your unit's balance and the outstanding amounts by category.
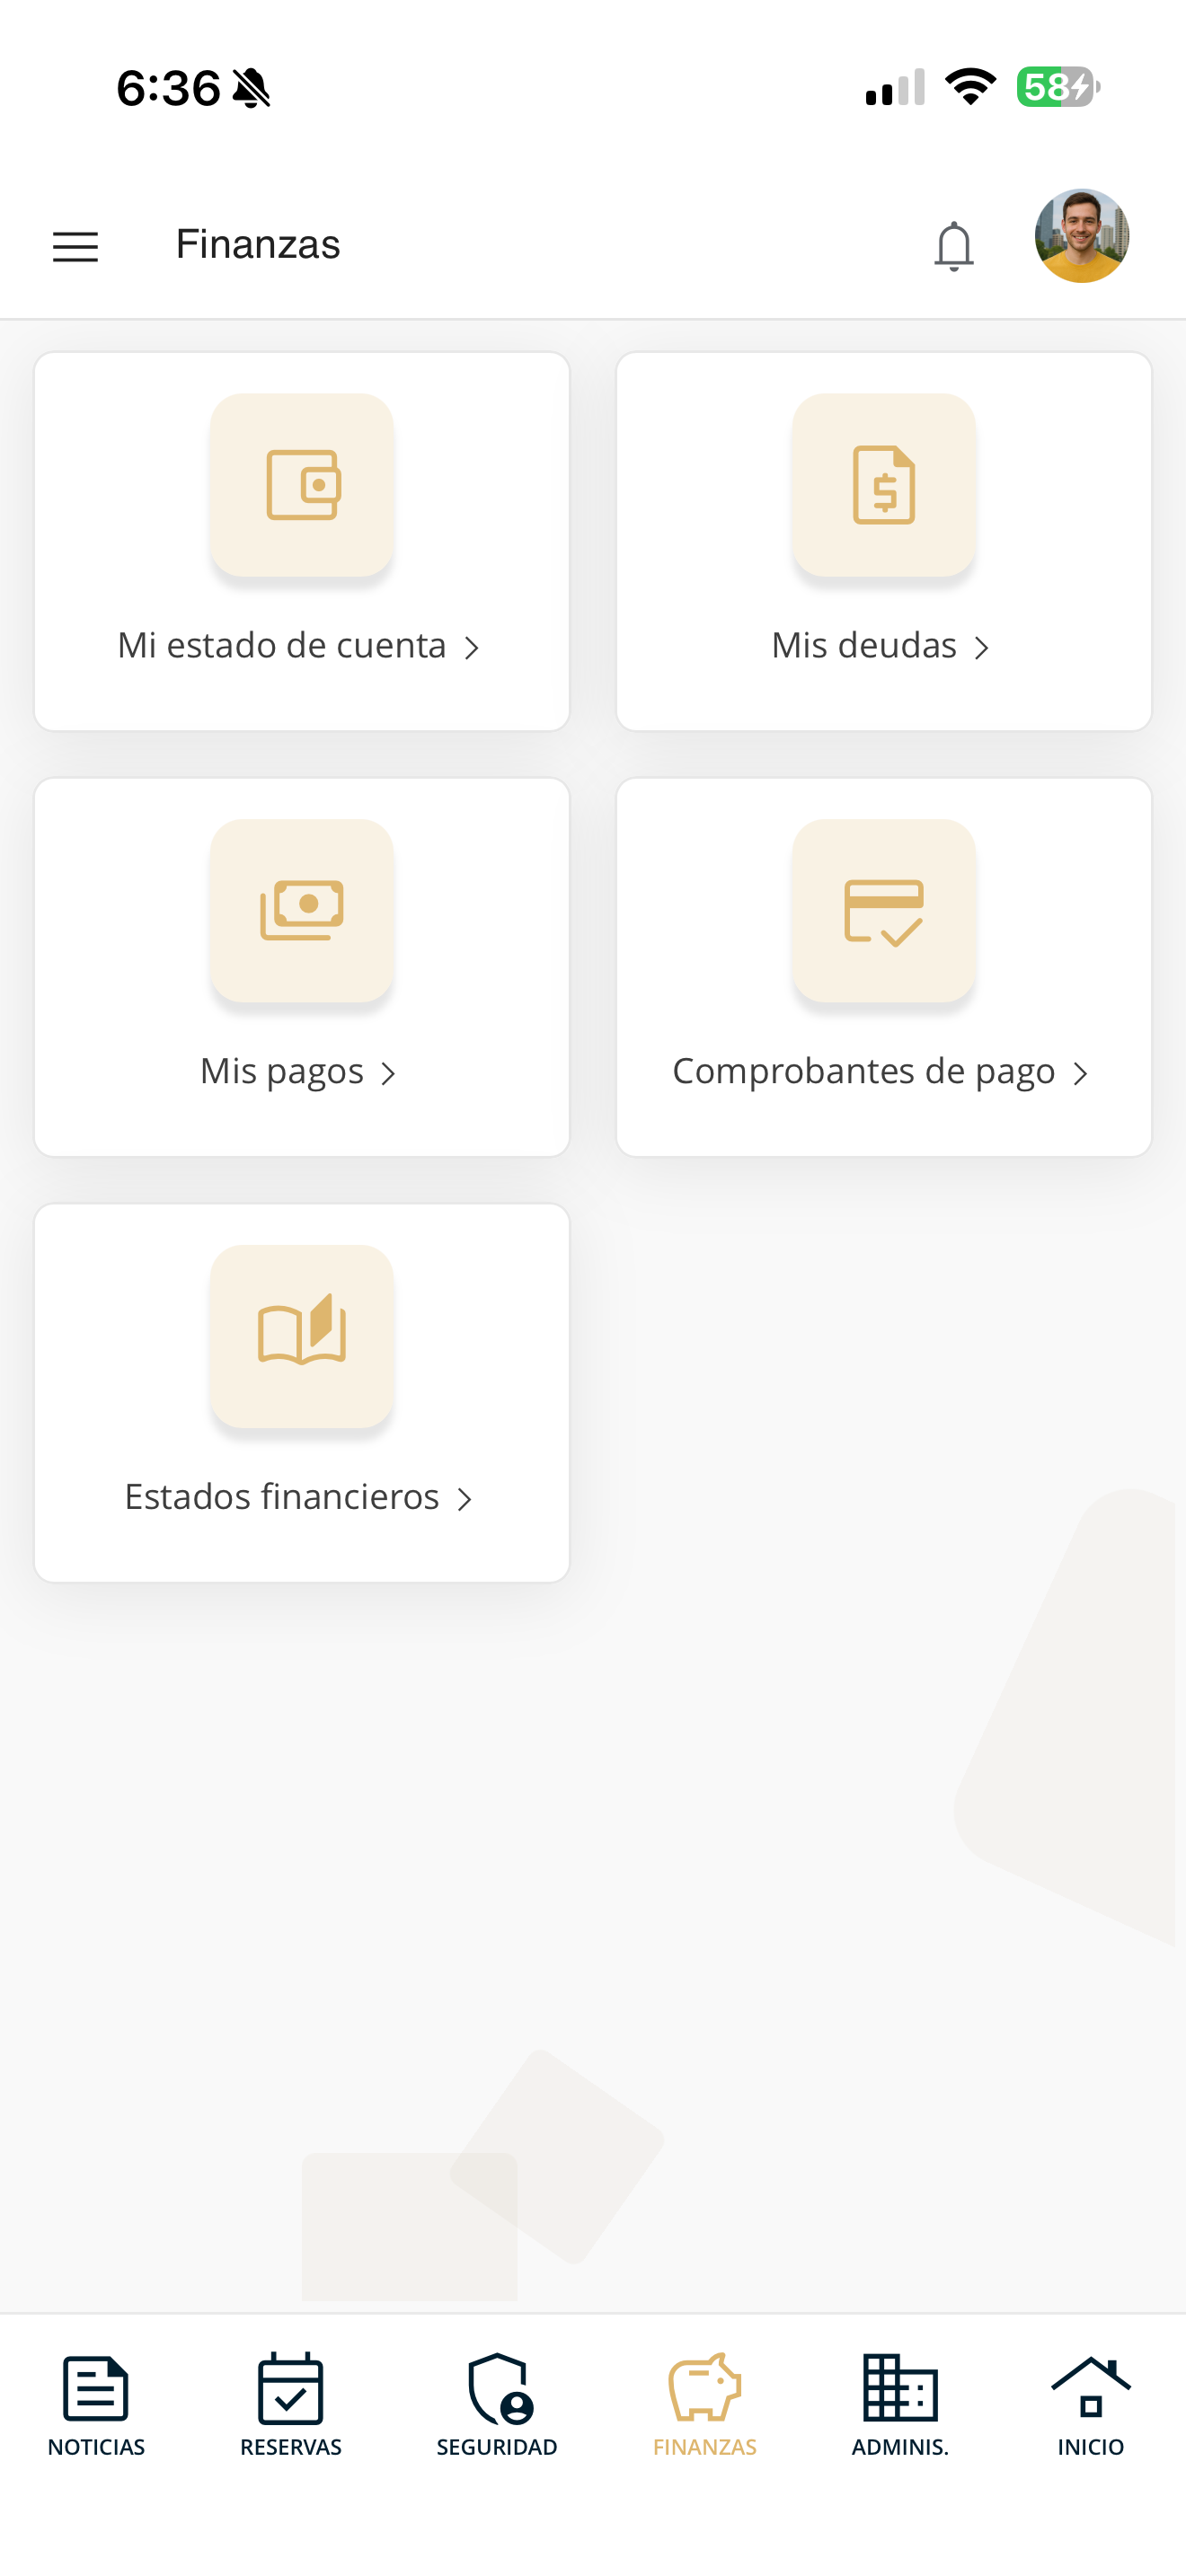
Go to Finances
Open Finances in the bottom bar and tap "View my account statement".
fin-menu.png
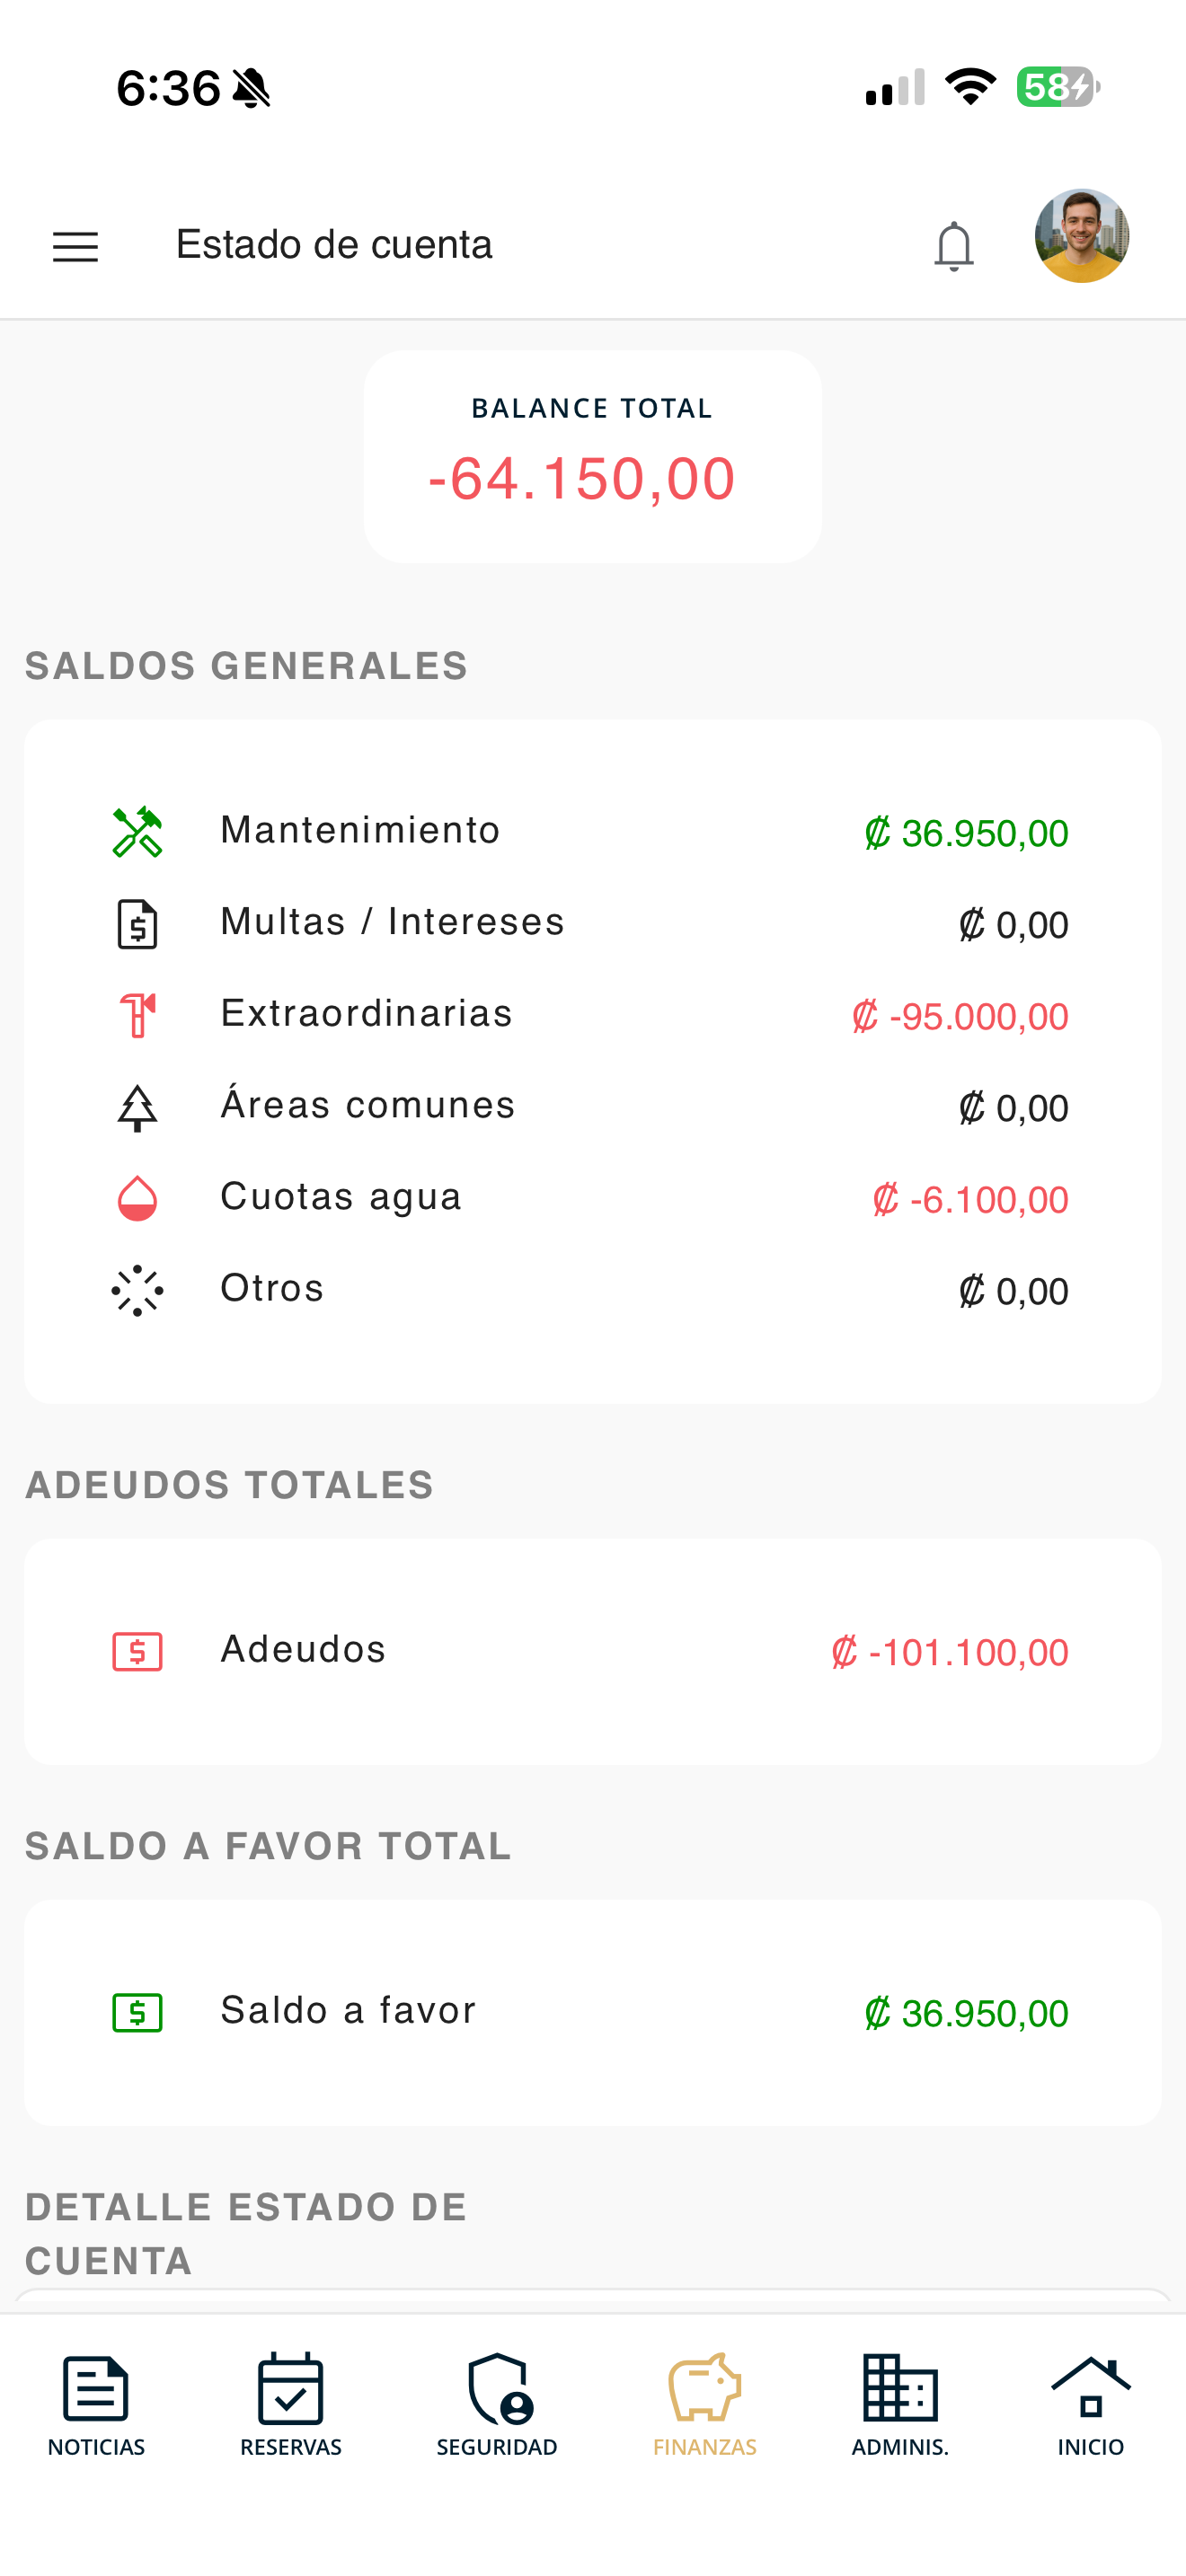
Review your account statement
You will see your unit's Total balance and, under General balances, the breakdown by item: Maintenance, Fines / Interest, Extraordinary, Common areas, Water fees and Others. The Total amounts due and the Credit balance are also shown.
fin-estado-01.png
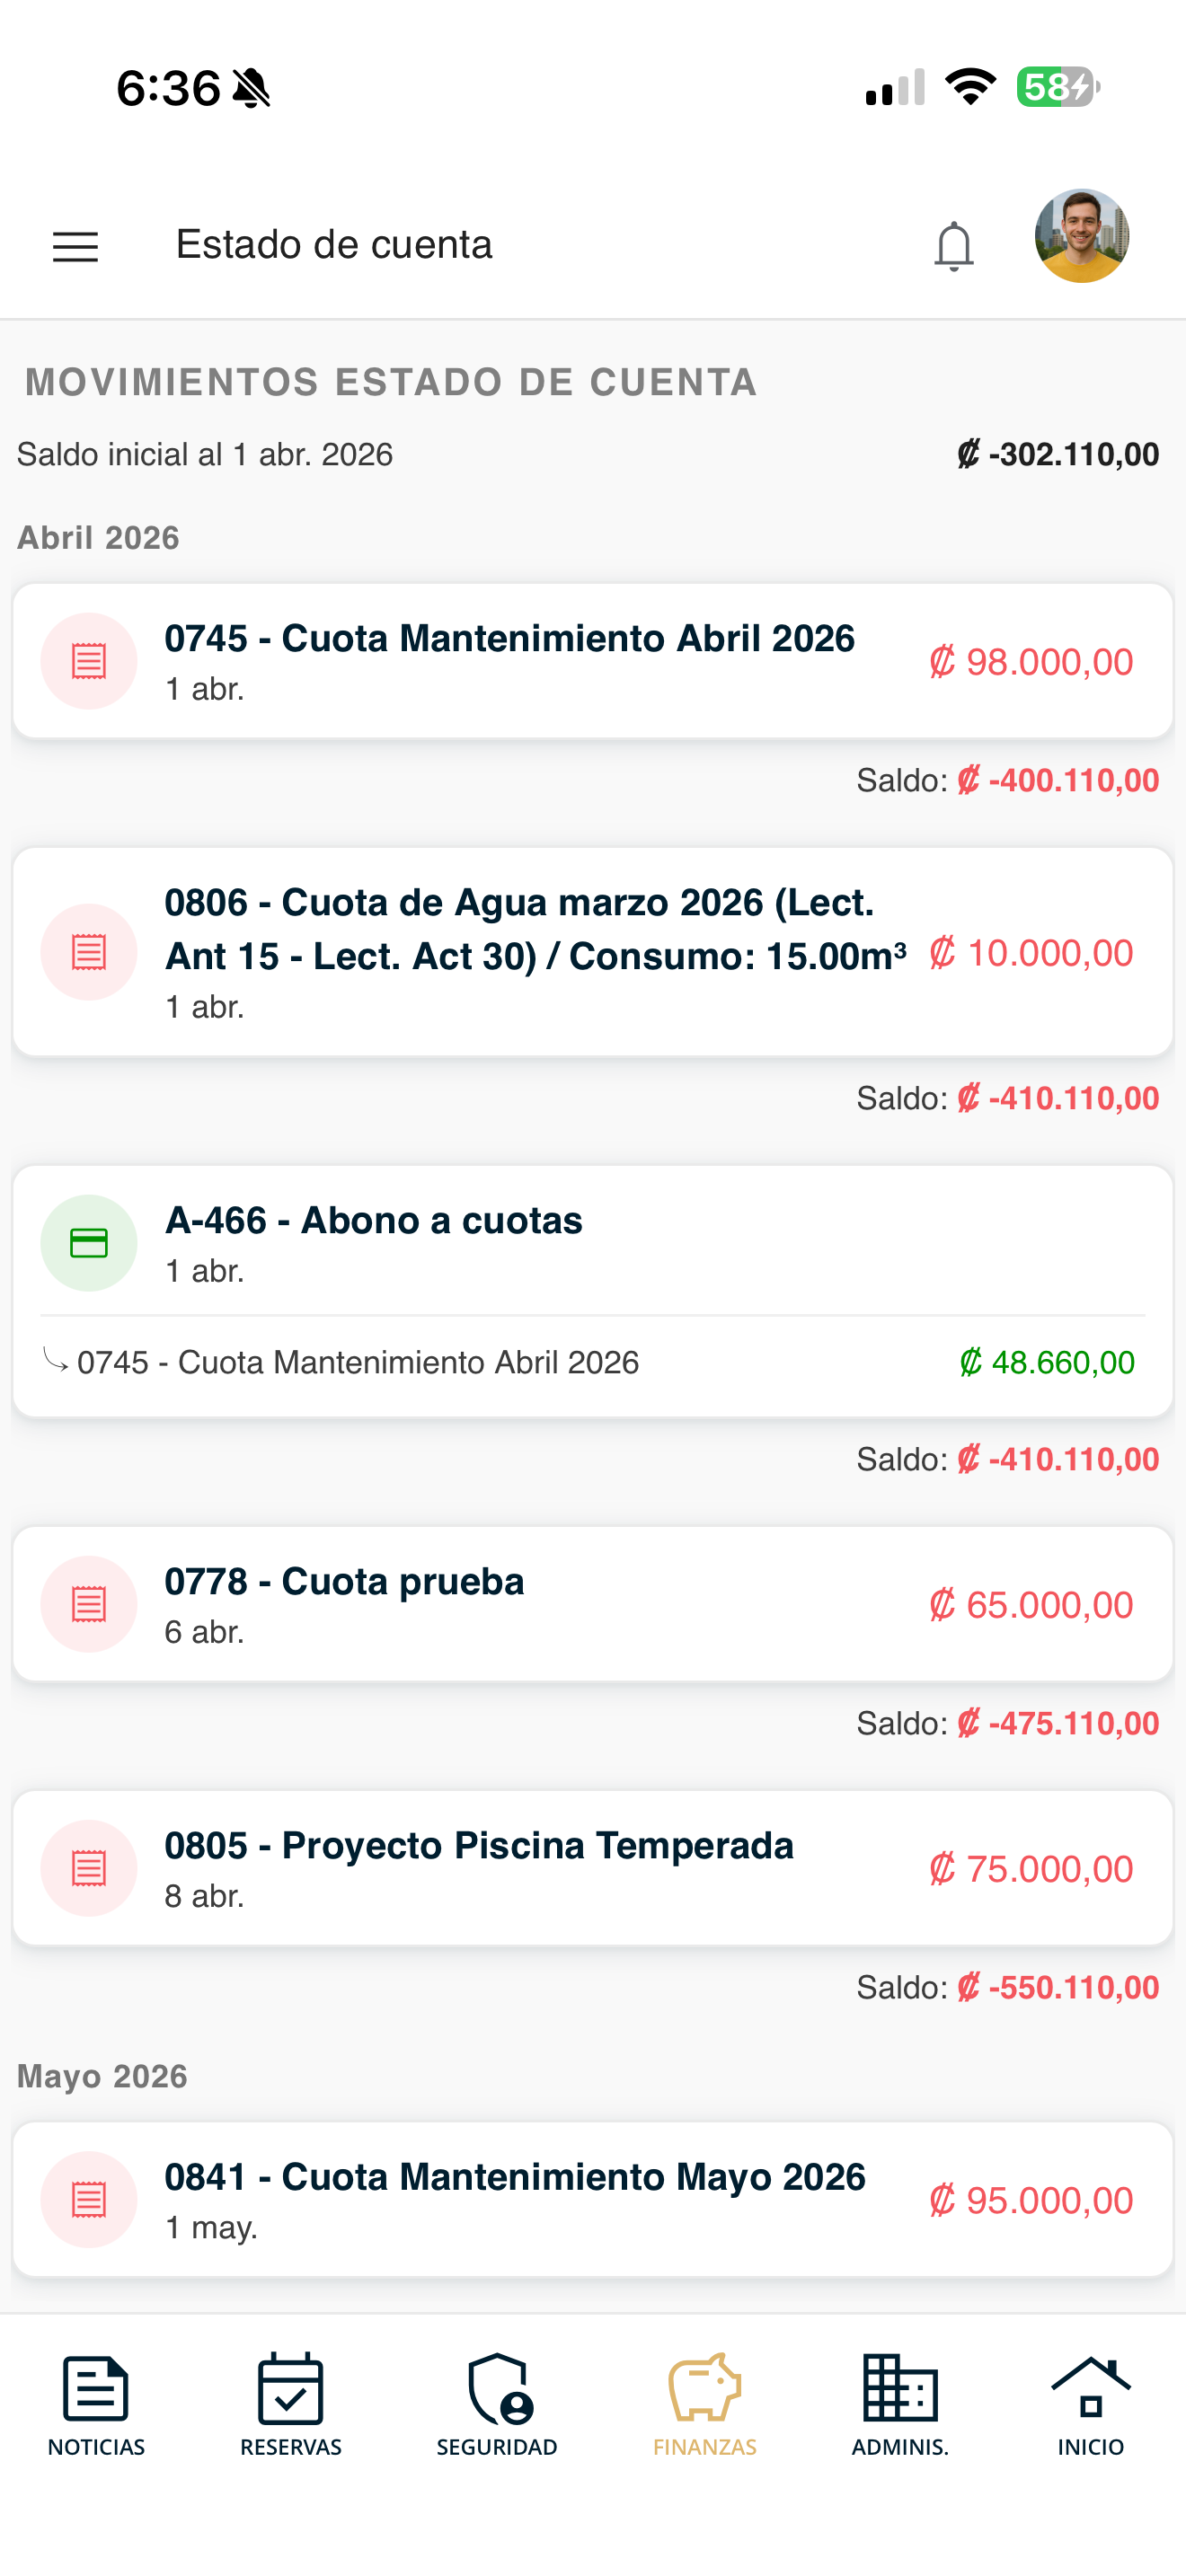
Review the transactions
Further down, under Account statement transactions, you see the chronological detail: each fee or charge (maintenance, water, extraordinary, payments, etc.) with its amount and the accumulated balance by date.
fin-estado-02-movimientos.png
My debts
Review the fees and charges pending payment for your unit.
Go to Finances
Open Finances in the bottom bar and tap "View my debts".
fin-menu.png
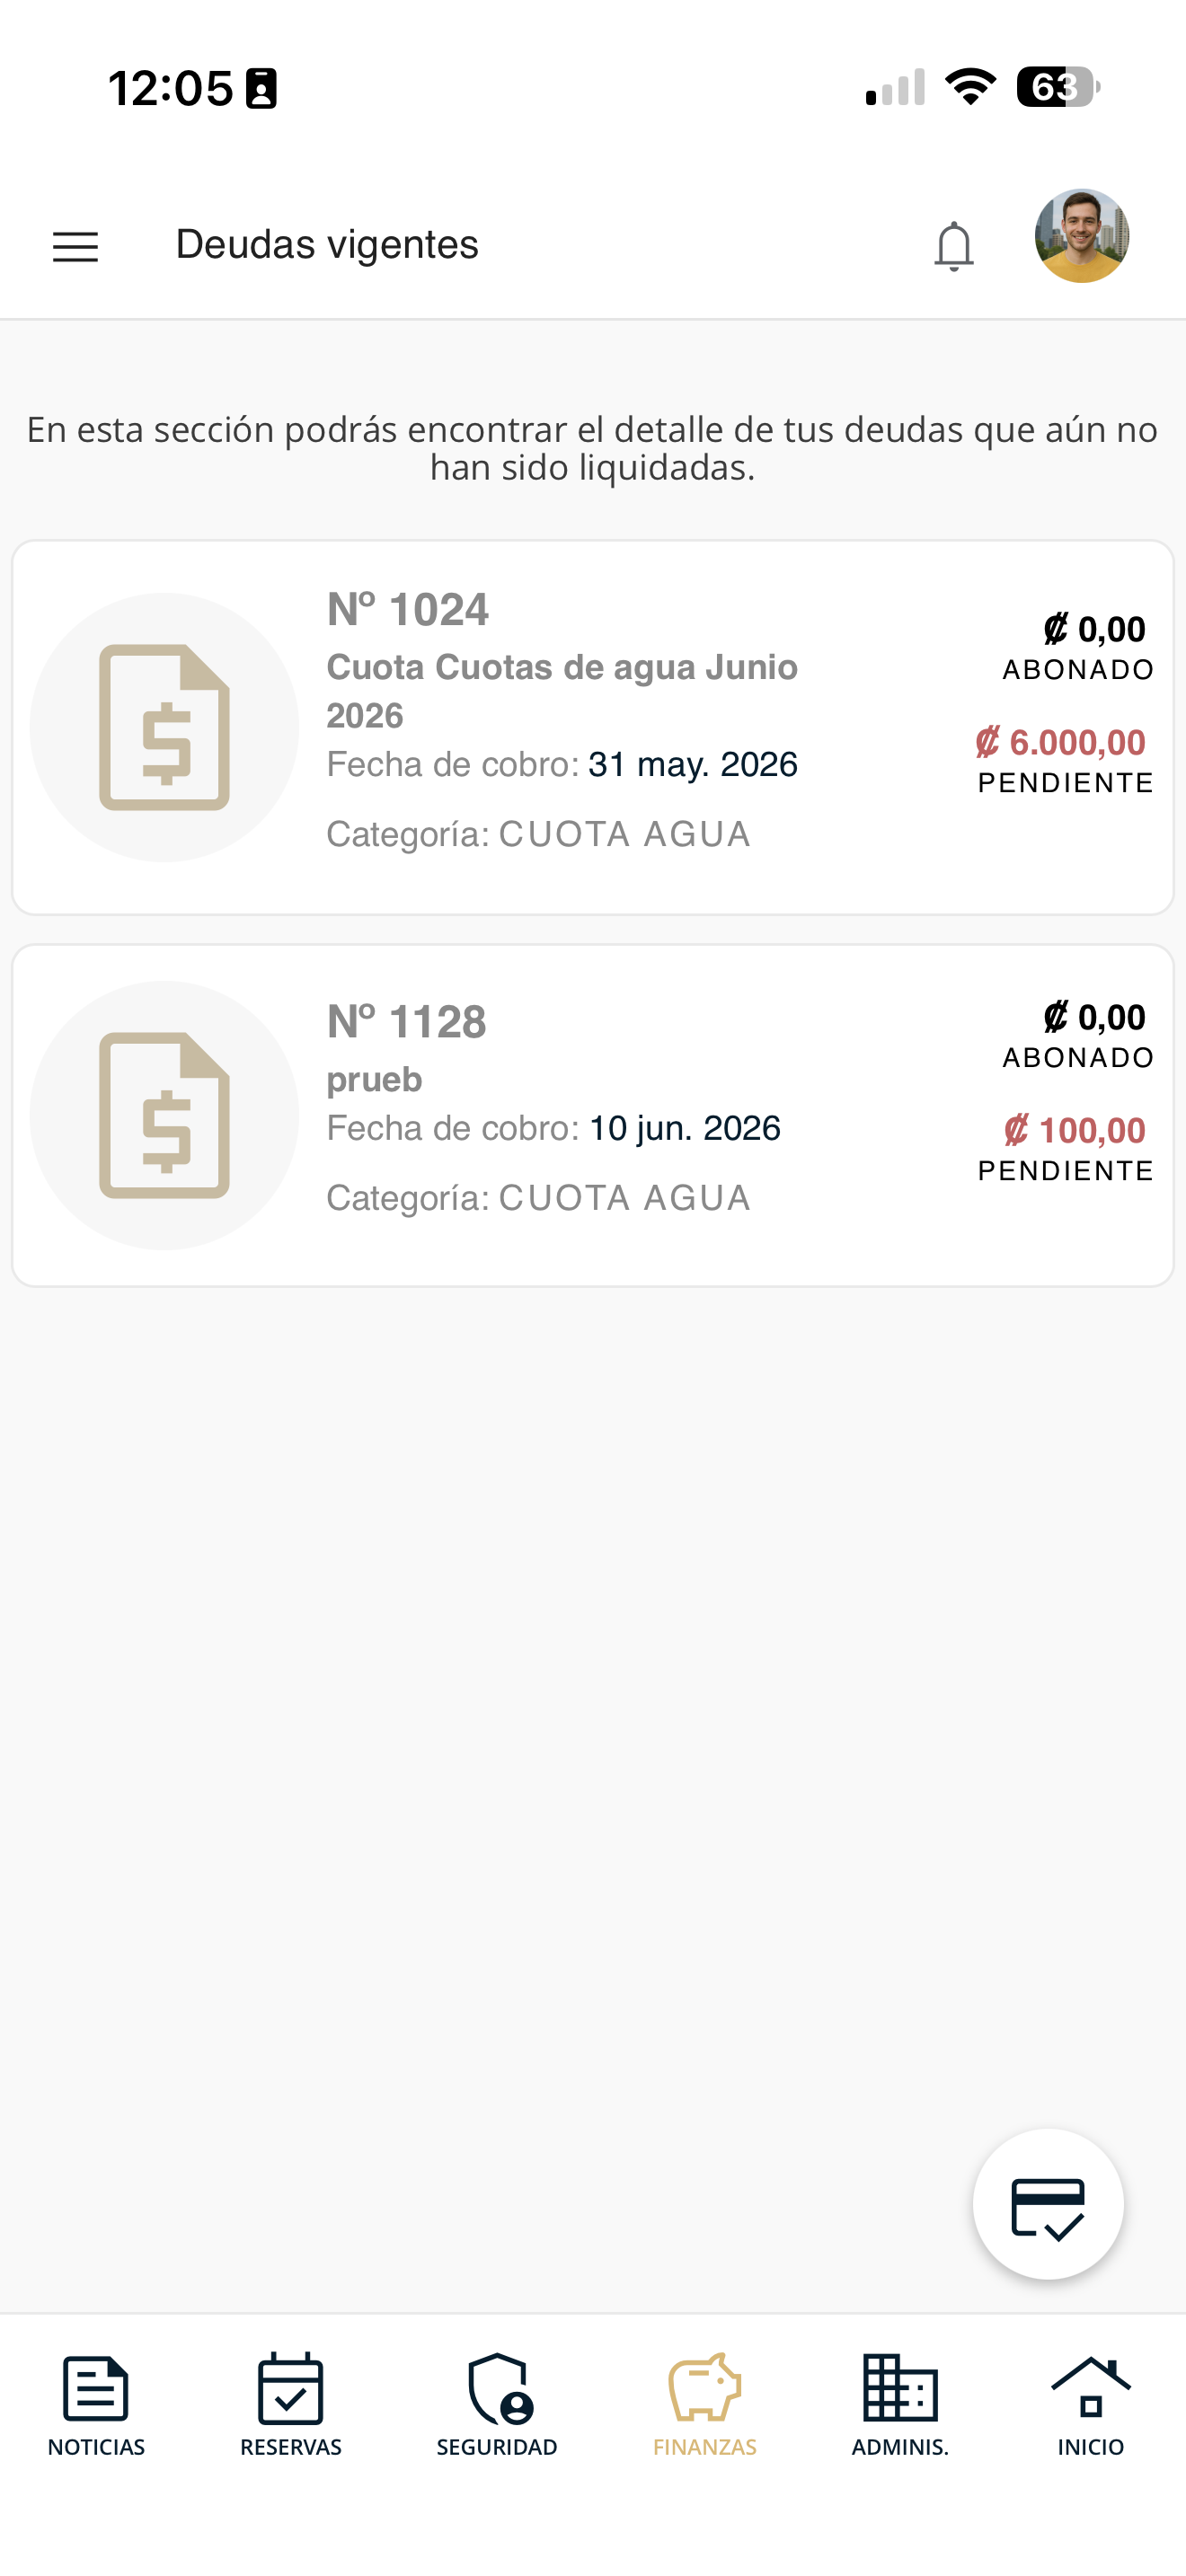
Review your current debts
Under "Current debts" you see the detail of the debts you have not yet settled: number, description, billing date, category and the paid and pending amounts.
fin-deudas-01.png
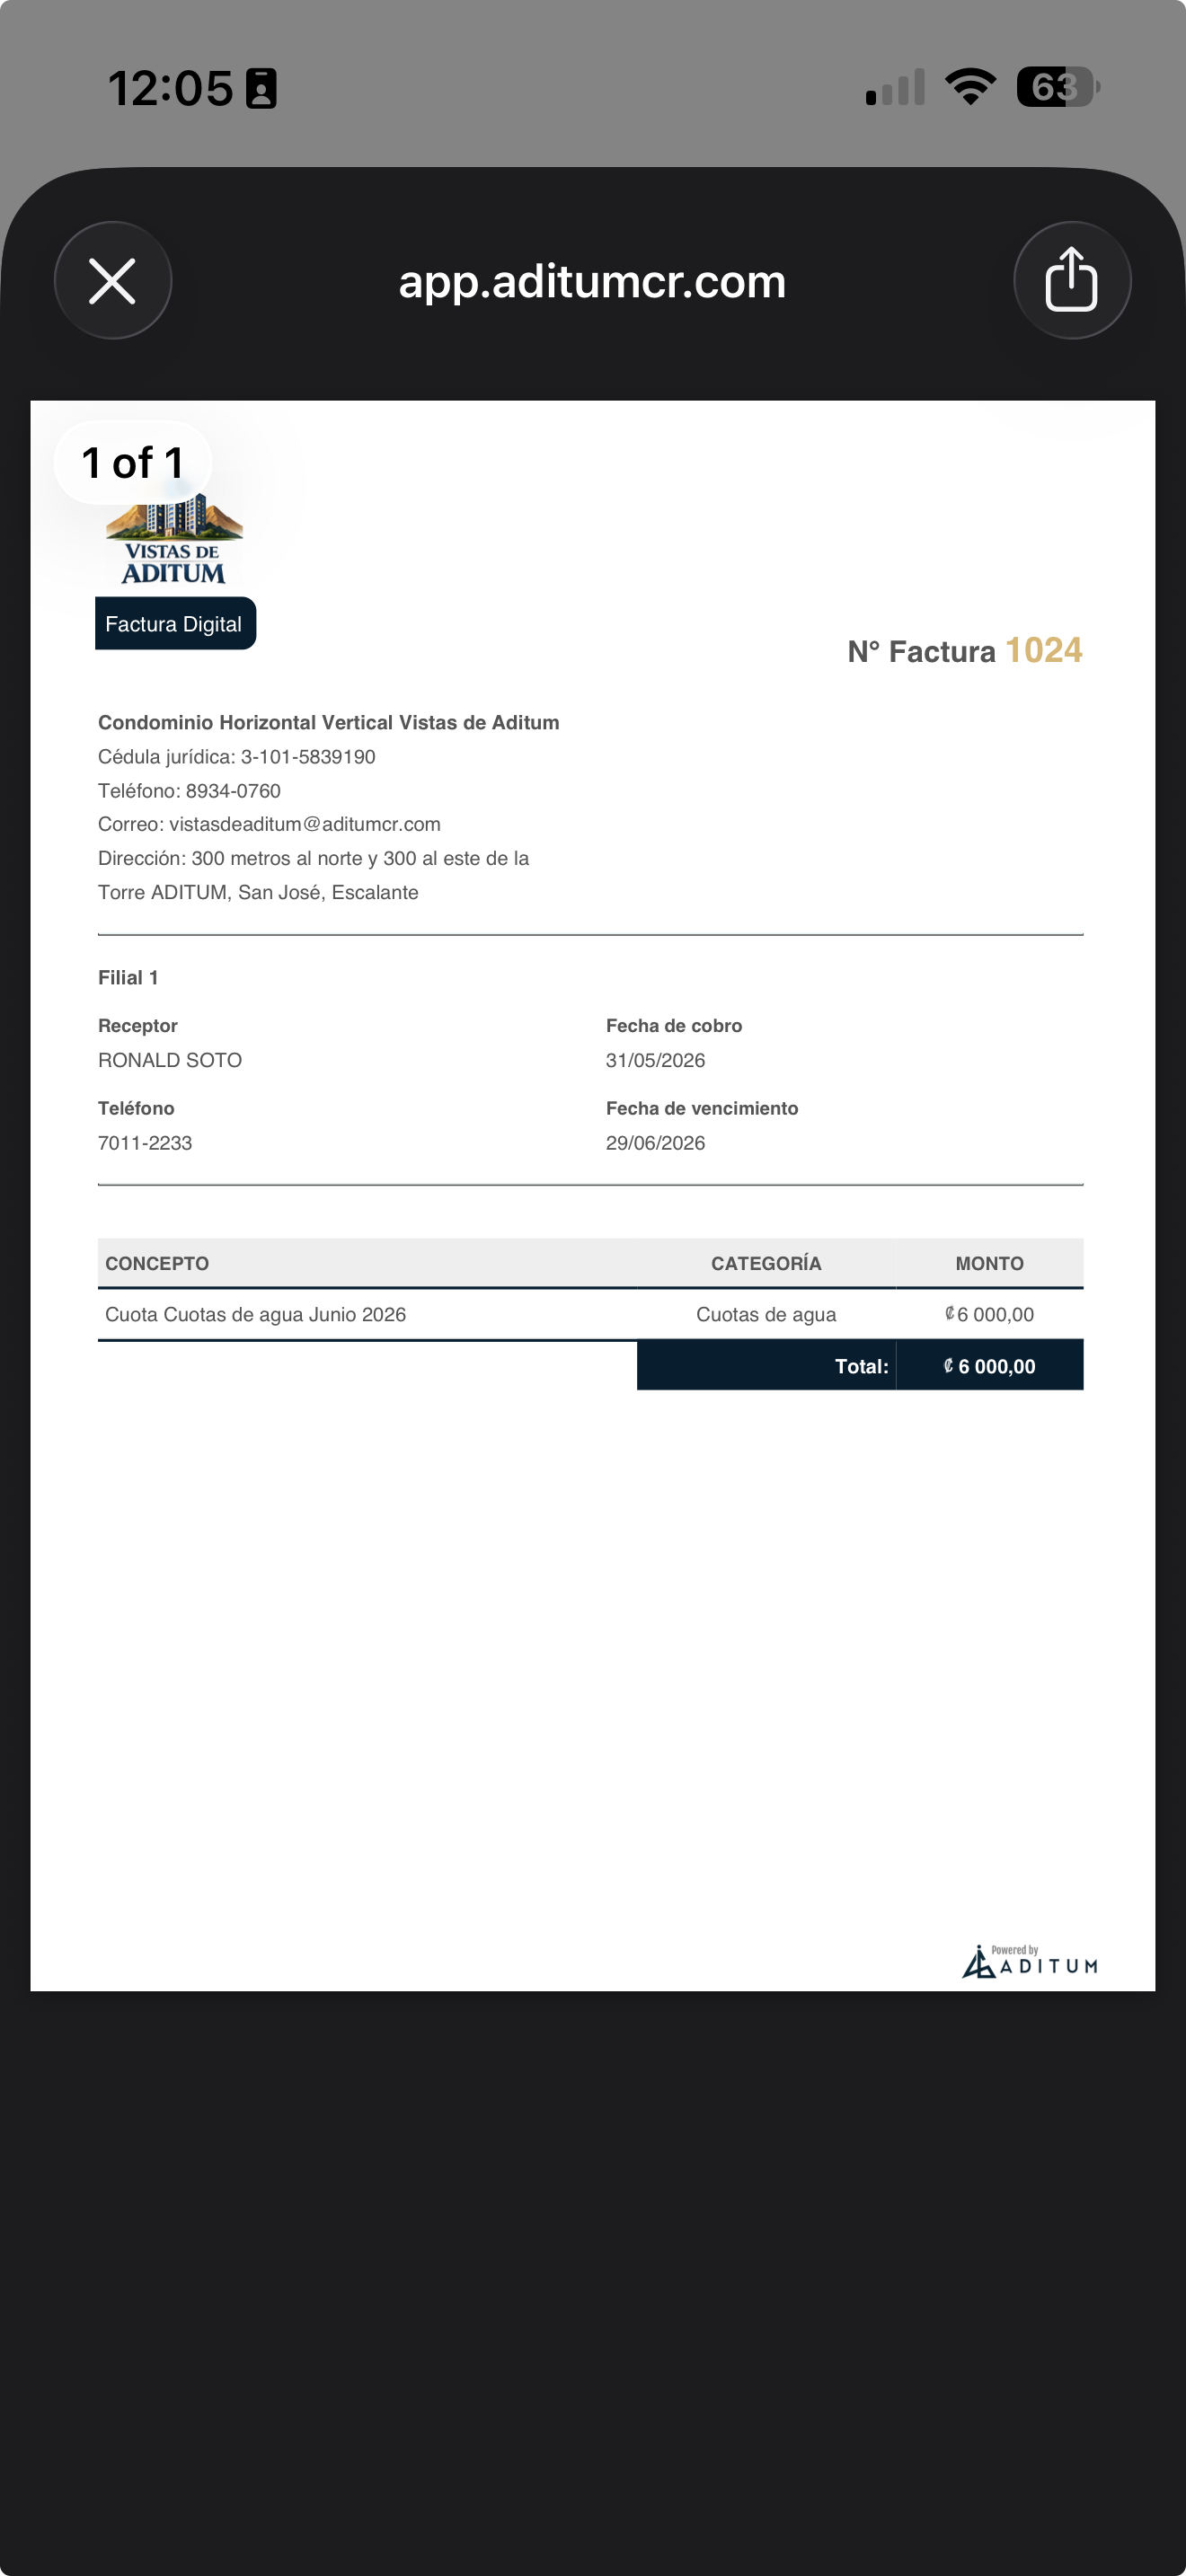
Check the invoice
Tap a debt to open its digital invoice, with the recipient, description, category, due date and the total to pay. You can save it or share it.
fin-deudas-02-factura.png
My payments
Check the history of the payments you have made.
Go to Finances
Open Finances in the bottom bar and tap "View my payments".
fin-menu.png
Review your payment history
You will see the receipt history (RECEIPT: A-503, etc.) with the payment type, the payment date and the amount. Use "Search payment" or "Filter" to find one.

fin-pagos-01.png
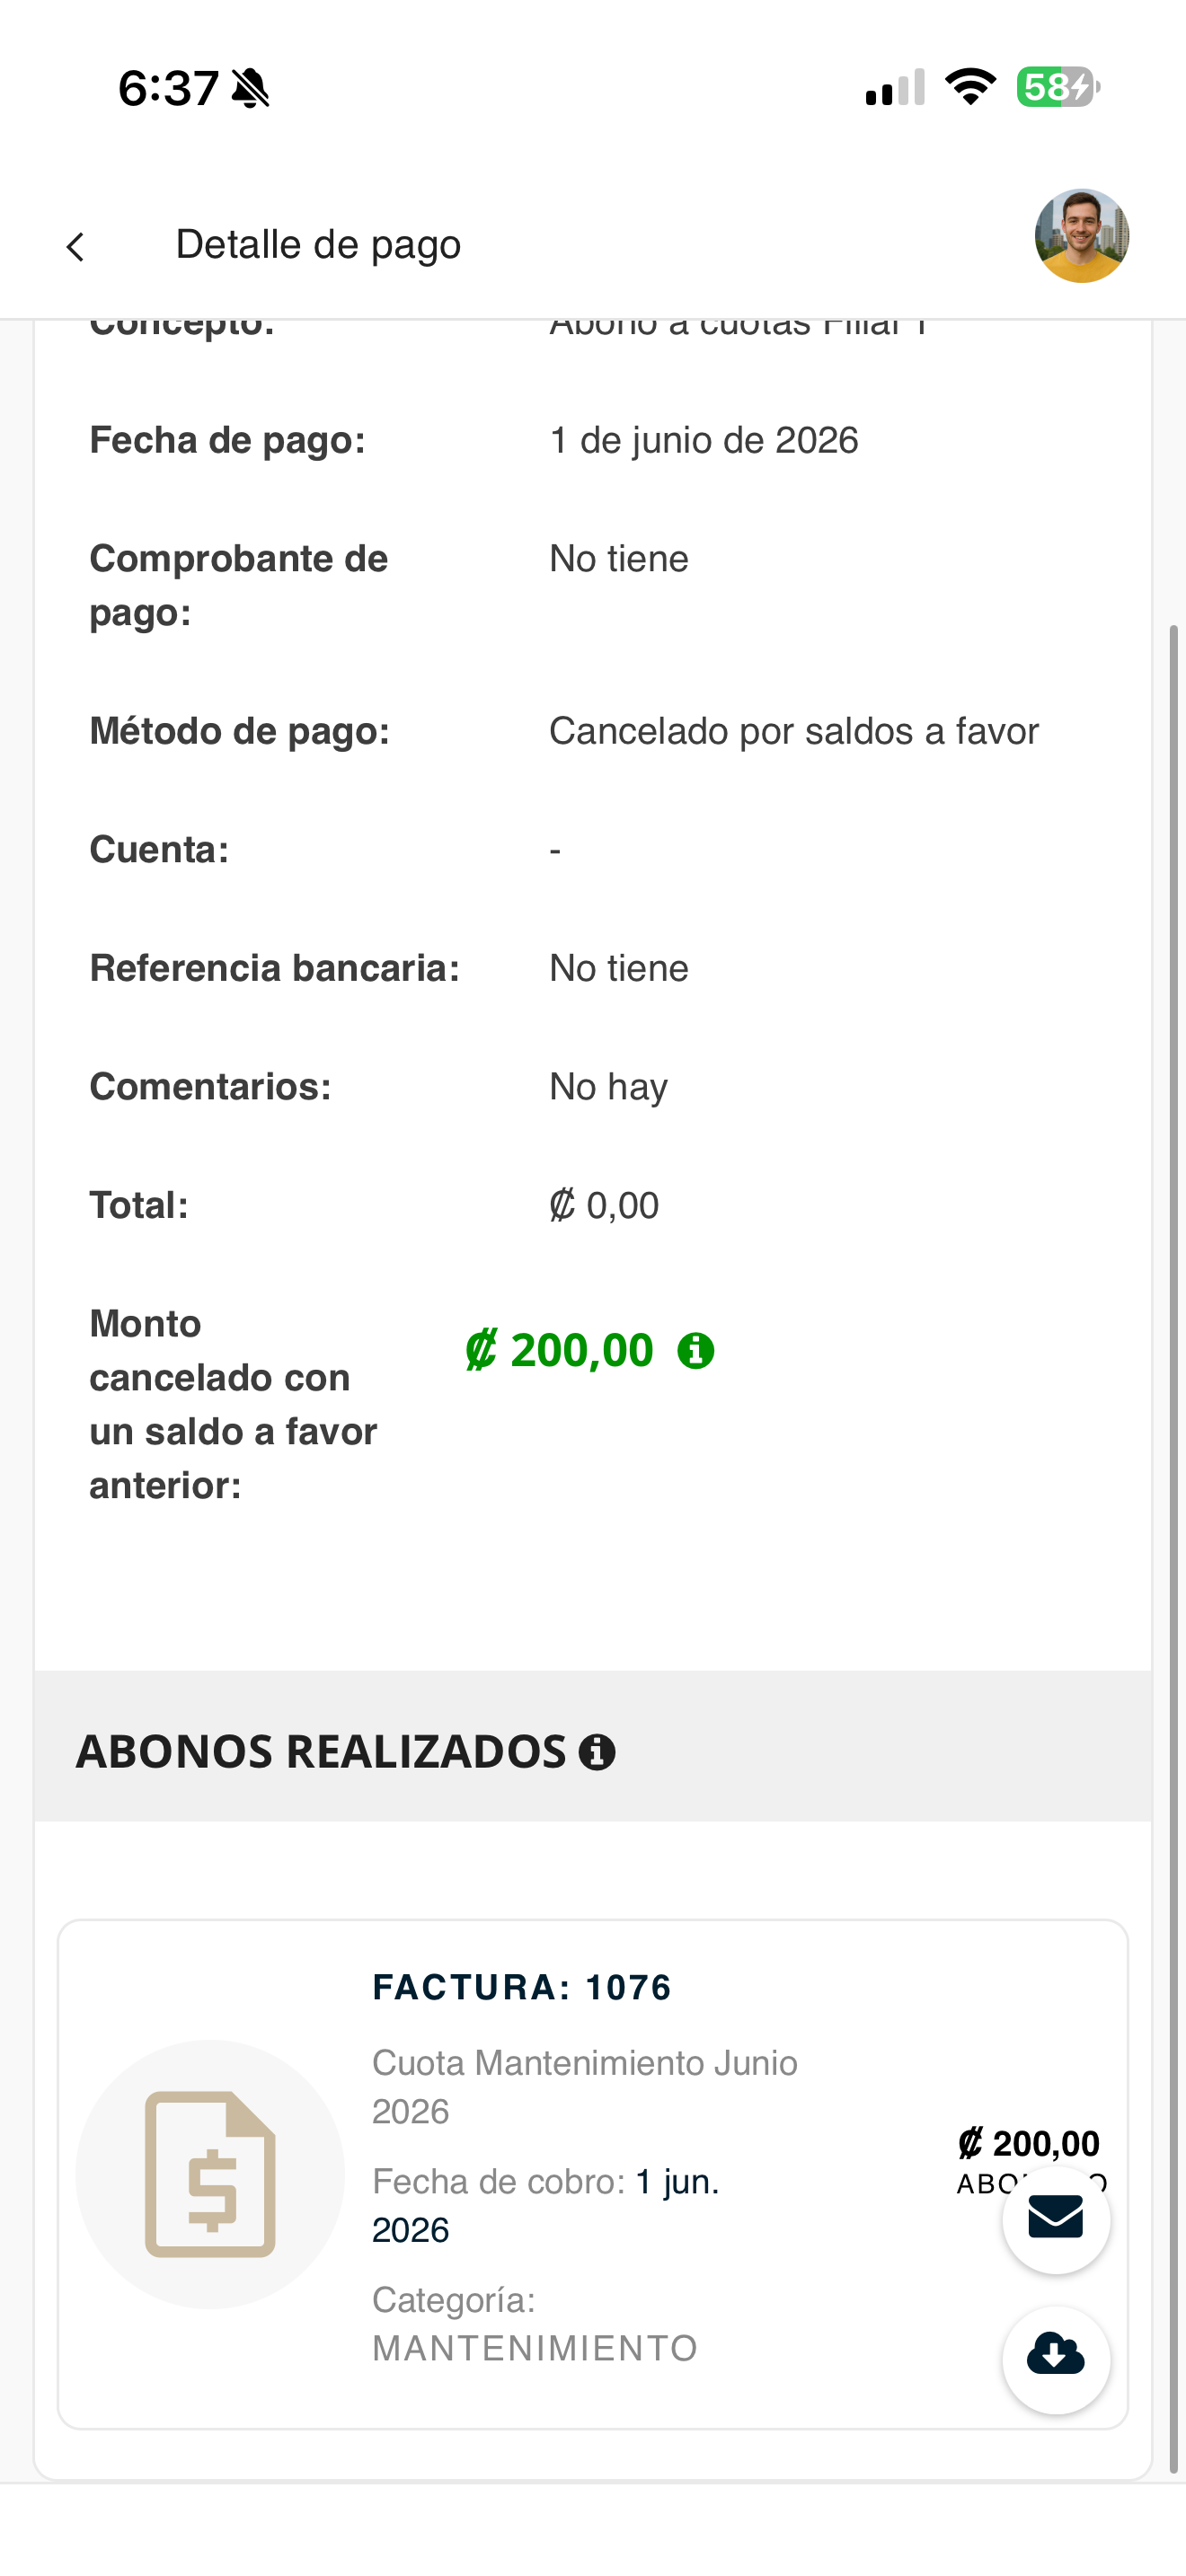
Check the payment details
Tap a receipt to see its details: description, date, payment method, bank reference, total and the payments made (which invoices it was applied to).
fin-pagos-02-detalle.png
View or download the receipt
From the detail you can open the payment receipt in document format, with the folio number, the breakdown and the condominium's details, ready to save or share.

fin-pagos-03-recibo.png
Payment receipts
Send the proof of your deposits or transfers so management can record your payment.
Go to Finances
Open Finances in the bottom bar and tap "Payment receipts".
fin-menu.png
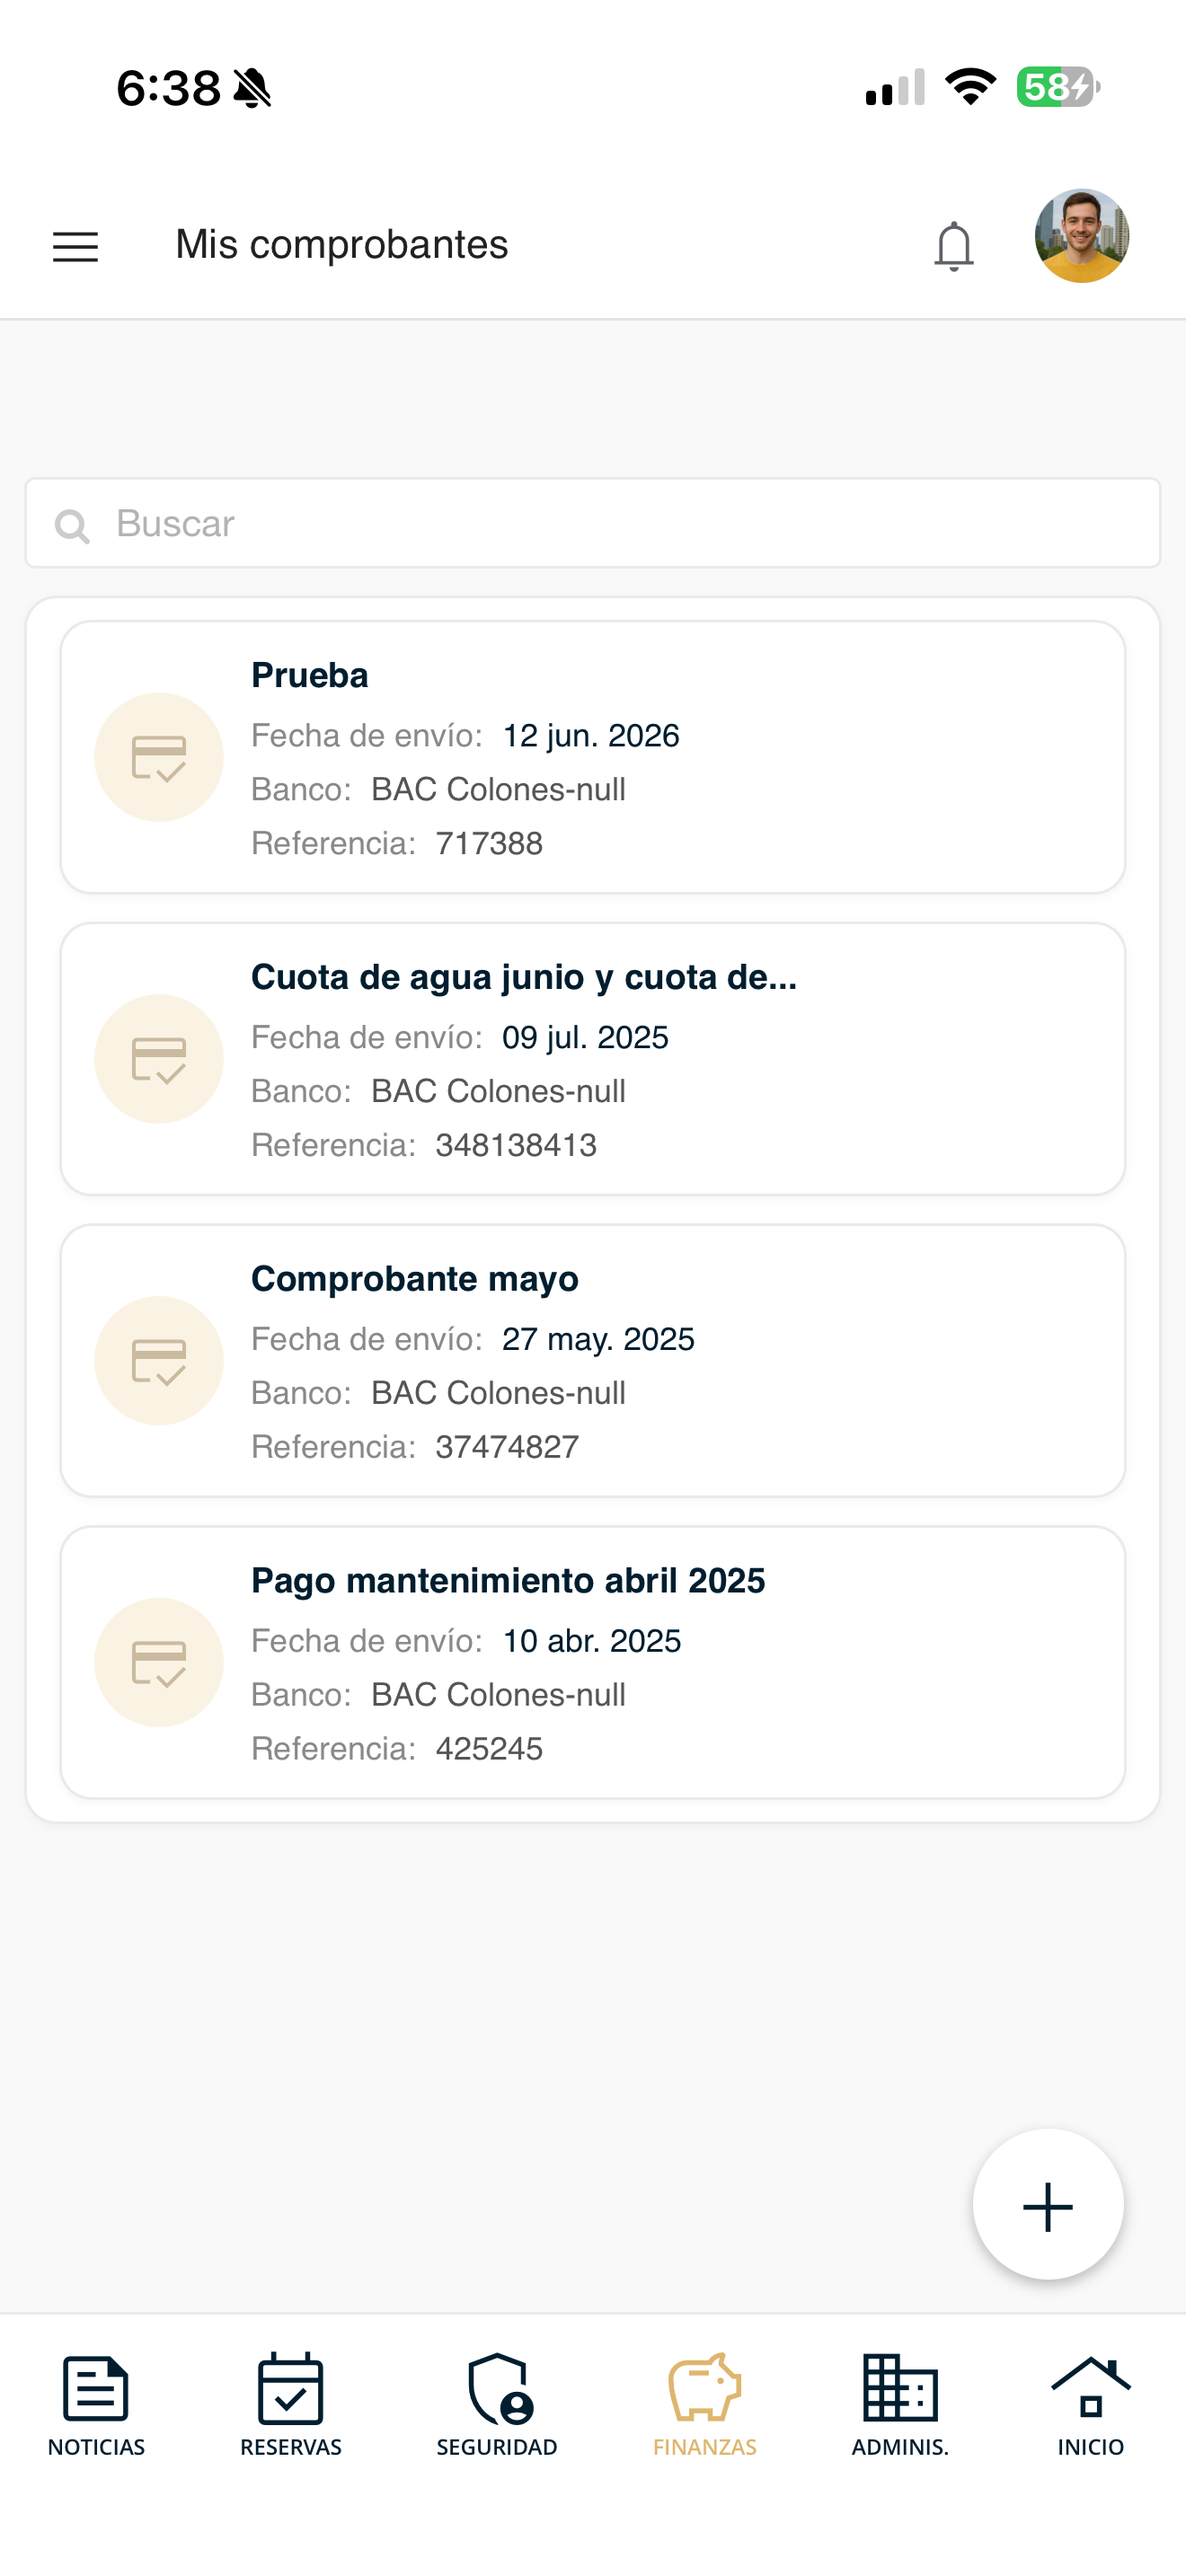
Review "My receipts"
Under "My receipts" you will see the ones you have already sent (with their submission date, bank and reference). To create a new one, tap the "+" button at the bottom right.
fin-comprobantes-01.png
Fill out and submit the receipt
Complete the form: Subject, the bank where the deposit was made, the Amount Paid, the Bank Reference and a Description. Tap "Attach Receipt" to upload the photo or PDF, and press "Accept". Management validates it and applies it to your account.
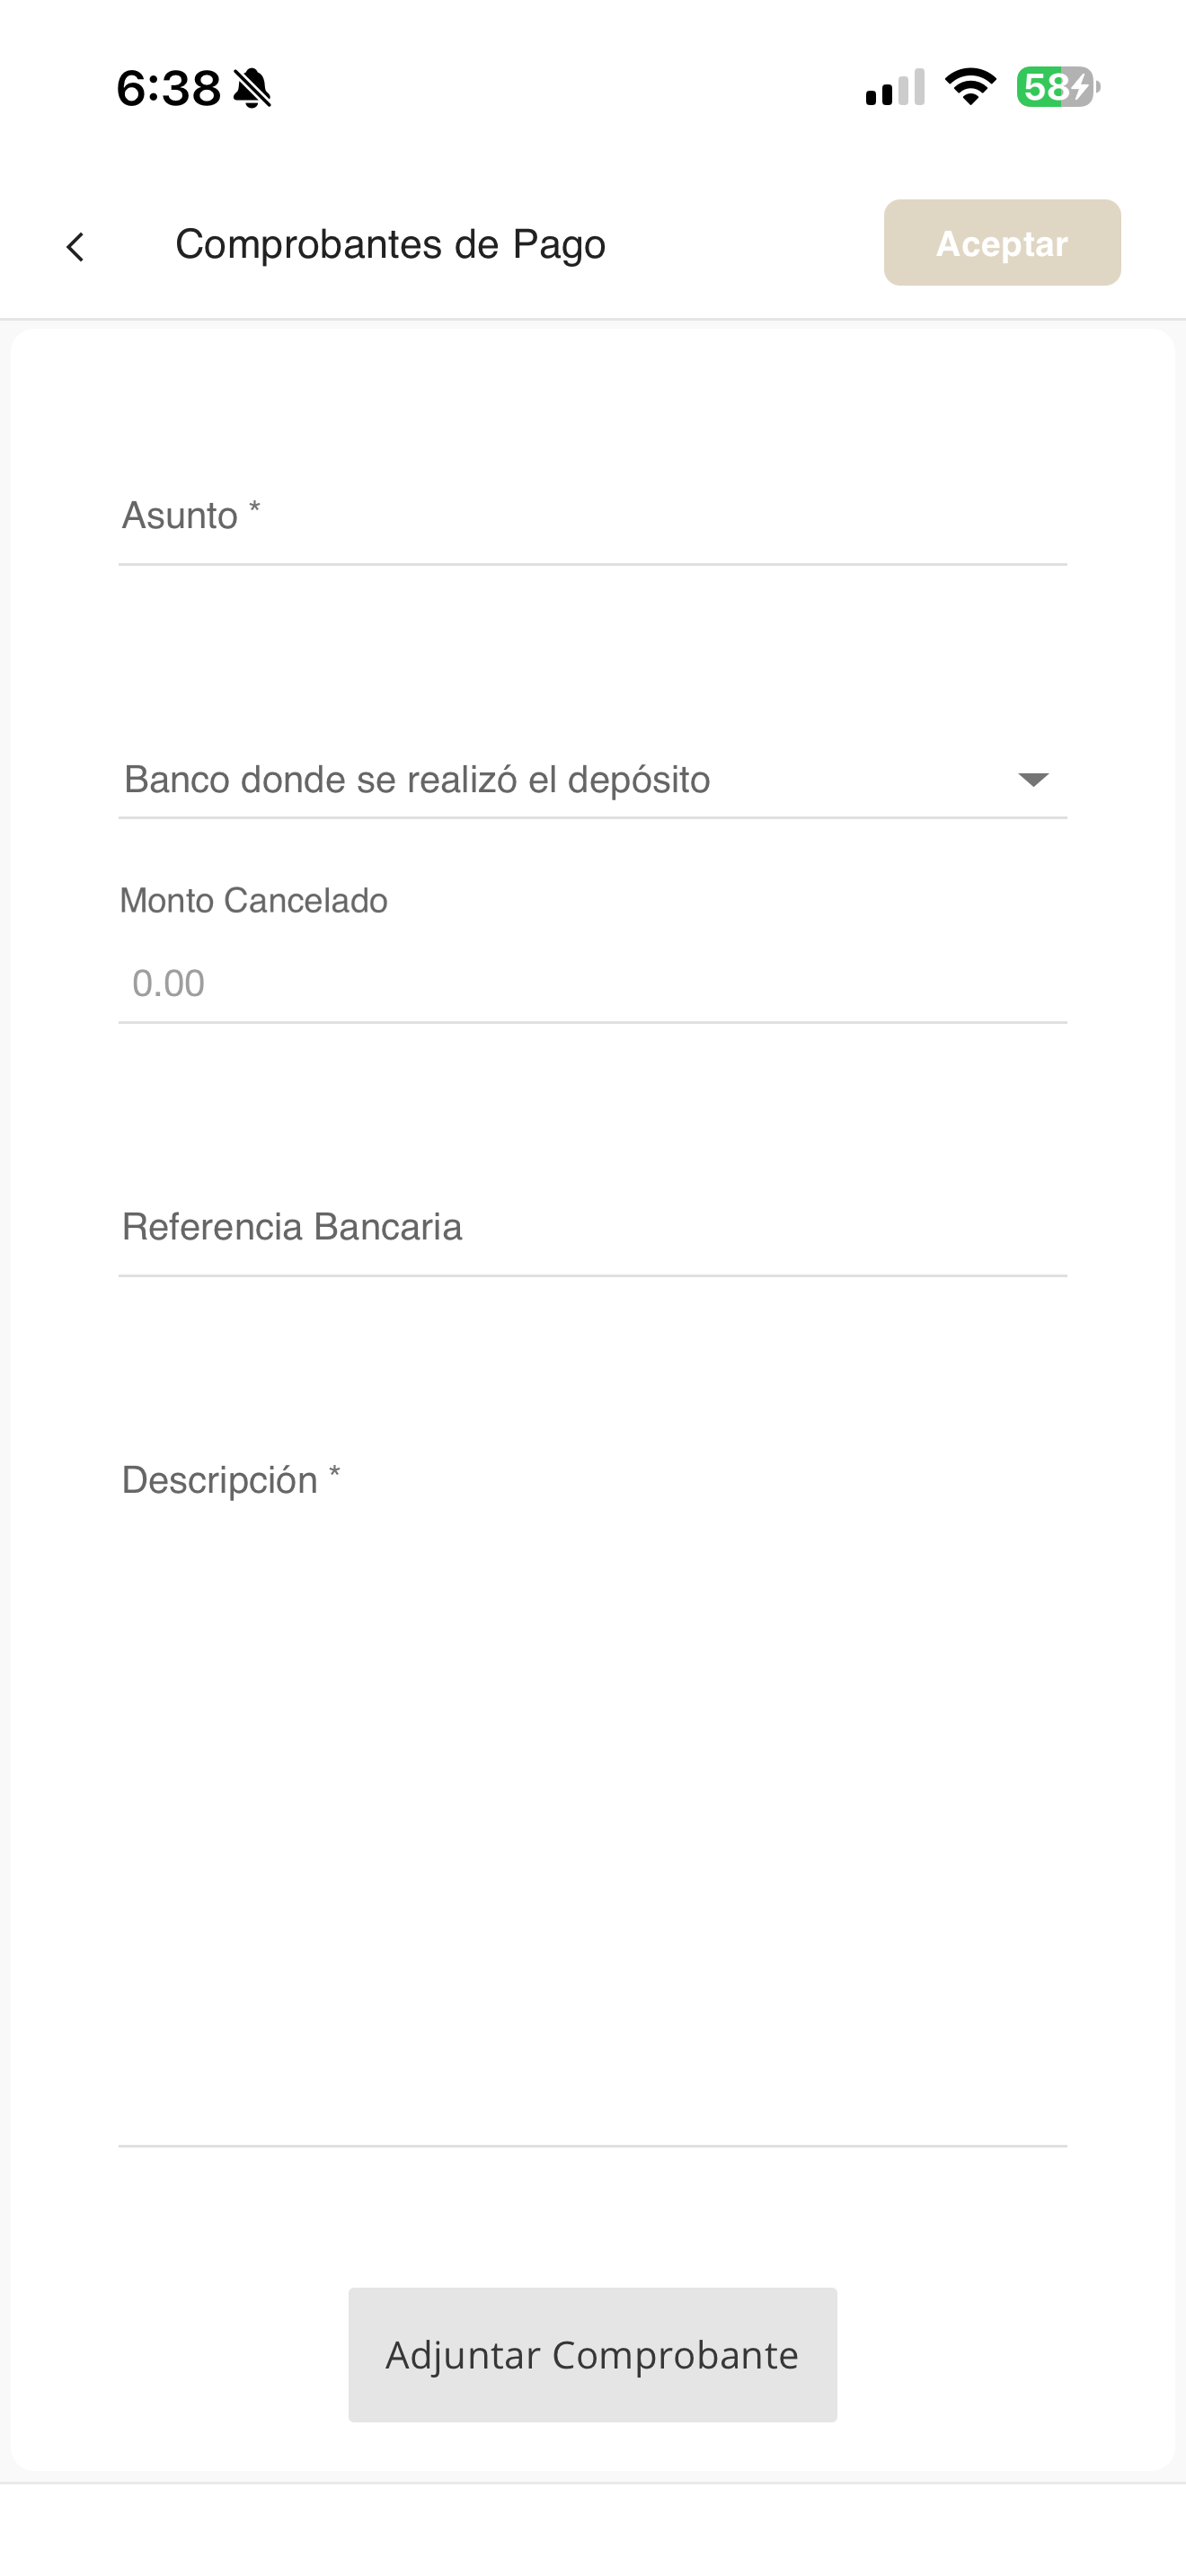
fin-comprobantes-02-nuevo.png
Financial statements
Check the condominium's financial statements available to residents.
Go to Finances
Open Finances in the bottom bar and tap "Financial statements".
fin-menu.png
Browse the folders by month
You will see folders by month (January, February, March…). Tap the month you are interested in to view and download the condominium's financial documents for that period.
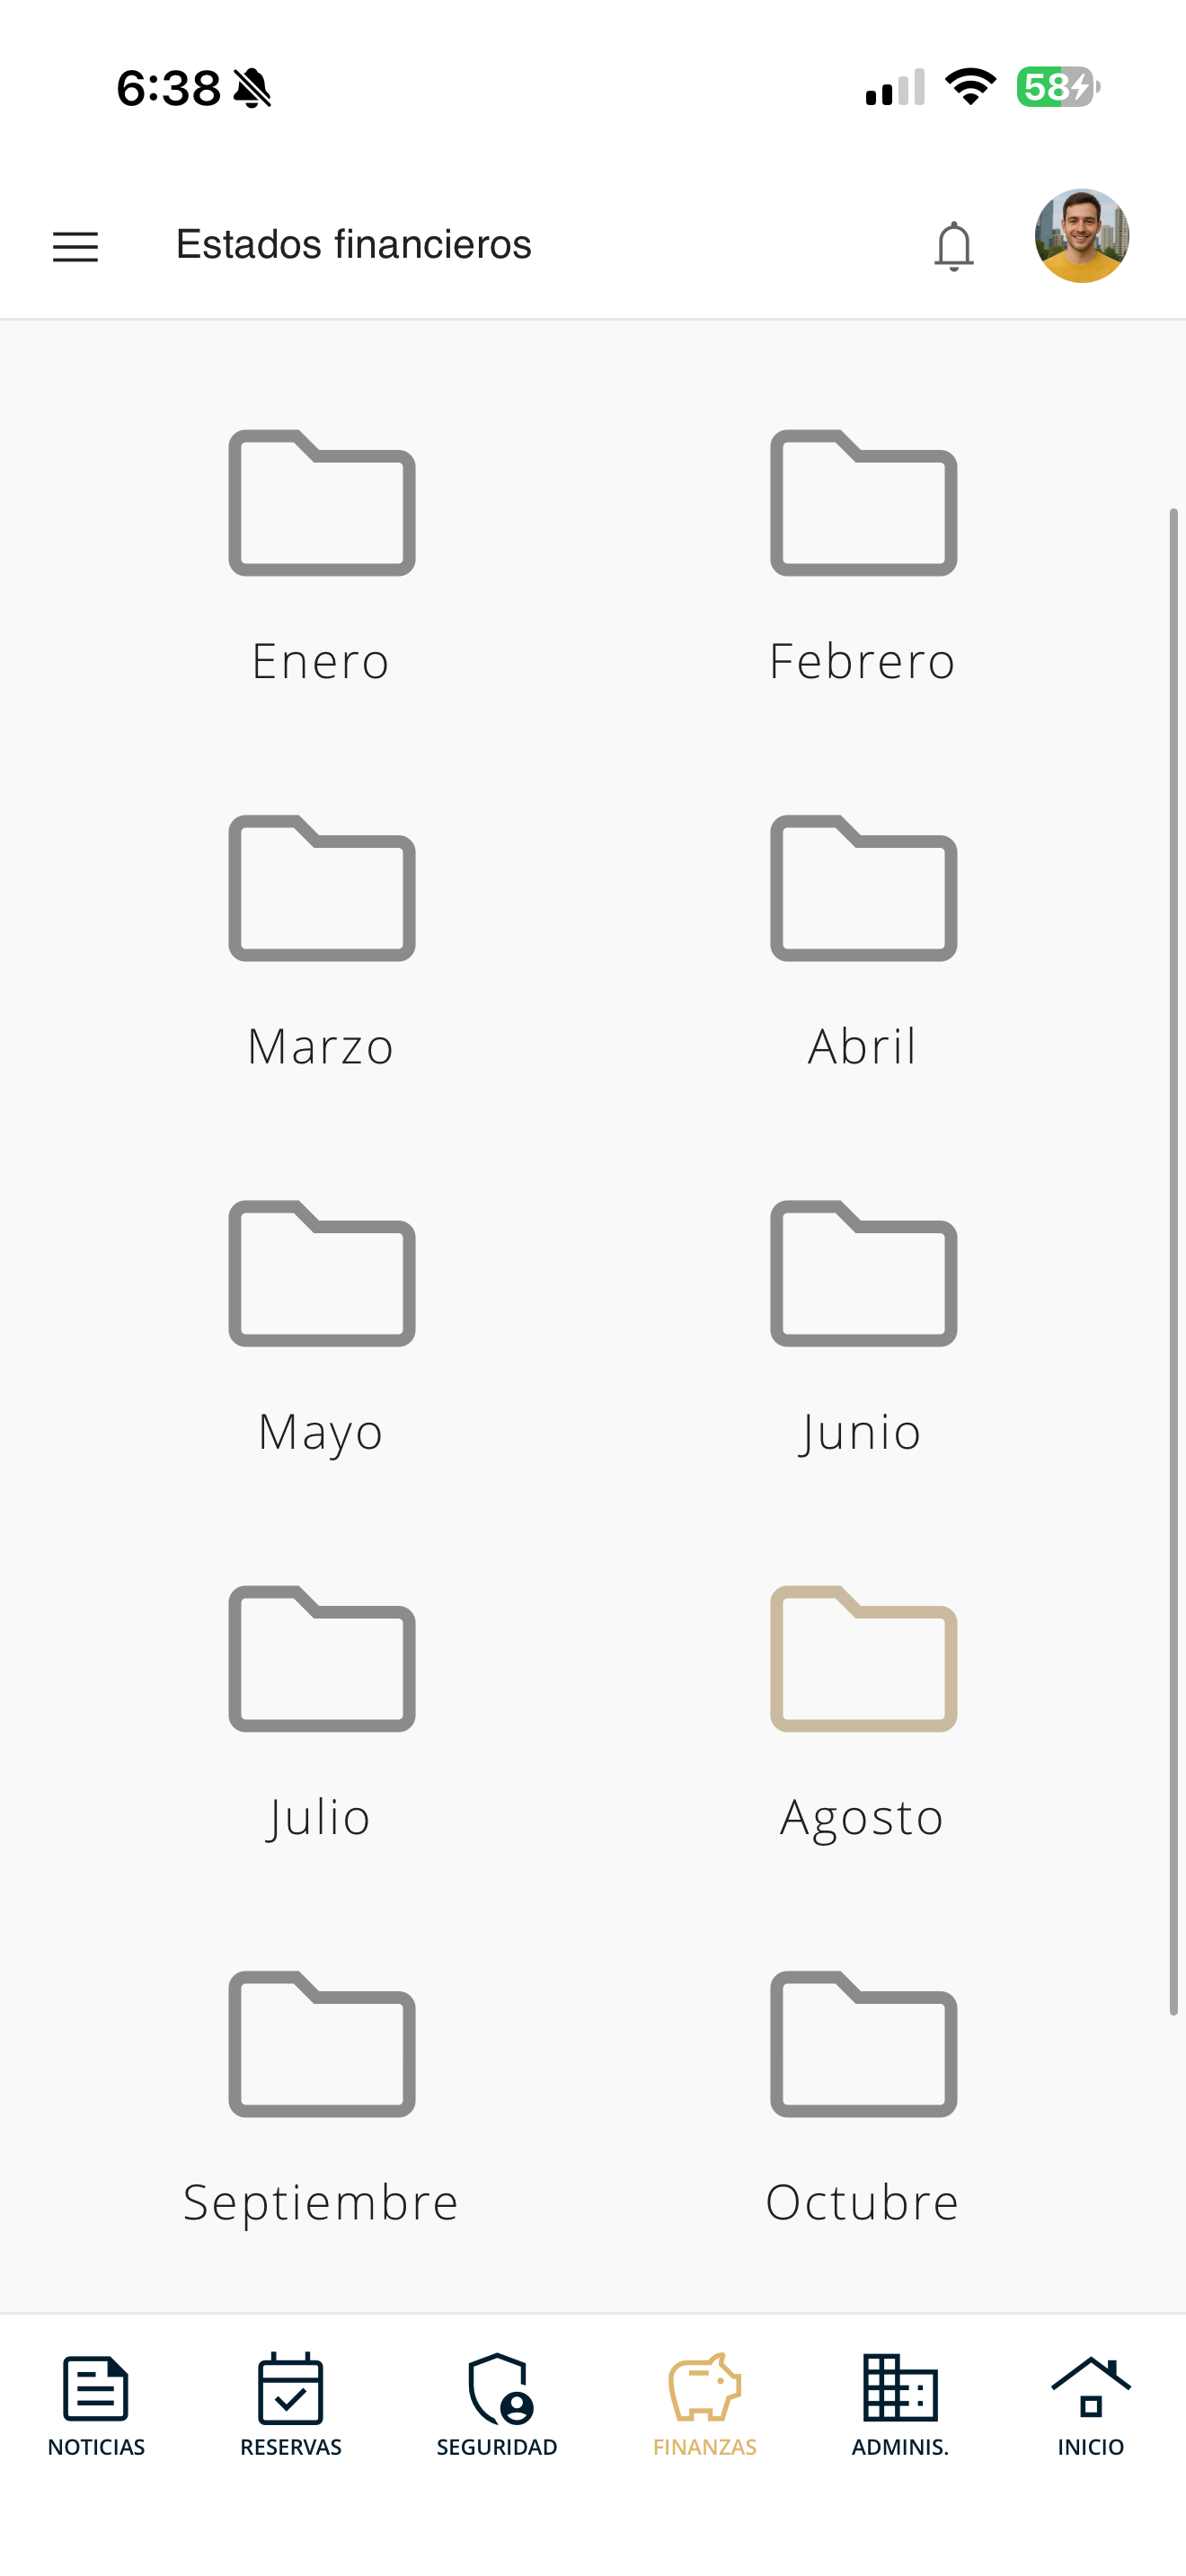
fin-estados-01.png
Condominium tickets
Use tickets to report problems or requests to management and track them. Choose what you want to do:
Submit a ticket
Create a ticket to report a problem or make a request to management.
Go to Administrative
Open Administrative in the bottom bar and tap "My tickets".

admin-menu.png
Open "My tickets"
You will see your ticket list; tap the "+" button at the bottom right to create a new one.

tickets-enviar-01-menu.png
Fill out and register the ticket
On "Register Ticket", choose the Category, type your complaint or suggestion in the editor and, if you want, use "Attach" to upload files (max. 10 MB). Then press "Accept".
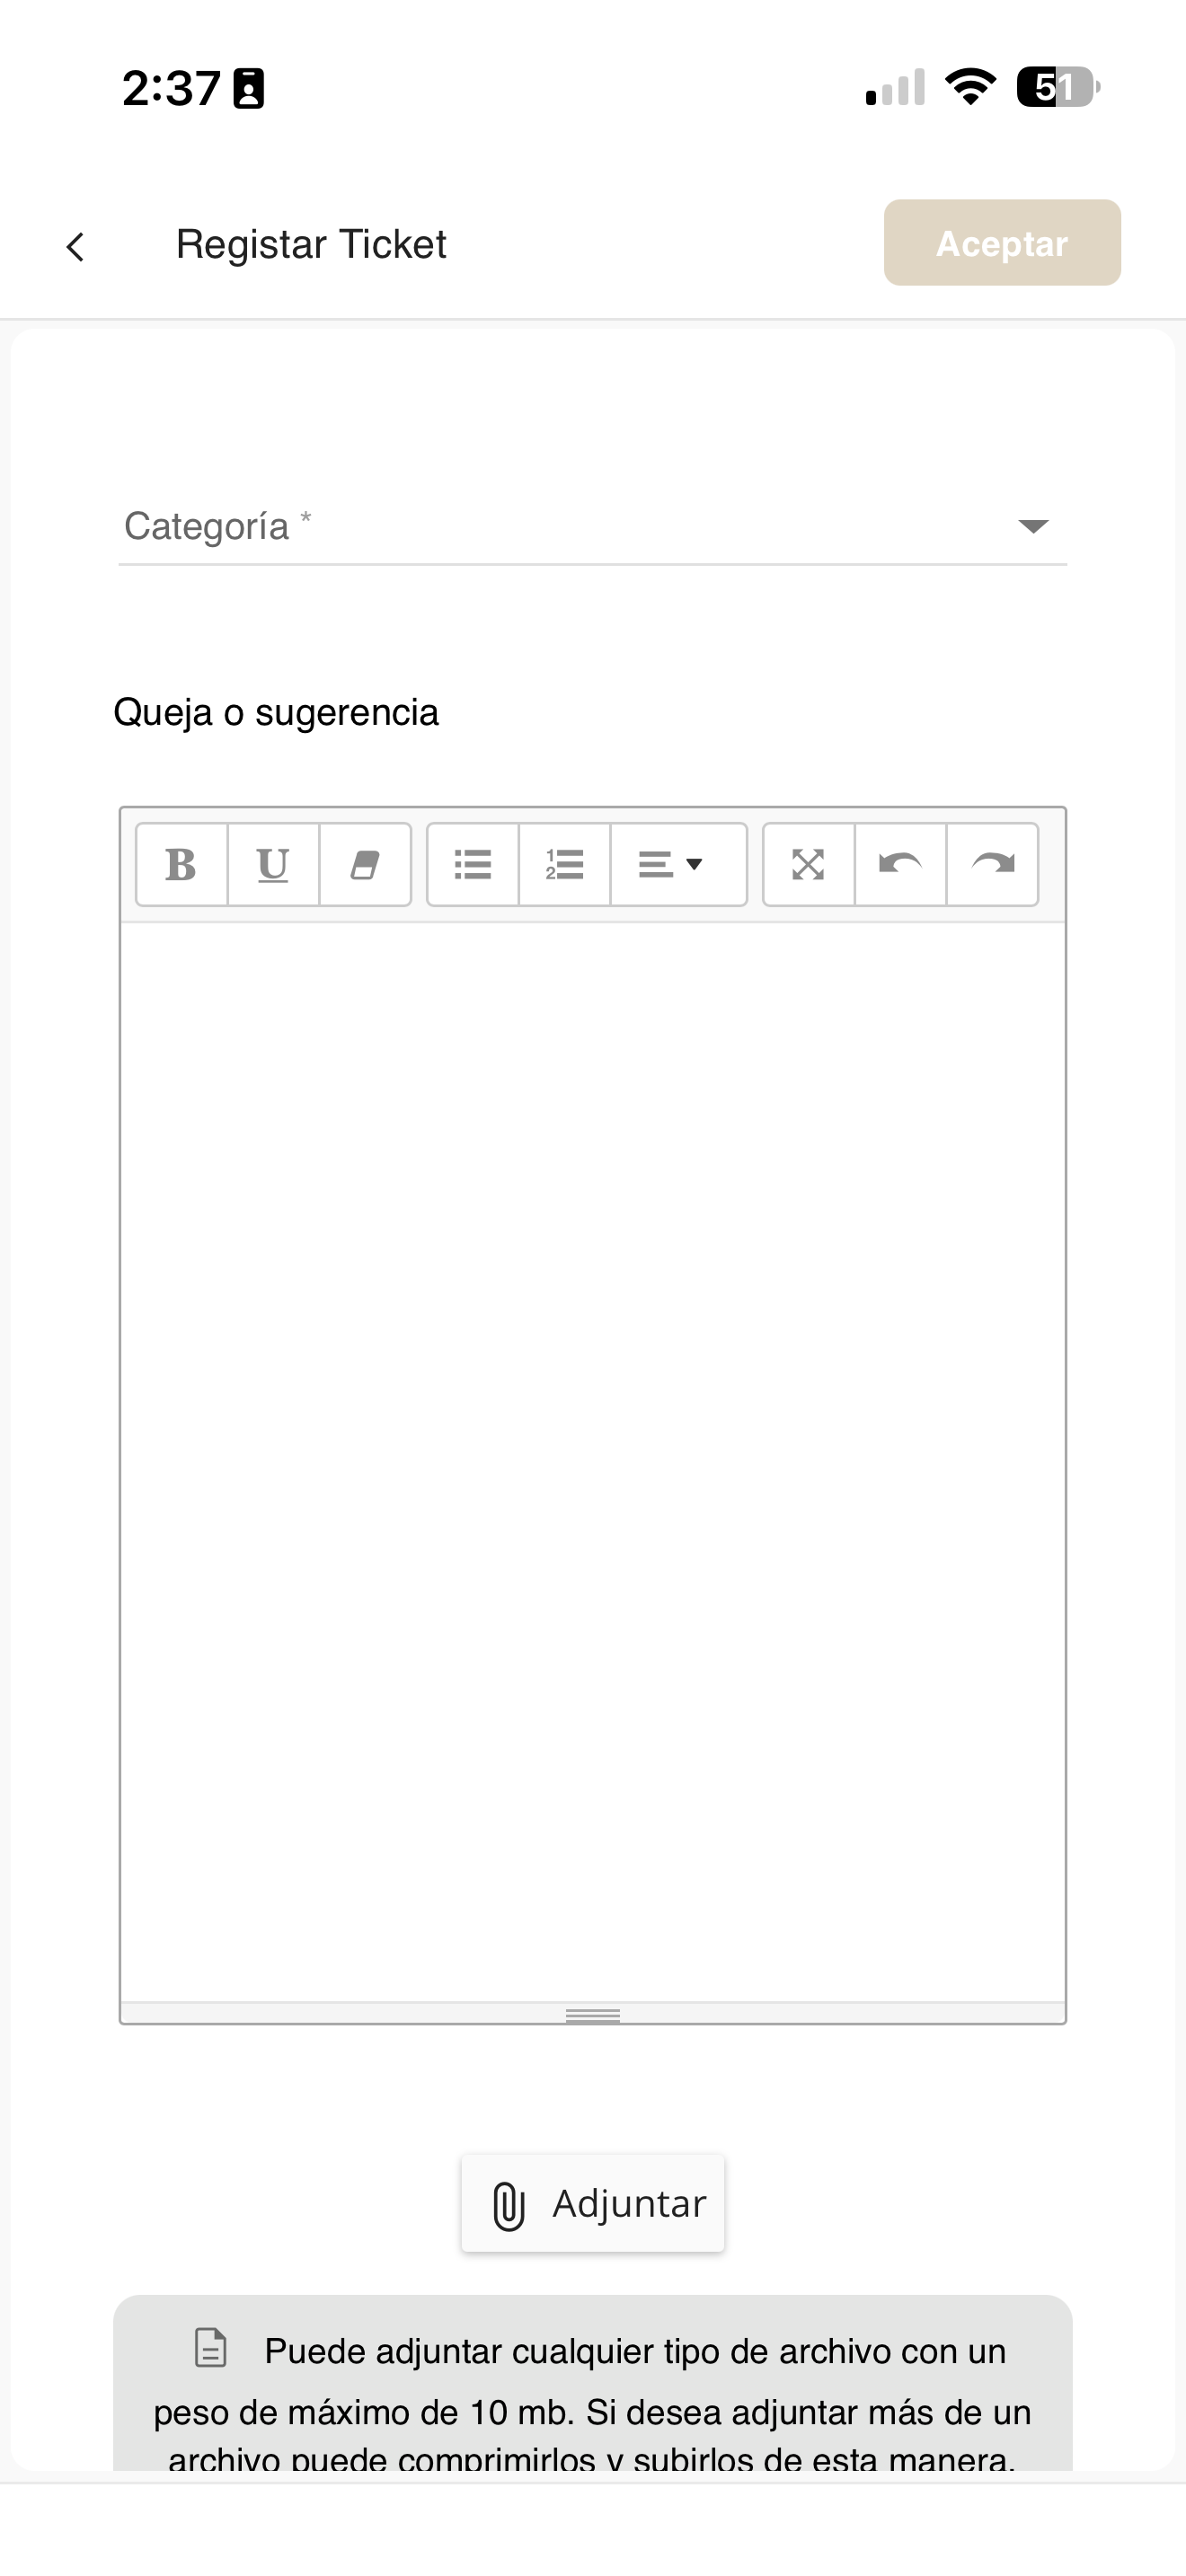
tickets-enviar-02-nuevo.png
Track a ticket
Check the status and progress of the tickets you have submitted.
Go to Administrative
Open Administrative in the bottom bar and tap "My tickets".
admin-menu.png
Open "My tickets"
You will see your ticket list. On the ticket you want to track, tap "View tracking".

tickets-seguimiento-01-lista.png
View the ticket tracking
The ticket detail opens: its status (for example, "Resolved"), category, date and the message you sent. From here you can also Rate the ticket.
tickets-seguimiento-02-tracking.png
Read the follow-up and replies
Further down you will see the Follow-up with replies from Aditum Support and yours, in chronological order.

tickets-seguimiento-02-detalle.png
Reply to an existing ticket
Add a comment or reply to a ticket that is already open.
Go to Administrative
Open Administrative in the bottom bar and tap "My tickets".
admin-menu.png
Open the ticket
In "My tickets", tap the ticket you want to reply to in order to open its detail.

tickets-responder-01-detalle.png
Write your reply
In the ticket detail, go to "Send reply", type your message (you can Attach a file) and send it. Your reply stays in the same conversation with Aditum Support.

tickets-responder-02-responder.png
Documents
Check the condominium's documents: regulations, minutes and meeting notes, contracts and others.
Go to Administrative
Open Administrative in the bottom bar and tap "Documents".
admin-menu.png
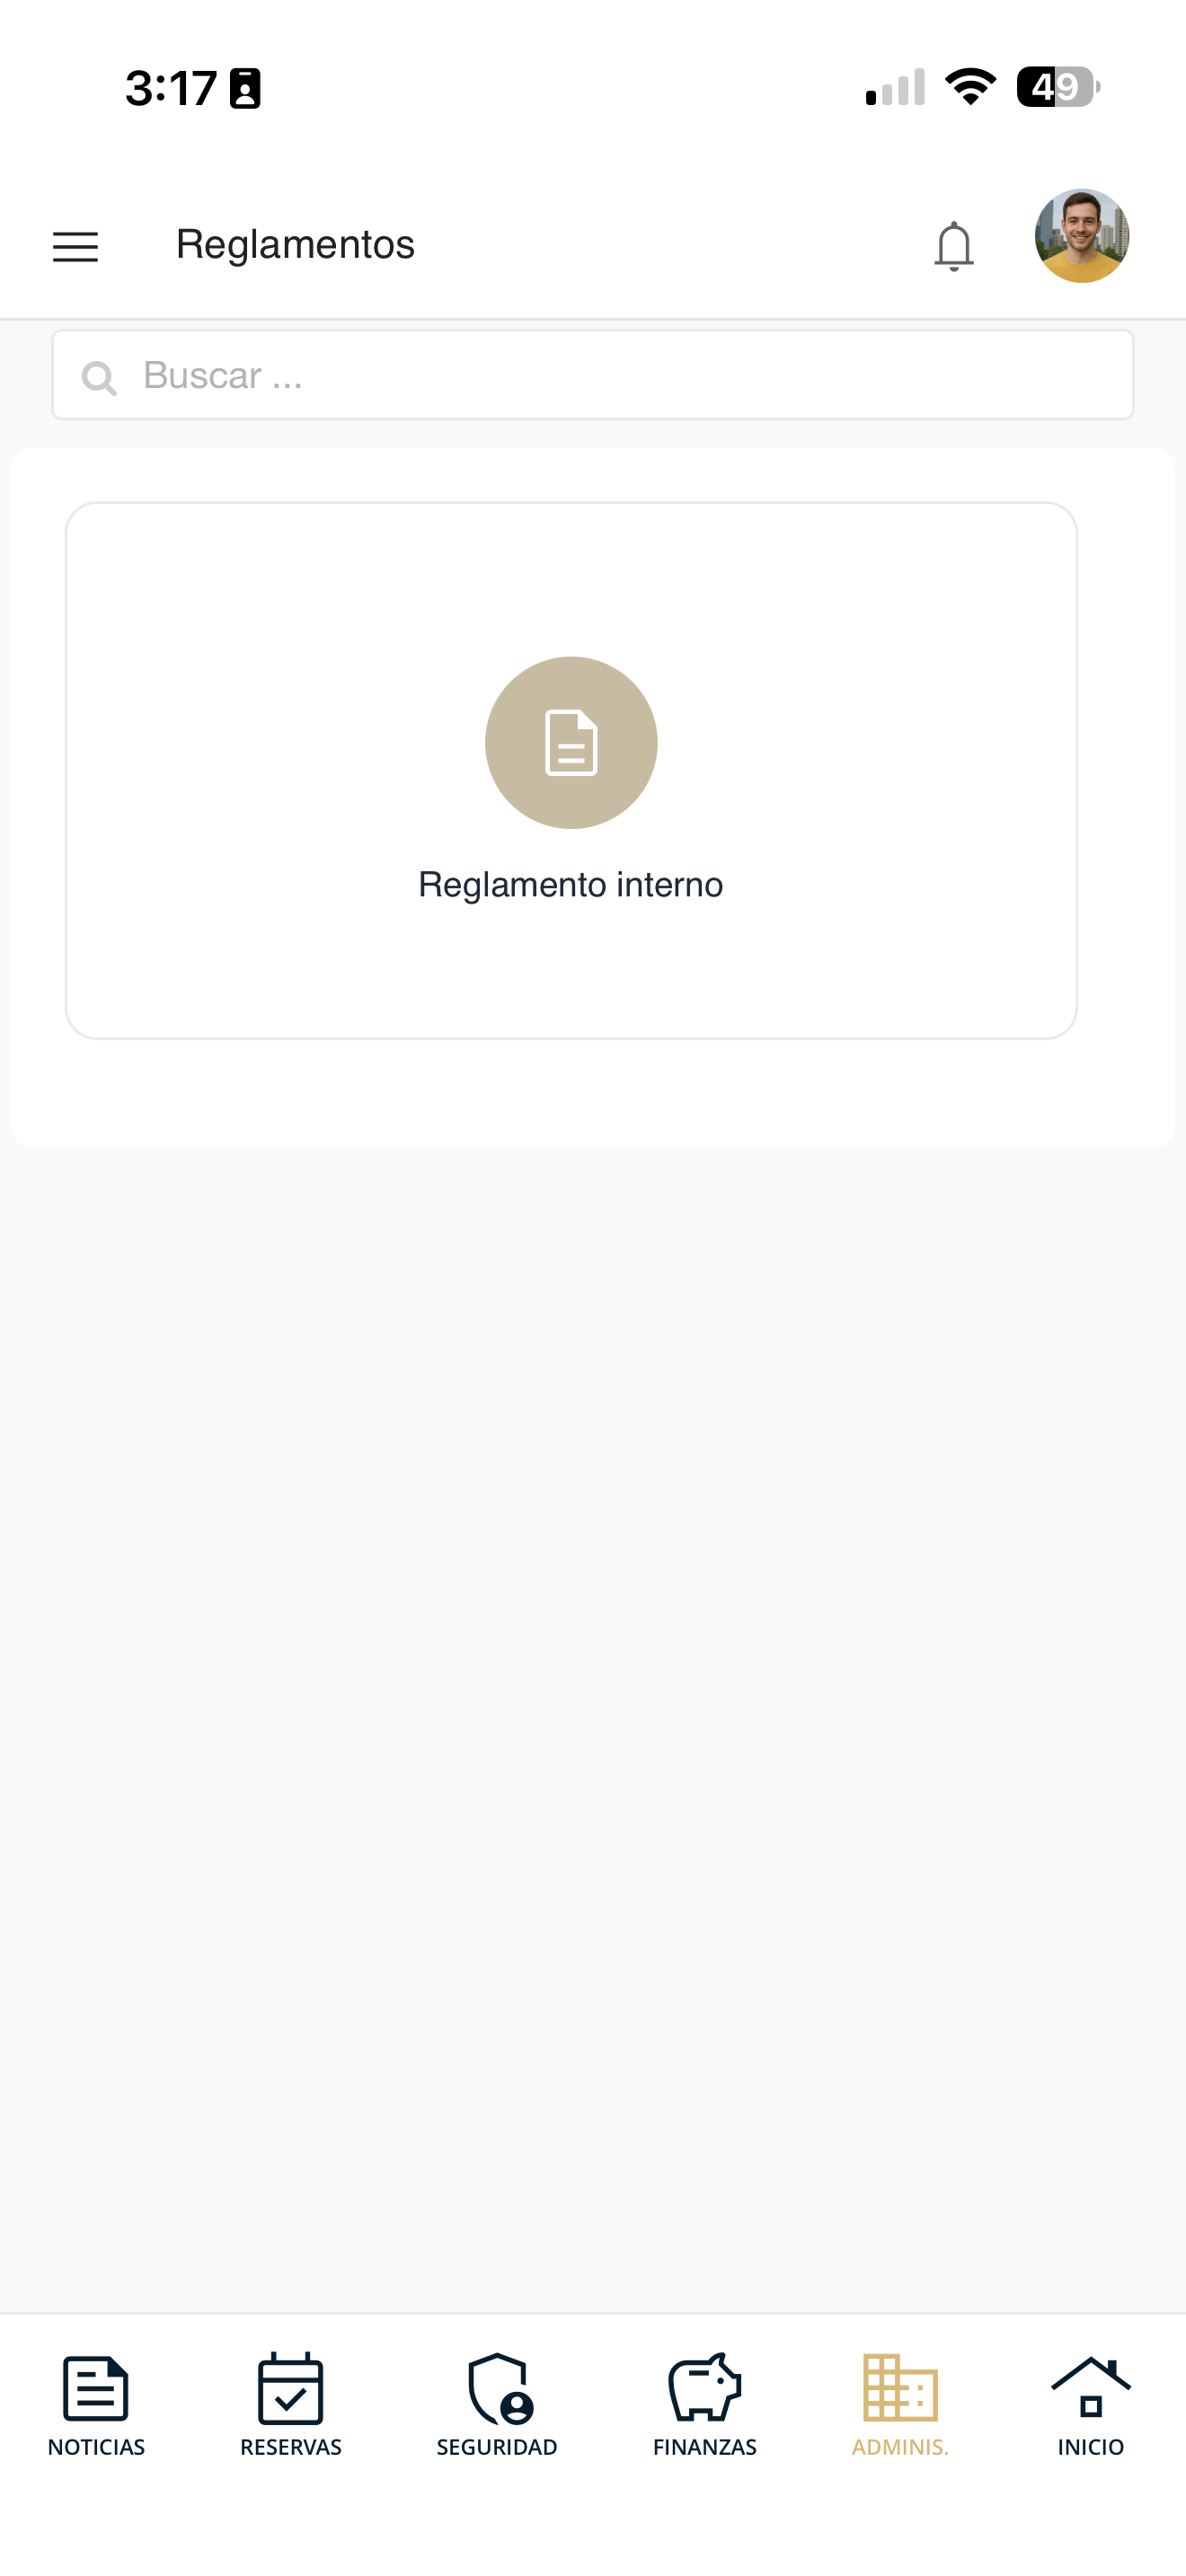
See the available types
You will see the available document types: Regulations, Minutes and meeting notes, Others and Contracts.
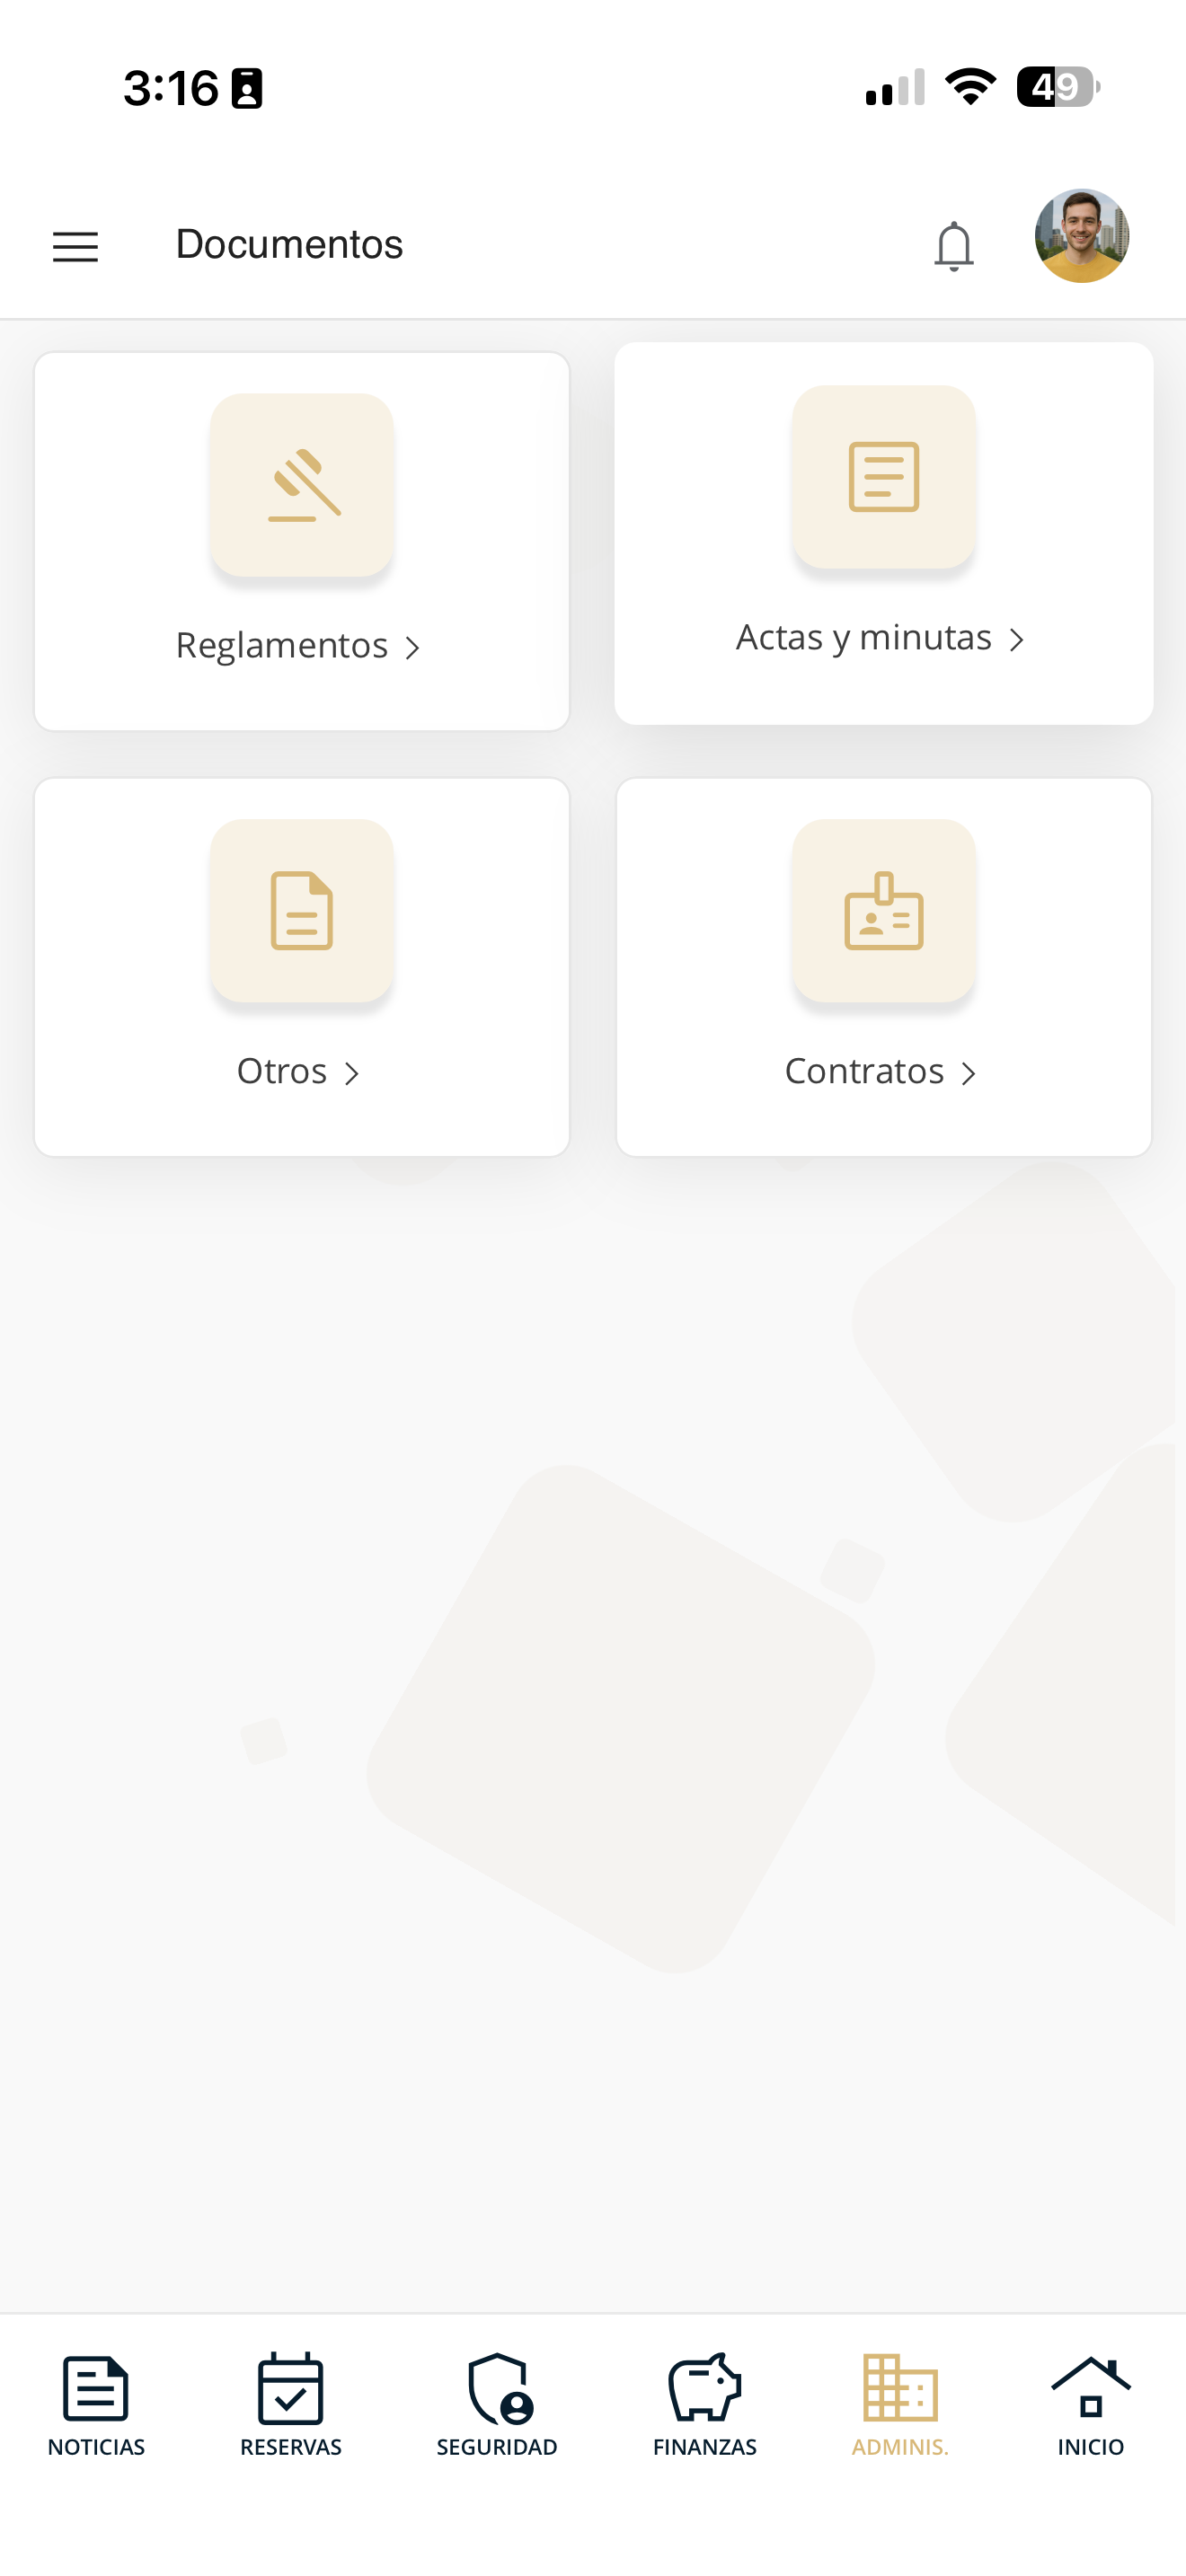
doc-01-tipos.png
Open a category
Tap the type you need, for example "Regulations". The file (or the list of files) available in that category will be shown.
doc-02-archivo.png
Open the document
Press the file to open the document and read it. From there you can view it in full (and download or share it depending on your device).
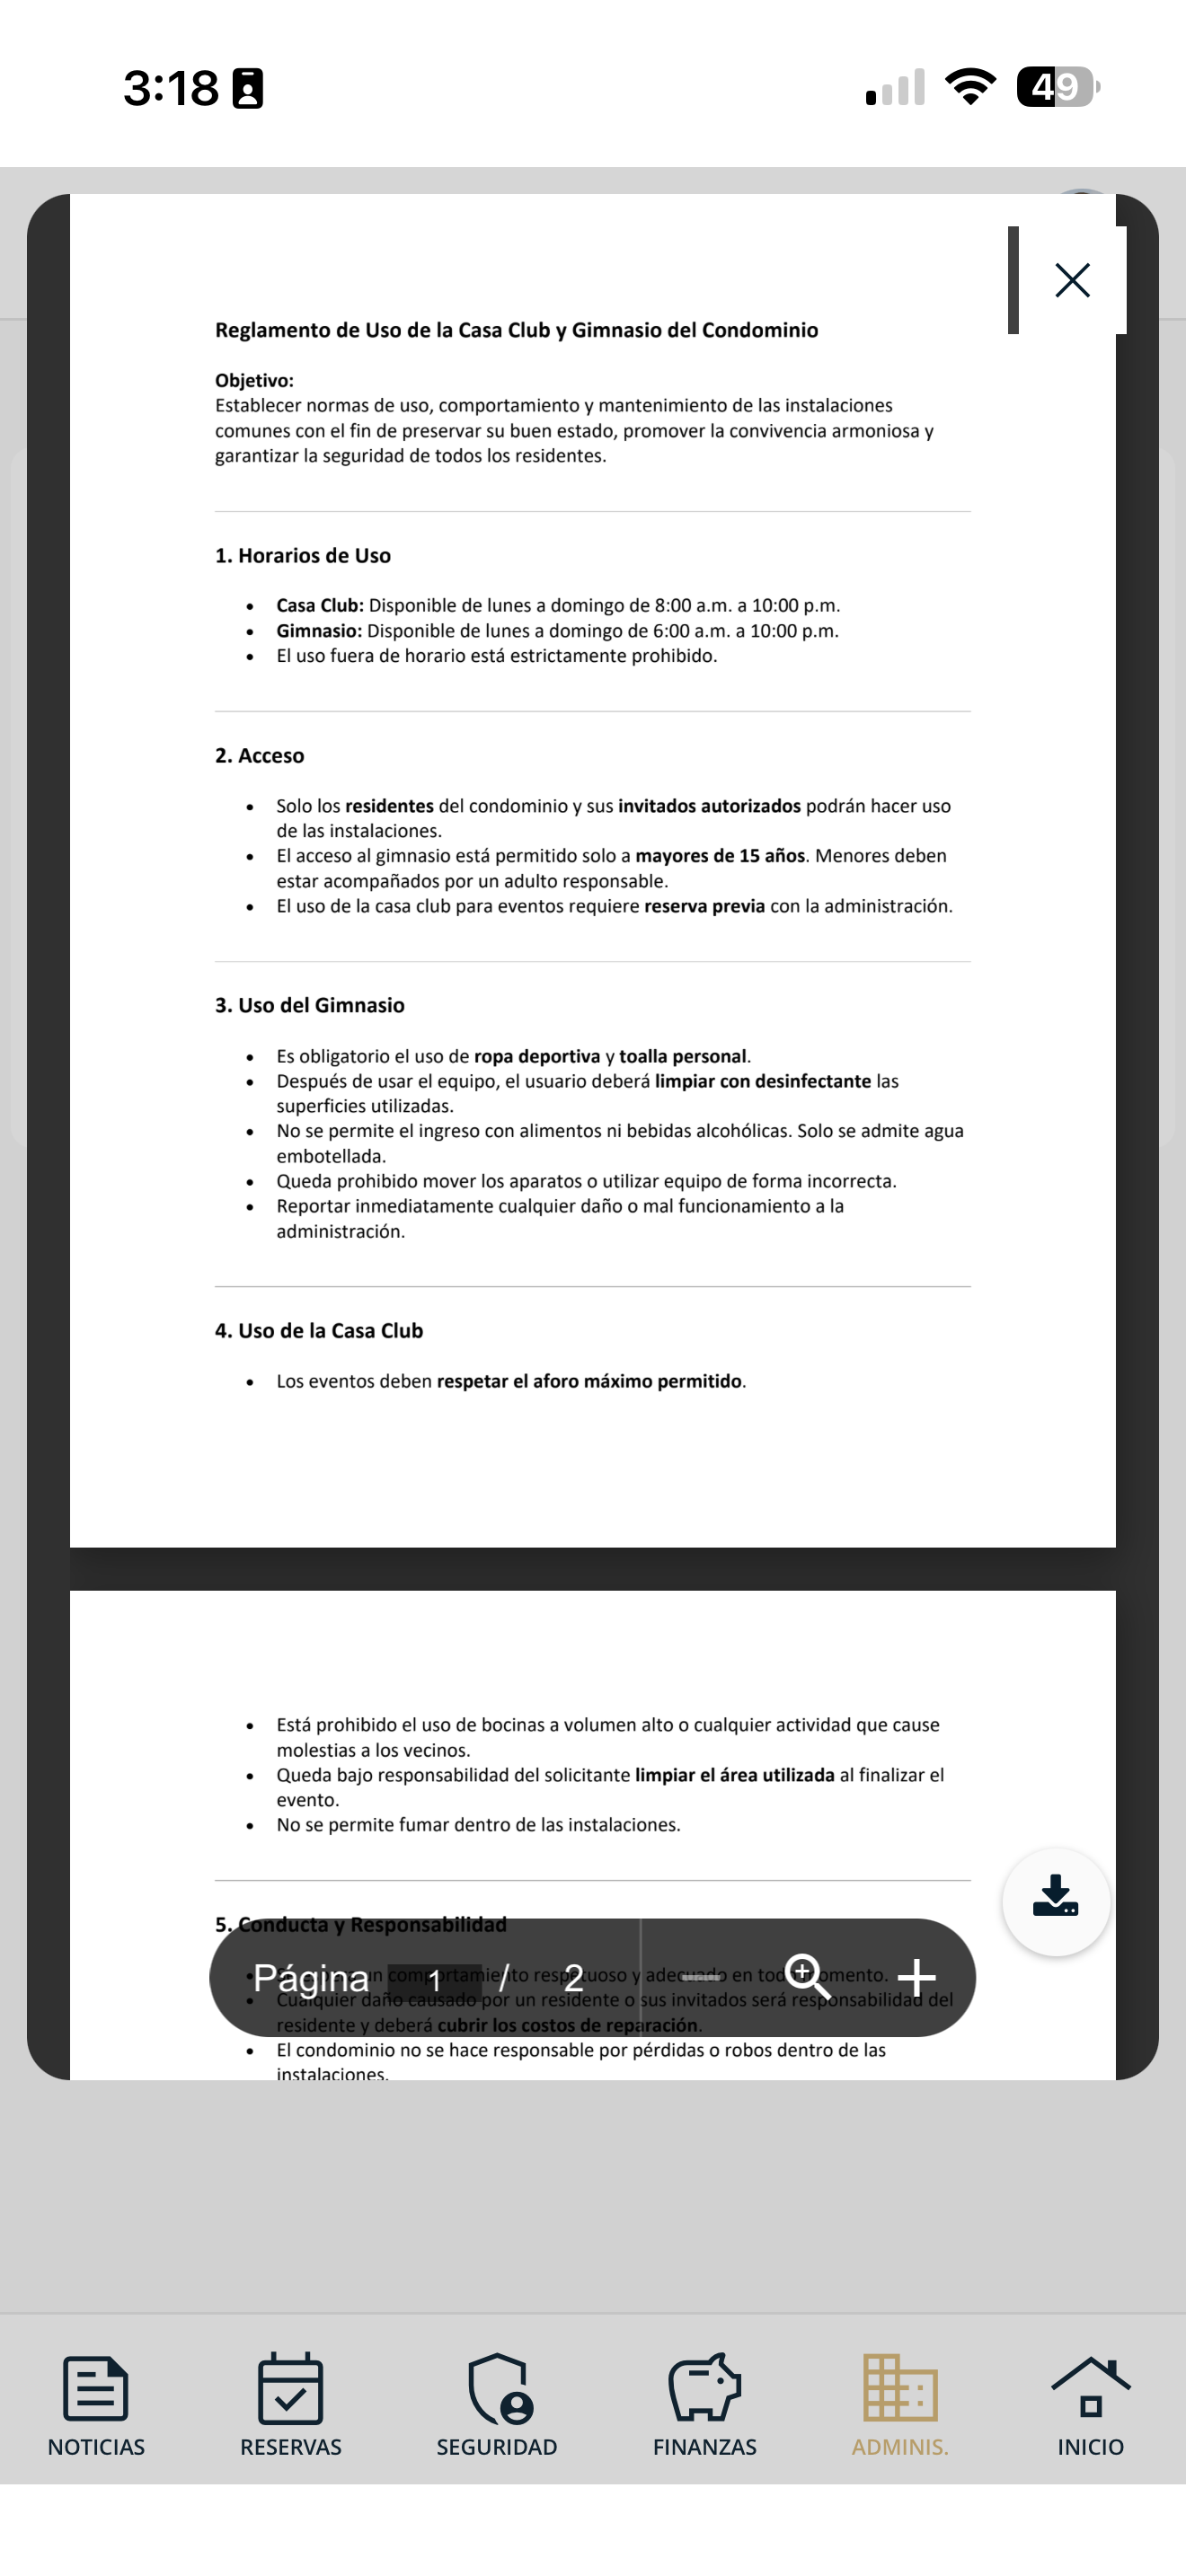
doc-03-abierto.png
Requests to the administrator
Communicate directly with management. Choose what you want to do:
Submit a request
Create a request to communicate directly with management.
Go to Administrative
Open Administrative in the bottom bar and tap "My requests".
admin-menu.png
Open "My requests"
You will see "Direct communication with management" with your requests. Tap the "+" button at the bottom right to create a new one.
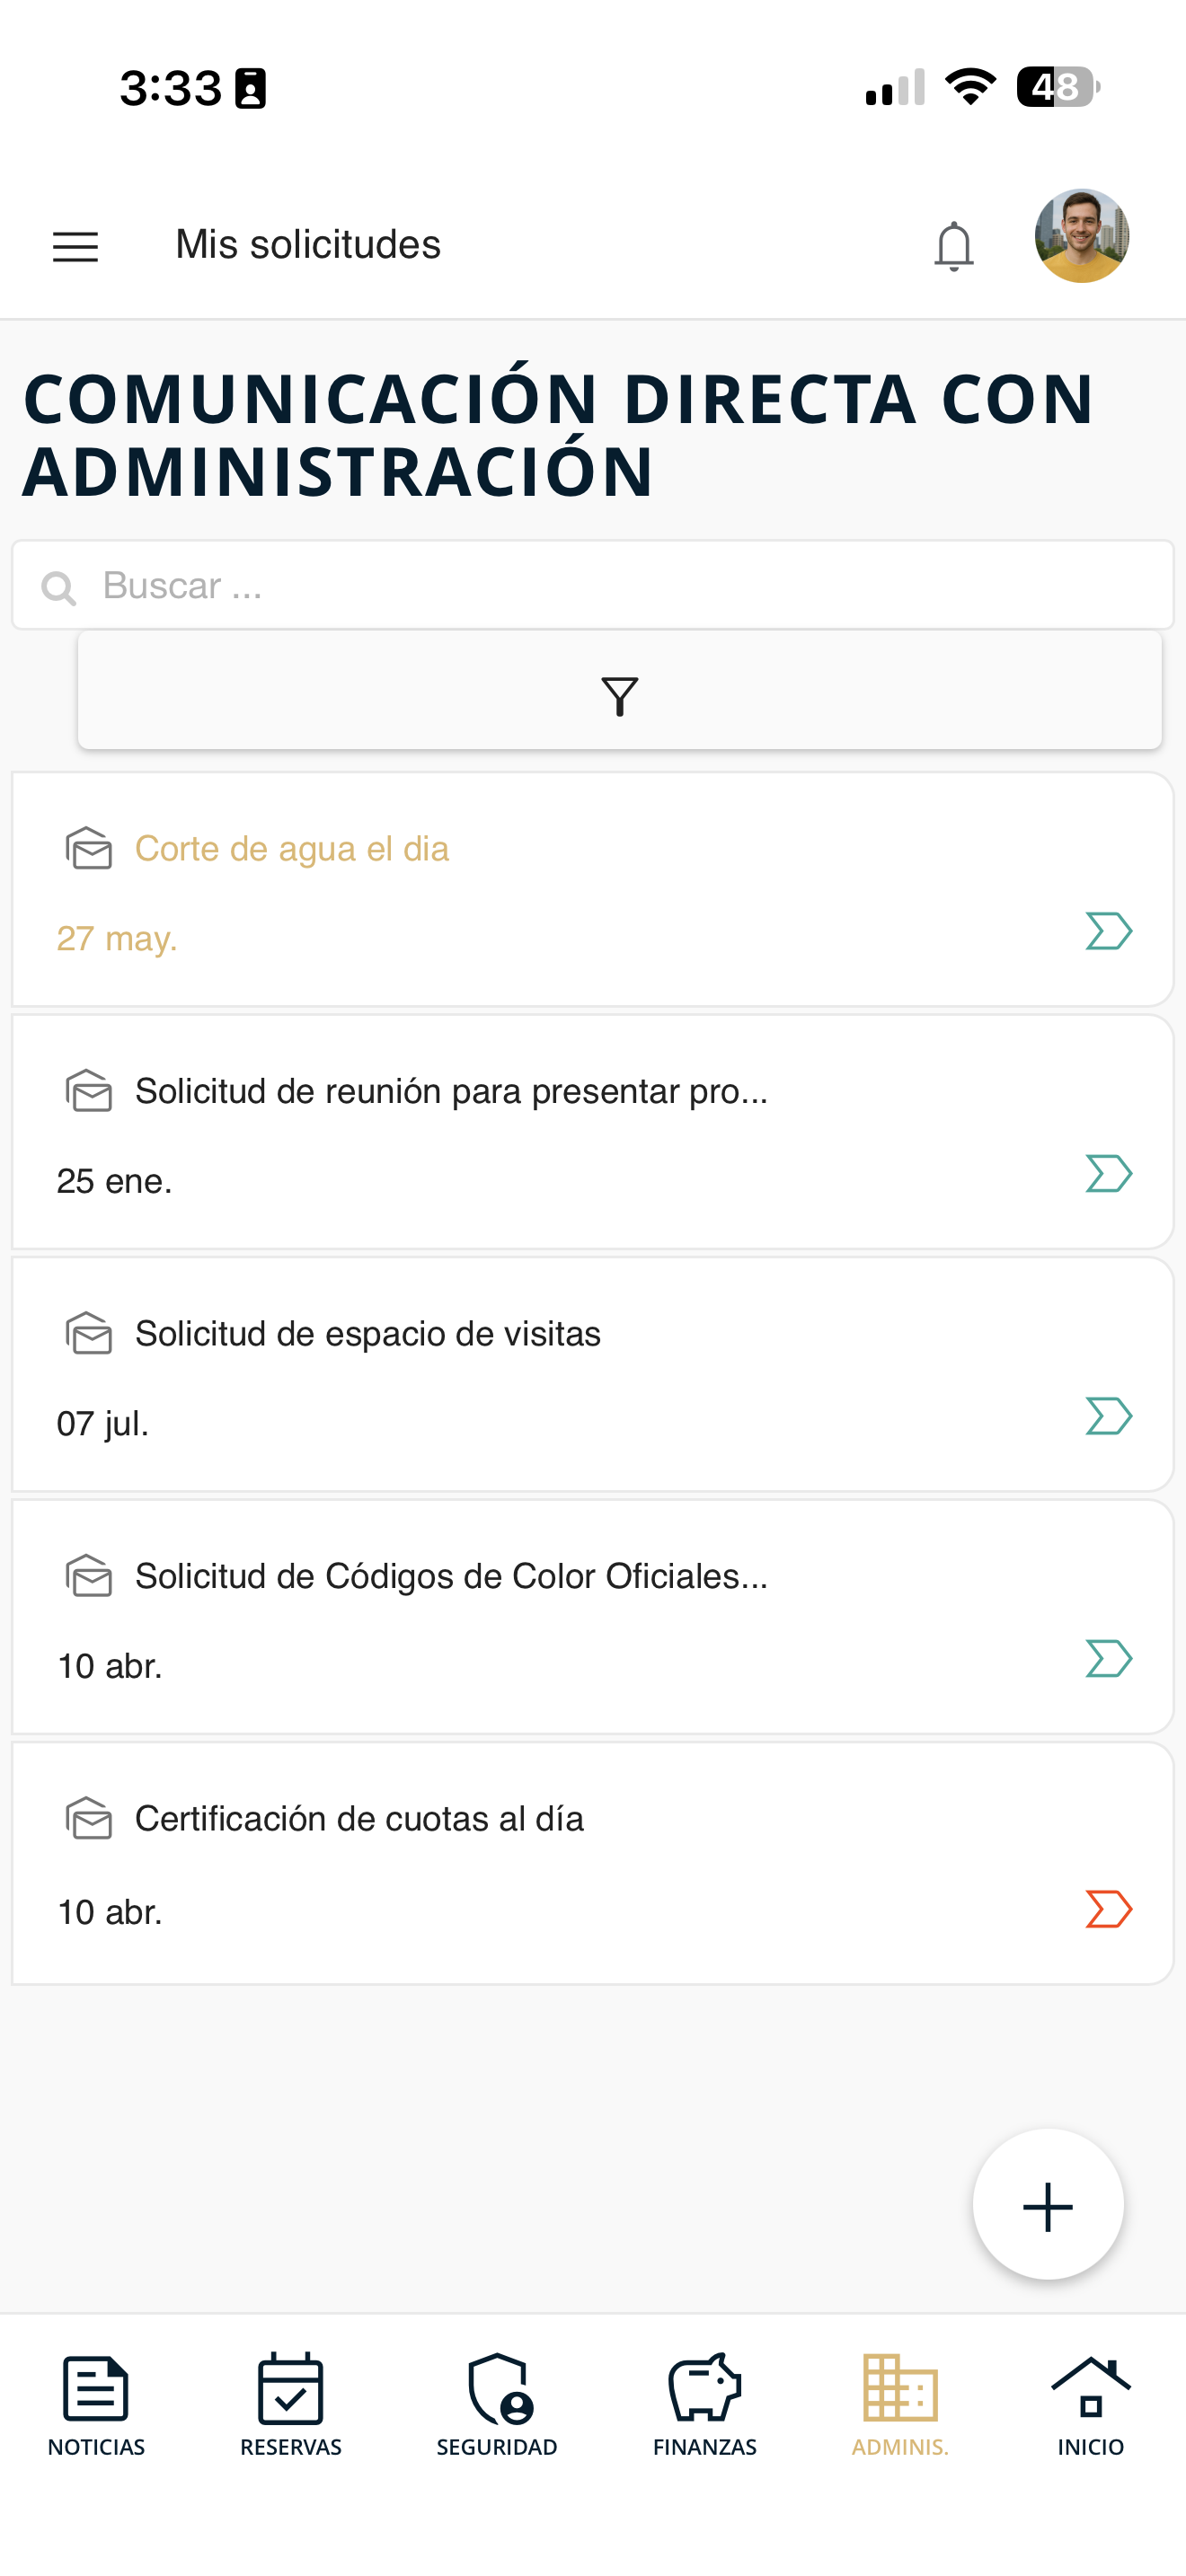
sol-01-lista.png
Fill out and send the request
On "Submit request", type the Subject and the Message. If you want, use "Attach" (max. 10 MB) and press "Send".
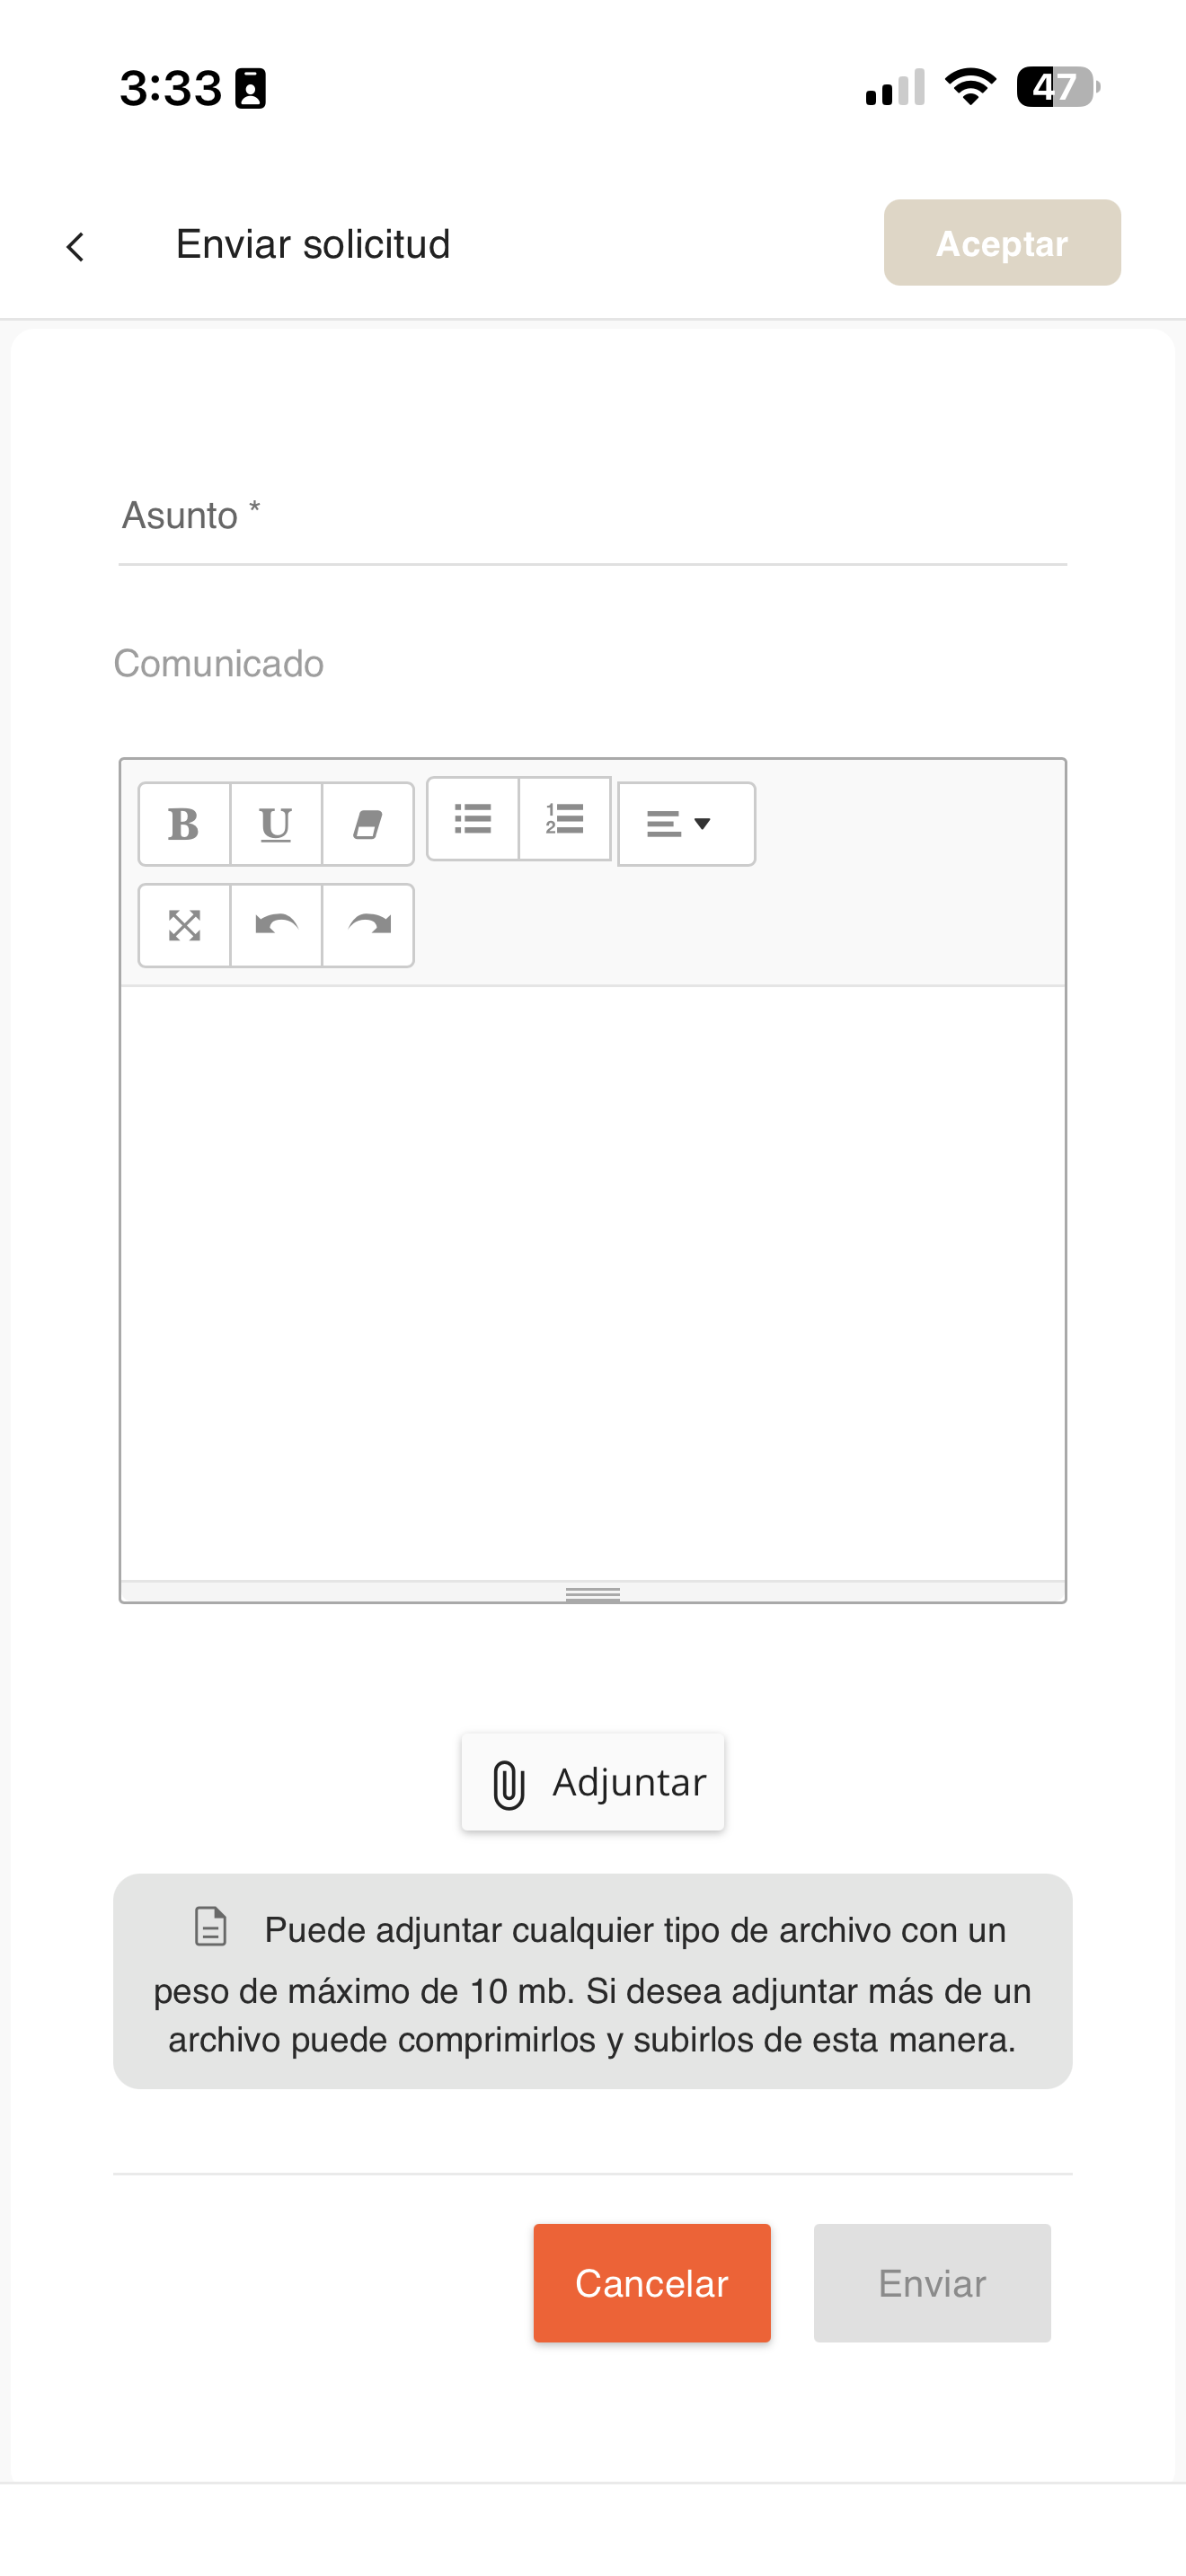
sol-02-nueva.png
View tracking of a request
Check the detail and progress of the requests you have submitted.
Go to Administrative
Open Administrative in the bottom bar and tap "My requests".
admin-menu.png
Open the request
In the list, tap the request you want to review (use the search box or the filter if you need to).
sol-01-lista.png
Review the detail
The "Message detail" opens: the full message, sender, date and the conversation with management.
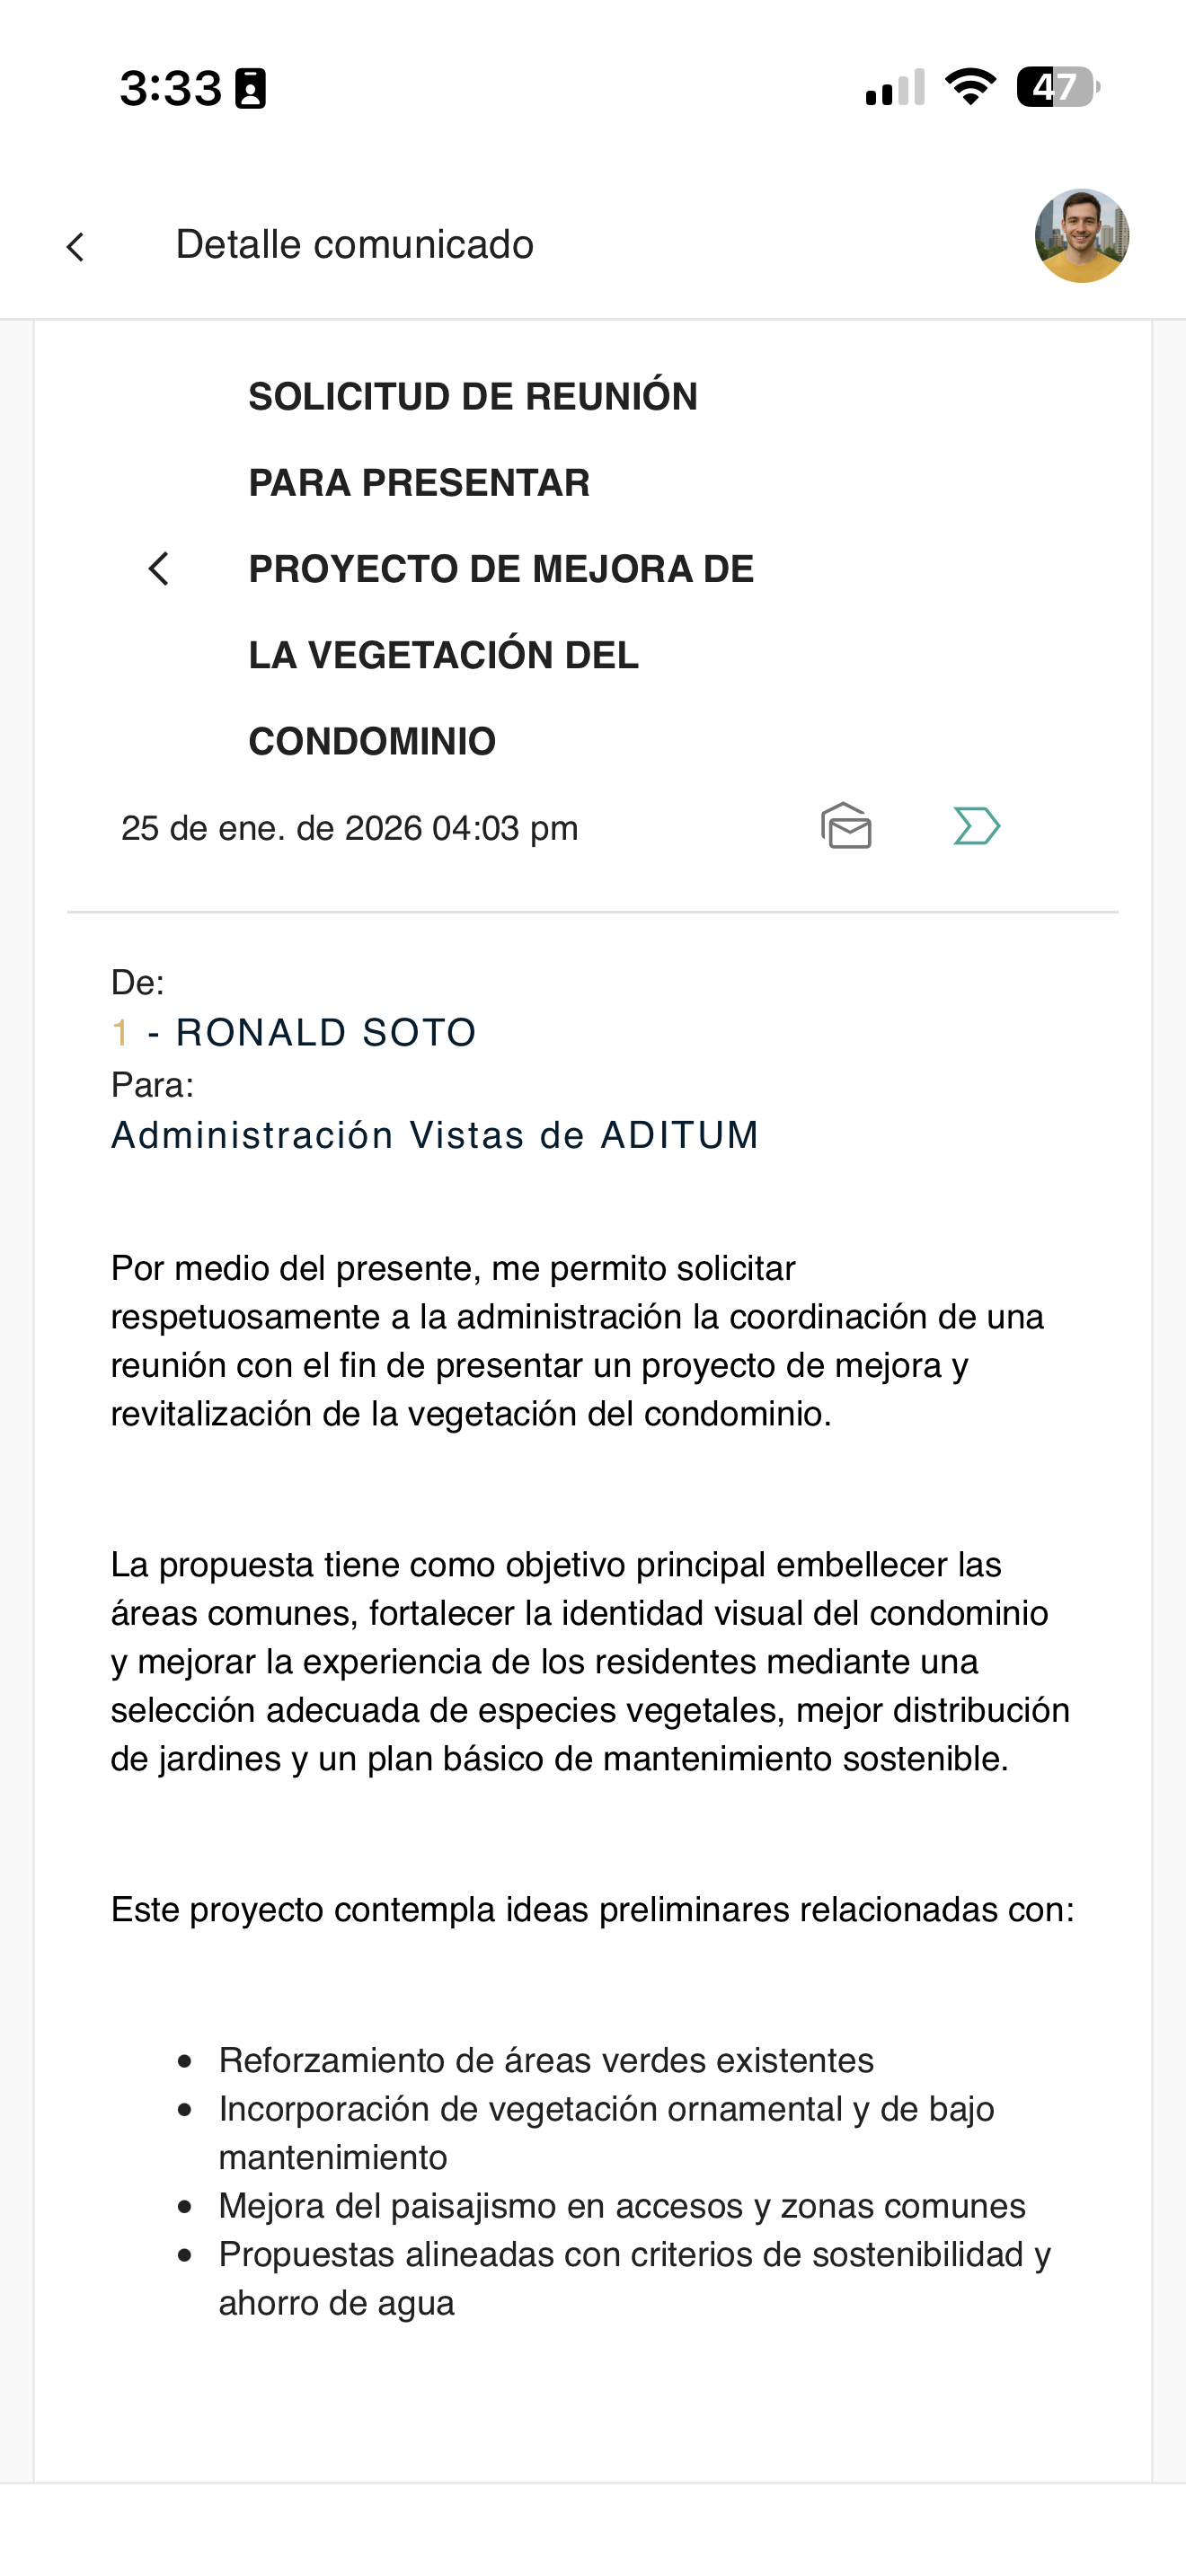
sol-03-detalle.png
Reply to a request
Reply within the conversation of an open request with management.
Go to Administrative
Open Administrative in the bottom bar and tap "My requests".
admin-menu.png
Open the request
Tap the request you want to reply to in order to open its "Message detail".
sol-03-detalle.png
Write your reply
Further down, in "Conversation", type your Reply (you can Attach a file) and press "Send Reply".
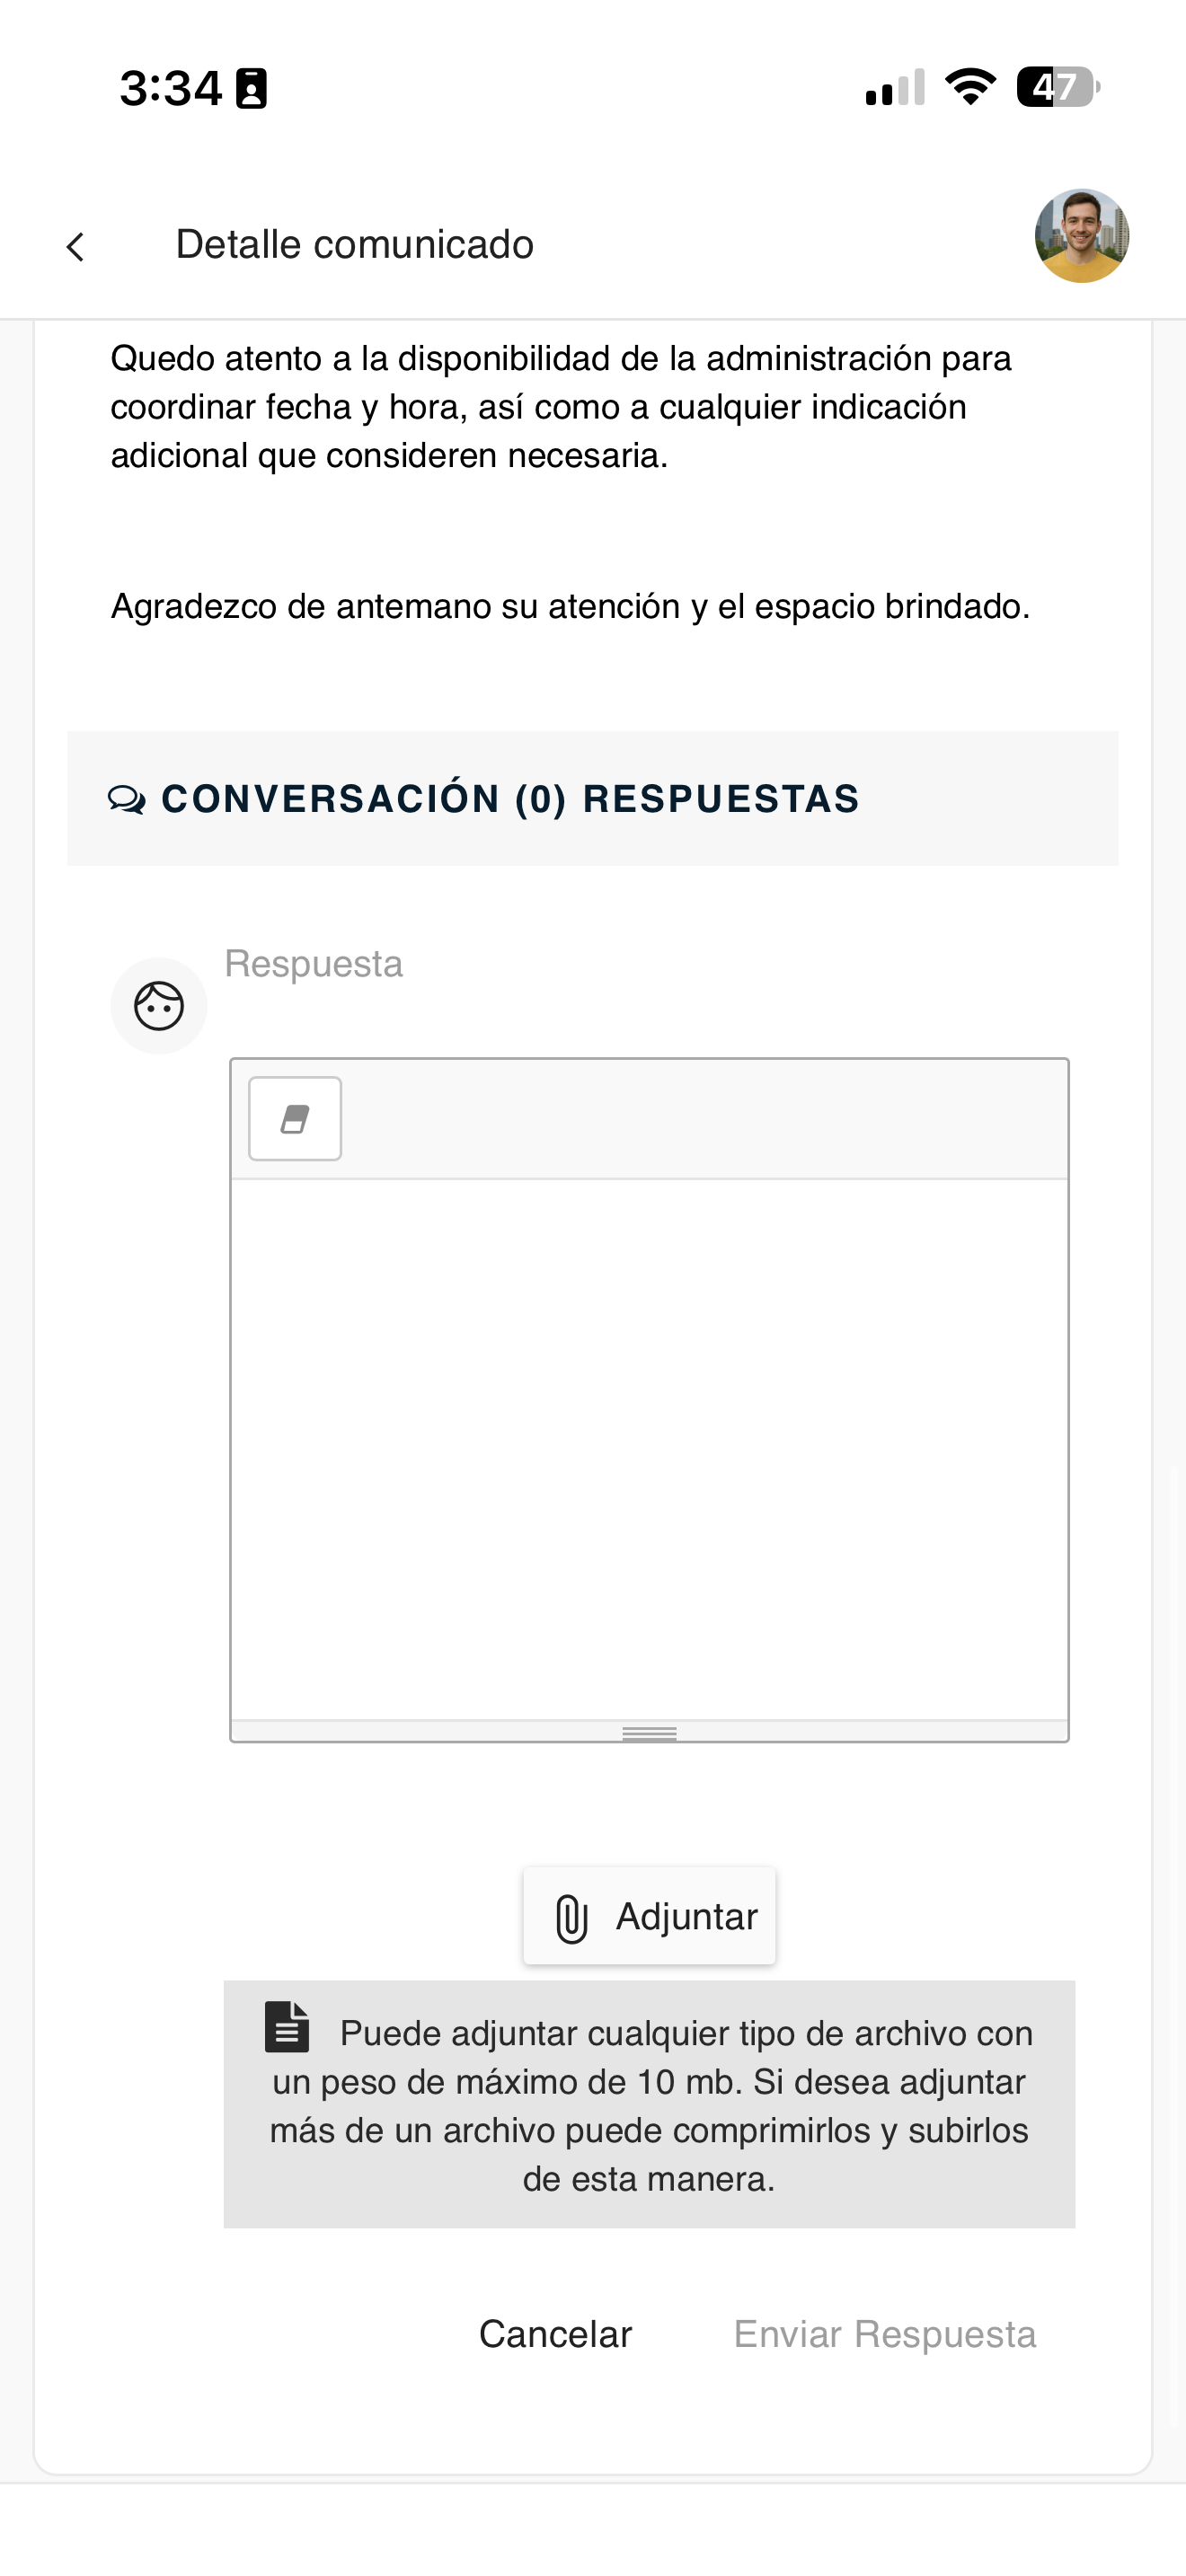
sol-04-responder.png
View the assemblies
Check the condominium's assemblies: previous ones held in Aditum and the currently called assembly.
Go to "Assemblies"
Open Administrative in the bottom bar and tap "Assemblies".
admin-menu.png
Review the list
You will see all the assemblies. The current one appears as "CALLED" with the notice "Please confirm your attendance"; past ones appear as "FINISHED" with their attendance type.

asamblea-02-listado.png
Confirm attendance
Before the assembly, confirm your attendance, choose how you will participate and attach your credentials as an owner.
Go to "Assemblies"
Open Administrative in the bottom bar and tap "Assemblies".
admin-menu.png
Open the called assembly
Enter the assembly marked as "CALLED" and press "Confirm Attendance".

asamblea-03-detalle.png
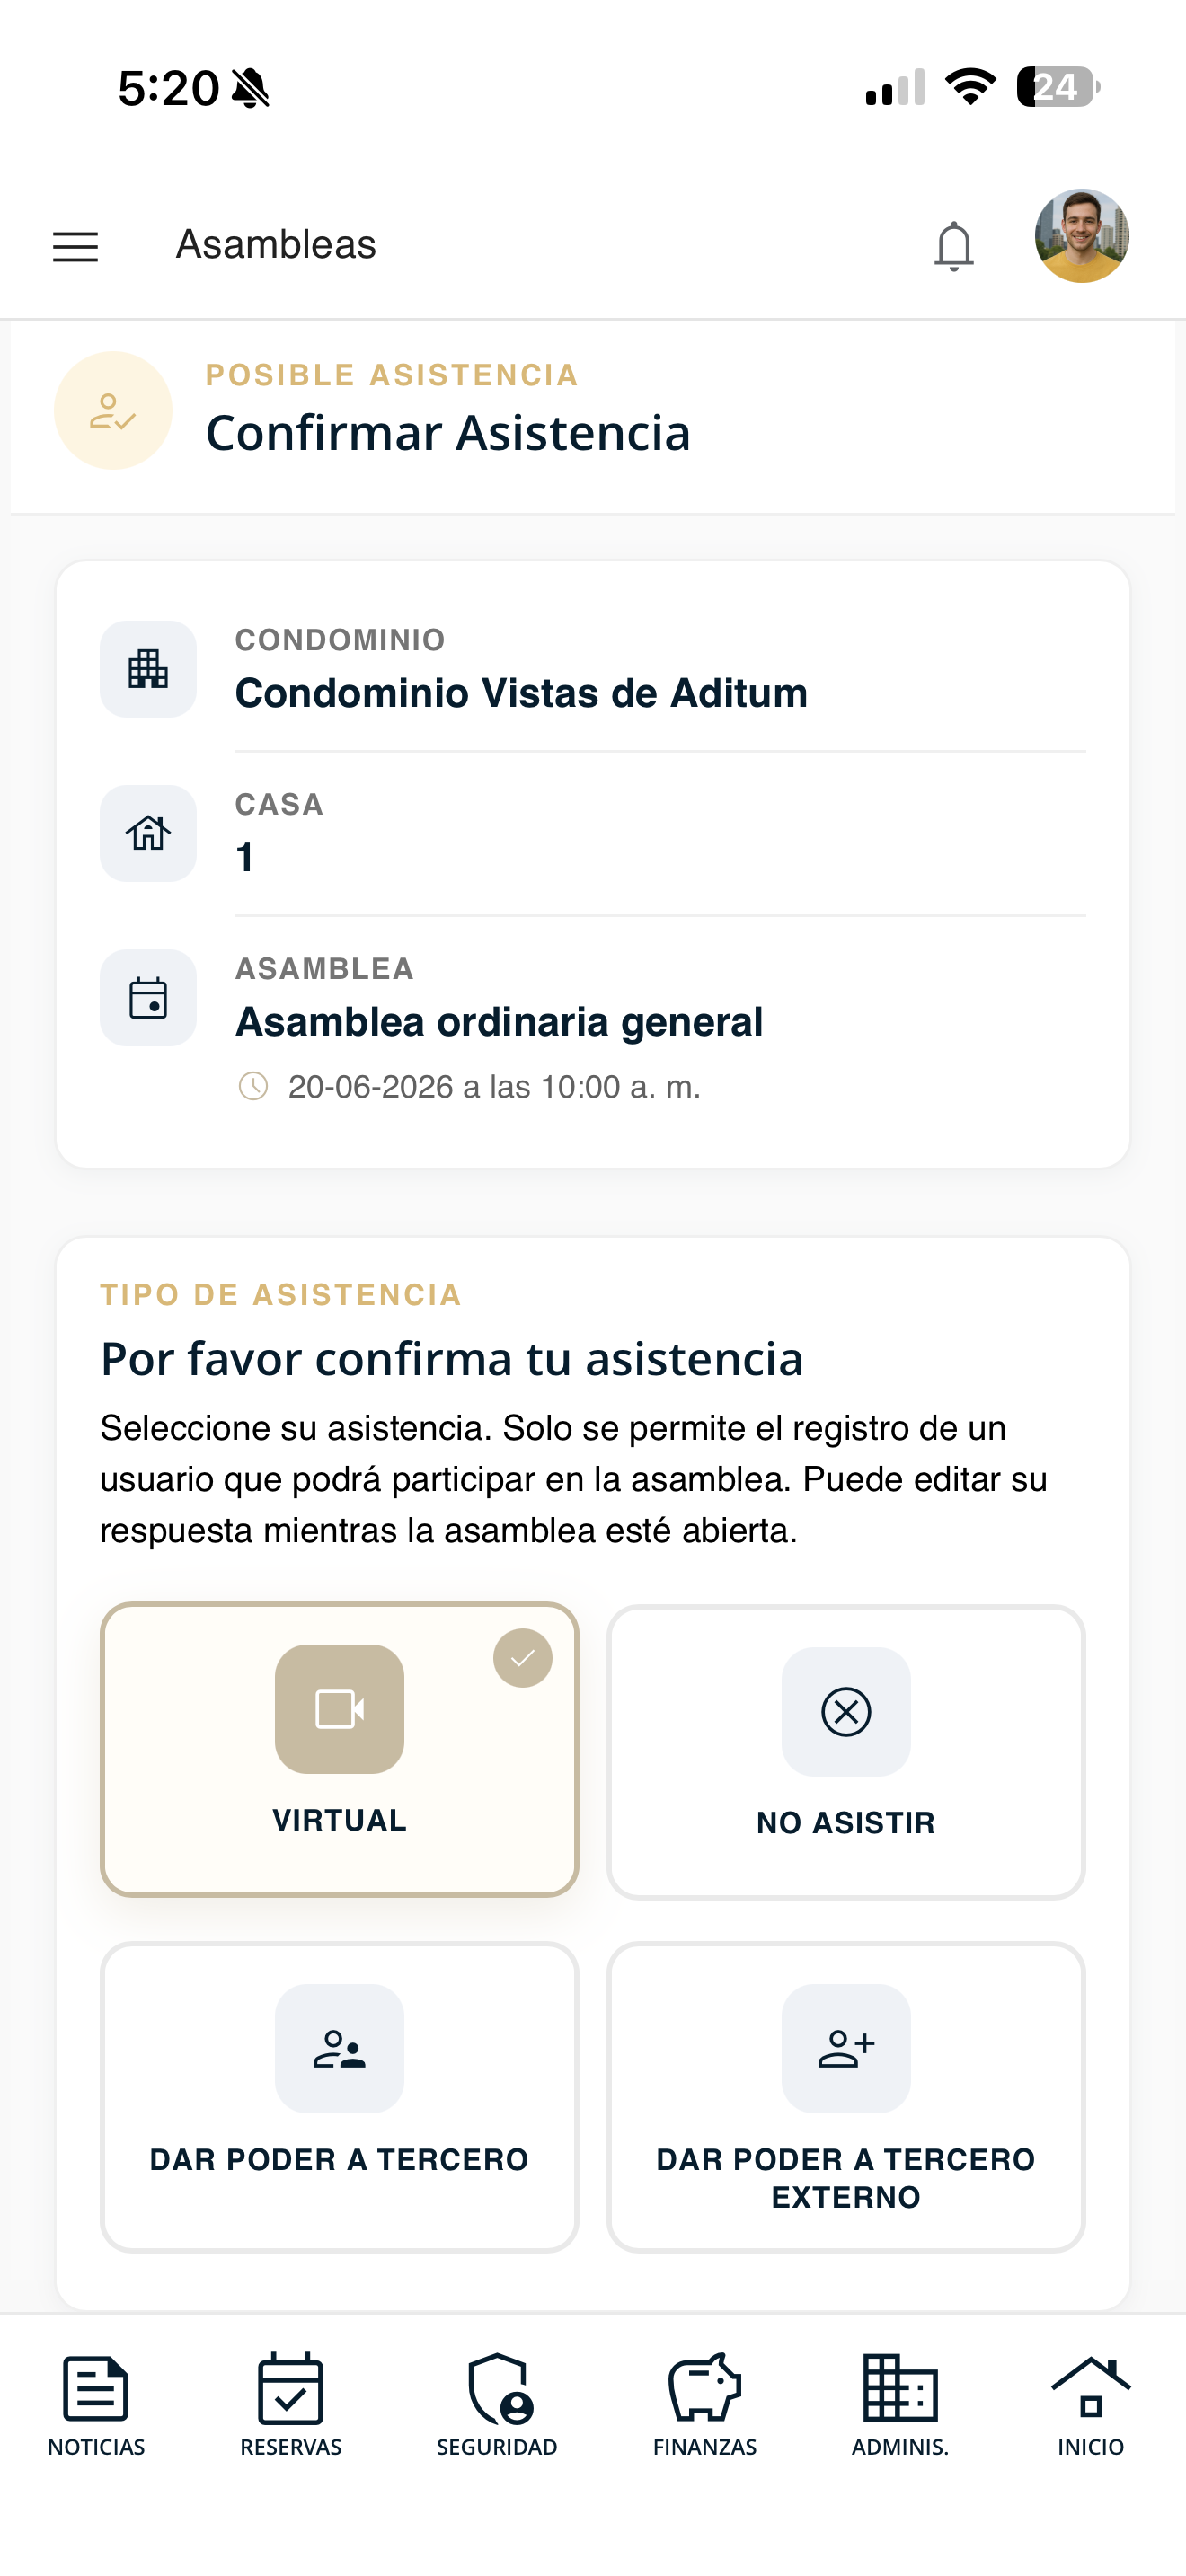
Choose the attendance type
Select how you will participate: Virtual, Do not attend, Grant proxy to a third party or Grant proxy to an external third party.
asamblea-04-tipo.png
Attach your credentials
Press "Upload Image" and take or choose a photo showing your face next to your ID (or a document that certifies you as the registered owner). Make sure it is sharp and legible, and press "Save".
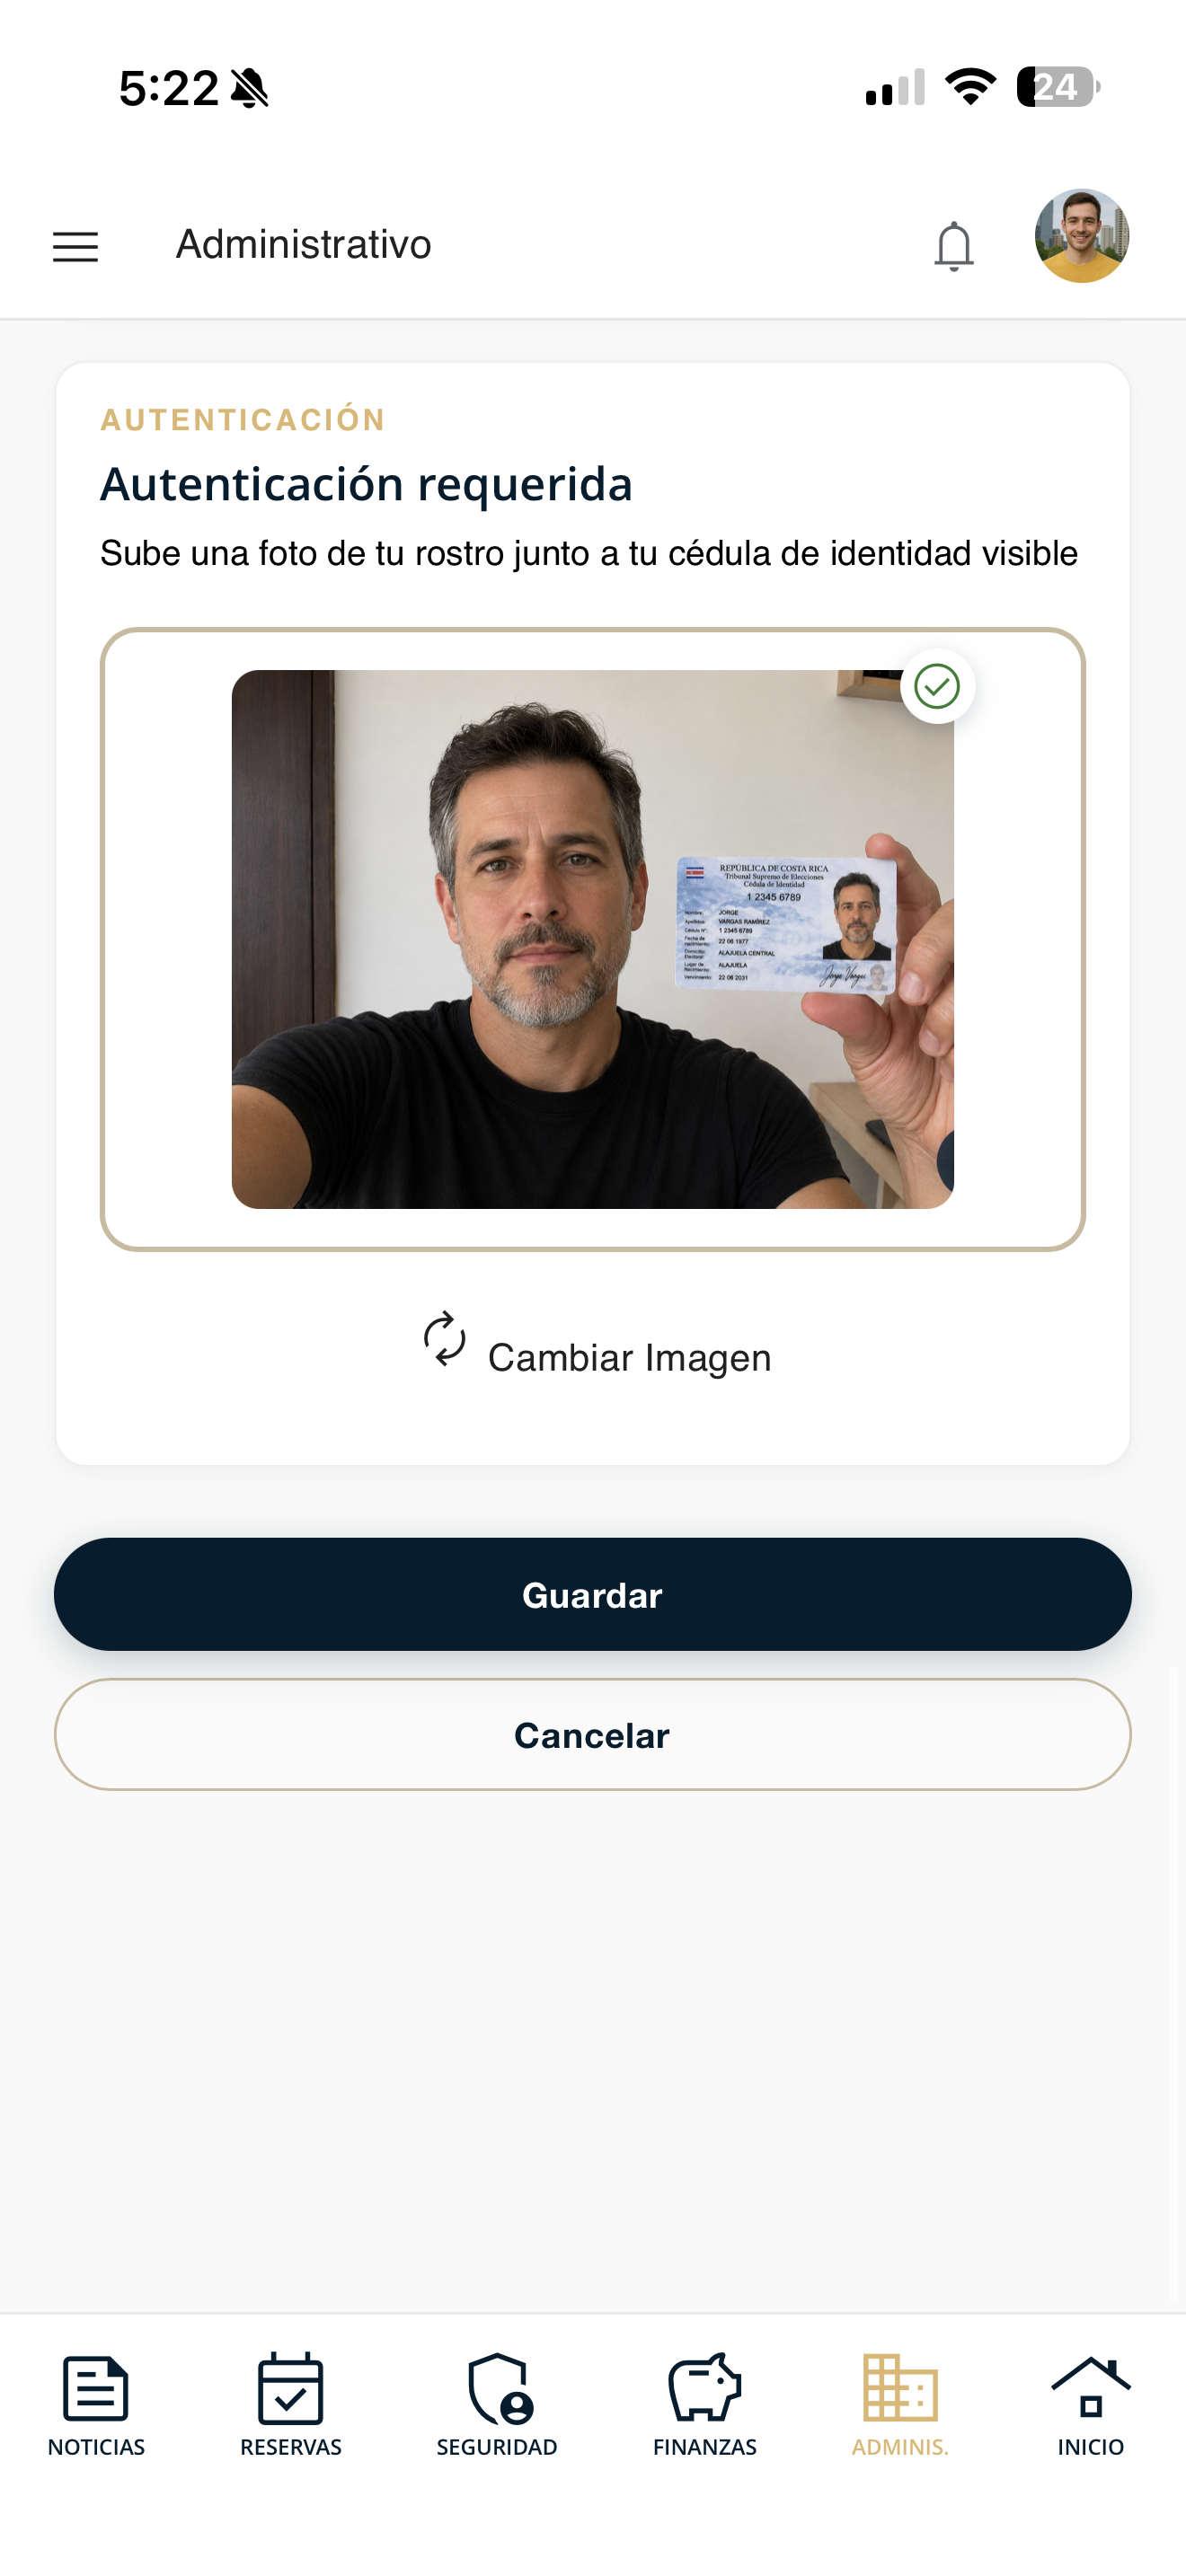
asamblea-05-acreditacion.png
Follow the agenda
During the live assembly, follow the agenda items in real time.
Go to "Assemblies"
Open Administrative in the bottom bar and tap "Assemblies", then enter the assembly in progress.
admin-menu.png
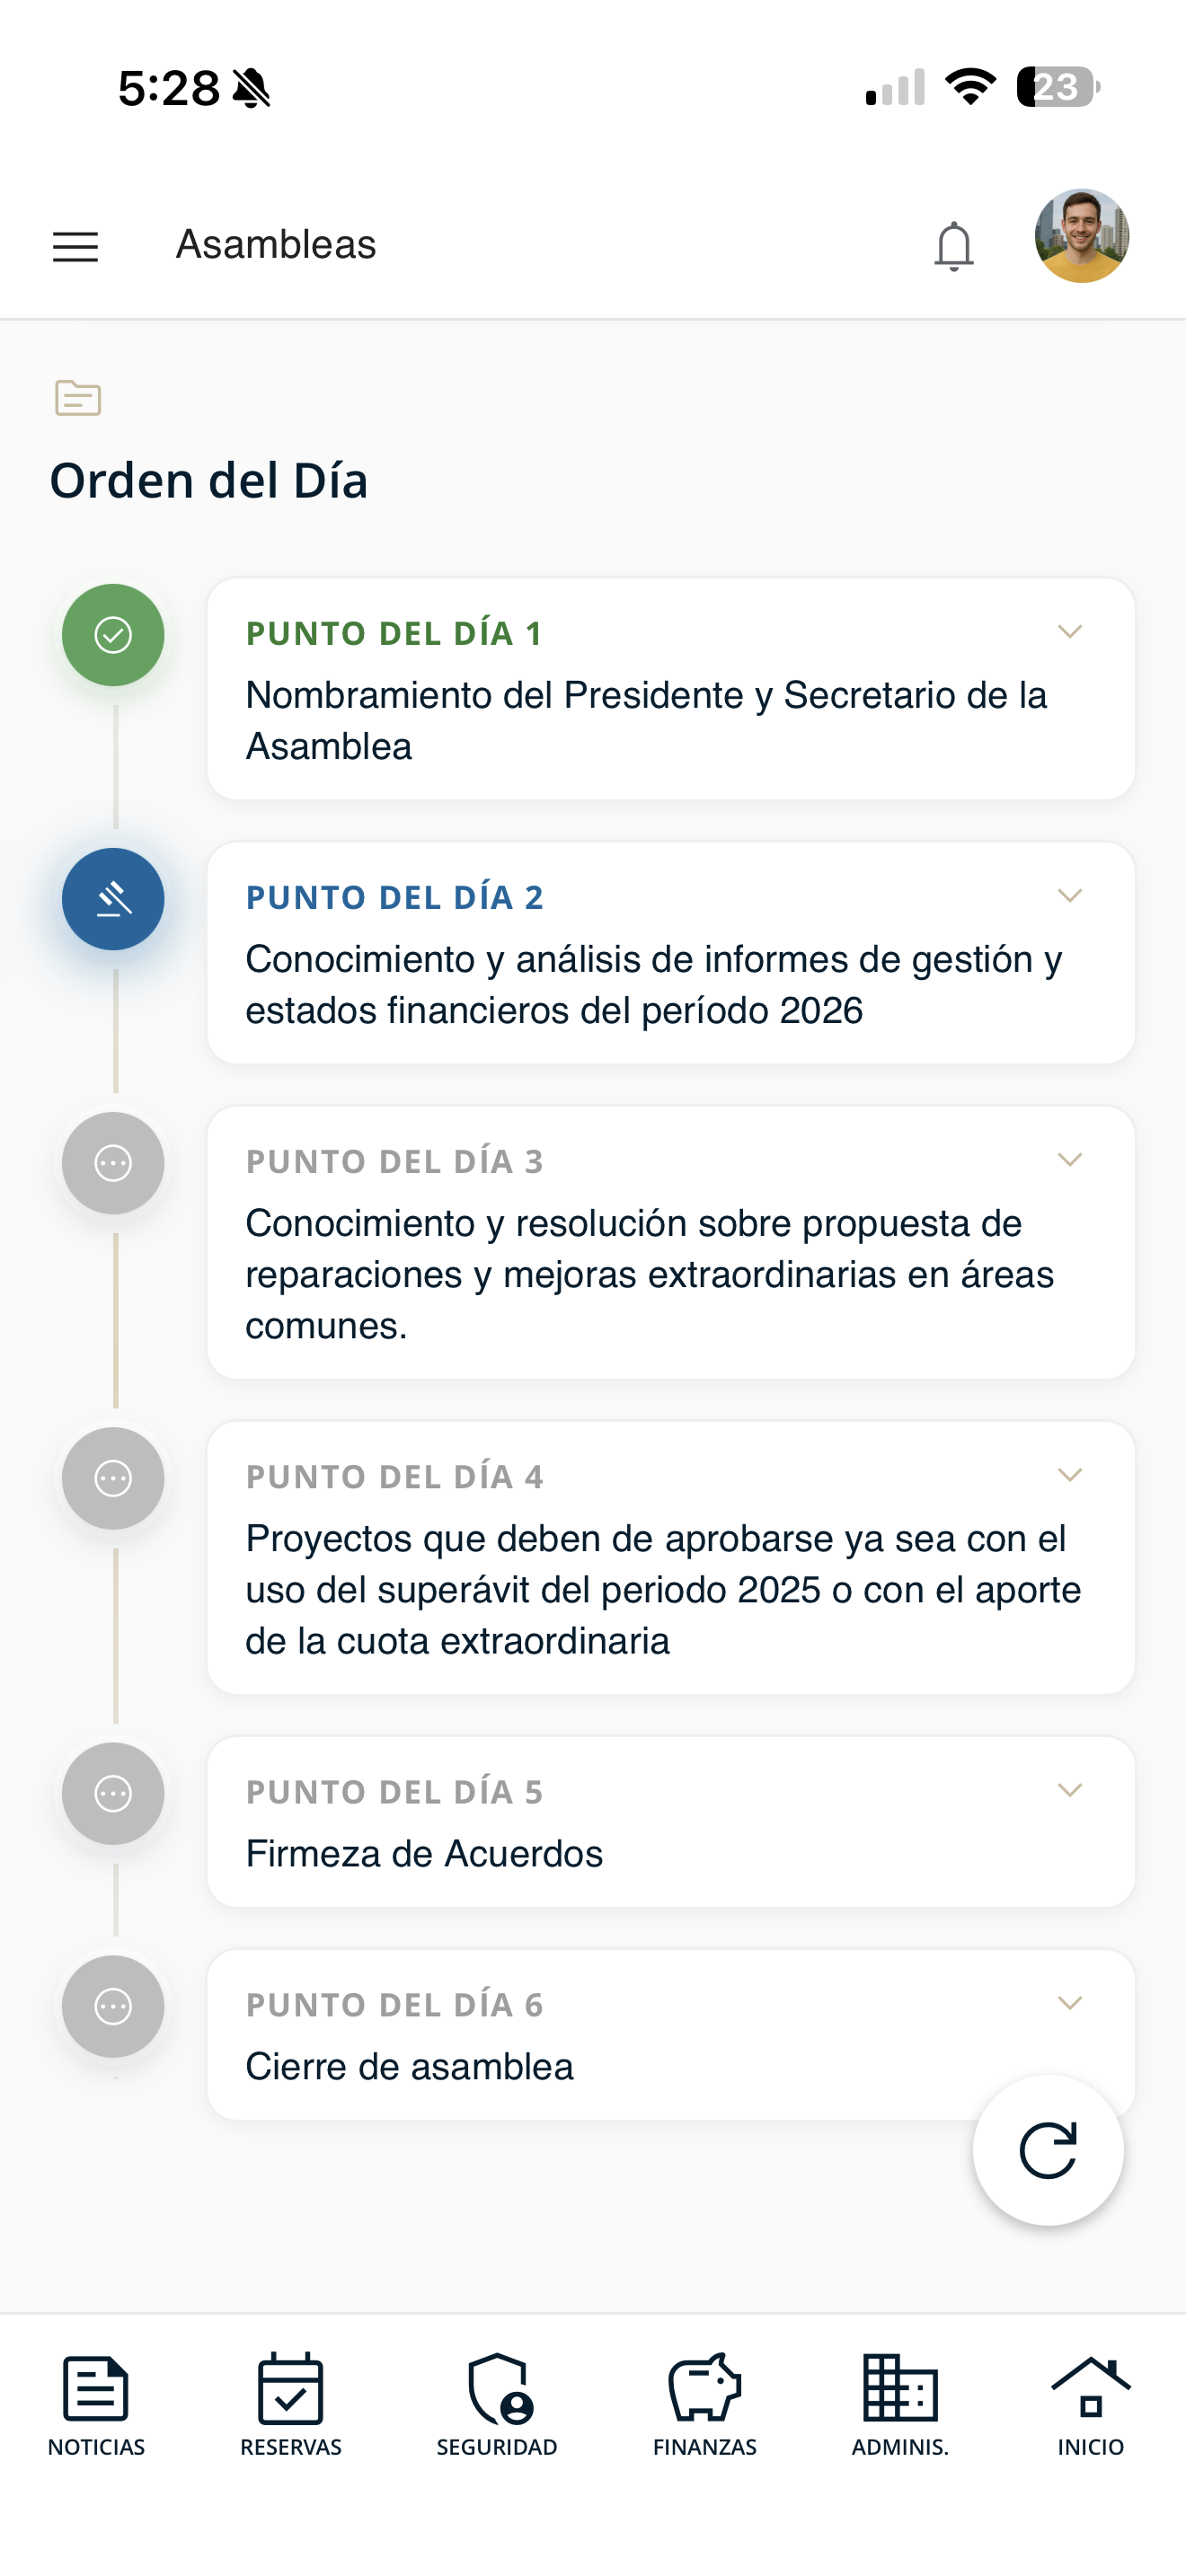
Follow the items live
When the assembly starts and your credentials are verified, you will see the full agenda. The item being discussed appears highlighted in blue; the others stay gray until their turn. This way you always know where the assembly is.
asamblea-06-ordendia.png
Cast your vote
When voting opens on an item, cast your vote from the app.
Go to "Assemblies"
Open Administrative in the bottom bar and tap "Assemblies", then enter the assembly in progress.
admin-menu.png
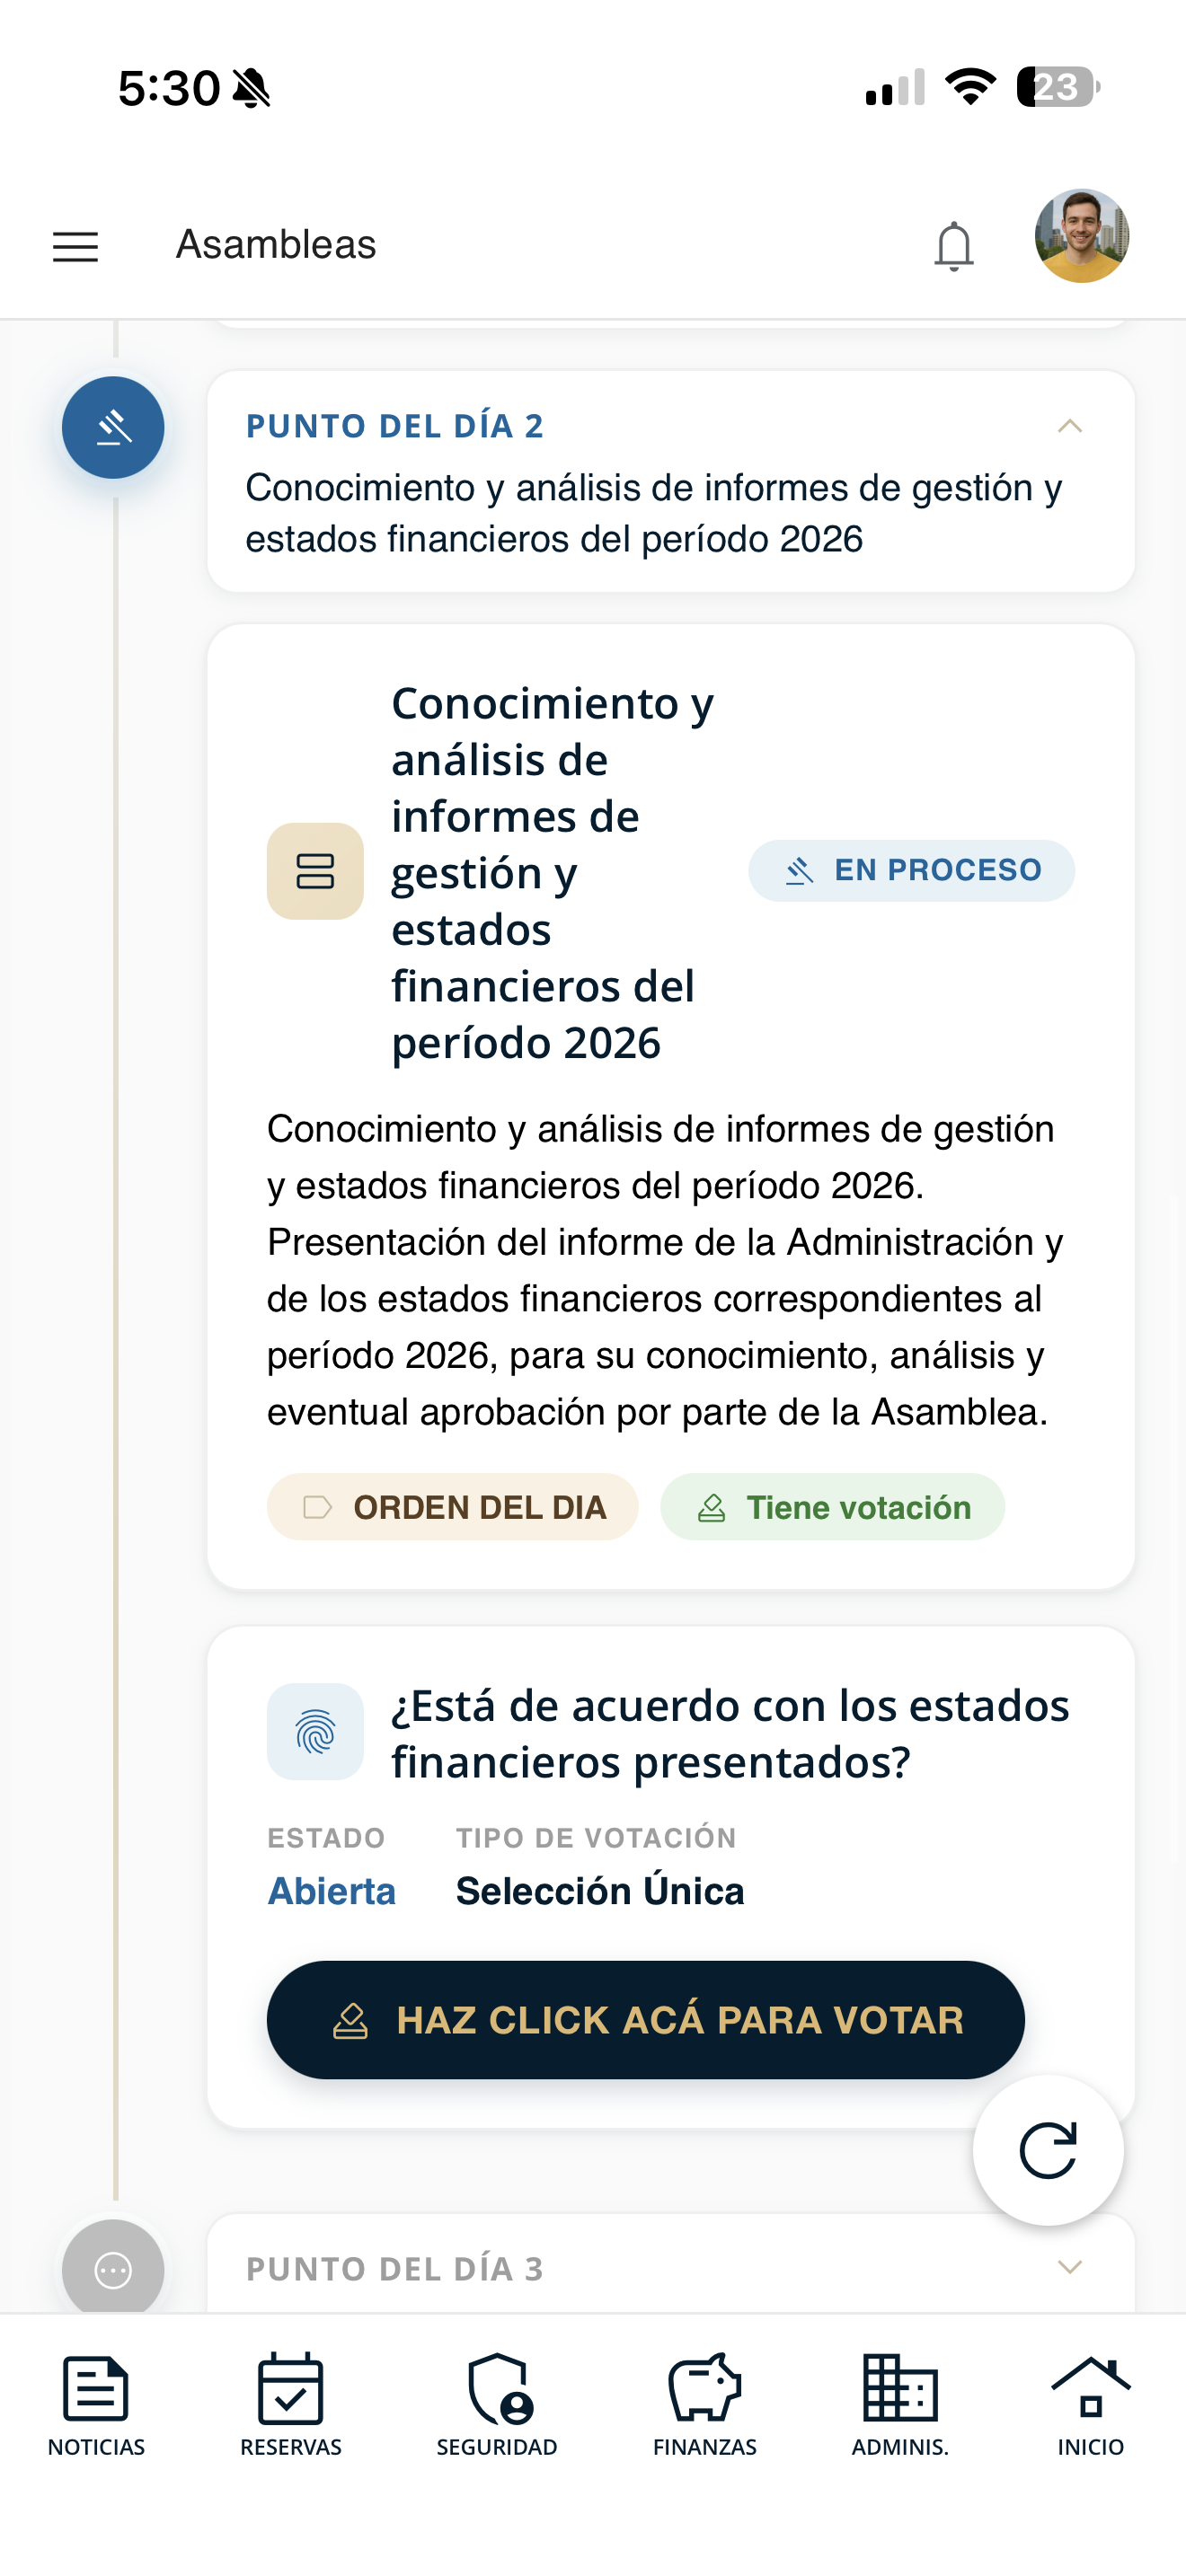
Open the item voting
On the active item, when voting is open, the "CLICK HERE TO VOTE" button appears. Tap it.
asamblea-07-boton-votar.png
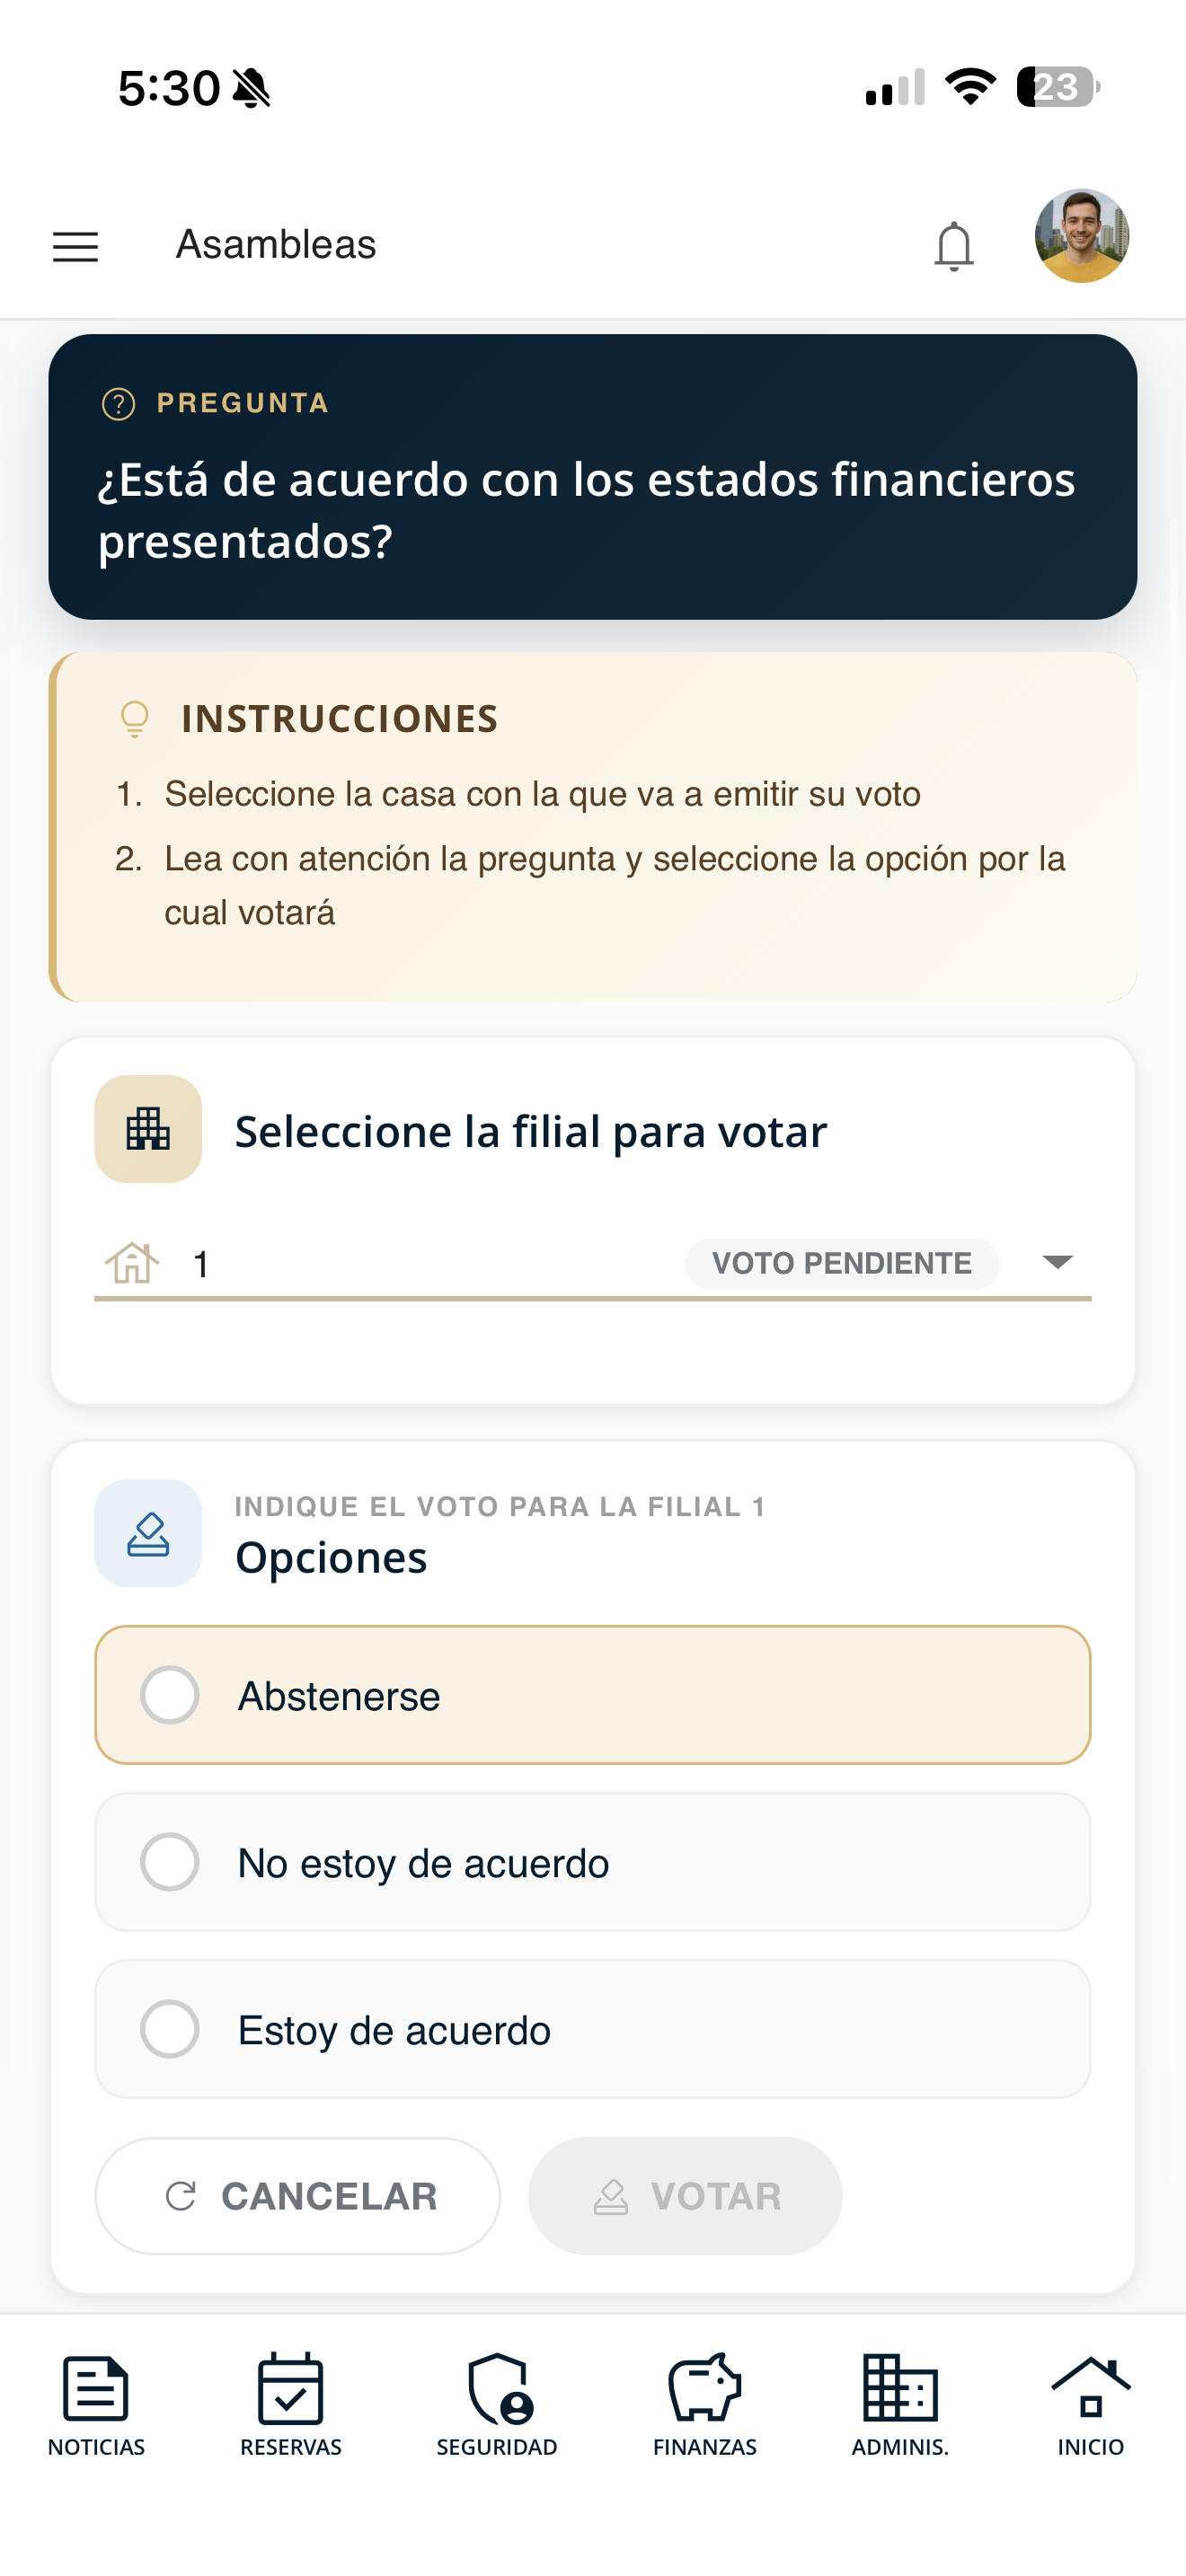
Cast your vote
Read the question, select the unit you will vote with and choose your option (I agree, I disagree or Abstain). Tap "VOTE" to confirm.
asamblea-08-votacion.png
View the result
When voting on an item closes, check the official result and the winning option.
Wait for voting to close
When everyone has voted and management closes the voting, the item status changes to "Closed".
asamblea-07-boton-votar.png
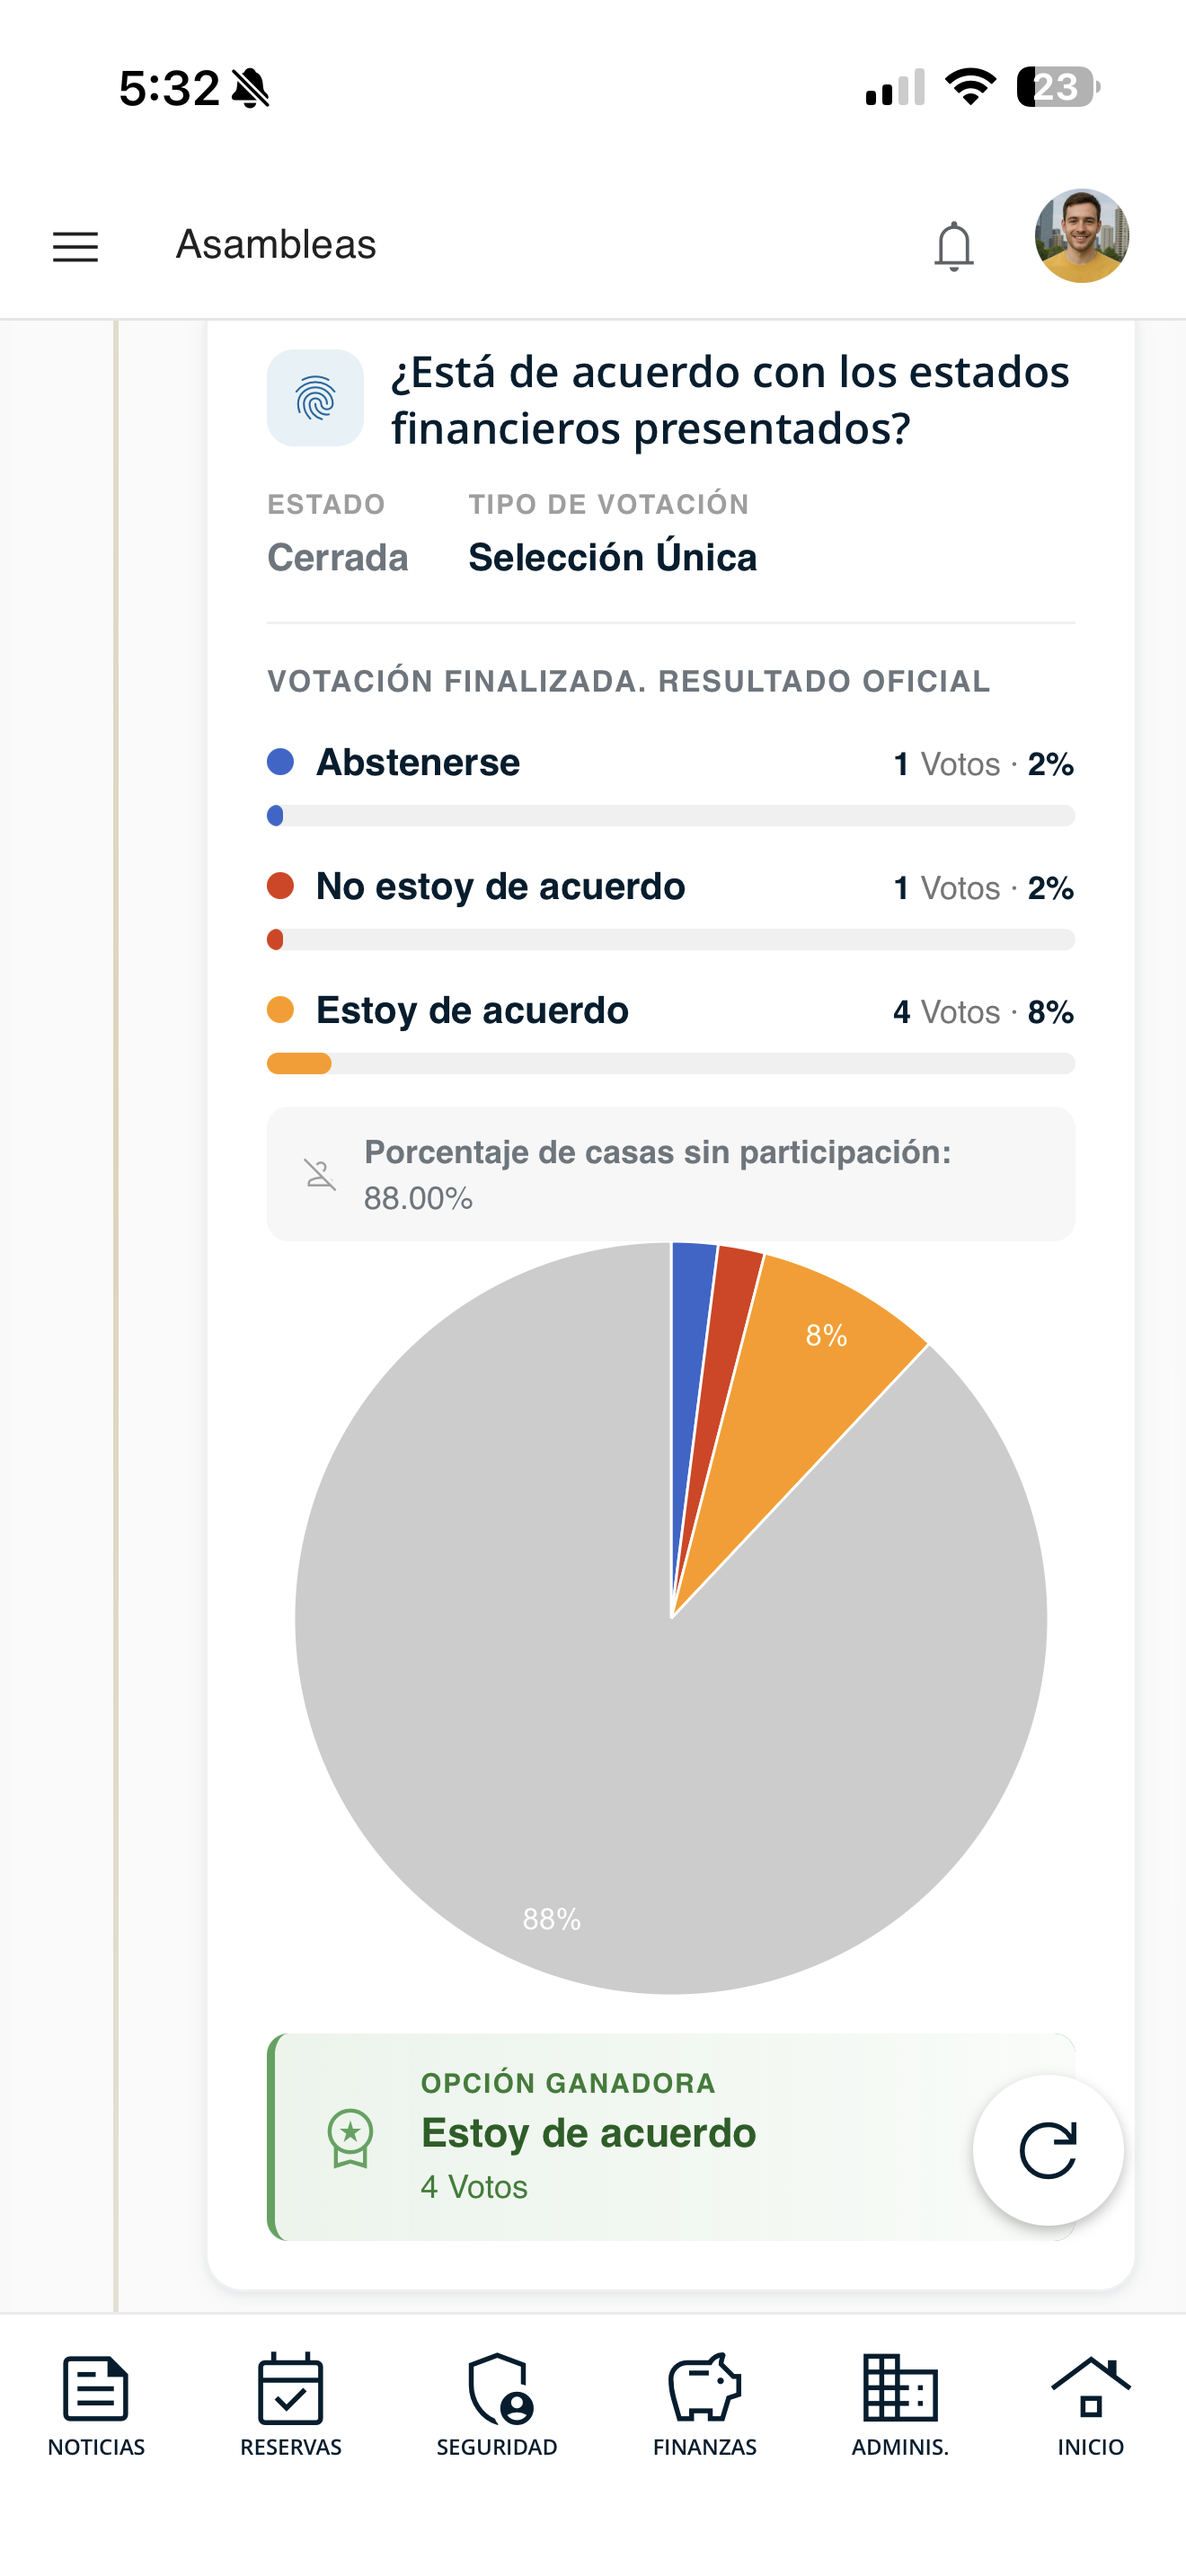
View the official result
You will see the count by option (with percentages and bars), the pie chart, the percentage of households that did not participate and, in green, the winning option with its votes.
asamblea-09-resultado.png
My file
Check your unit's file: certifications, warnings and payments, organized in folders.
Go to Administrative
Open Administrative in the bottom bar and tap "My file".
admin-menu.png
Open your file
You will see "My unit's file" organized in folders: Certifications, Warnings and Payments. Tap the folder you need.
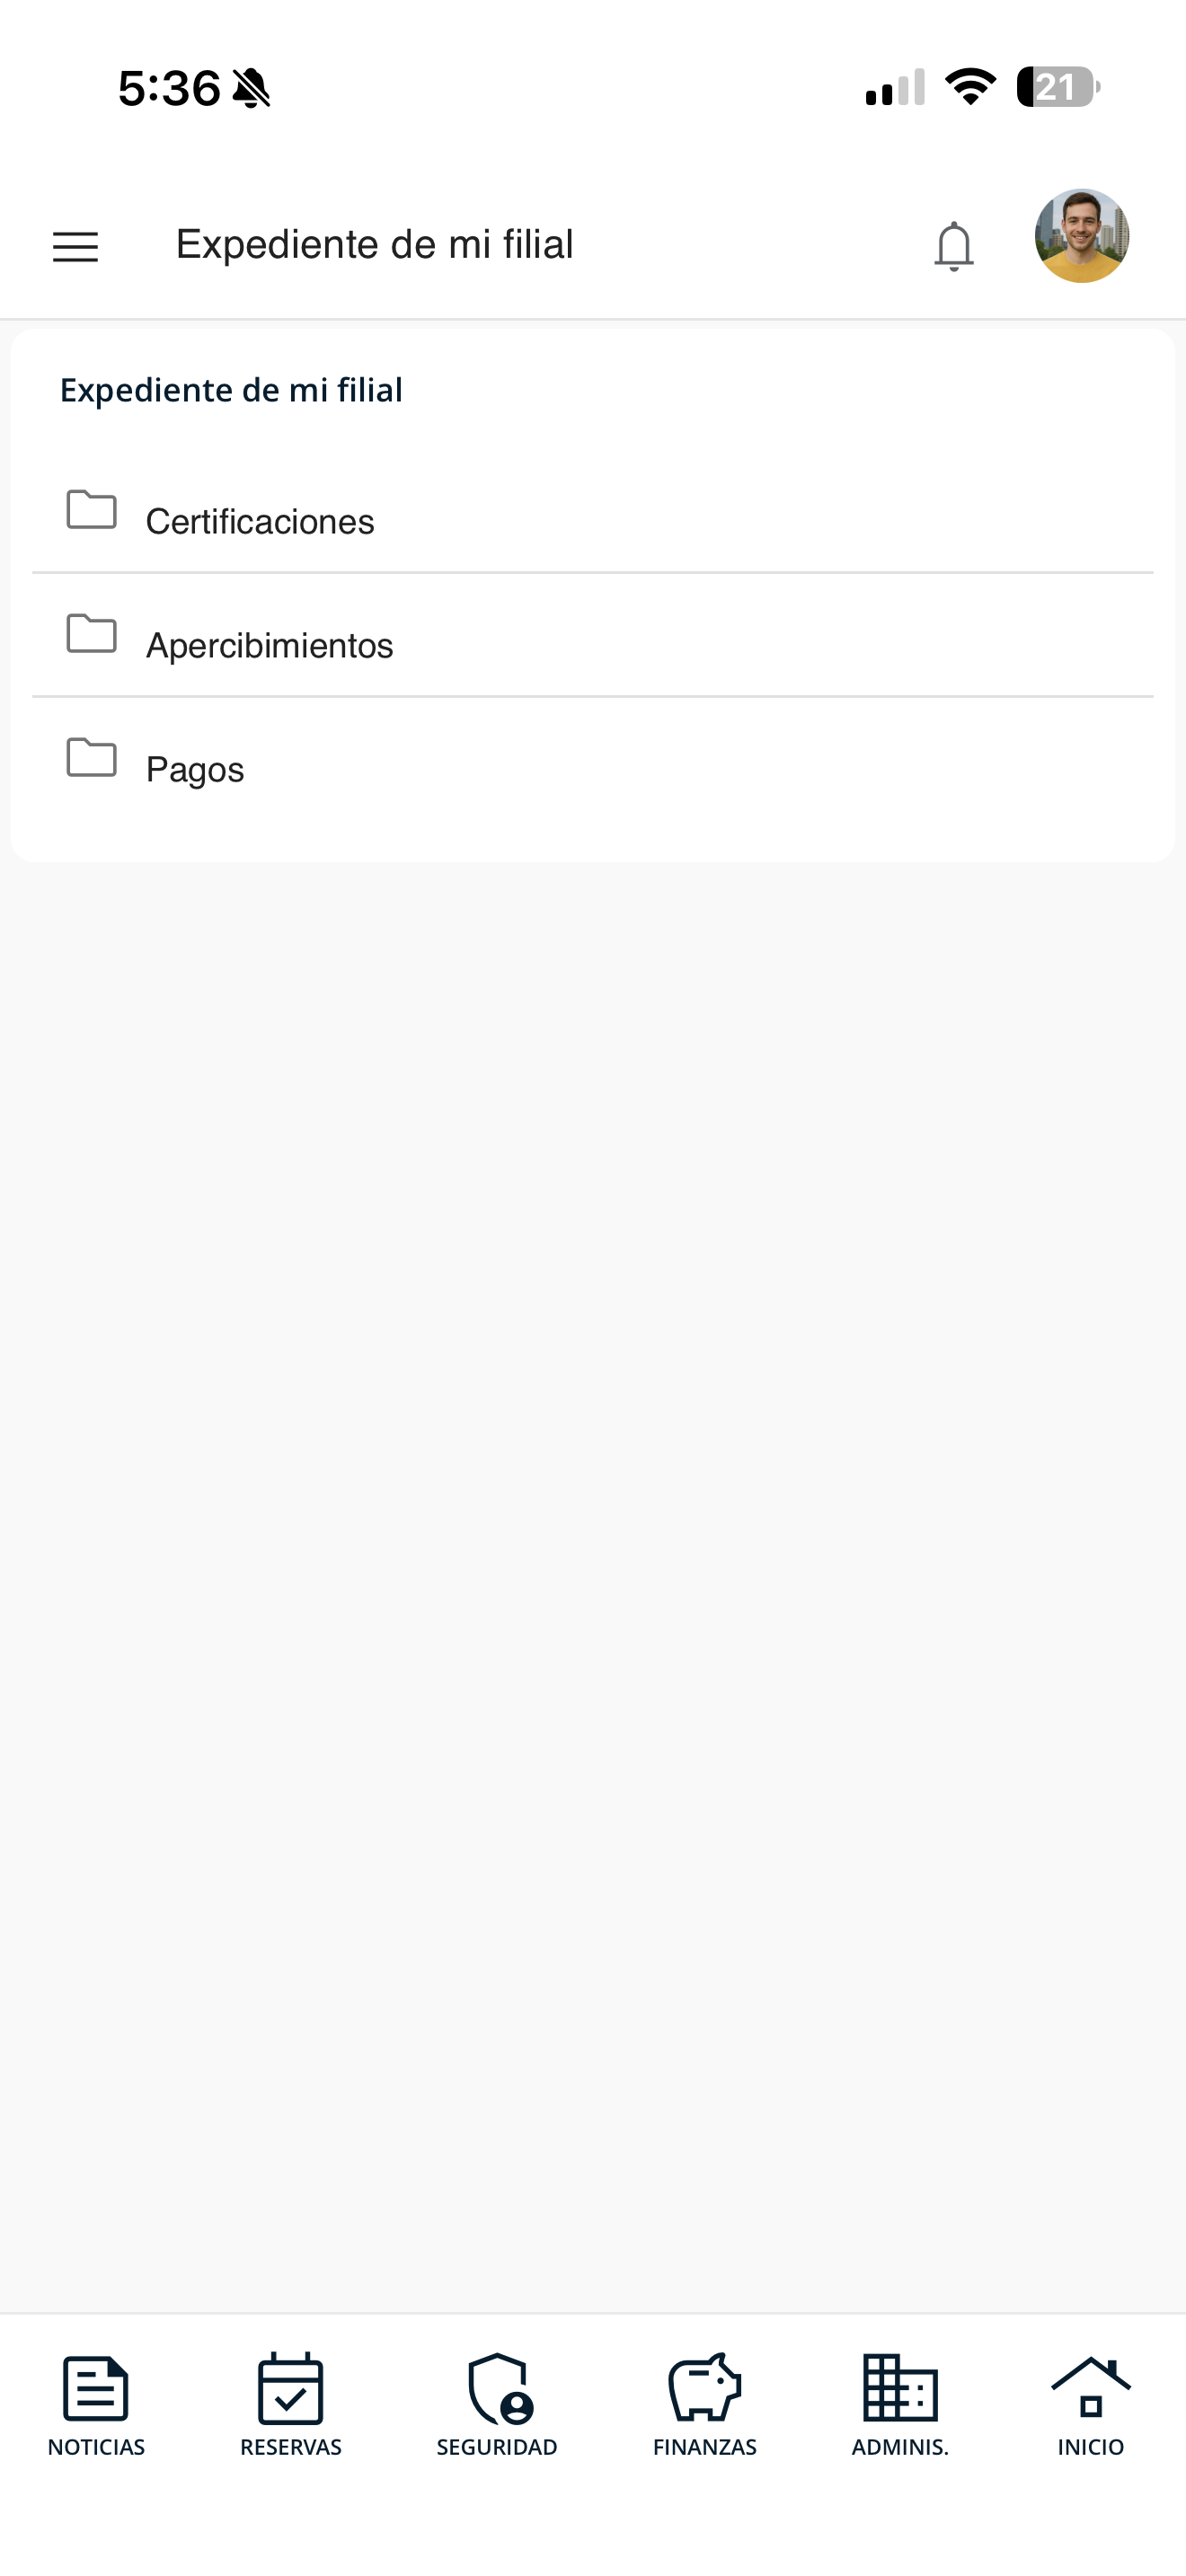
exp-01-expediente.png
Open and download the document
Inside the folder you will see the available documents (for example, "Certification of fees up to date.pdf"). Tap the file to view it or use the download icon to save it.
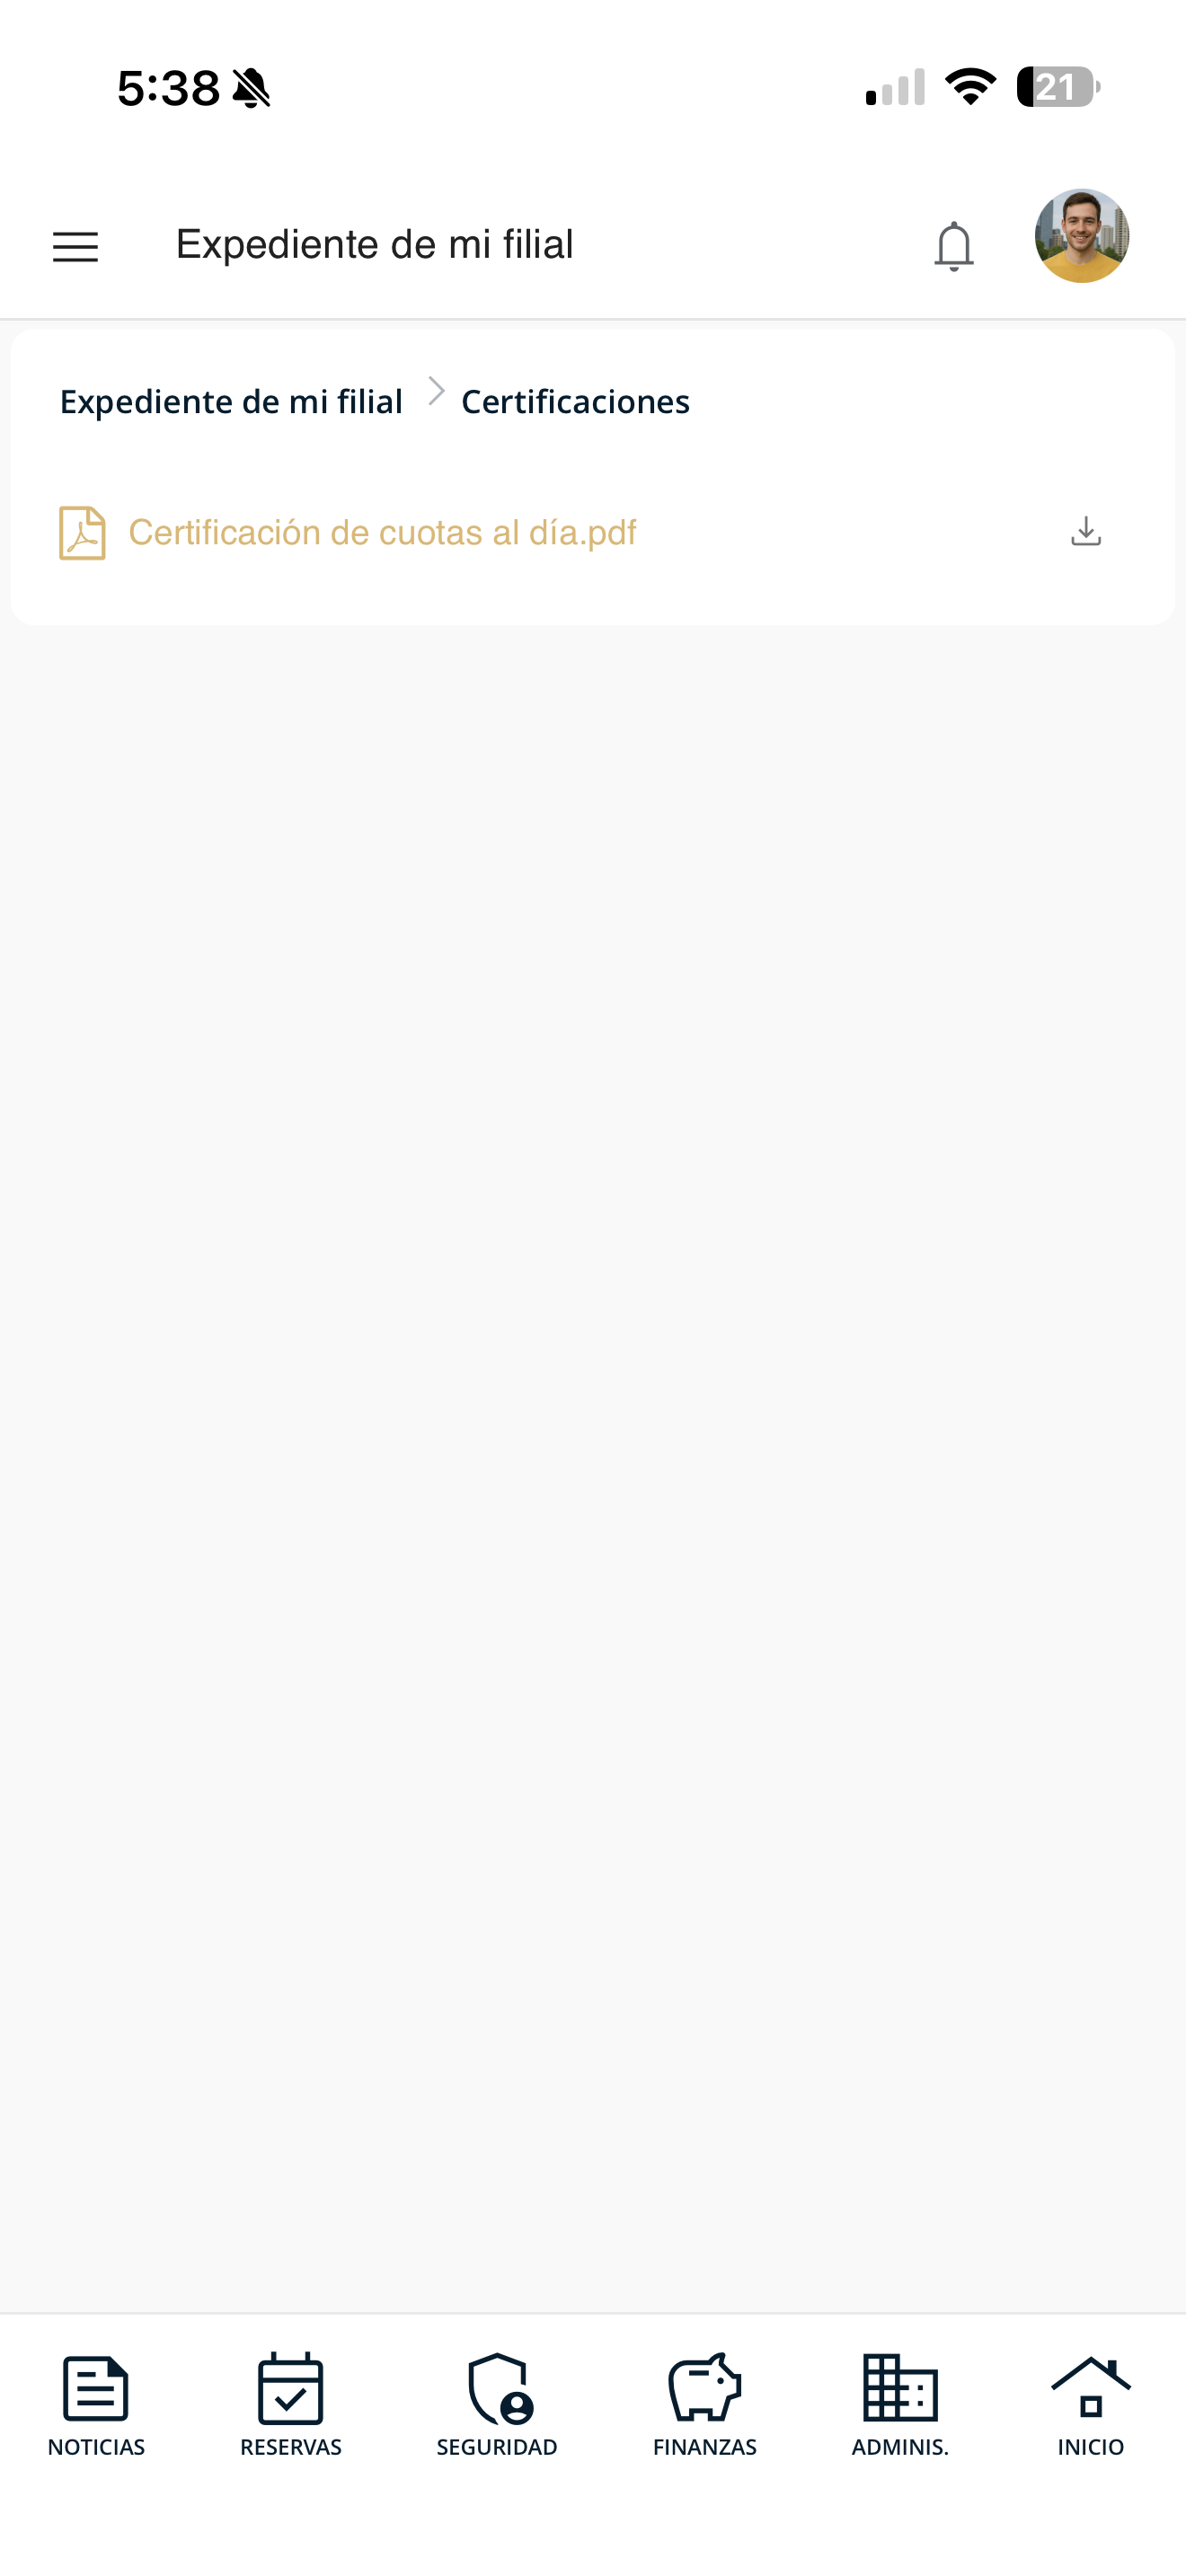
exp-02-secciones.png
View residents
Check the users registered in your unit: owners and authorized residents, with their information and whether they have a system account.
Open the menu and go to "Residents"
Tap the ☰ menu (top left) and, under "Manage my unit", choose "Residents".
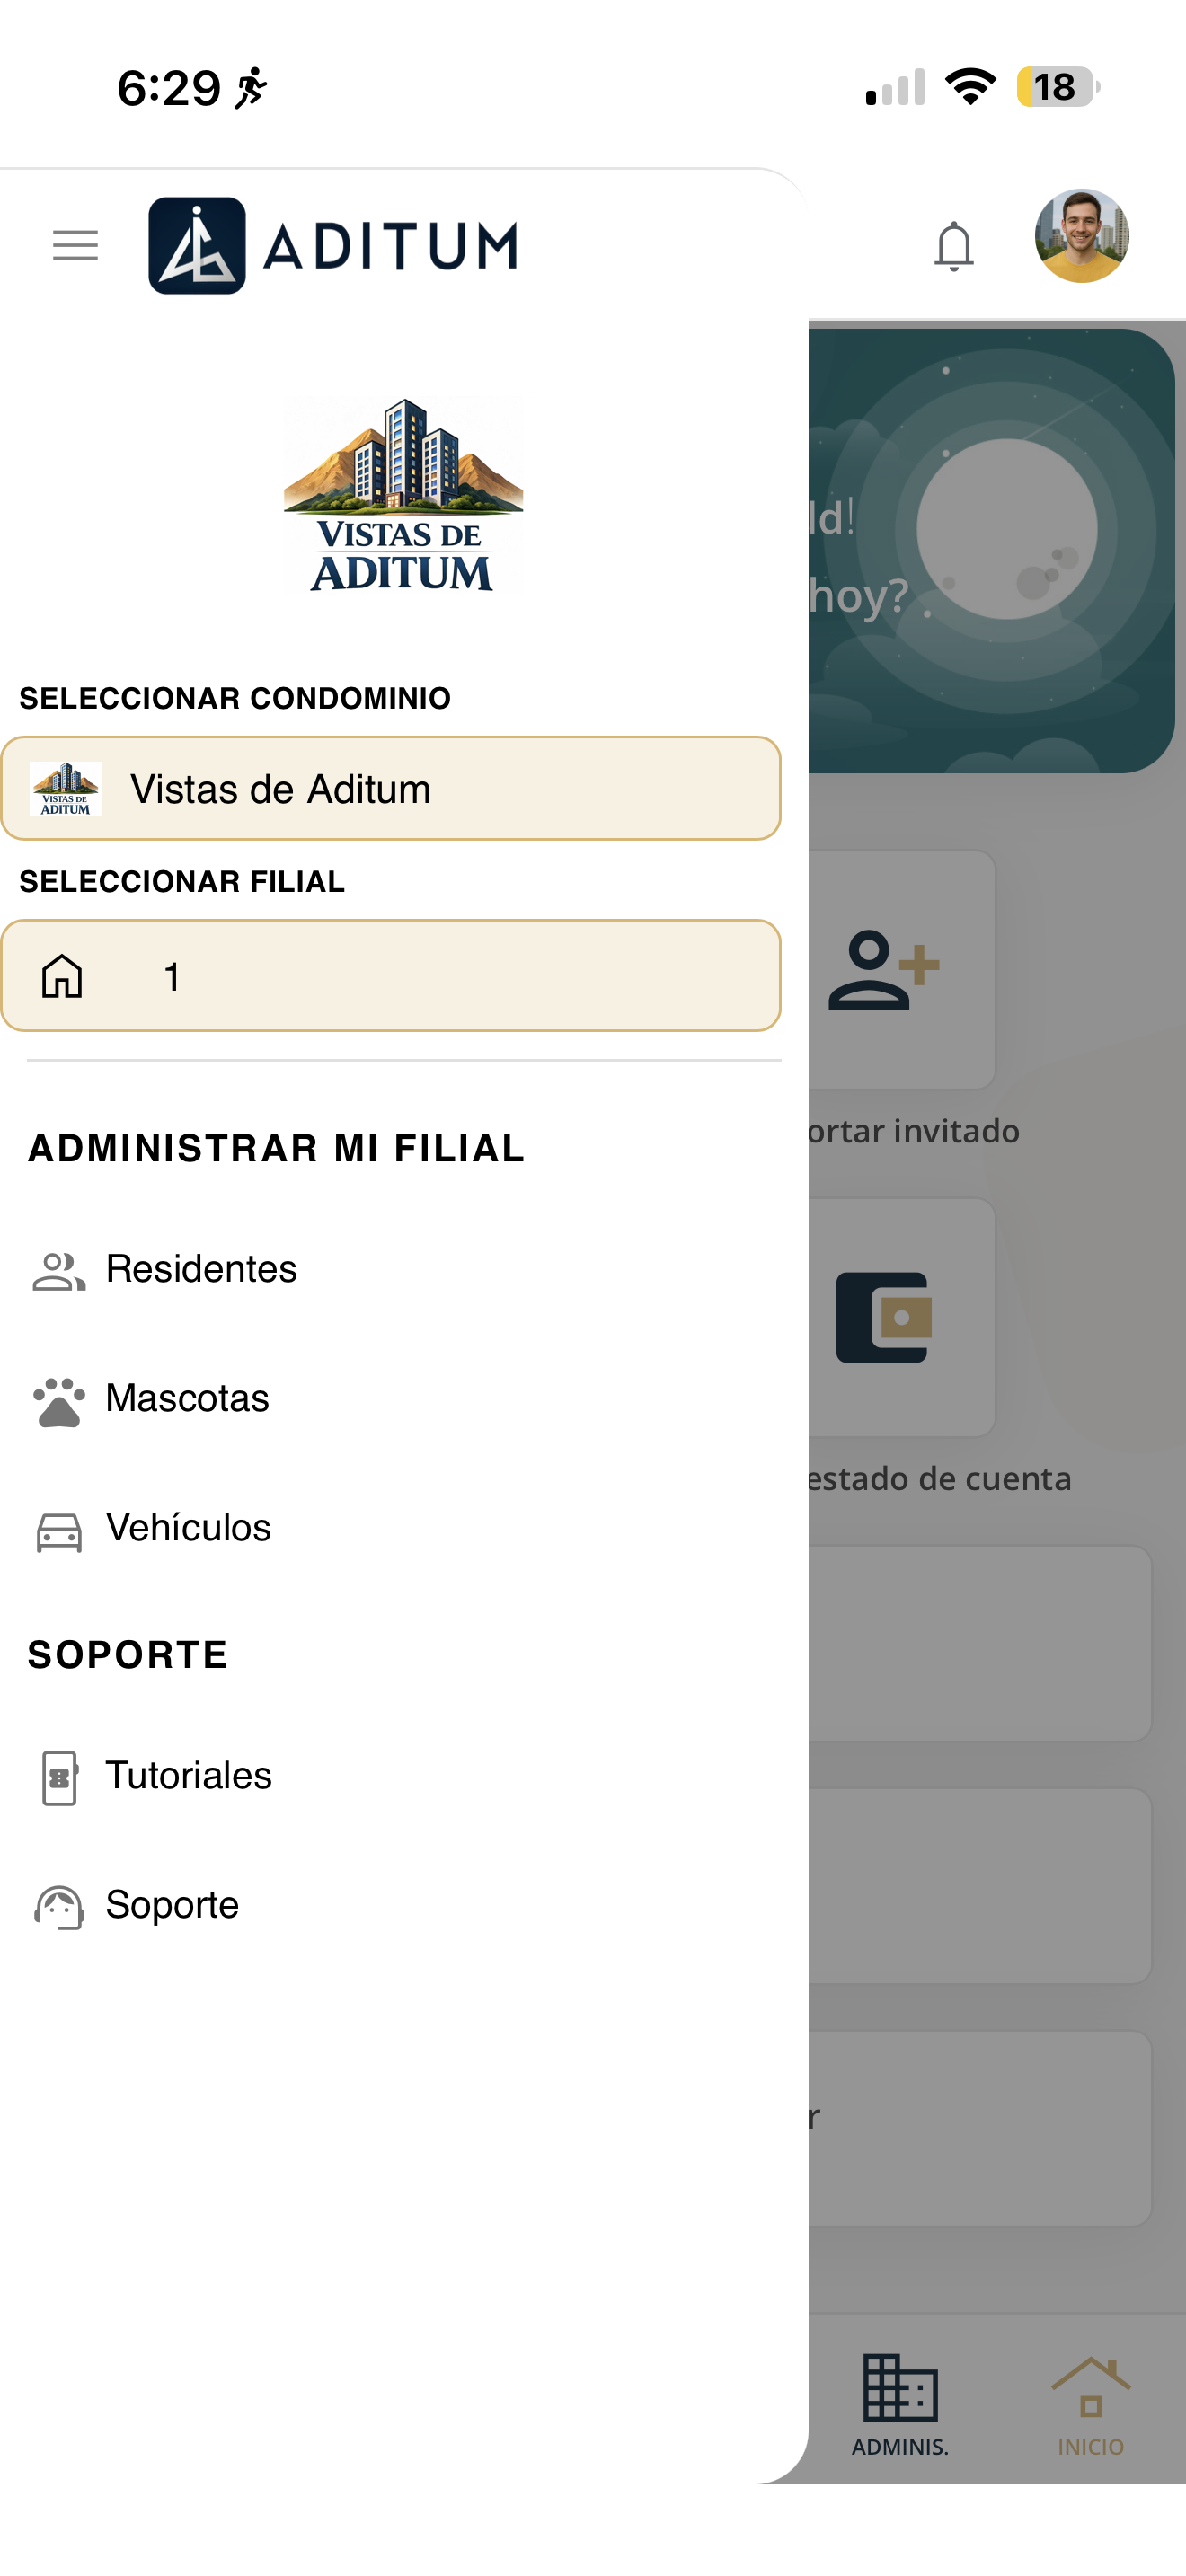
res-menu.png
Review your unit's users
You will see "Users by unit" separated into Owners and Authorized residents. For each one, their ID number, email, mobile and whether they "Have a system account" is shown.
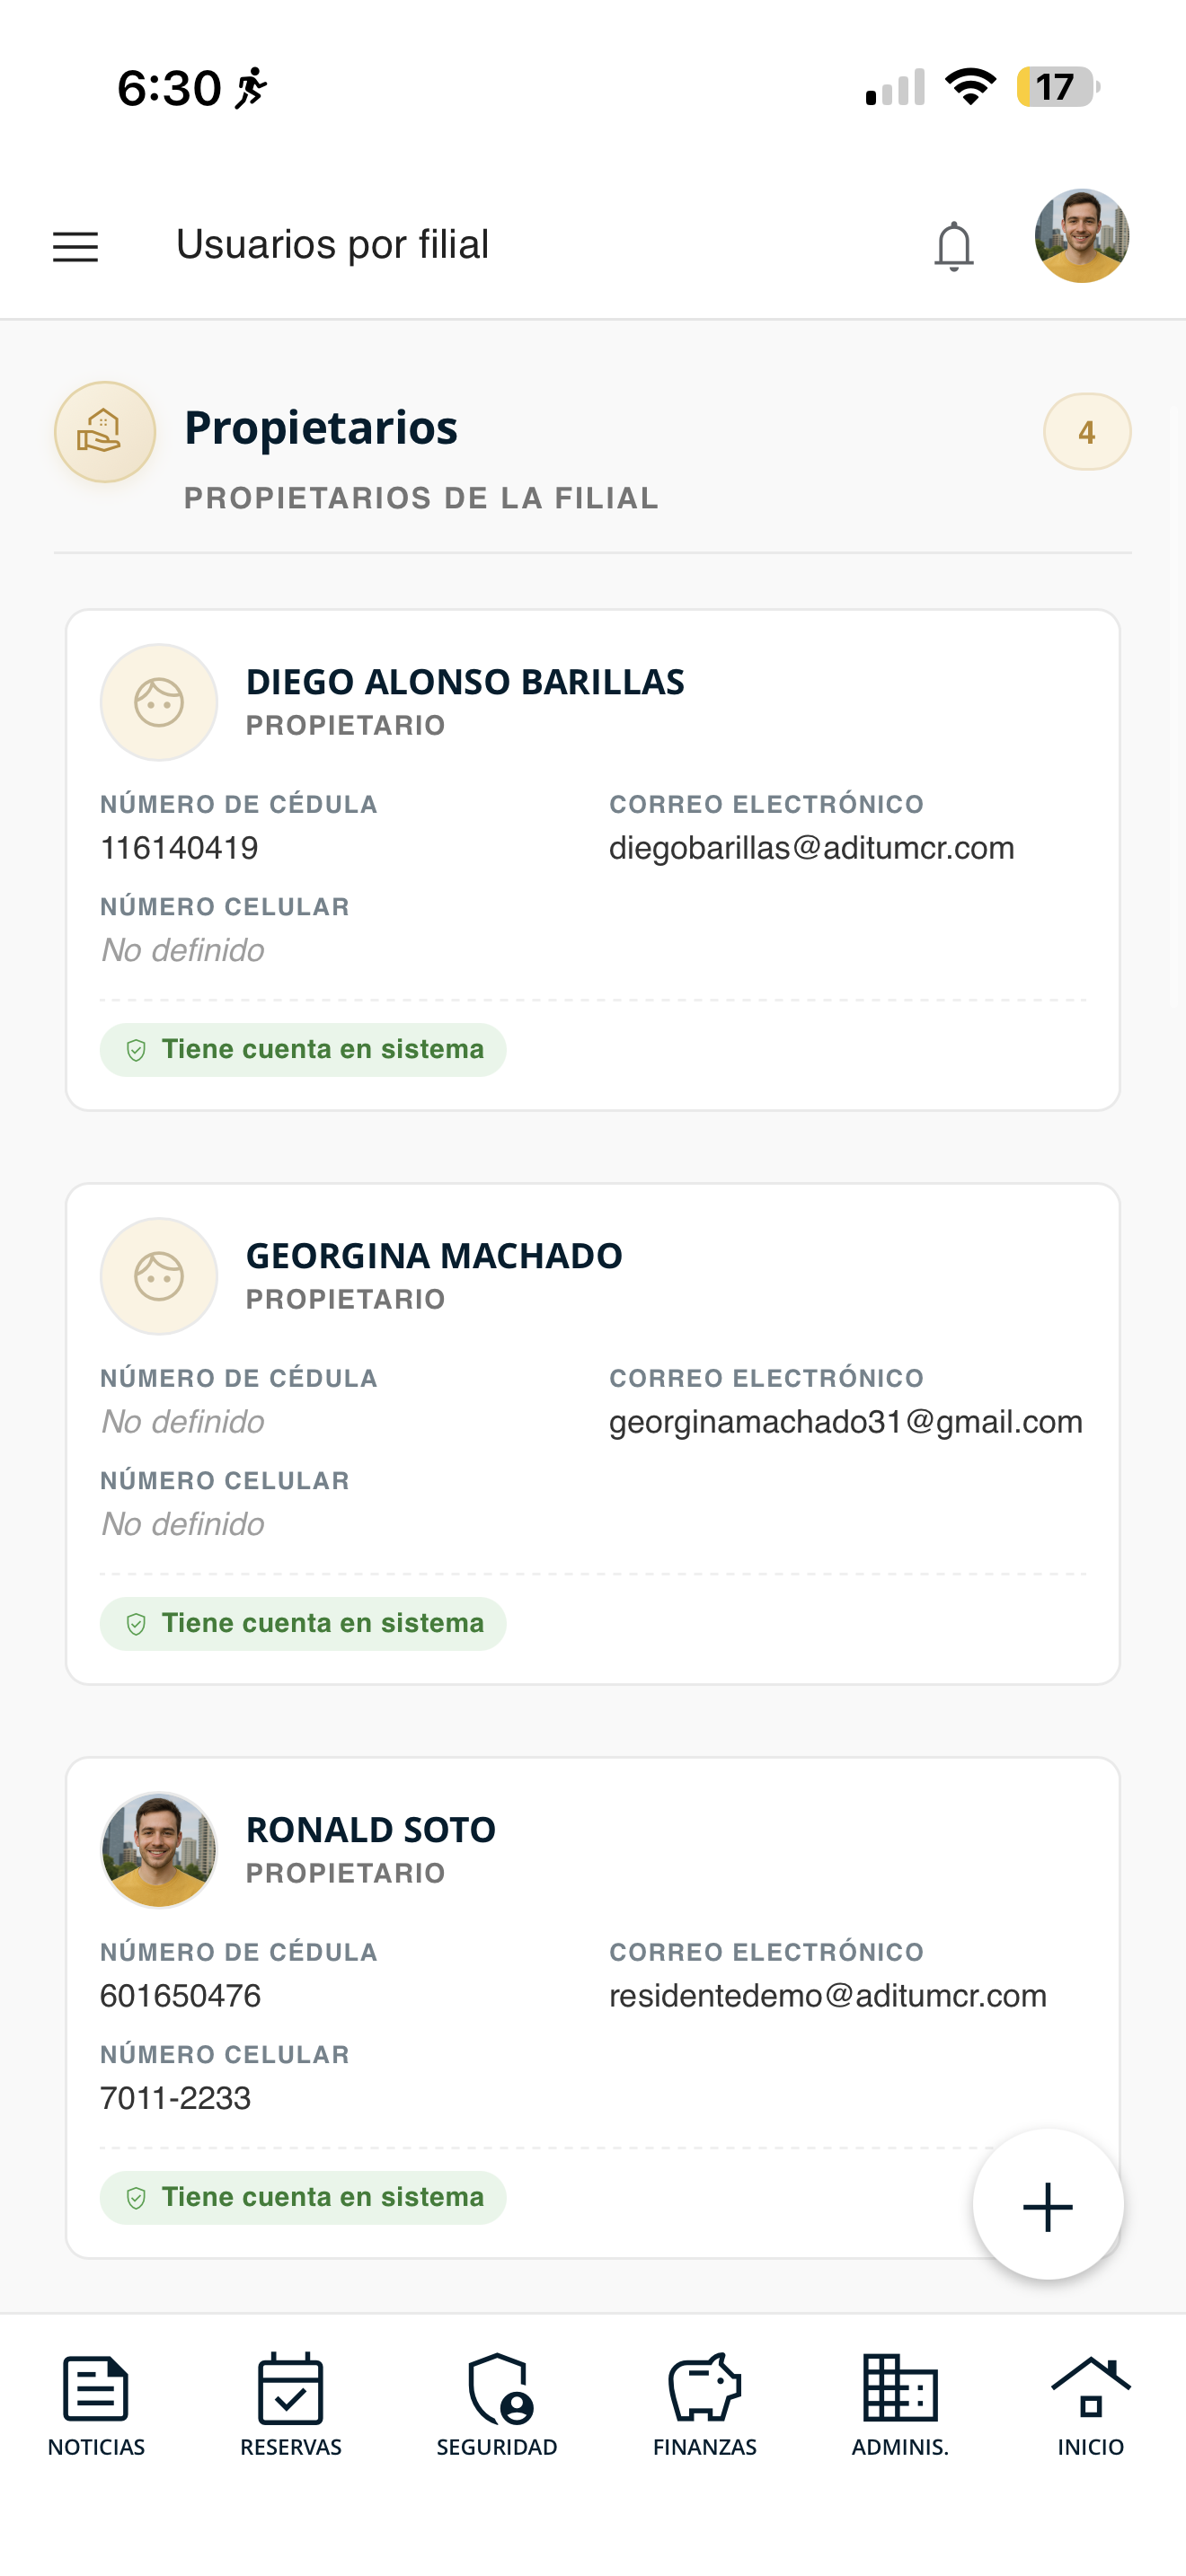
res-lista.png
Add resident
Register a new user in your unit.
Open the menu and go to "Residents"
Tap the ☰ menu and, under "Manage my unit", choose "Residents".
res-menu.png
Tap the "+" button
In the users list, tap the "+" button at the bottom right to register a new one.
res-lista.png
Fill out the form and save
On "Register user", upload an image (optional) and fill in the details: Nationality, ID number (no dashes), Name, last names and mobile number. Then press "Accept".
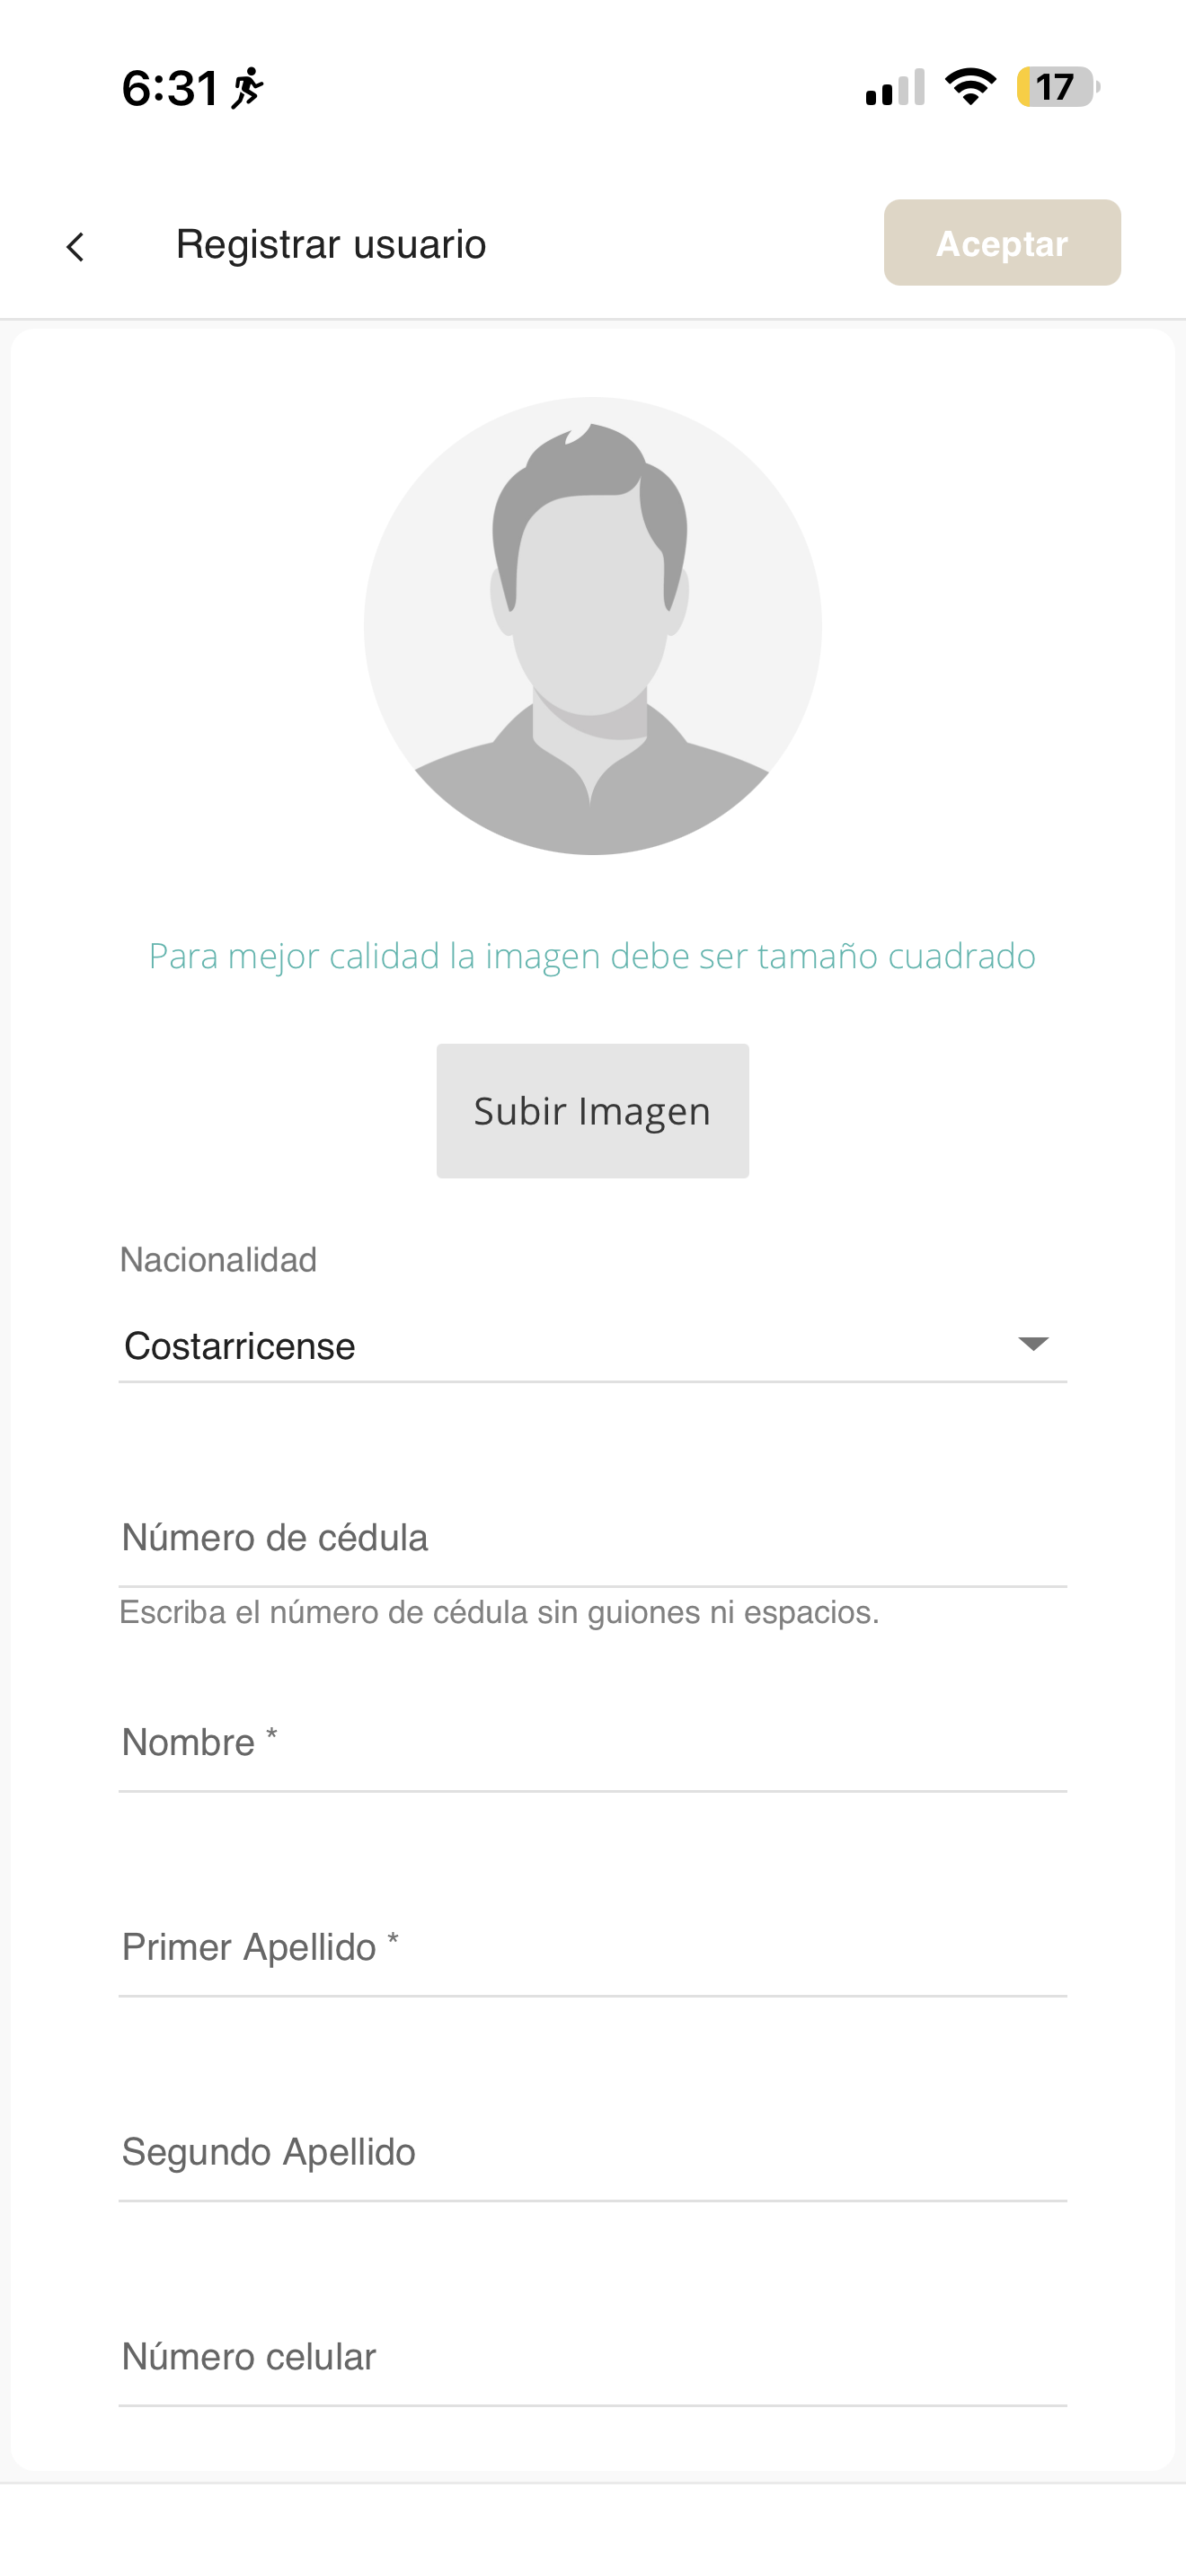
res-form.png
Edit resident
Modify the information of a user in your unit.
Open the menu and go to "Residents"
Tap the ☰ menu and, under "Manage my unit", choose "Residents".
res-menu.png
Choose "Edit"
Locate the user, open their actions menu and select "Edit".
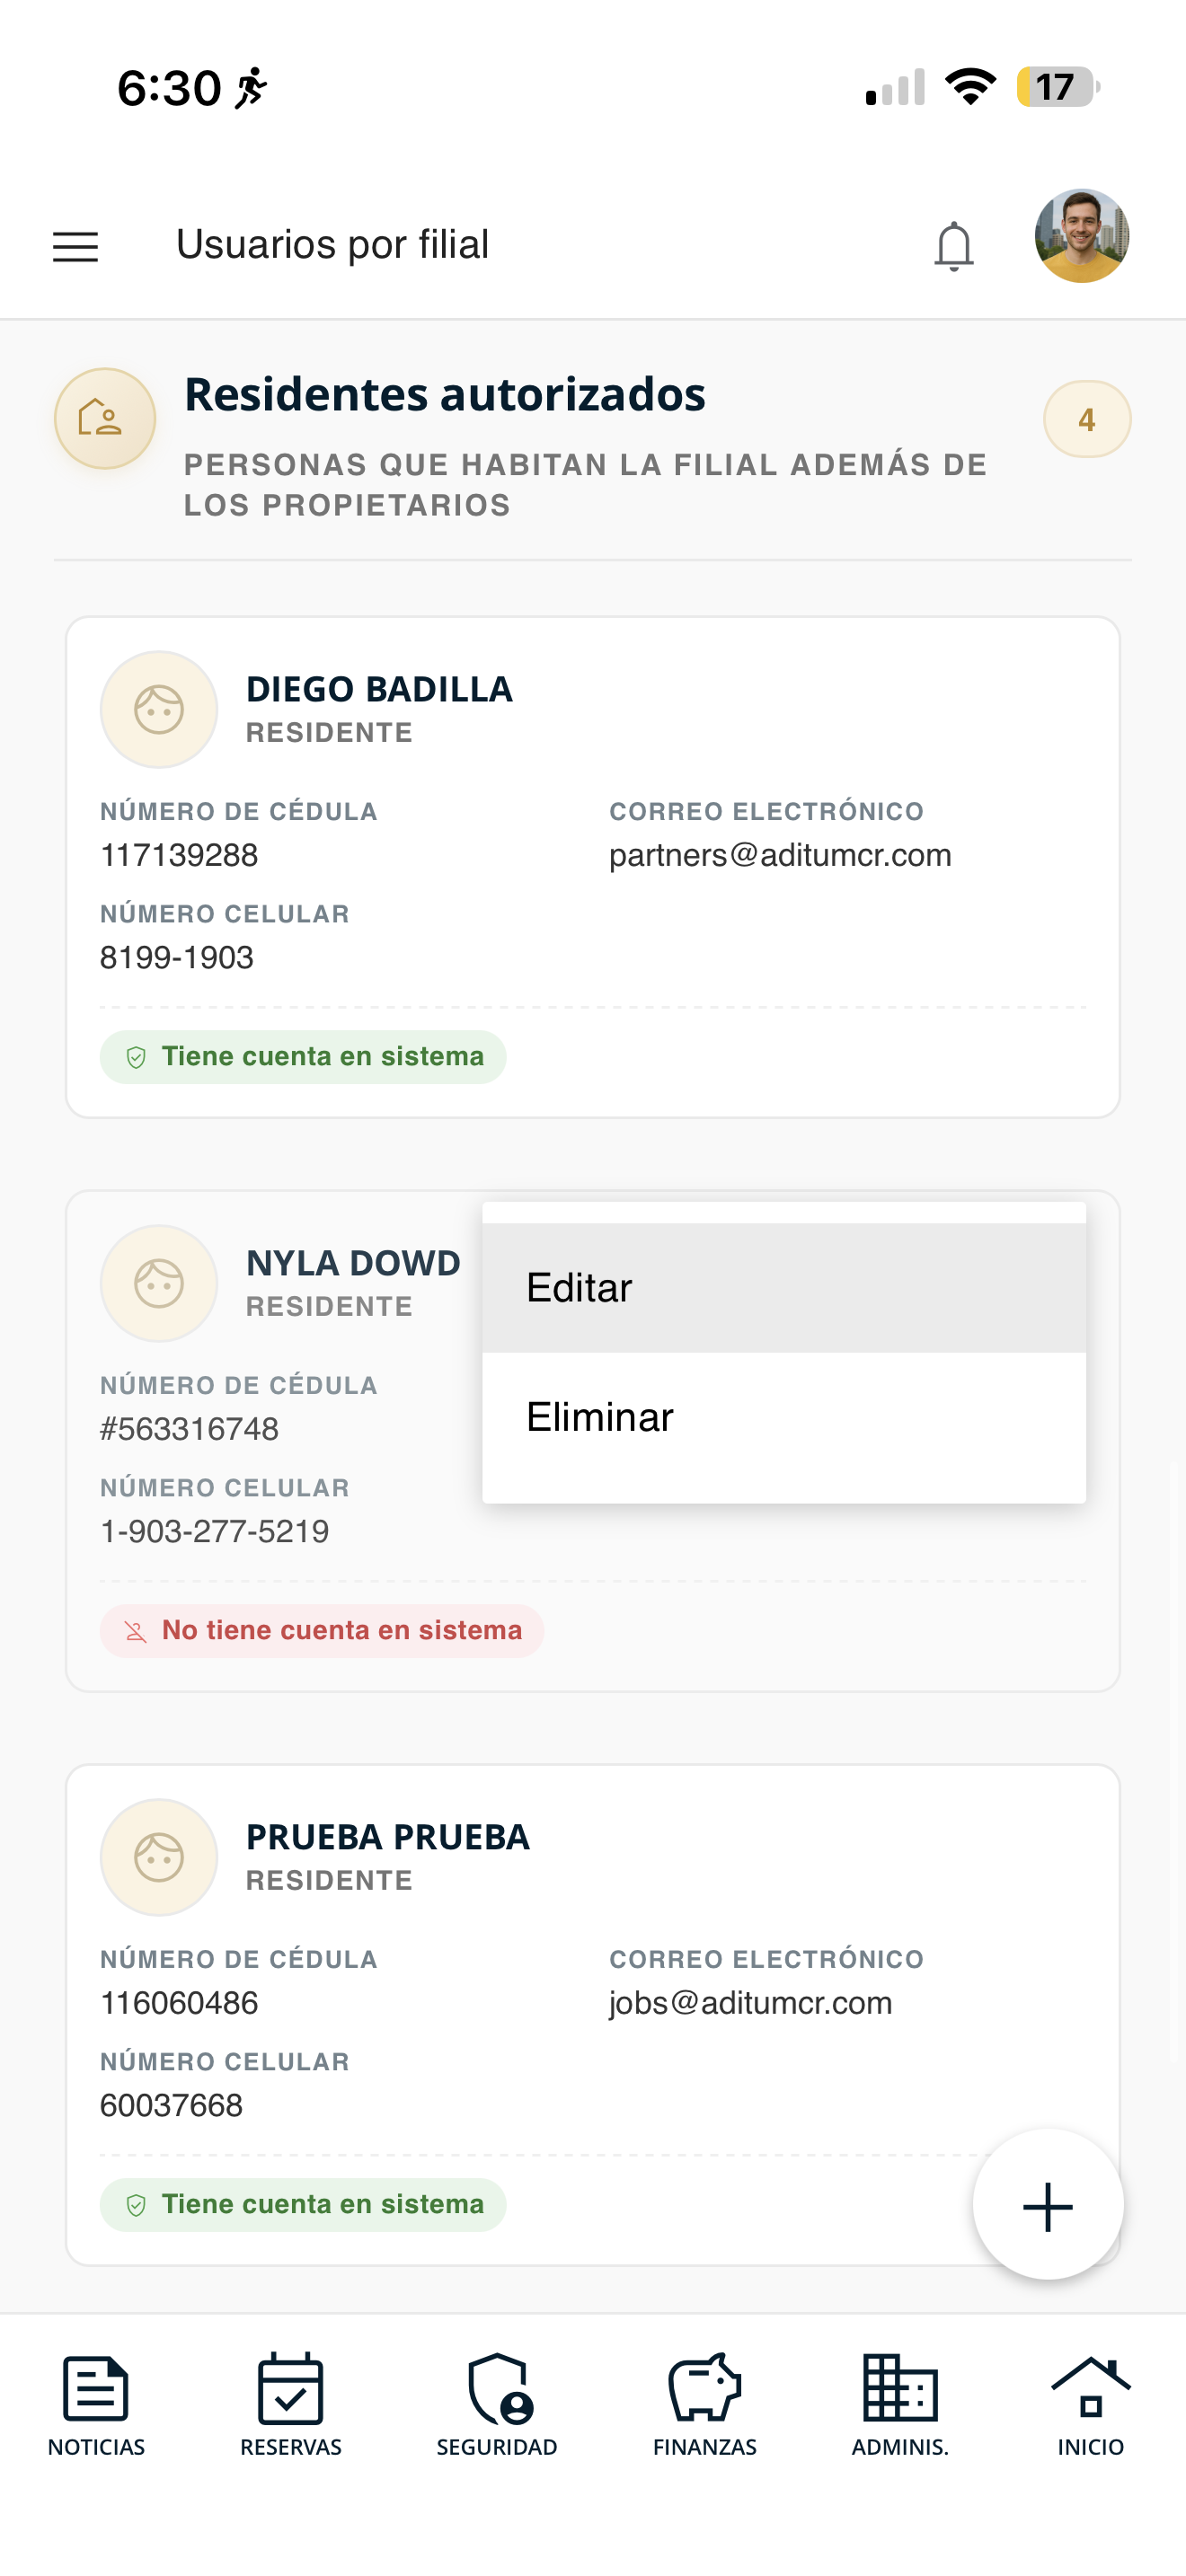
res-acciones.png
Modify the details and save
The form opens with the data loaded. Change whatever you need (nationality, ID, name, last names, mobile) and press "Accept".
res-form.png
Delete resident
Delete a user from your unit.
Open the menu and go to "Residents"
Tap the ☰ menu and, under "Manage my unit", choose "Residents".
res-menu.png
Choose "Delete"
Locate the user, open their actions menu and select "Delete". The app will ask you to confirm before removing them.
res-acciones.png
View pets
Check the pets registered in your unit and their information.
Open the menu and go to "Pets"
Tap the ☰ menu and, under "Manage my unit", choose "Pets".
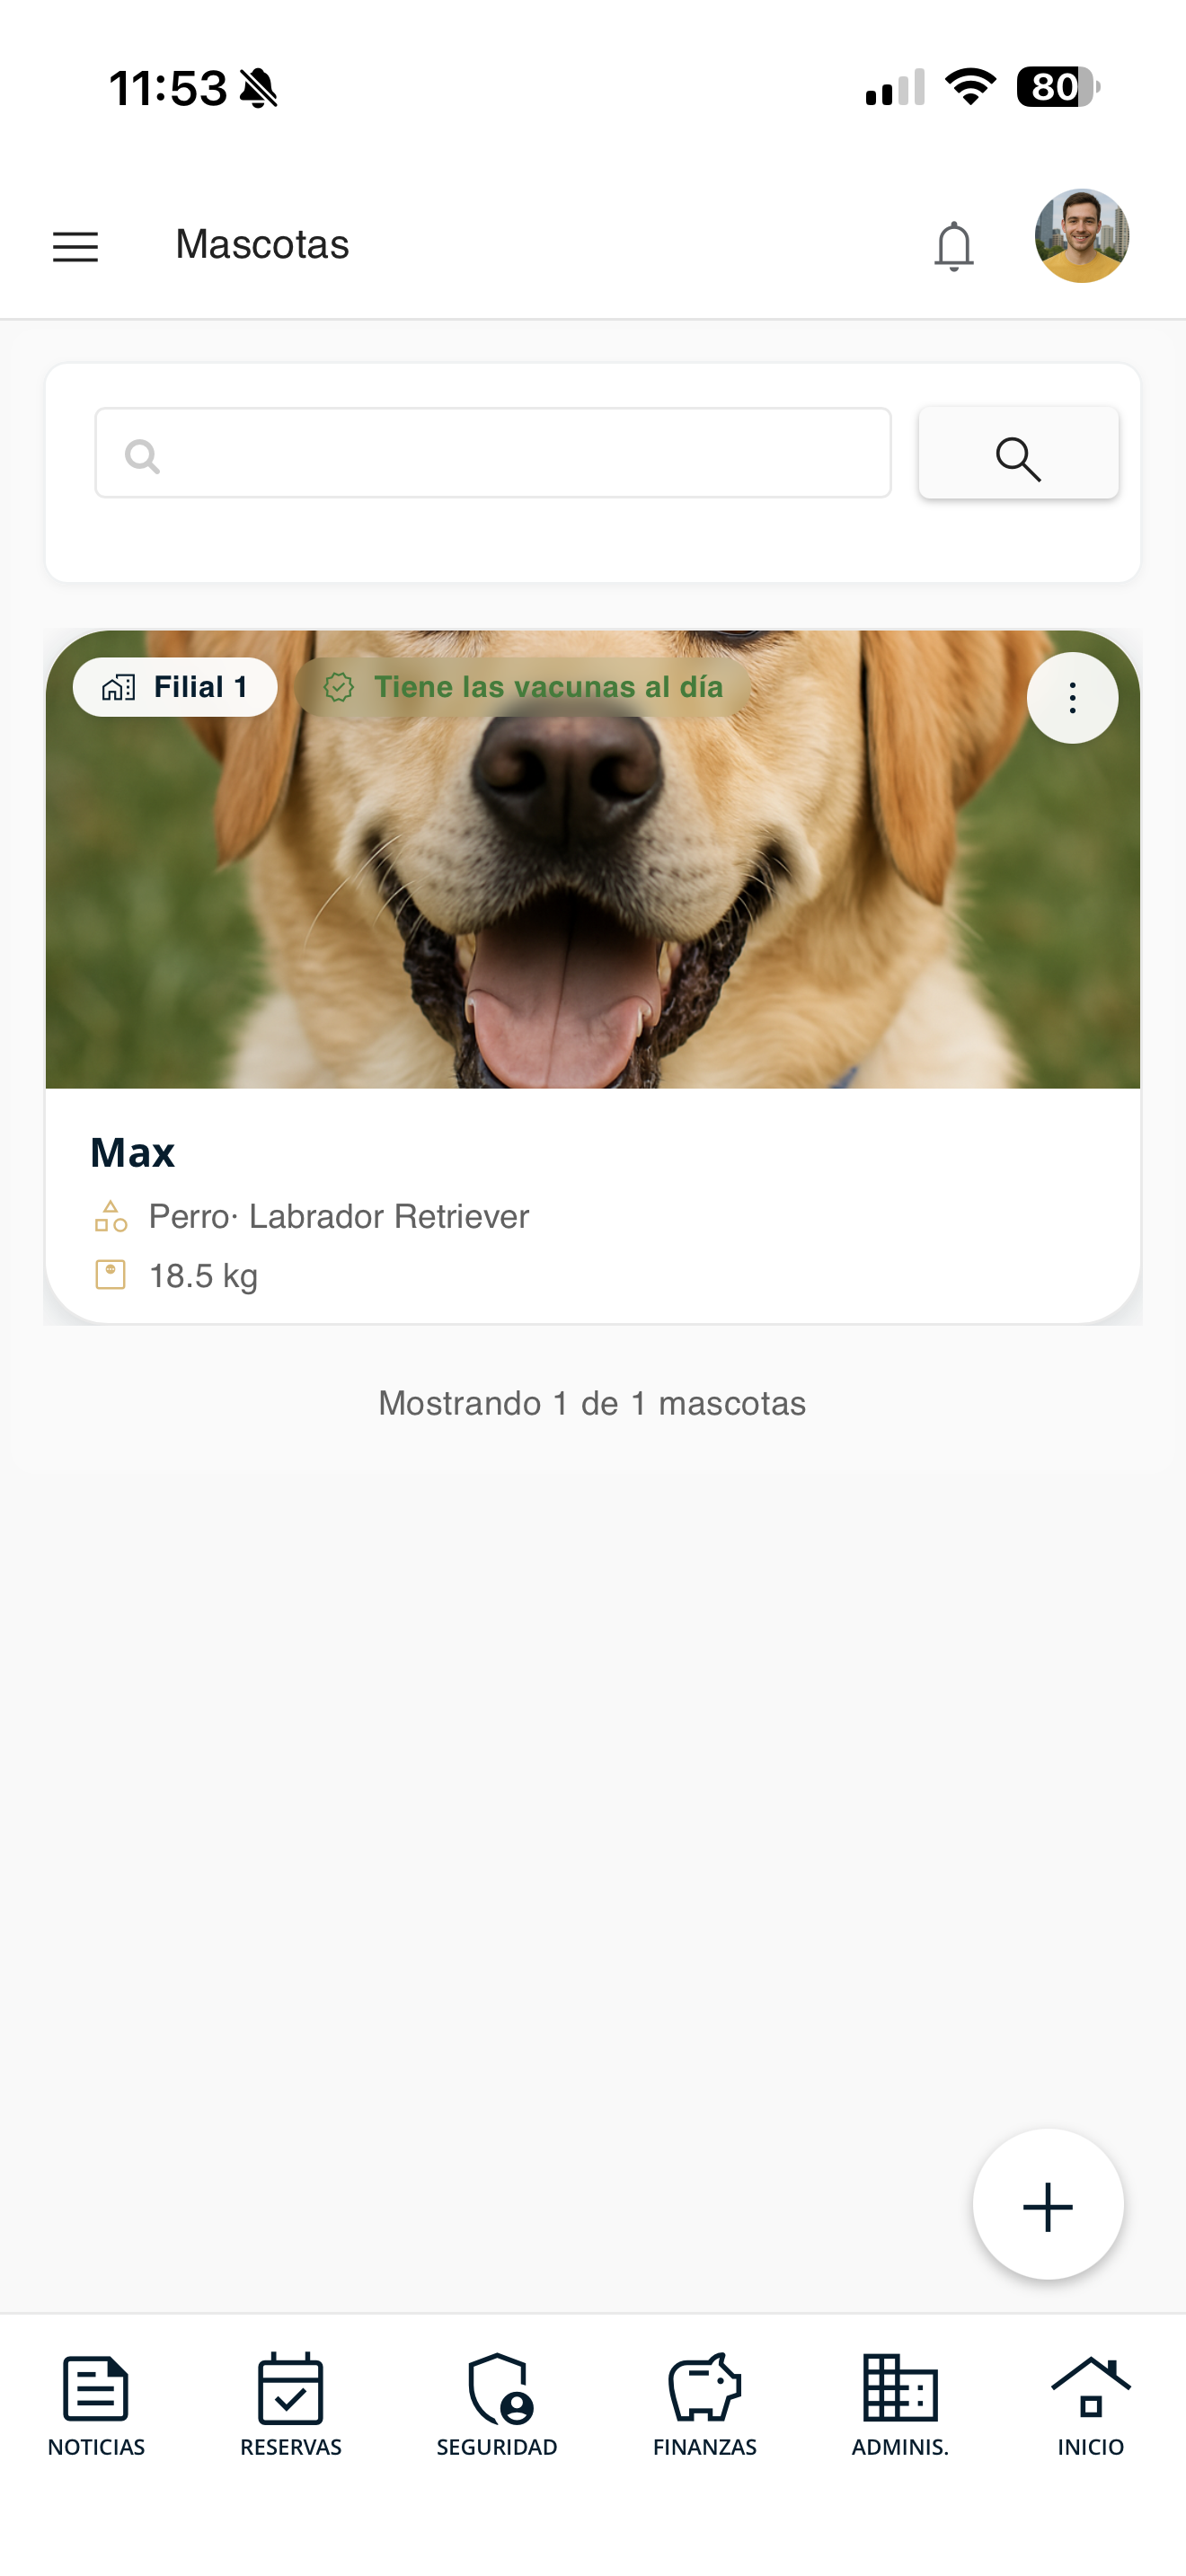
res-menu.pngReview the pets list
You will see each pet with its name, type, breed, weight and whether it "Is up to date on vaccines". Use the search box or the "+" button to add one.
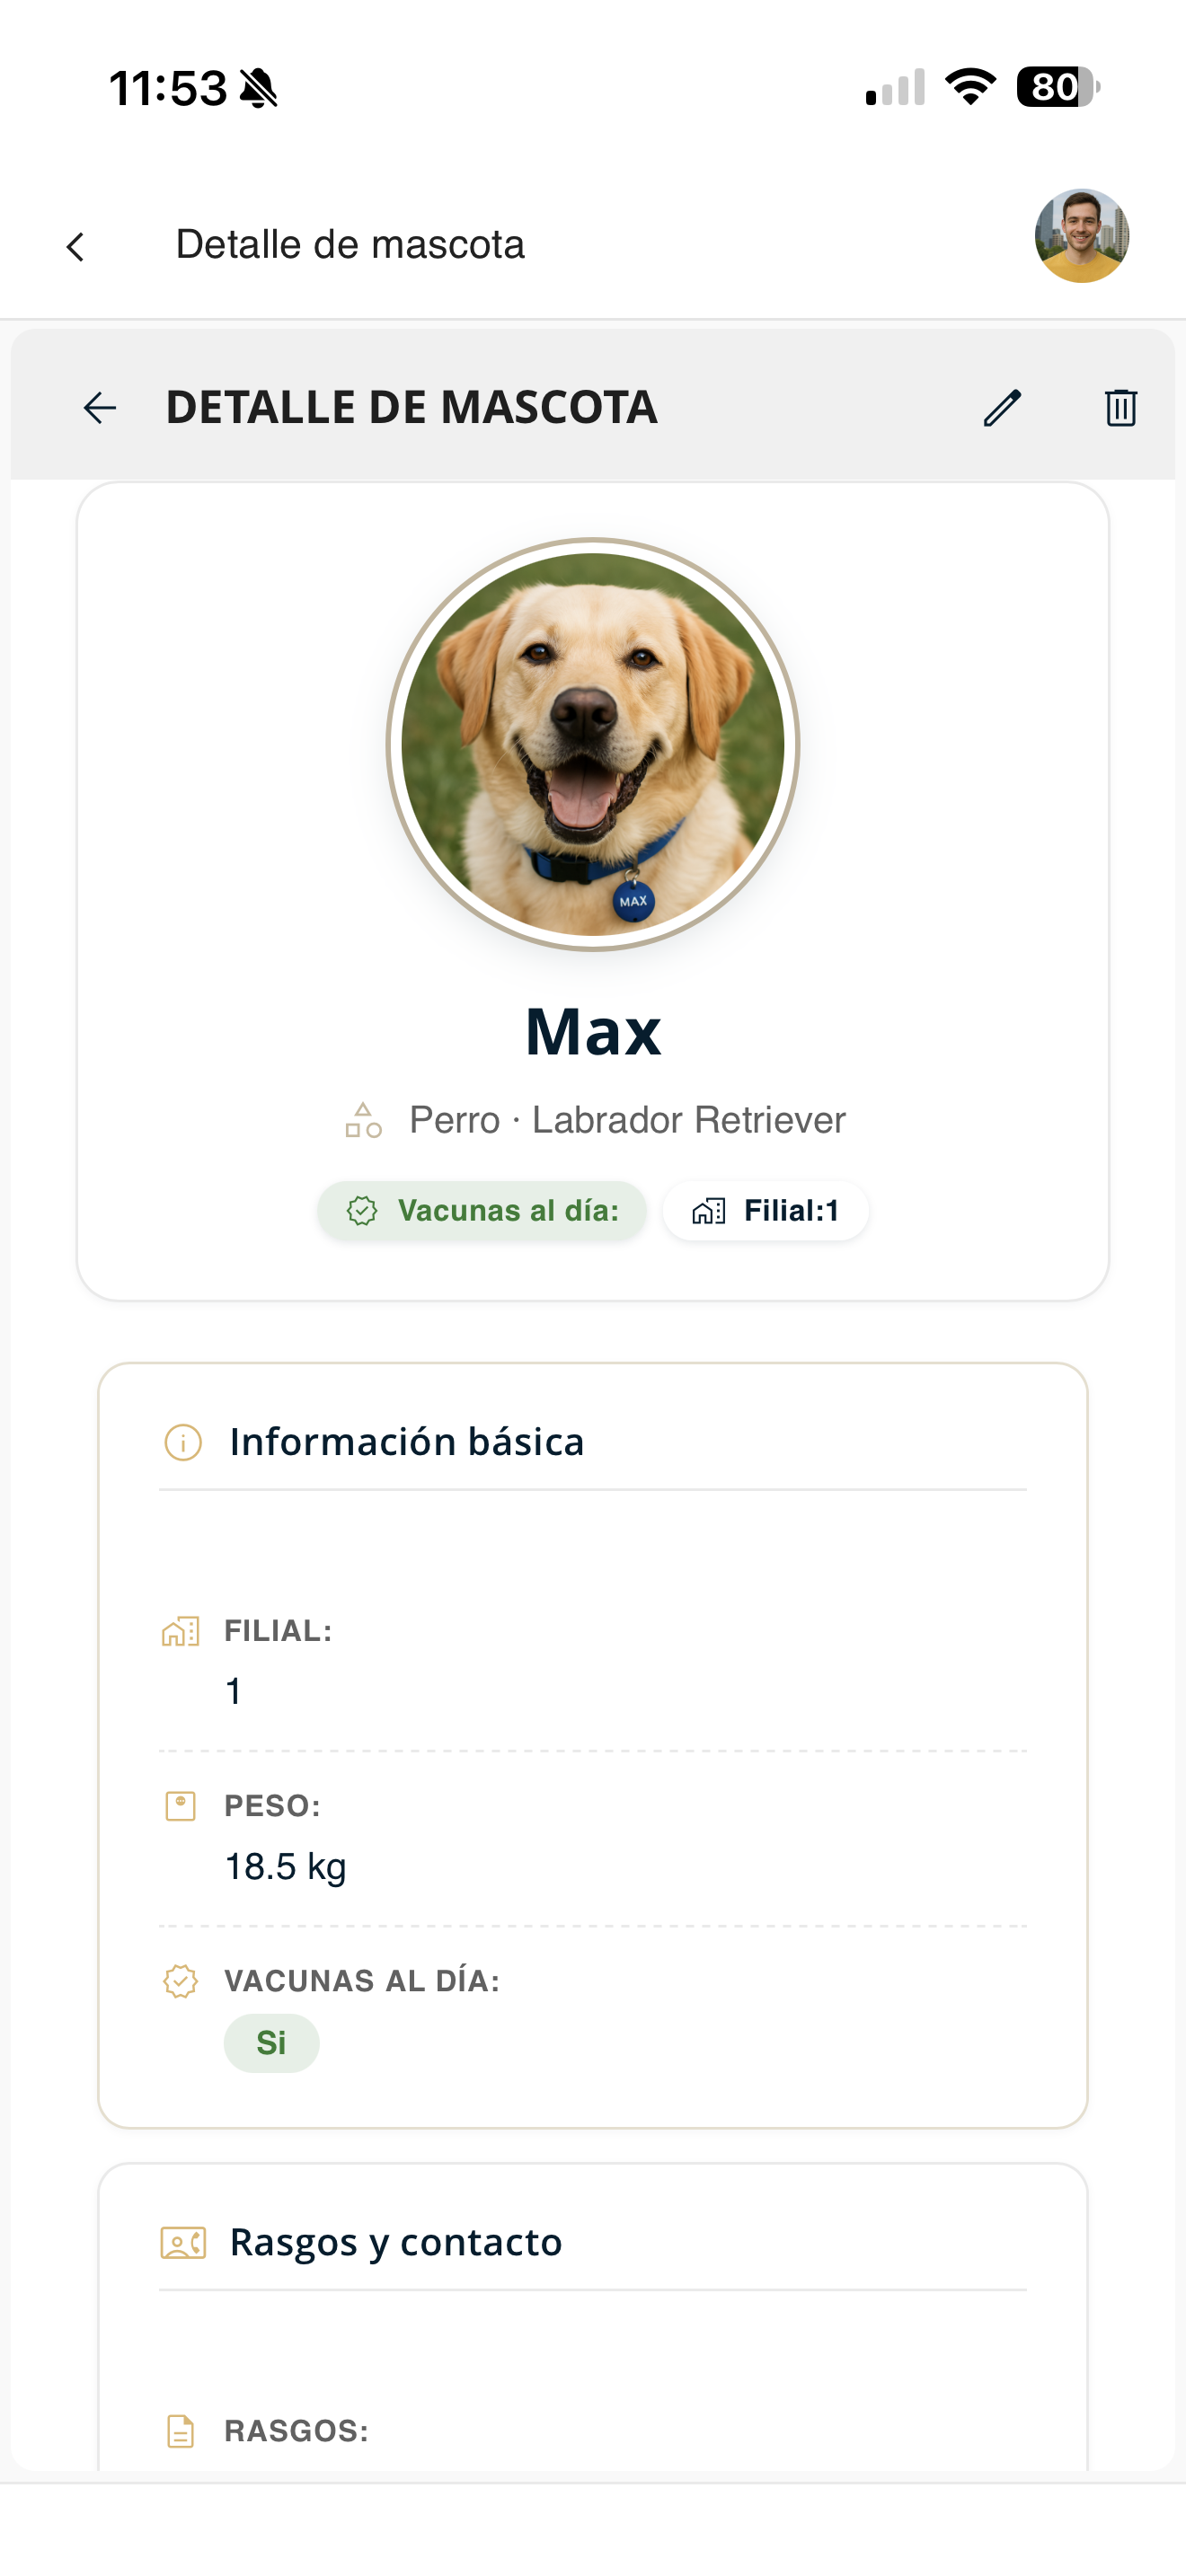
mascotas-lista.pngCheck the details
Open the pet's menu and choose "Detail" to see its full information: unit, weight, vaccines, traits and contact.
mascotas-detalle.pngAdd pet
Register a new pet in your unit.
Open the menu and go to "Pets"
Tap the ☰ menu and, under "Manage my unit", choose "Pets".
res-menu.pngTap the "+" button
In the pets list, tap the "+" button at the bottom right.
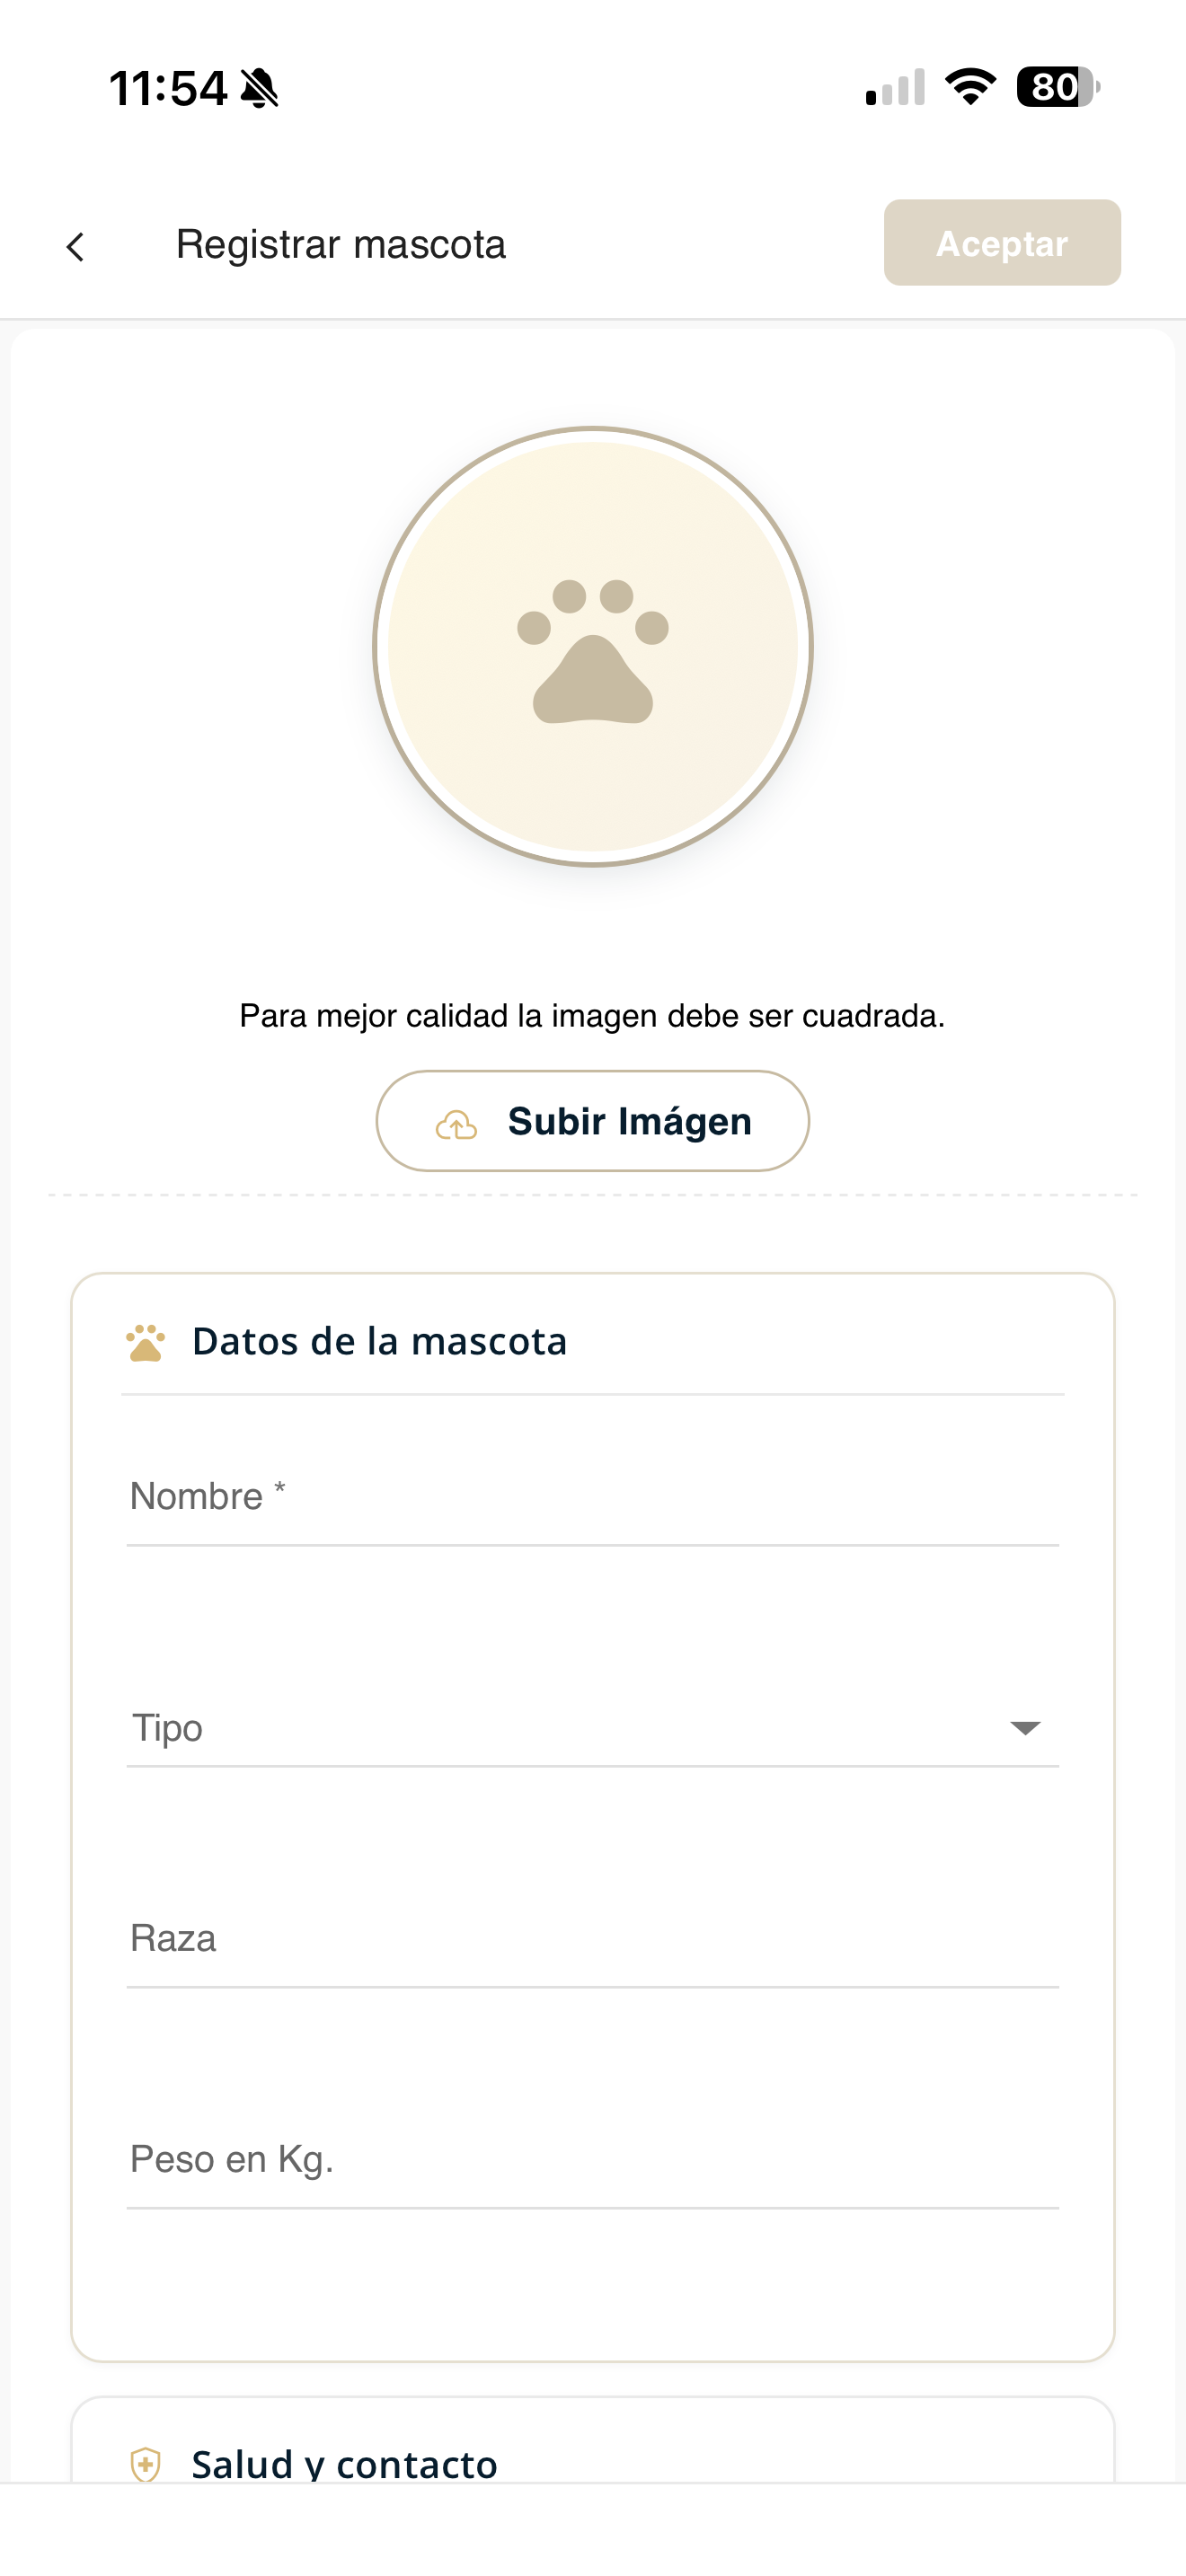
mascotas-lista.pngFill out the details and save
Upload an image (optional) and fill in Pet details: Name, Type, Breed and Weight, as well as Health and contact. Then press "Accept".
mascotas-agregar-form.pngEdit pet
Modify the information of a pet in your unit.
Open the menu and go to "Pets"
Tap the ☰ menu and, under "Manage my unit", choose "Pets".
res-menu.pngChoose "Edit"
Open the pet's actions menu (Detail, Edit, Delete) and choose "Edit".
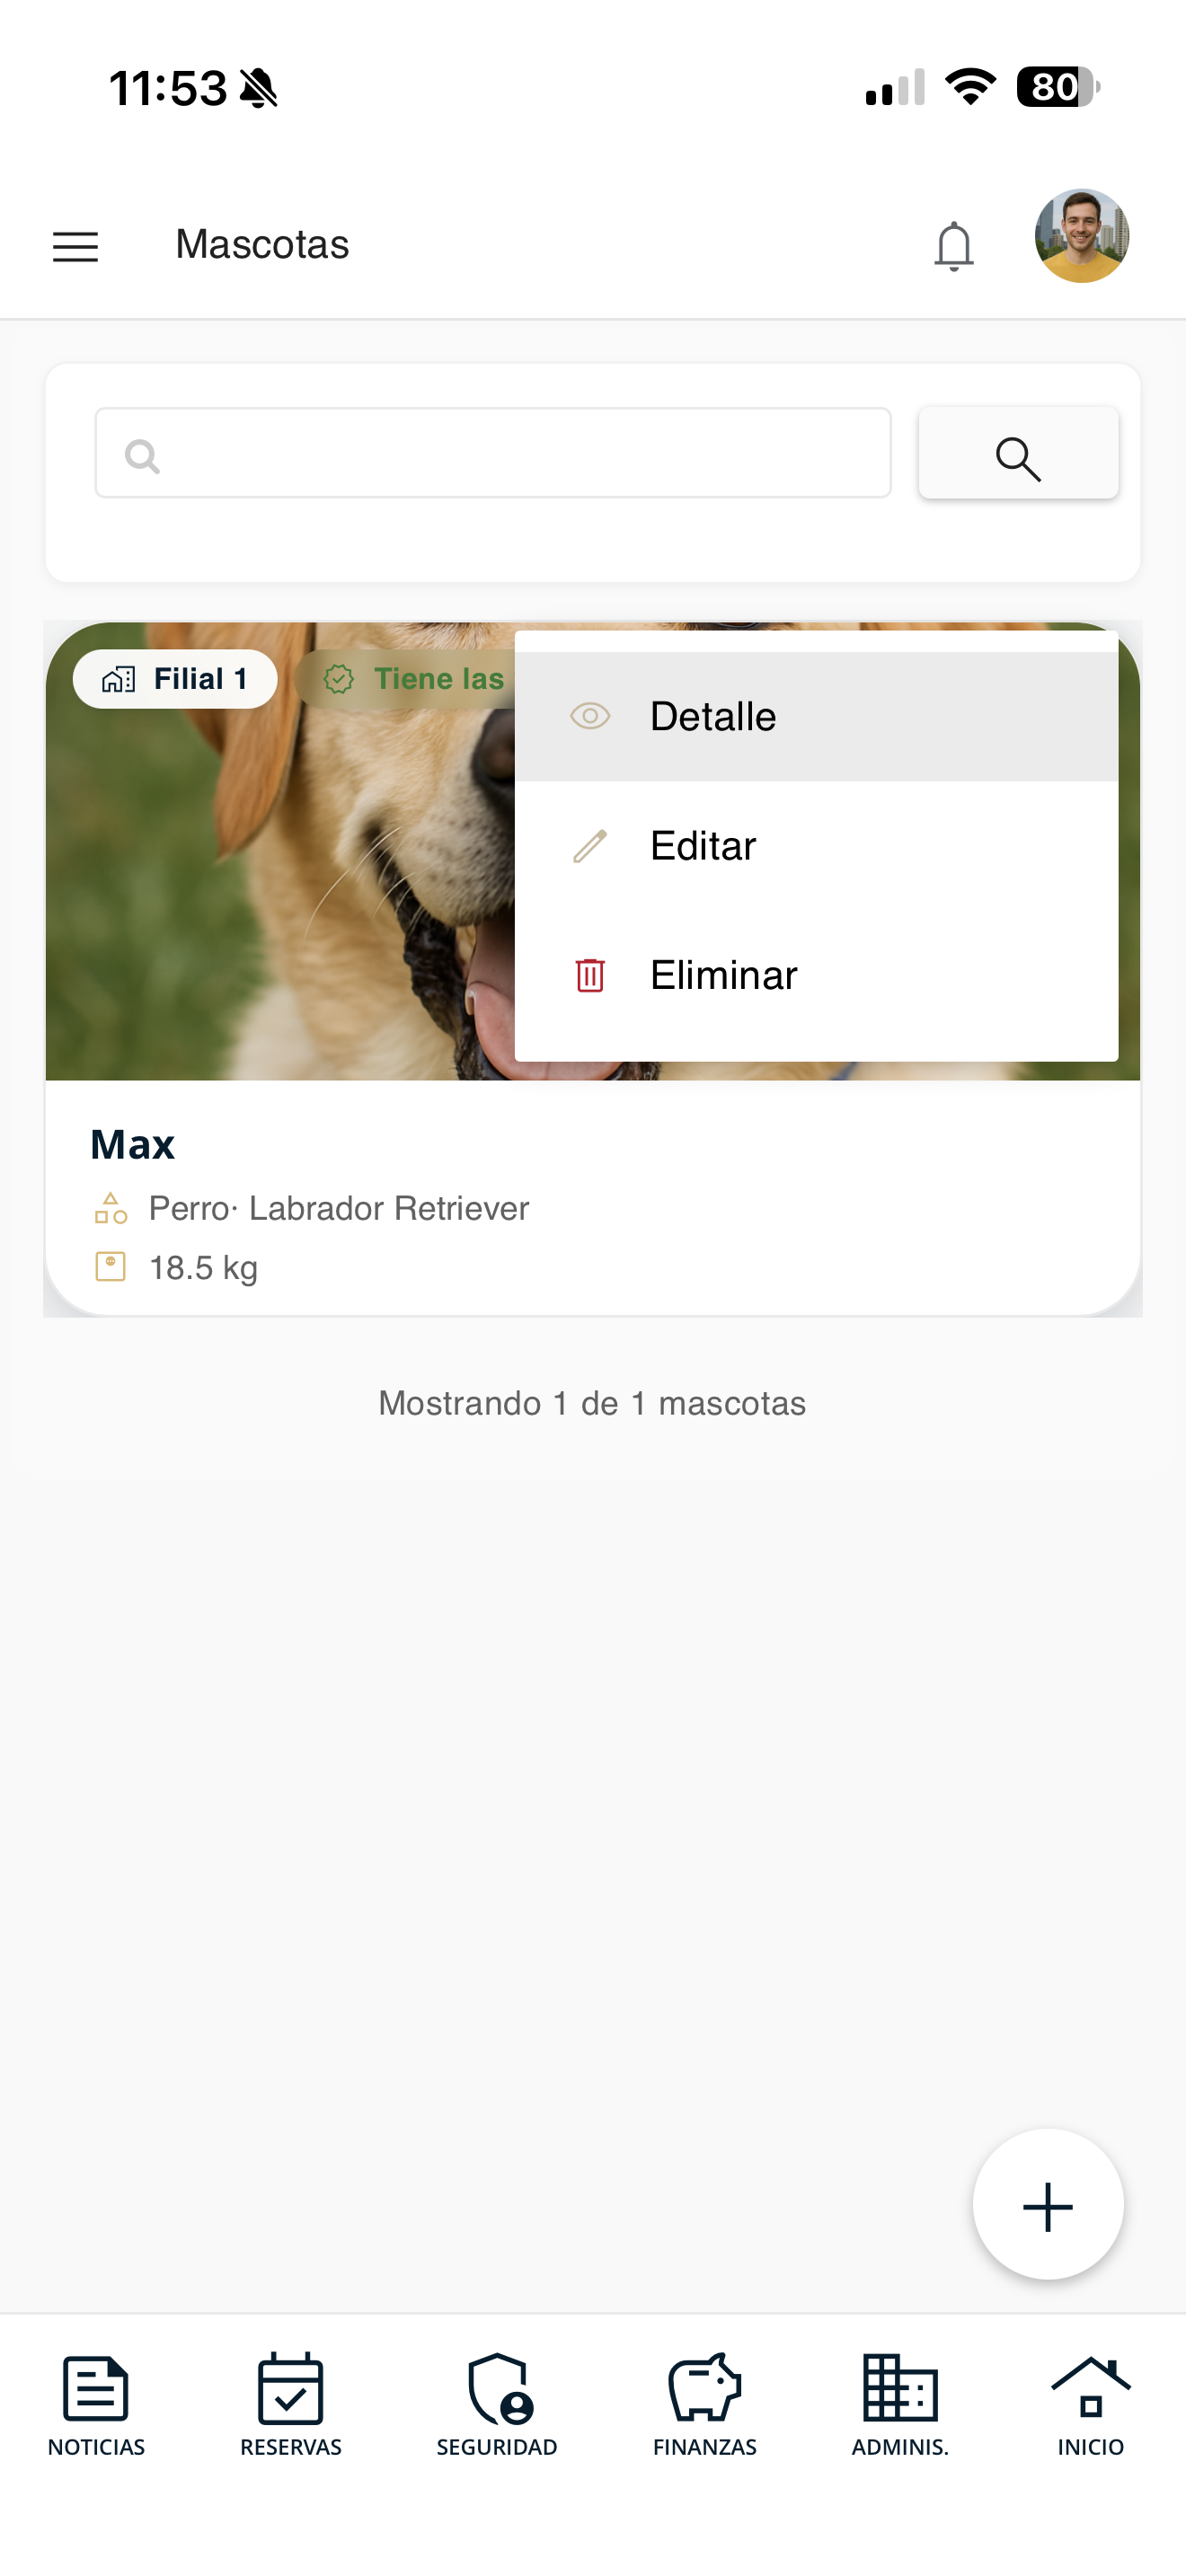
mascotas-acciones.pngModify and save
Change whatever details you need (name, type, breed, weight, health) and press "Accept".
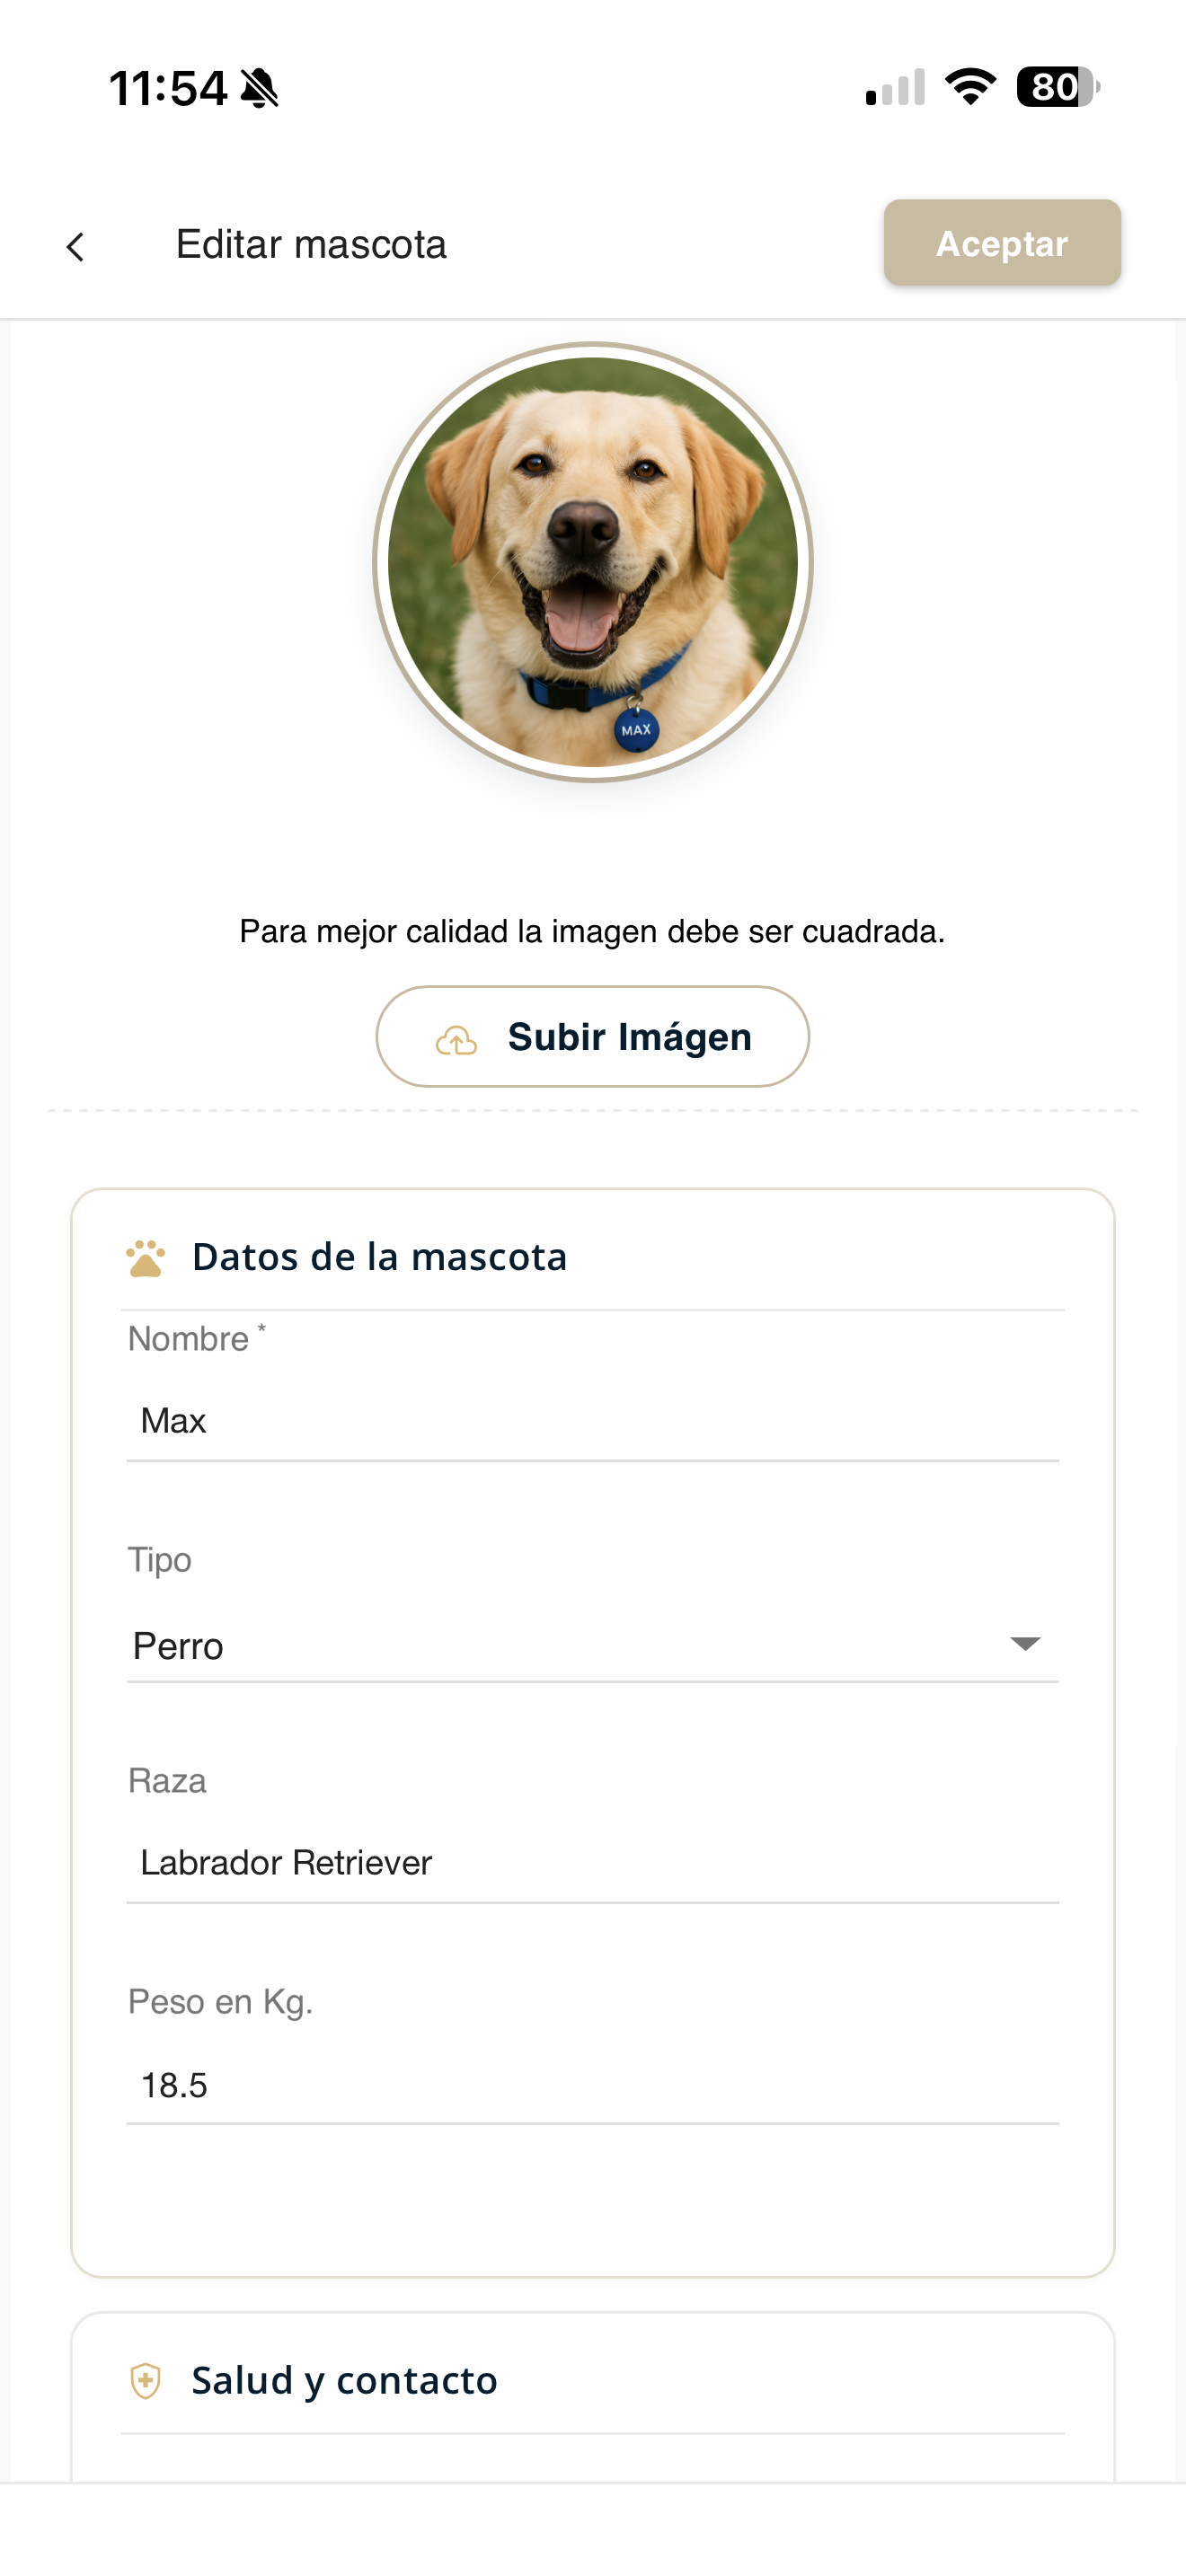
mascotas-editar-form.pngDelete pet
Delete a pet from your unit.
Open the menu and go to "Pets"
Tap the ☰ menu and, under "Manage my unit", choose "Pets".
res-menu.pngChoose "Delete"
Open the pet's actions menu and choose "Delete". The app will ask you to confirm.
mascotas-acciones.pngView vehicles
Check the vehicles registered in your unit.
Open the menu and go to "Vehicles"
Tap the ☰ menu and, under "Manage my unit", choose "Vehicles".
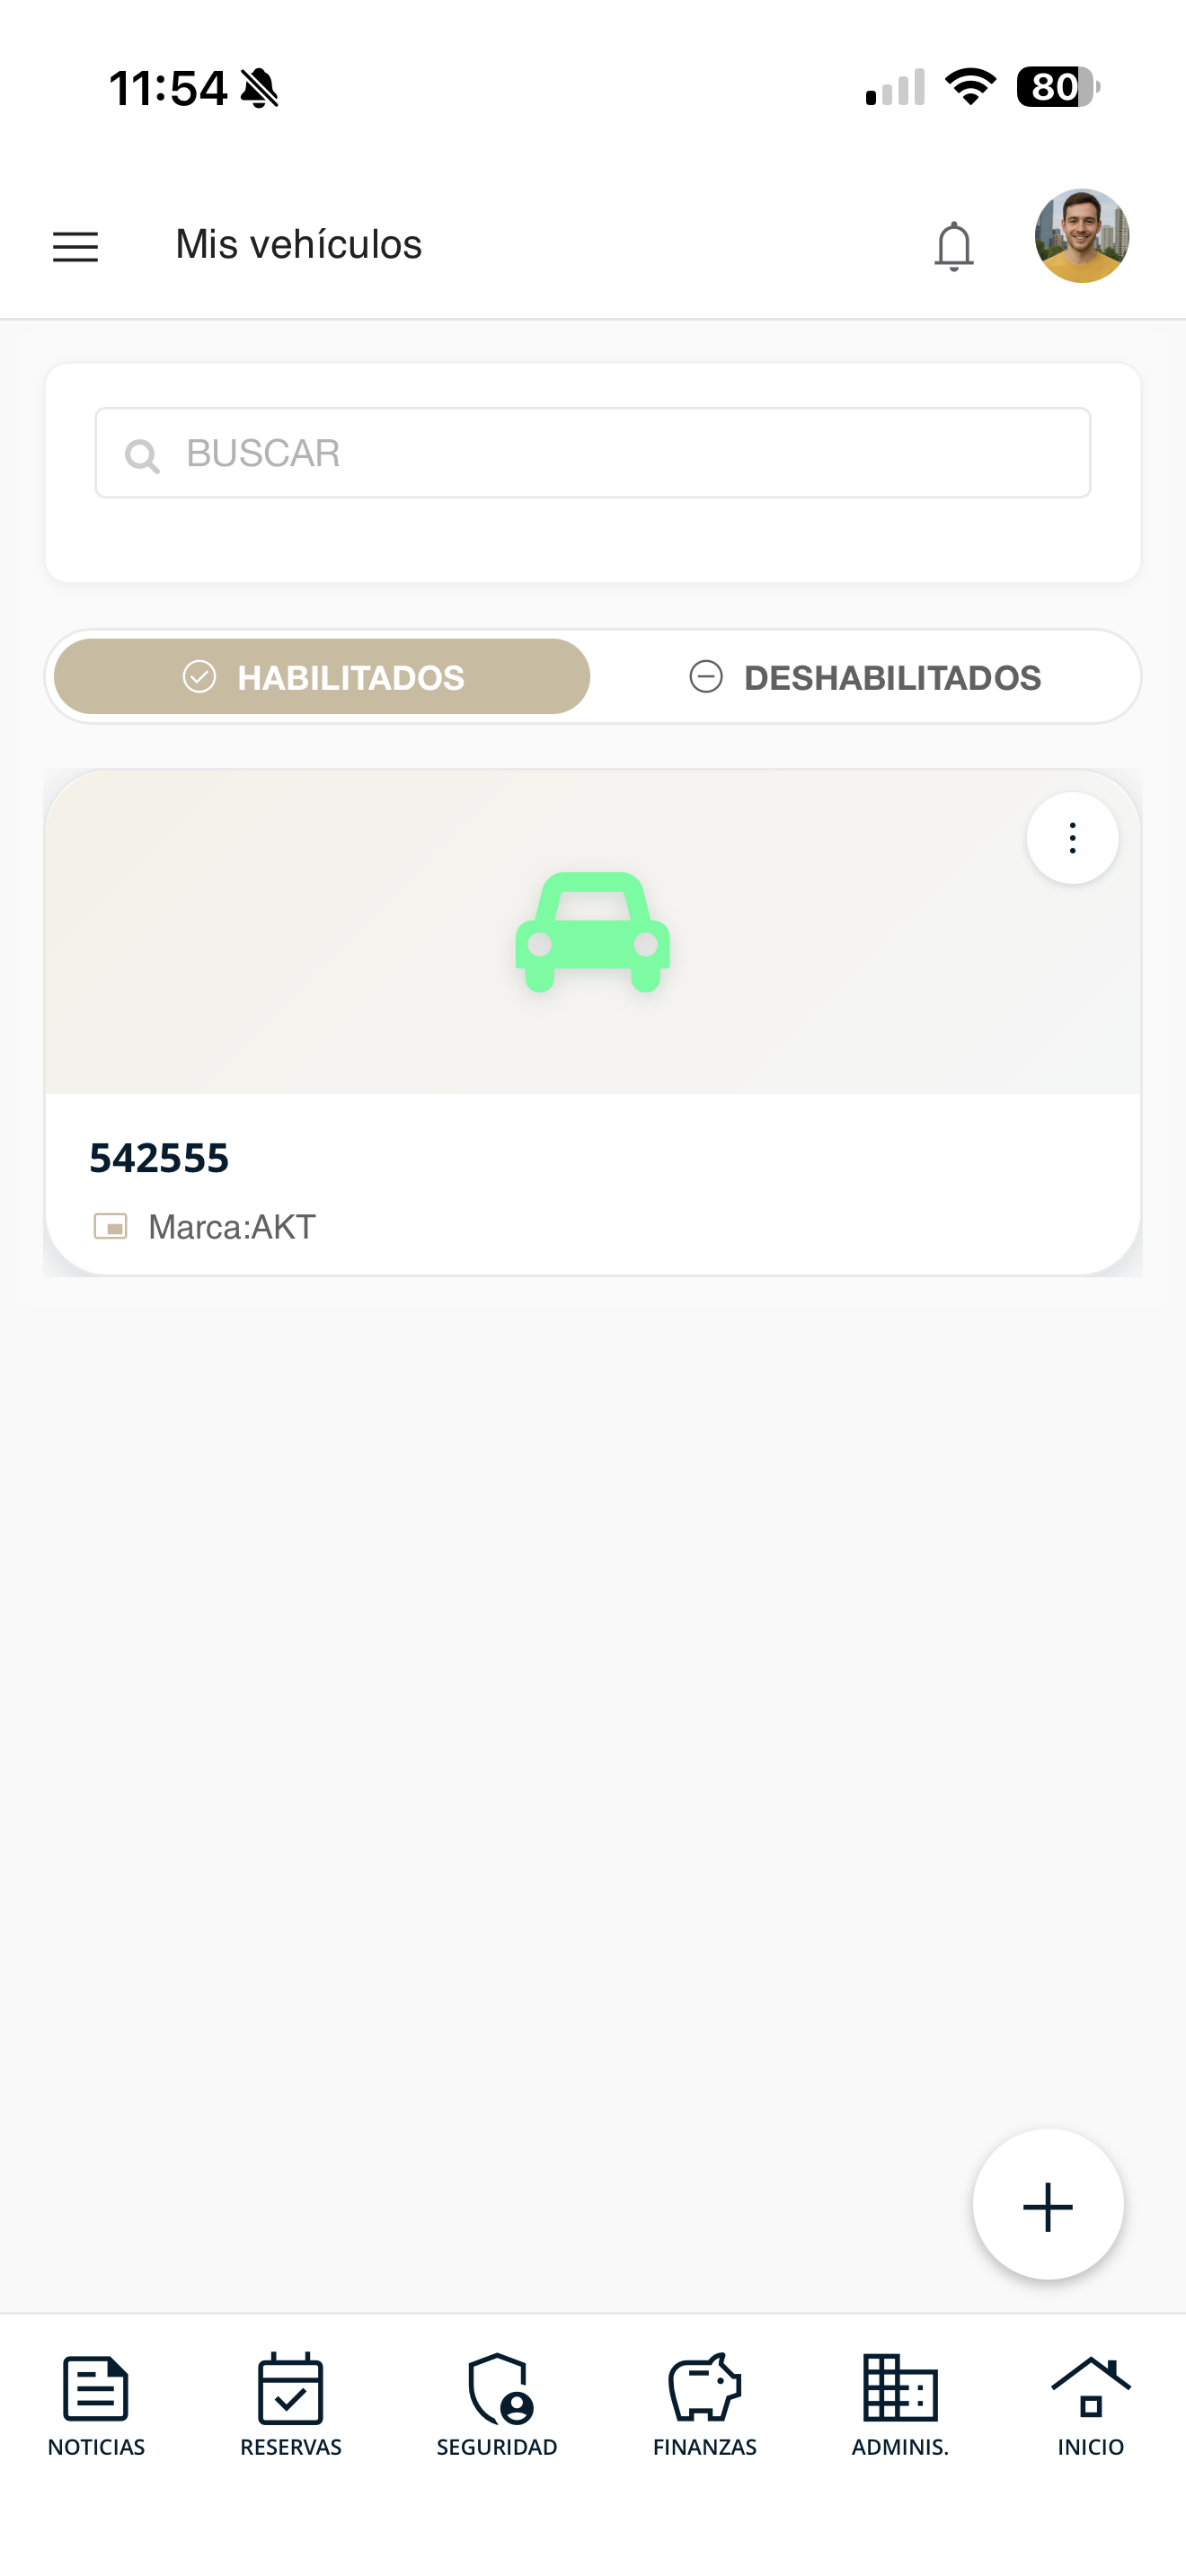
res-menu.pngReview the vehicles list
You will see each registered vehicle with its information (license plate, make, etc.). Use the search box or the "+" button to add one.
vehiculos-lista.pngCheck the details
Open the vehicle's menu and choose "Detail" to see all its information.
vehiculos-detalle.pngAdd vehicle
Register a new vehicle in your unit.
Open the menu and go to "Vehicles"
Tap the ☰ menu and, under "Manage my unit", choose "Vehicles".
res-menu.pngTap the "+" button
In the vehicles list, tap the "+" button at the bottom right.
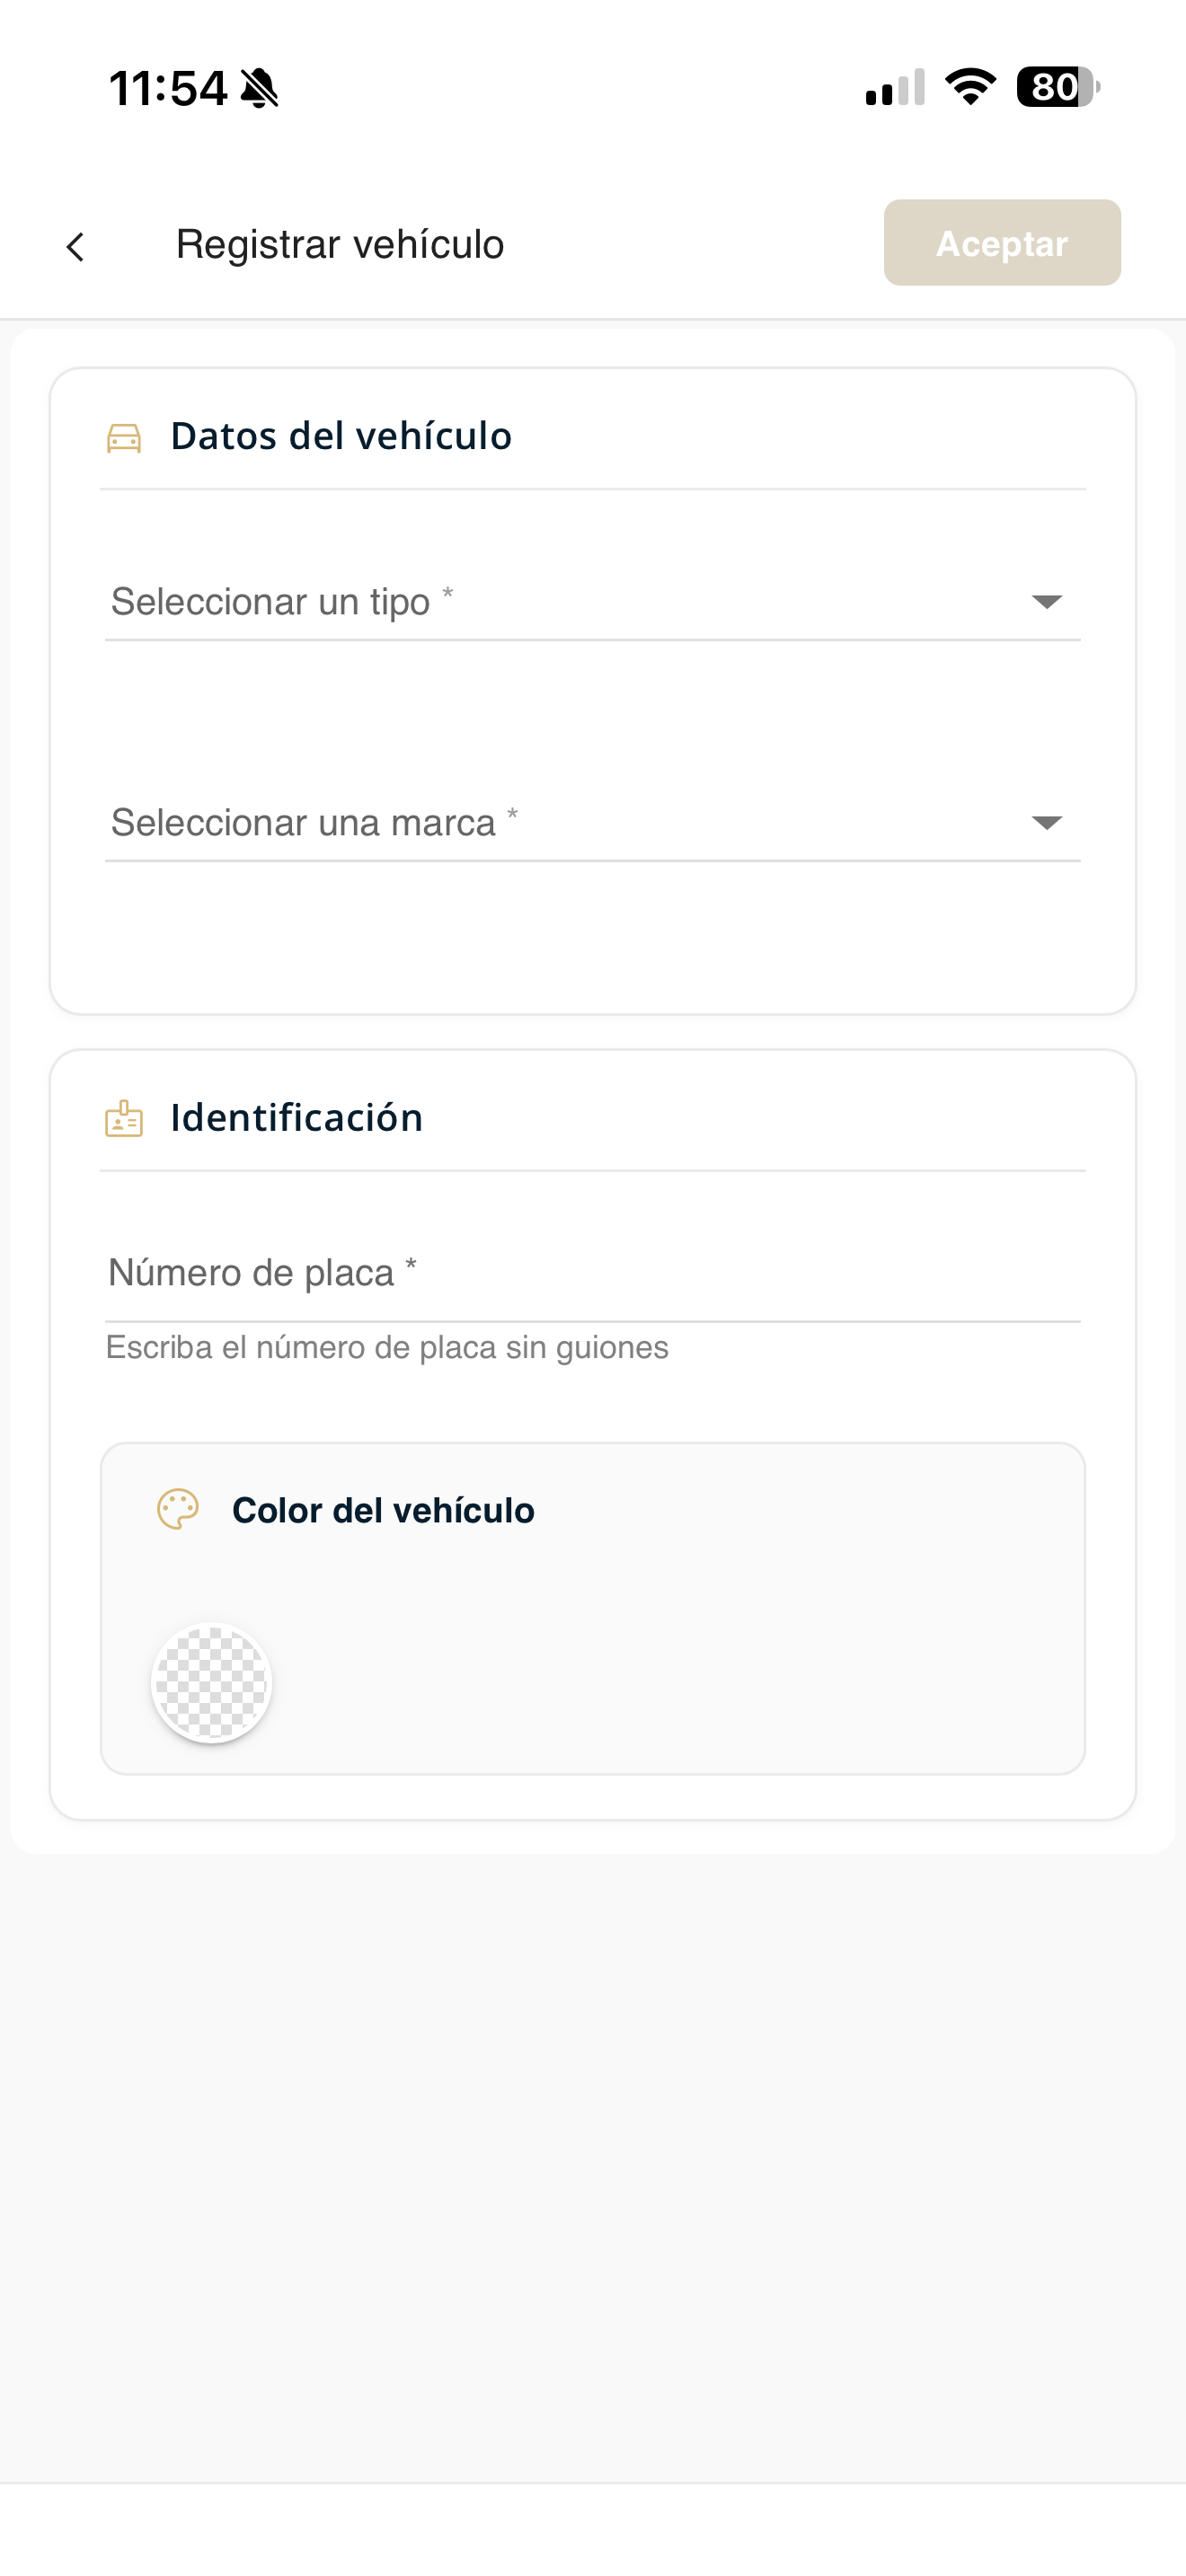
vehiculos-lista.pngFill out the details and save
Fill in the vehicle's details and press "Accept".
vehiculos-form.pngEdit vehicle
Modify the information of a vehicle in your unit.
Open the menu and go to "Vehicles"
Tap the ☰ menu and, under "Manage my unit", choose "Vehicles".
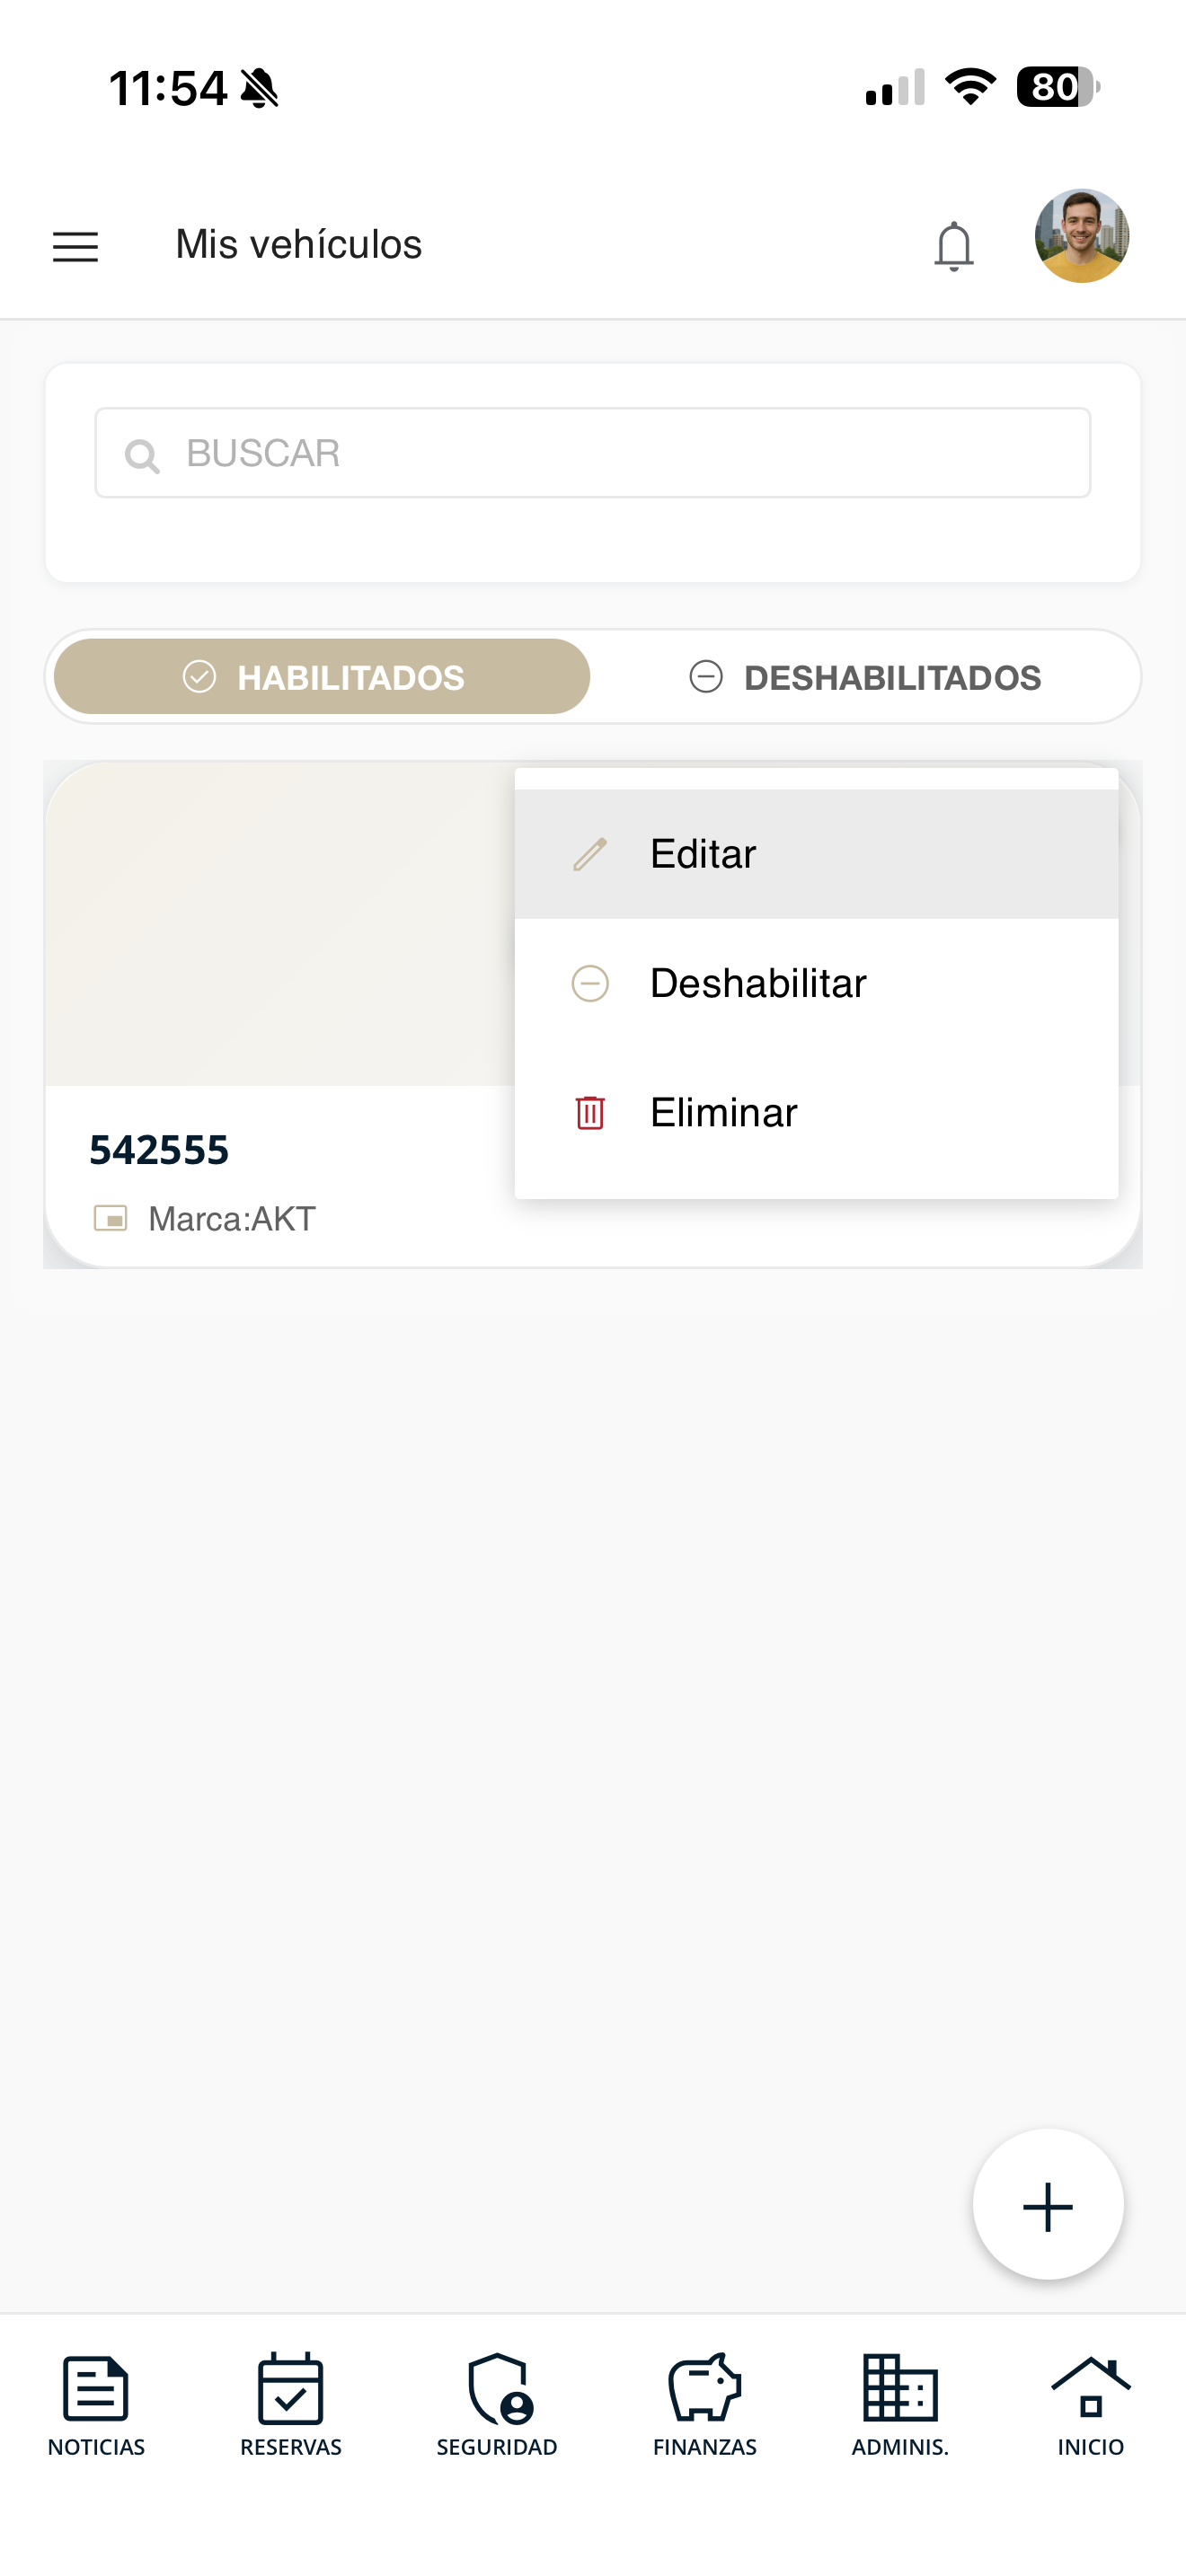
res-menu.pngChoose "Edit"
Open the vehicle's actions menu and choose "Edit".
vehiculos-acciones.pngModify and save
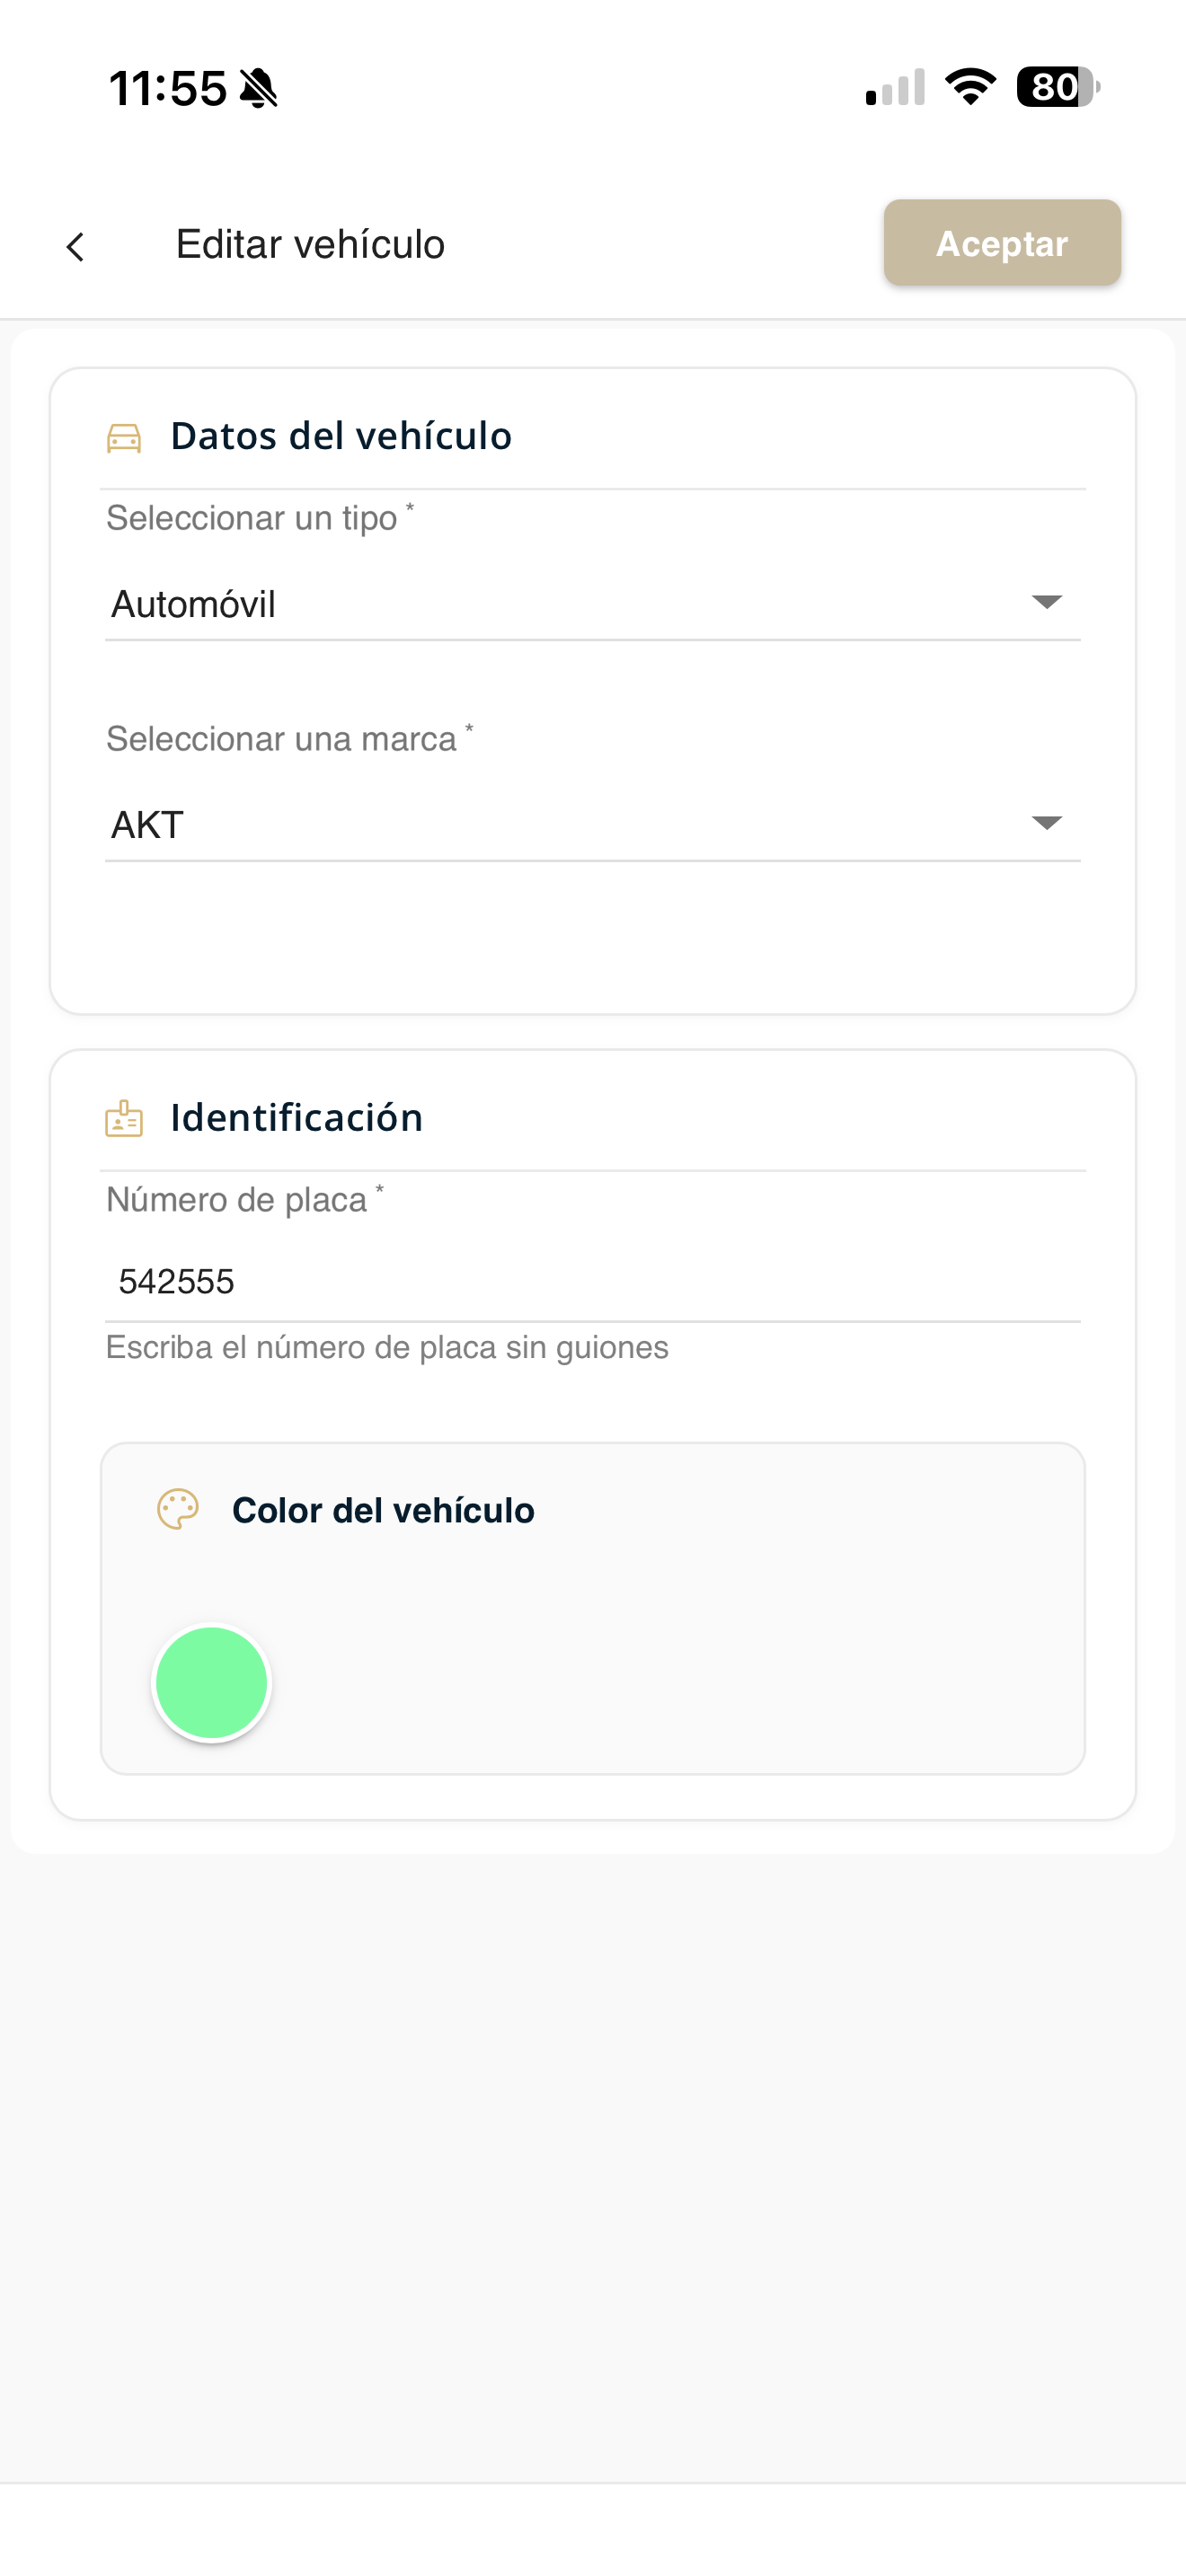
Change whatever details you need and press "Accept".
vehiculos-form.pngDelete vehicle
Delete a vehicle from your unit.
Open the menu and go to "Vehicles"
Tap the ☰ menu and, under "Manage my unit", choose "Vehicles".
res-menu.pngChoose "Delete"
Open the vehicle's actions menu and choose "Delete". The app will ask you to confirm.
vehiculos-acciones.pngContact support
If you have questions or any problem with Aditum, you can write to the support team and track your tickets. It is a free service.
Open the Support section
In the ☰ side menu, open Support. You will see the "How can we help you?" screen. Tap the "Go To The Support Center" button.
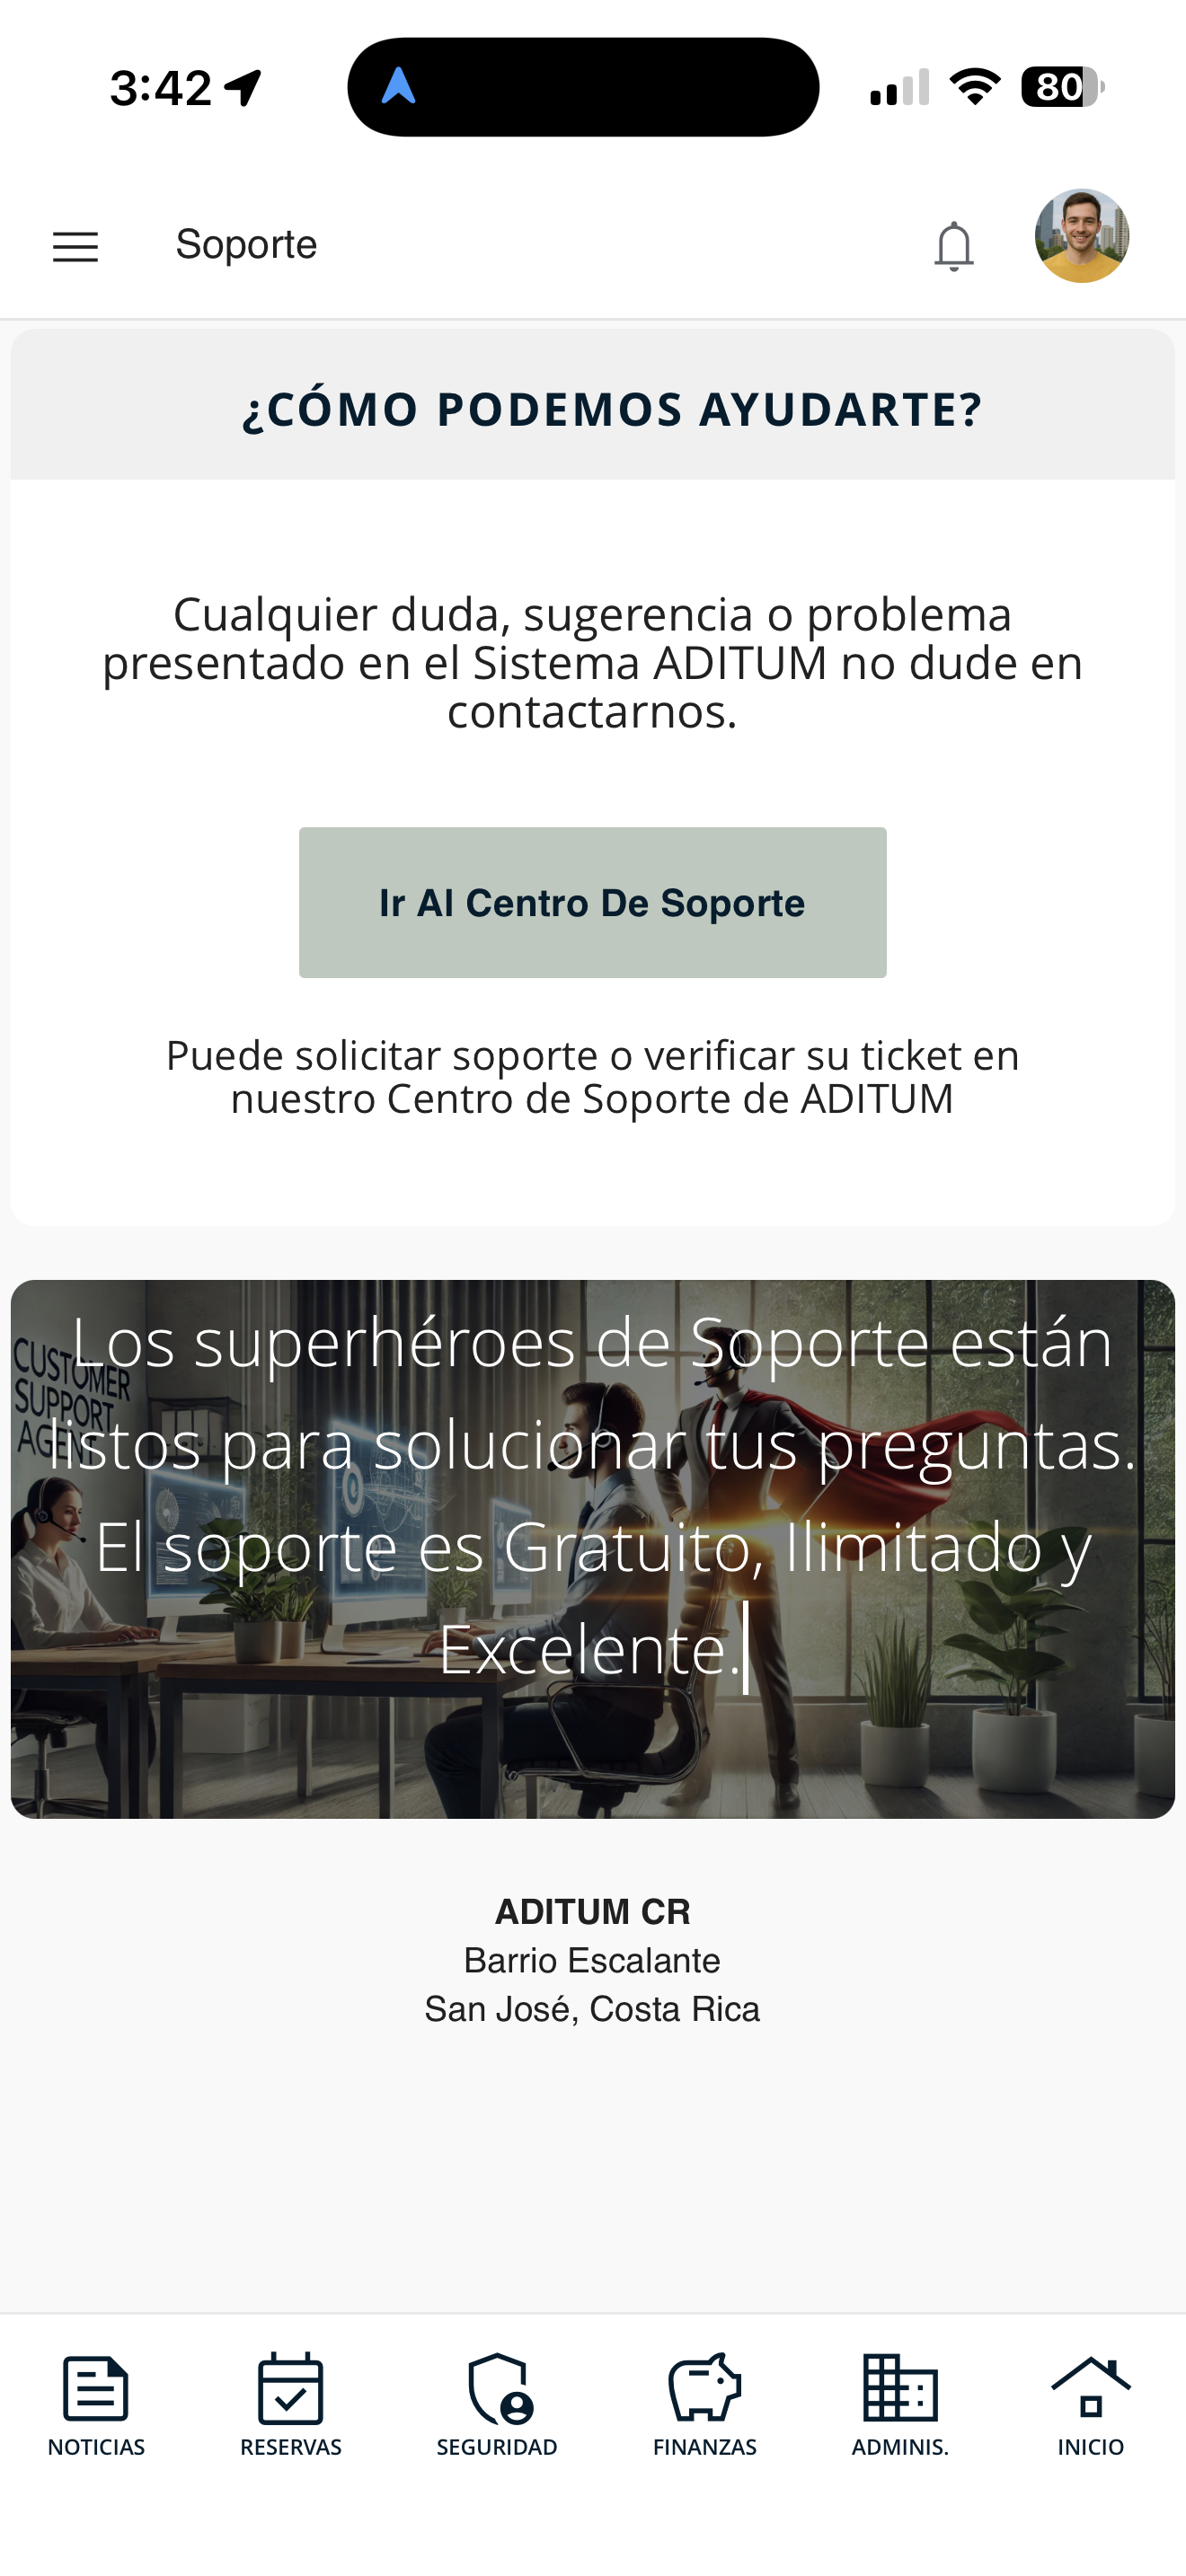
soporte-01.png
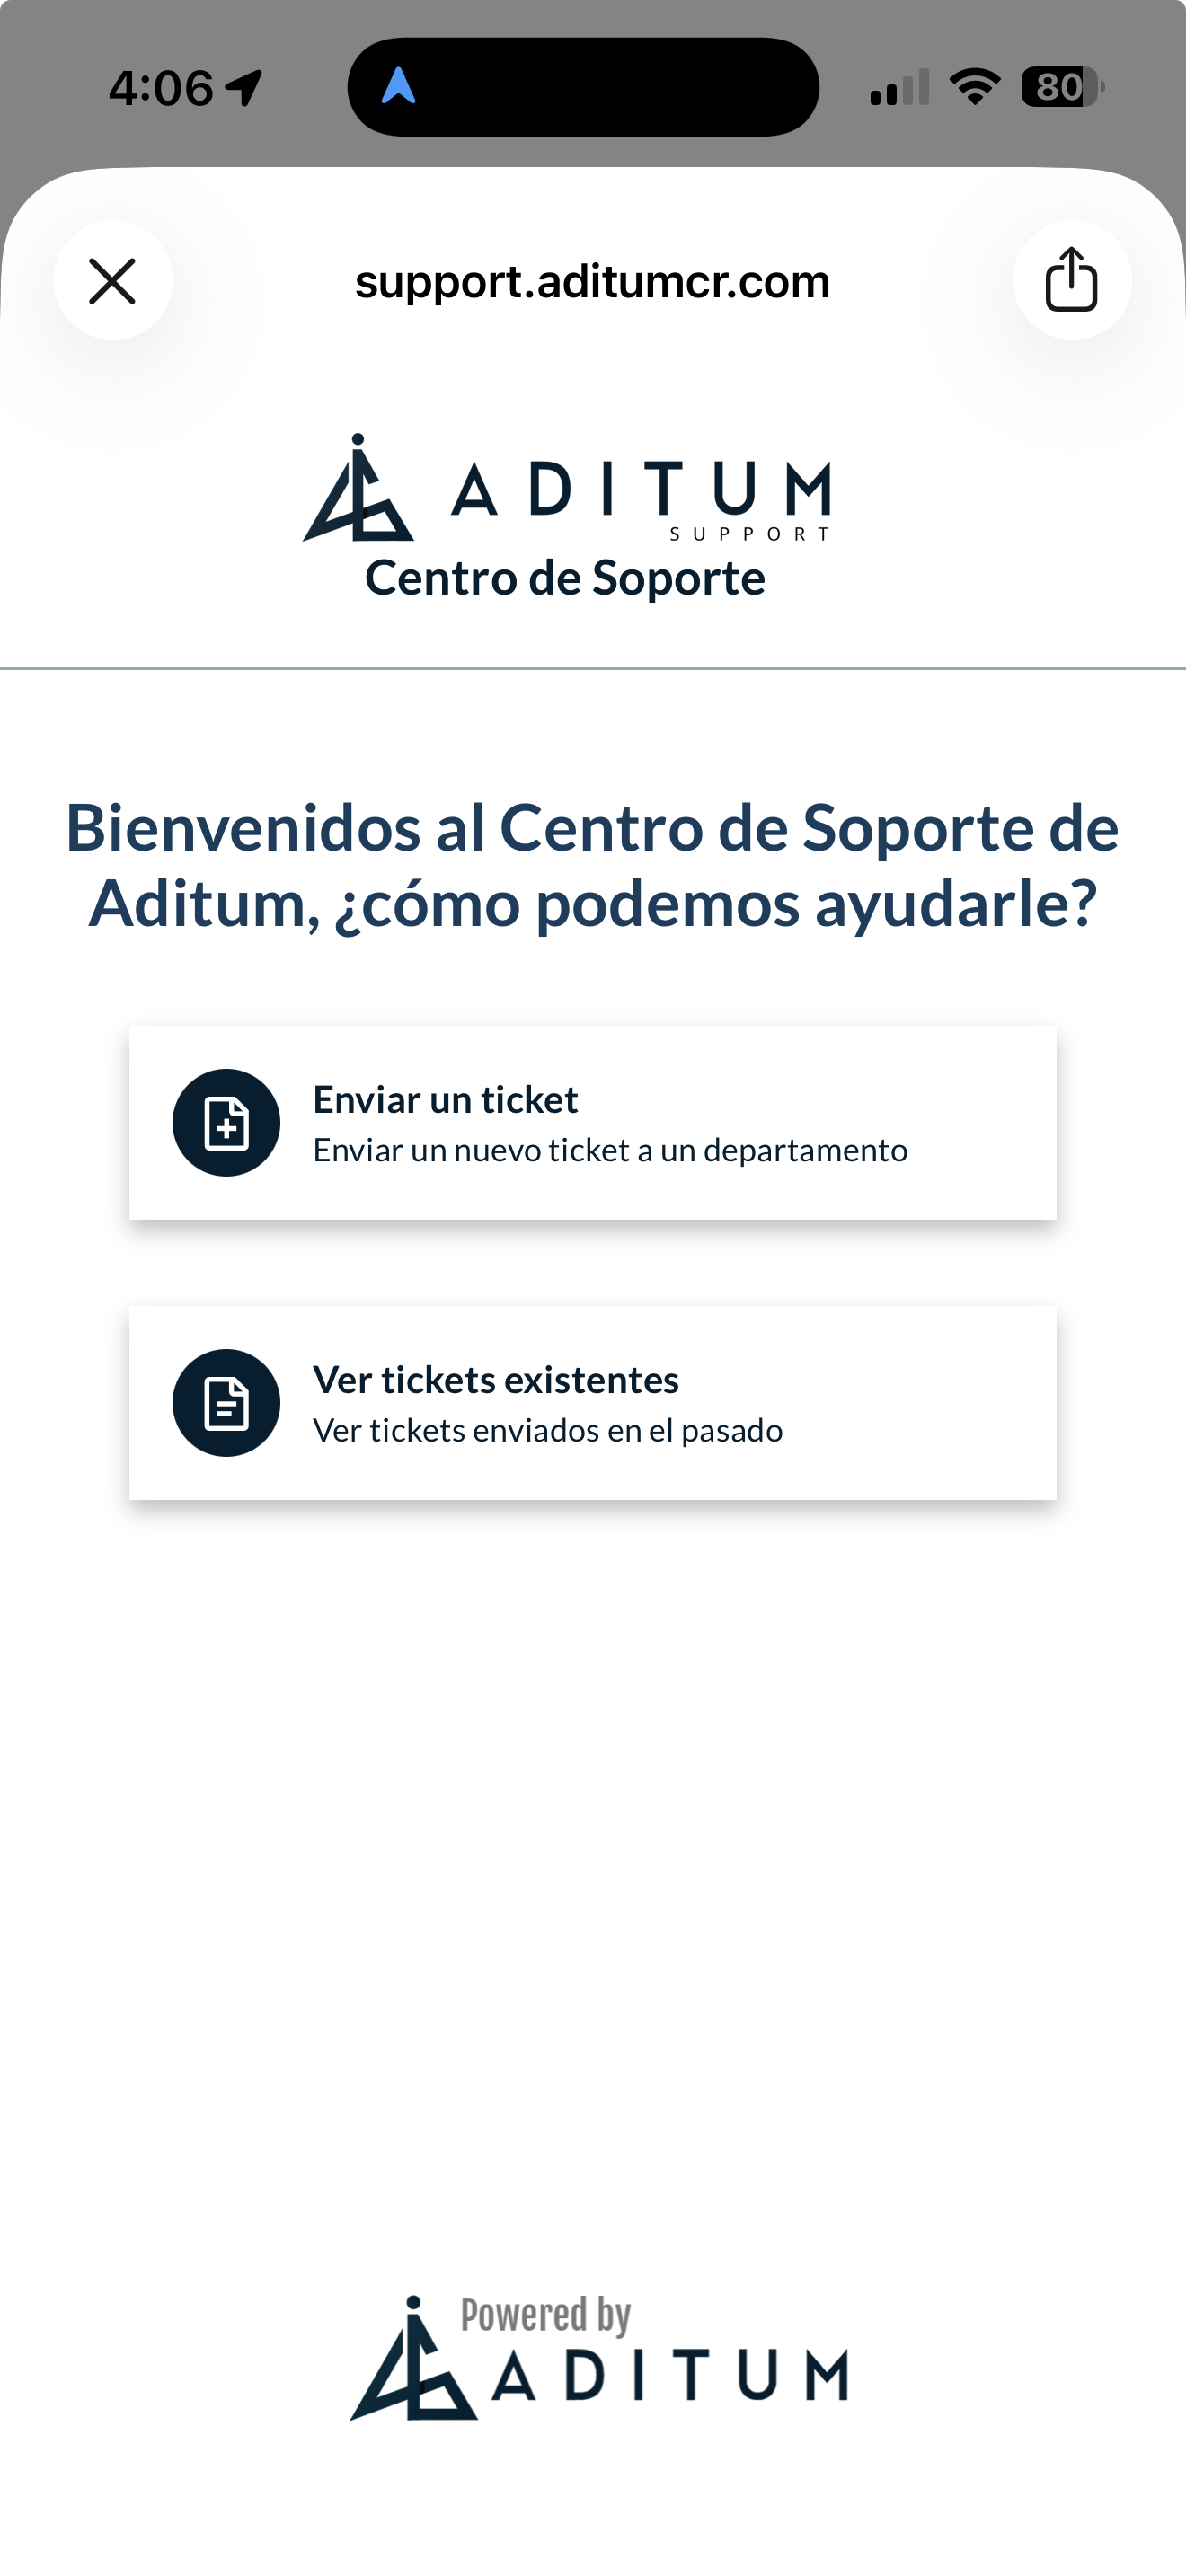
Choose what you need
The Support Center opens with two options: "Submit a ticket" for a new query, or "View existing tickets" to review the ones you already submitted.
soporte-02.png
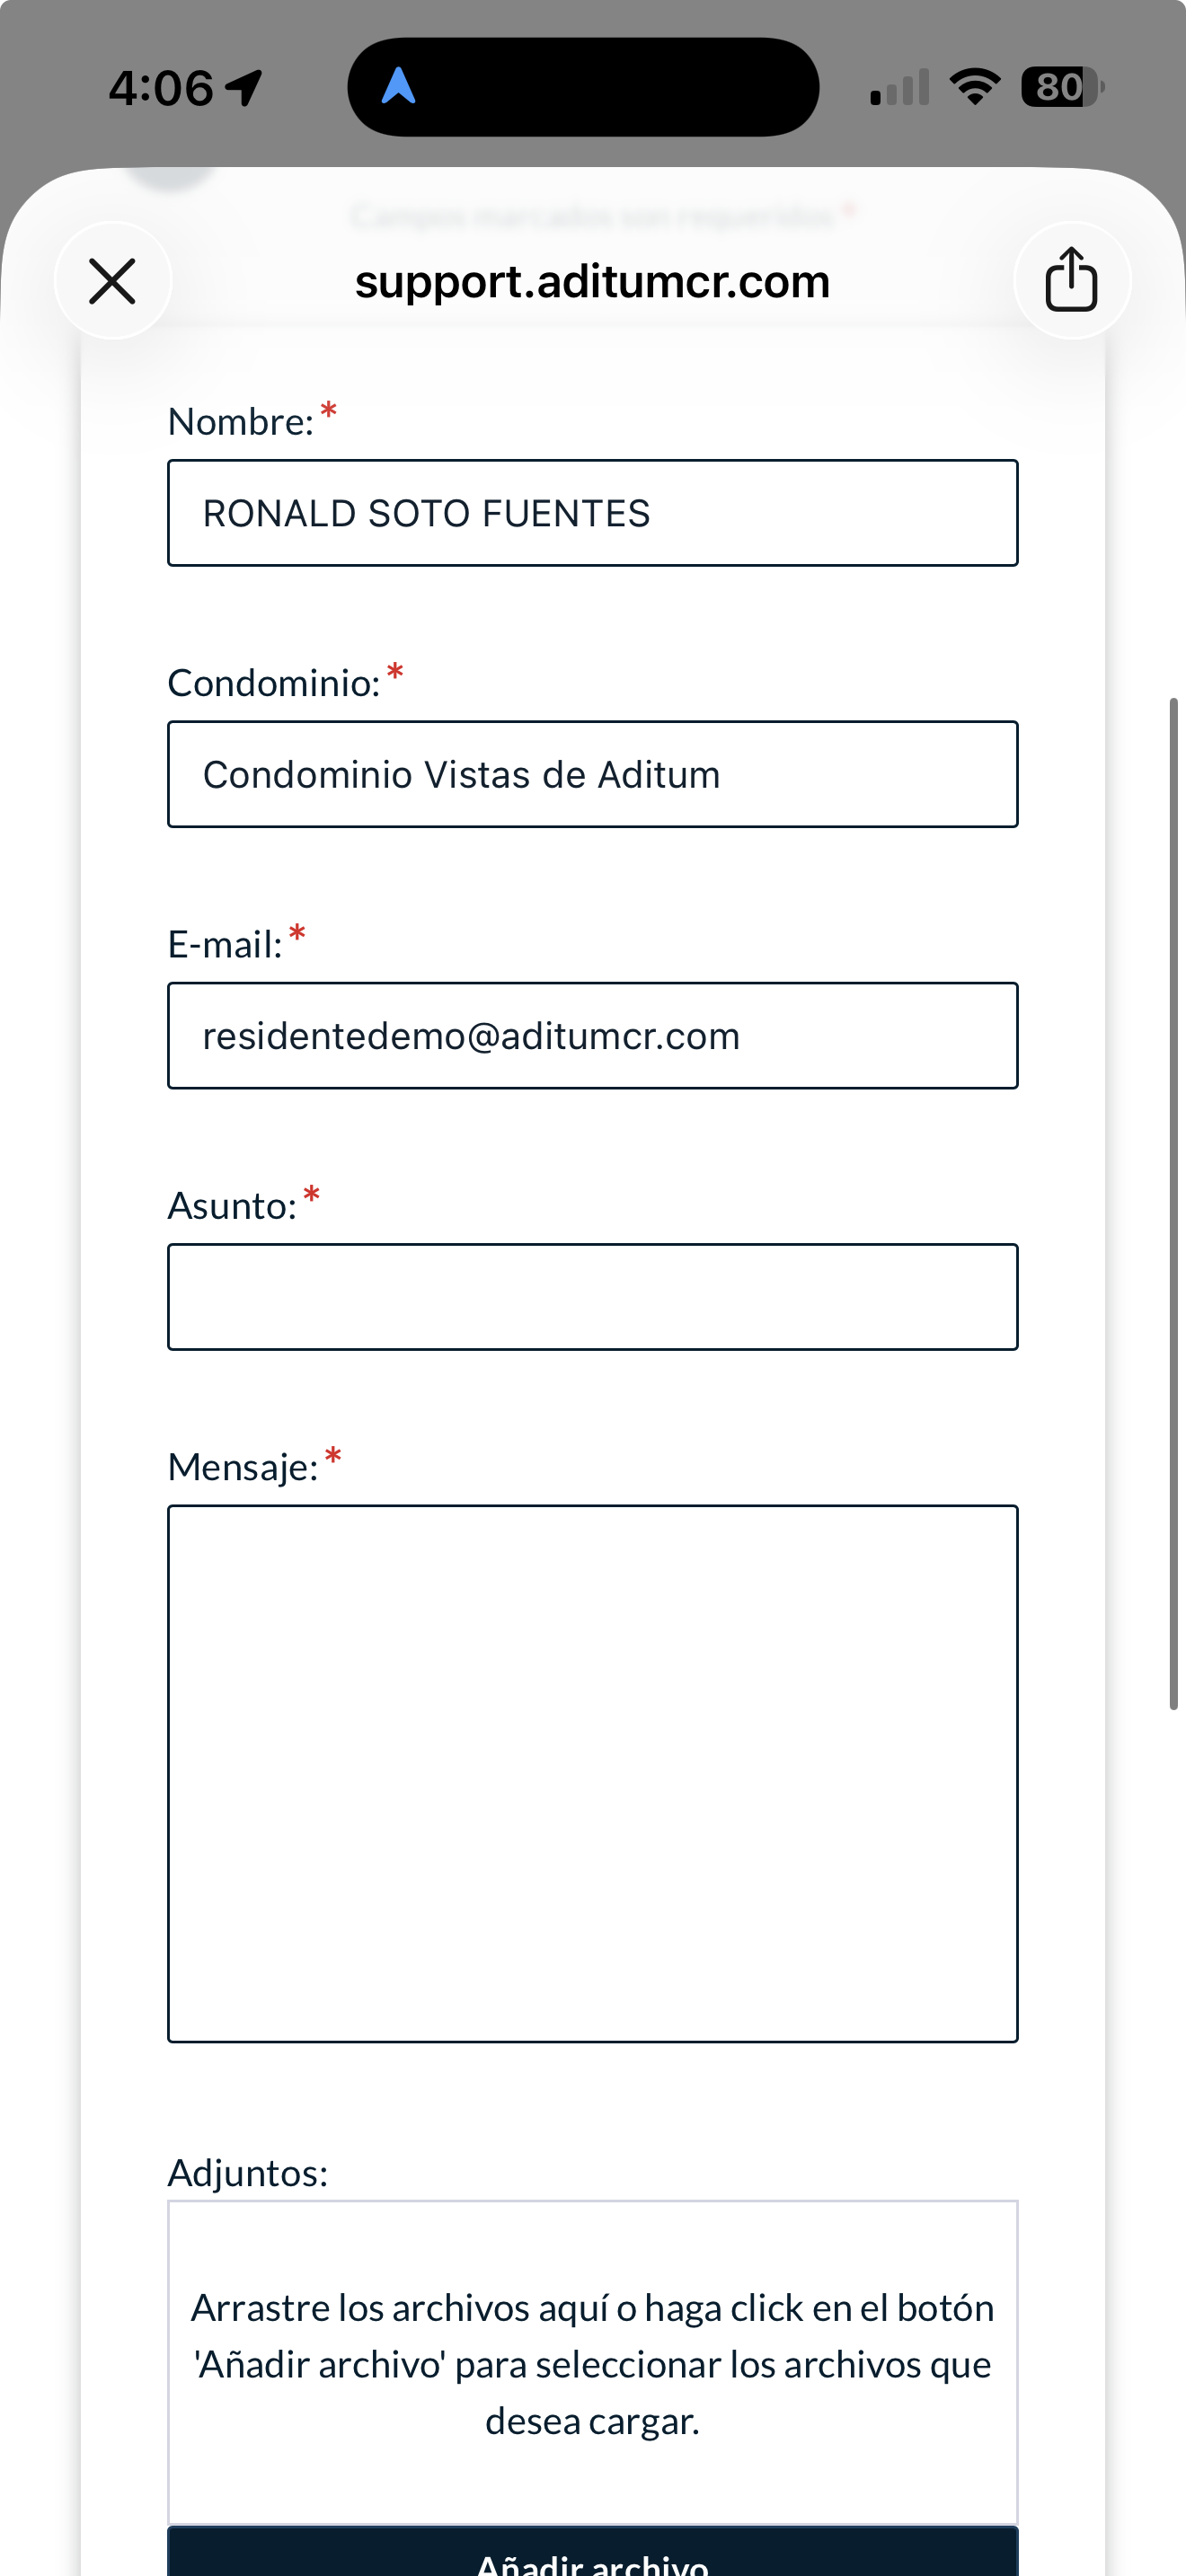
Submit a ticket
If you choose "Submit a ticket", a form opens with your Name, Condominium and email already filled in. Type the Subject and the Message and, if you want, attach files with "Add file". Then submit the ticket.
soporte-03.png
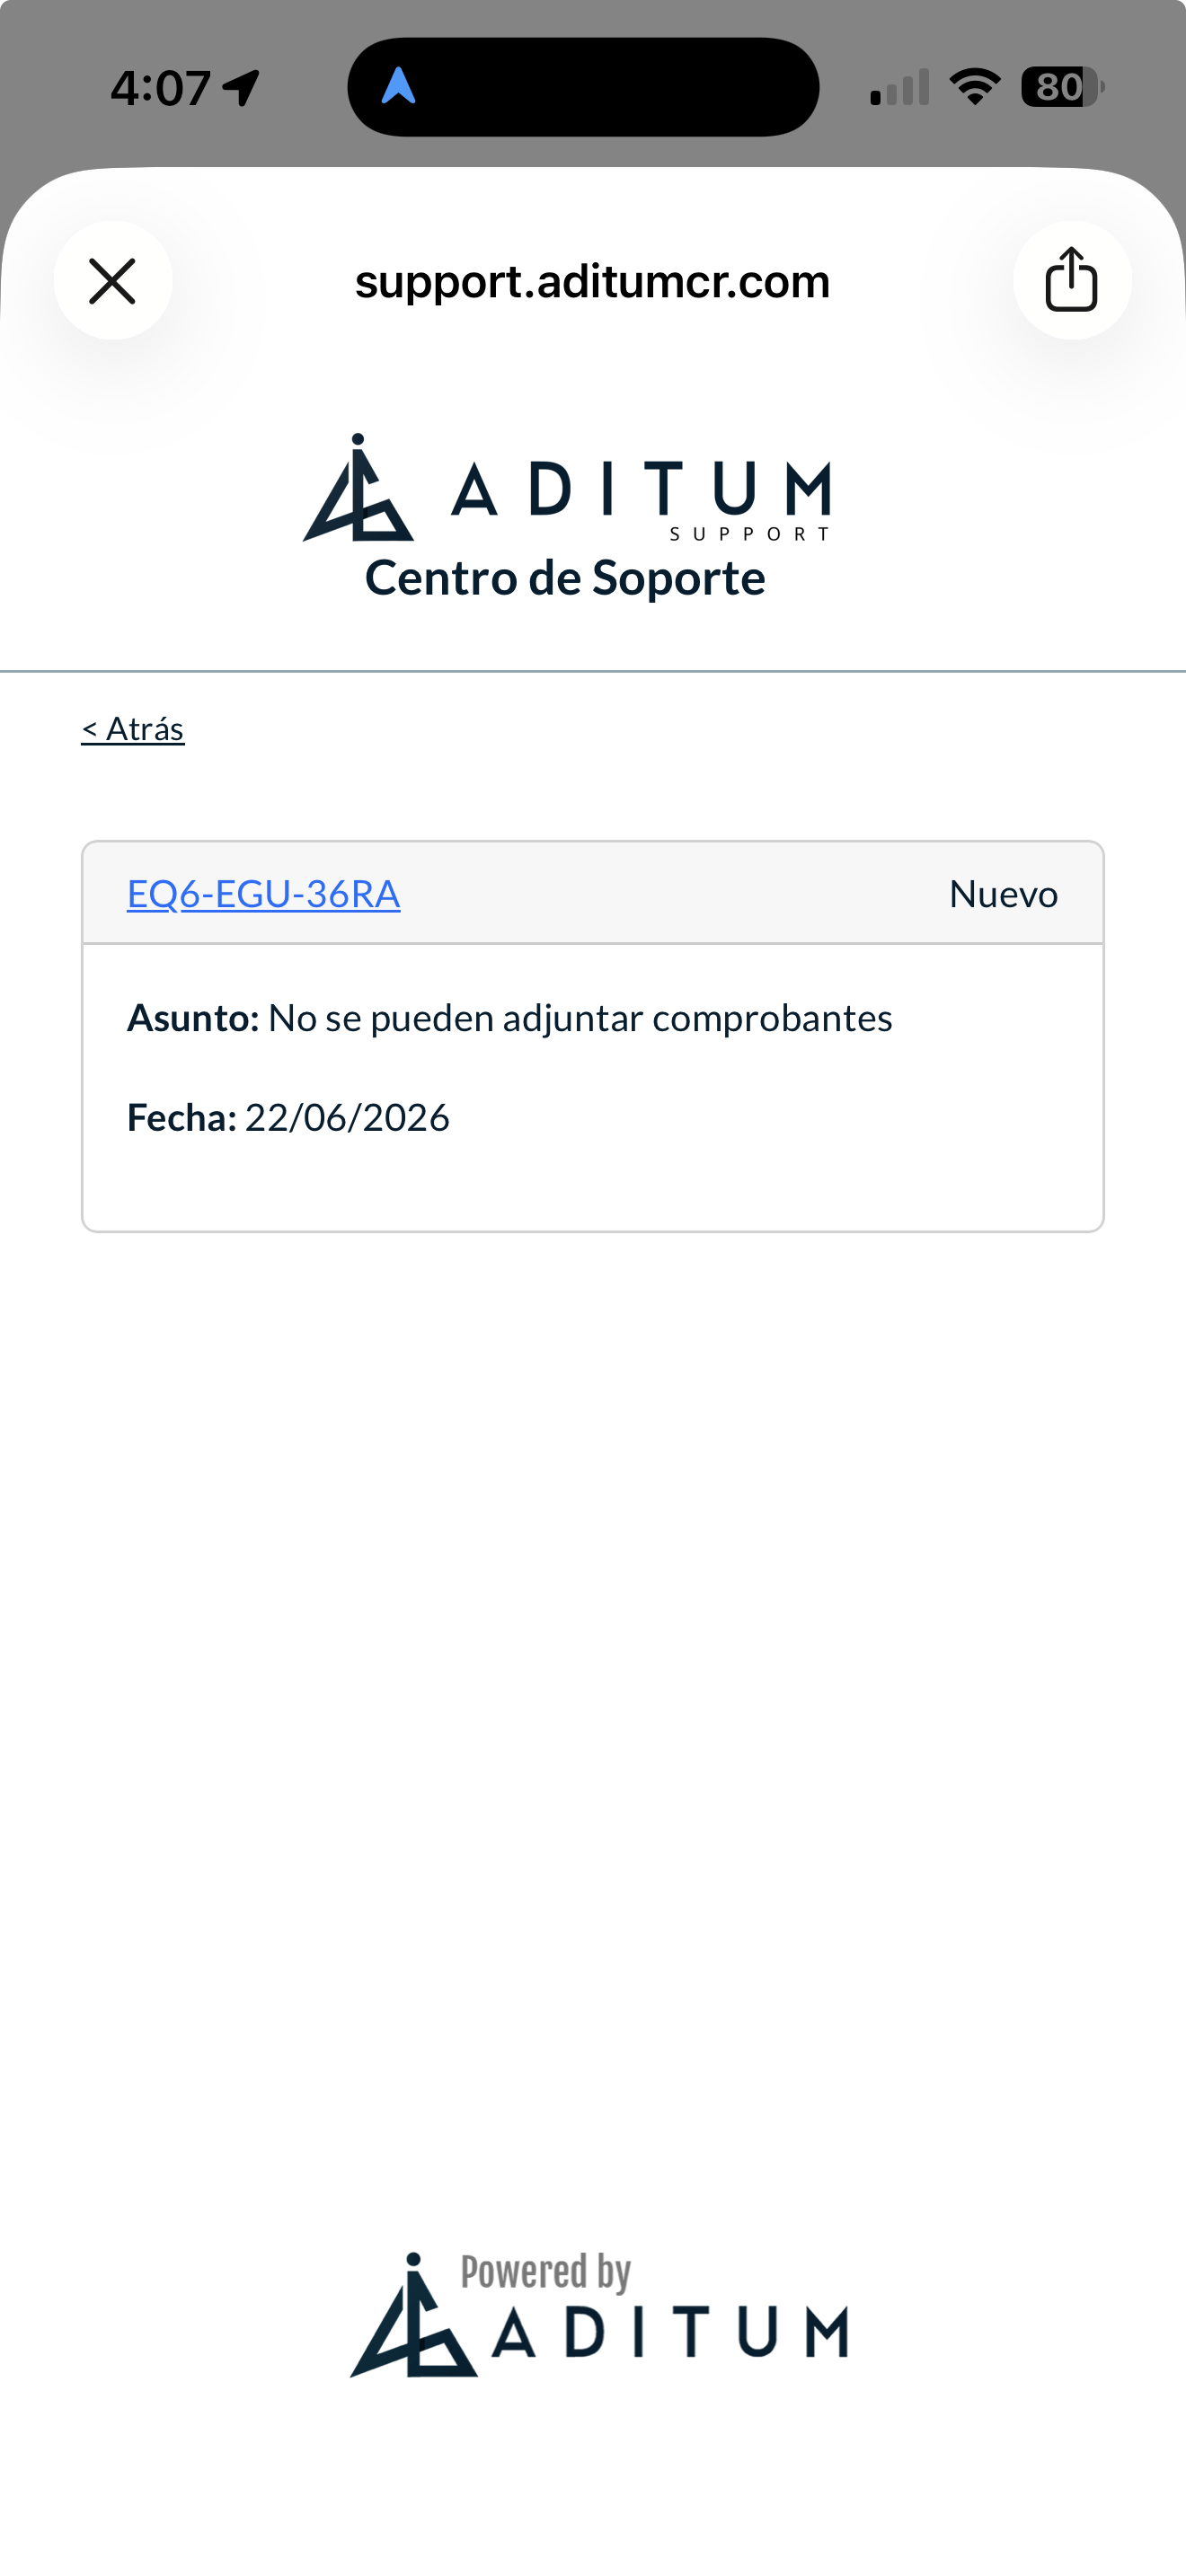
Track your tickets
In "View existing tickets", the list of your tickets appears. Each one shows its code, its status (for example, "New"), the subject and the date. Tap it to see the detail.
soporte-04.png
Frequently asked questions
Quick answers to the most common questions, organized by topic. Tap a question to see the answer. Some features and limits depend on each condominium's configuration, so they may vary by administration.
Account, users and access
• Owner: the owner of the unit. Sees and manages everything for their home (fees, payments, visitors, reservations) and can manage the associated tenants/residents.
• Tenant / Resident: lives in the home. Depending on what management enables, they can see their fees, invite visitors and reserve common areas, but not necessarily edit the property's details.
• Administrator: manages the condominium (generates fees, records payments, posts announcements, configures everything). You do not see them as a resident, but they are who you communicate with for procedures.
• Security guard: is at the guardhouse; receives and validates your visitor invitations and records entries/exits.
Each resident only sees the information for their own home; never that of other units in the condominium.
Fees, payments and account statement
• Maintenance: the condominium's ordinary monthly fee.
• Water: the water consumption for the period.
• Extraordinary: approved special fees (works, projects).
• Fine: penalties or sanctions.
• Common areas / Others: charges for area use or miscellaneous items.
Each type accumulates separately in your account statement.
Visitors and access control
• Temporary: a one-off visit with a specific date and time.
• Permanent: someone authorized on a recurring basis (regular family member).
• Express: a quick visit (for example a service or delivery).
• Employee: household staff with a weekly schedule.
• Vacation: for longer stay periods.
• Bus / transport: for transport vehicles.
• Blacklist: people whose entry is restricted.
Common areas
Assemblies and voting
Communication with management
My home's details
Mobile app and notifications
Tutorial coming soon
This feature does not have a tutorial yet. We will create it along with the screenshots. For now, start with Getting started → Activate your account.